
Configuring overflow rules
Configure overflow rules so a route automatically retries through a fallback route when the primary route receives a specific provider response code — without any change on your side of the integration.
Why use an overflow rule
Carrier and aggregator connections can fail in ways that are outside your control: a specific provider response code, a temporary routing issue upstream, or a connection that's known to be less reliable during certain conditions. Instead of Communications Platform having to detect the failure and resend the message itself, an overflow rule lets the Workspace retry automatically through a second, pre-configured route.
Overflow rules are:
- Scoped to a route pair — you choose exactly which primary route fails over to which overflow route.
- Triggered by a specific response code — only the code you configure activates the overflow; every other response is handled normally.
- Opt-in per Workspace — an overflow rule only exists if an admin creates one; routes don't fail over to each other by default.
How it works
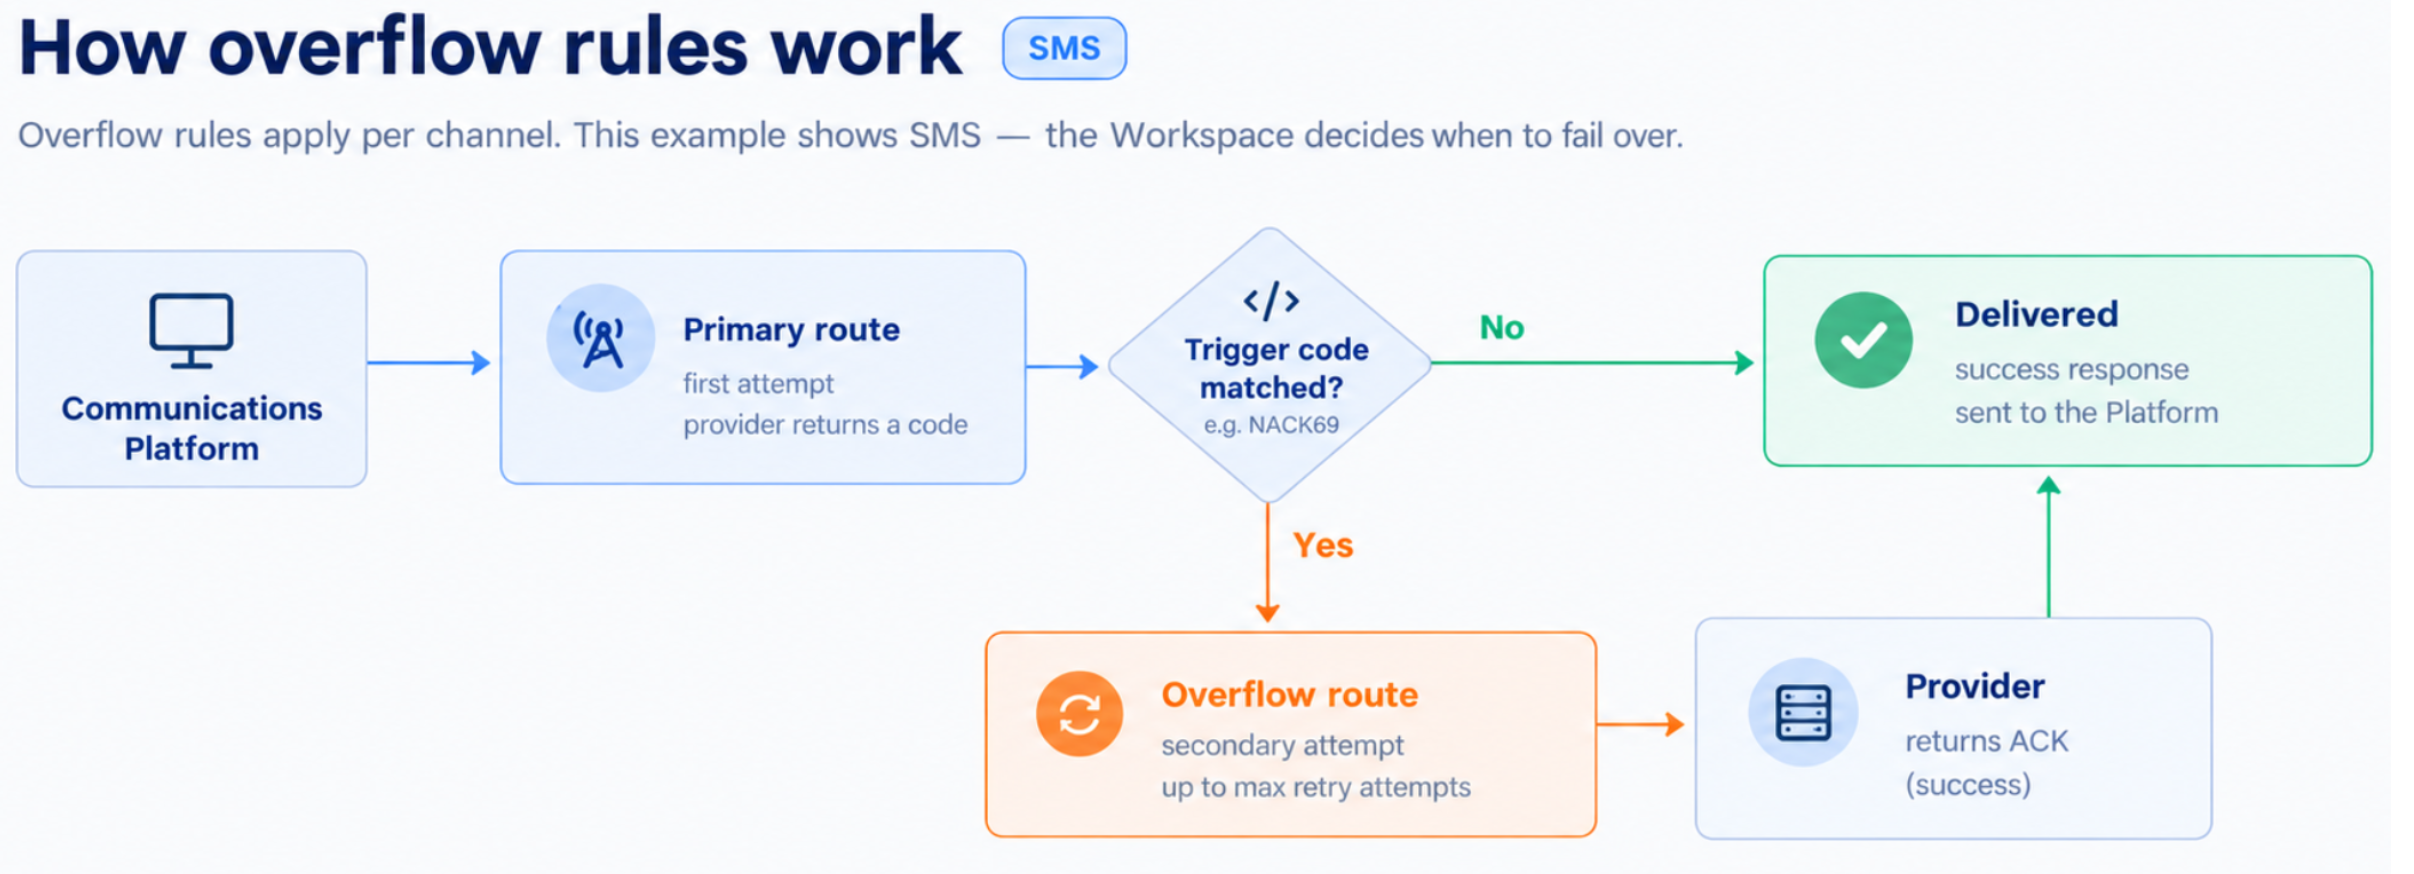
-
Communications Platform sends a message. The platform routes it through the primary route — the same route it would use if no overflow rule existed.
-
The provider on the primary route returns a response code.
-
The platform checks that code against the Trigger response code configured on the overflow rule.
- If the code doesn't match, delivery is already resolved — the platform returns that result to Communications Platform, exactly as it would without an overflow rule configured.
-
Once the overflow route returns a successful response, the platform sends that final result back to Communications Platform. From Communications Platform's perspective, this is a single request — the retry through the overflow route happens entirely on the platform side.
In the Messaging Logs, the overflow retry appears as a normal outbound (MT) SMS send. You'll see two log entries for the same message: the first attempt through the primary route, and a second entry through the overflow route once it succeeds. Both entries share the same Recipient, but each has its own Sender, Status, and Status Date — the first entry typically shows aREJECTDstatus, and the second shows a successful one (SENT).
Getting to the Overflow rules section
-
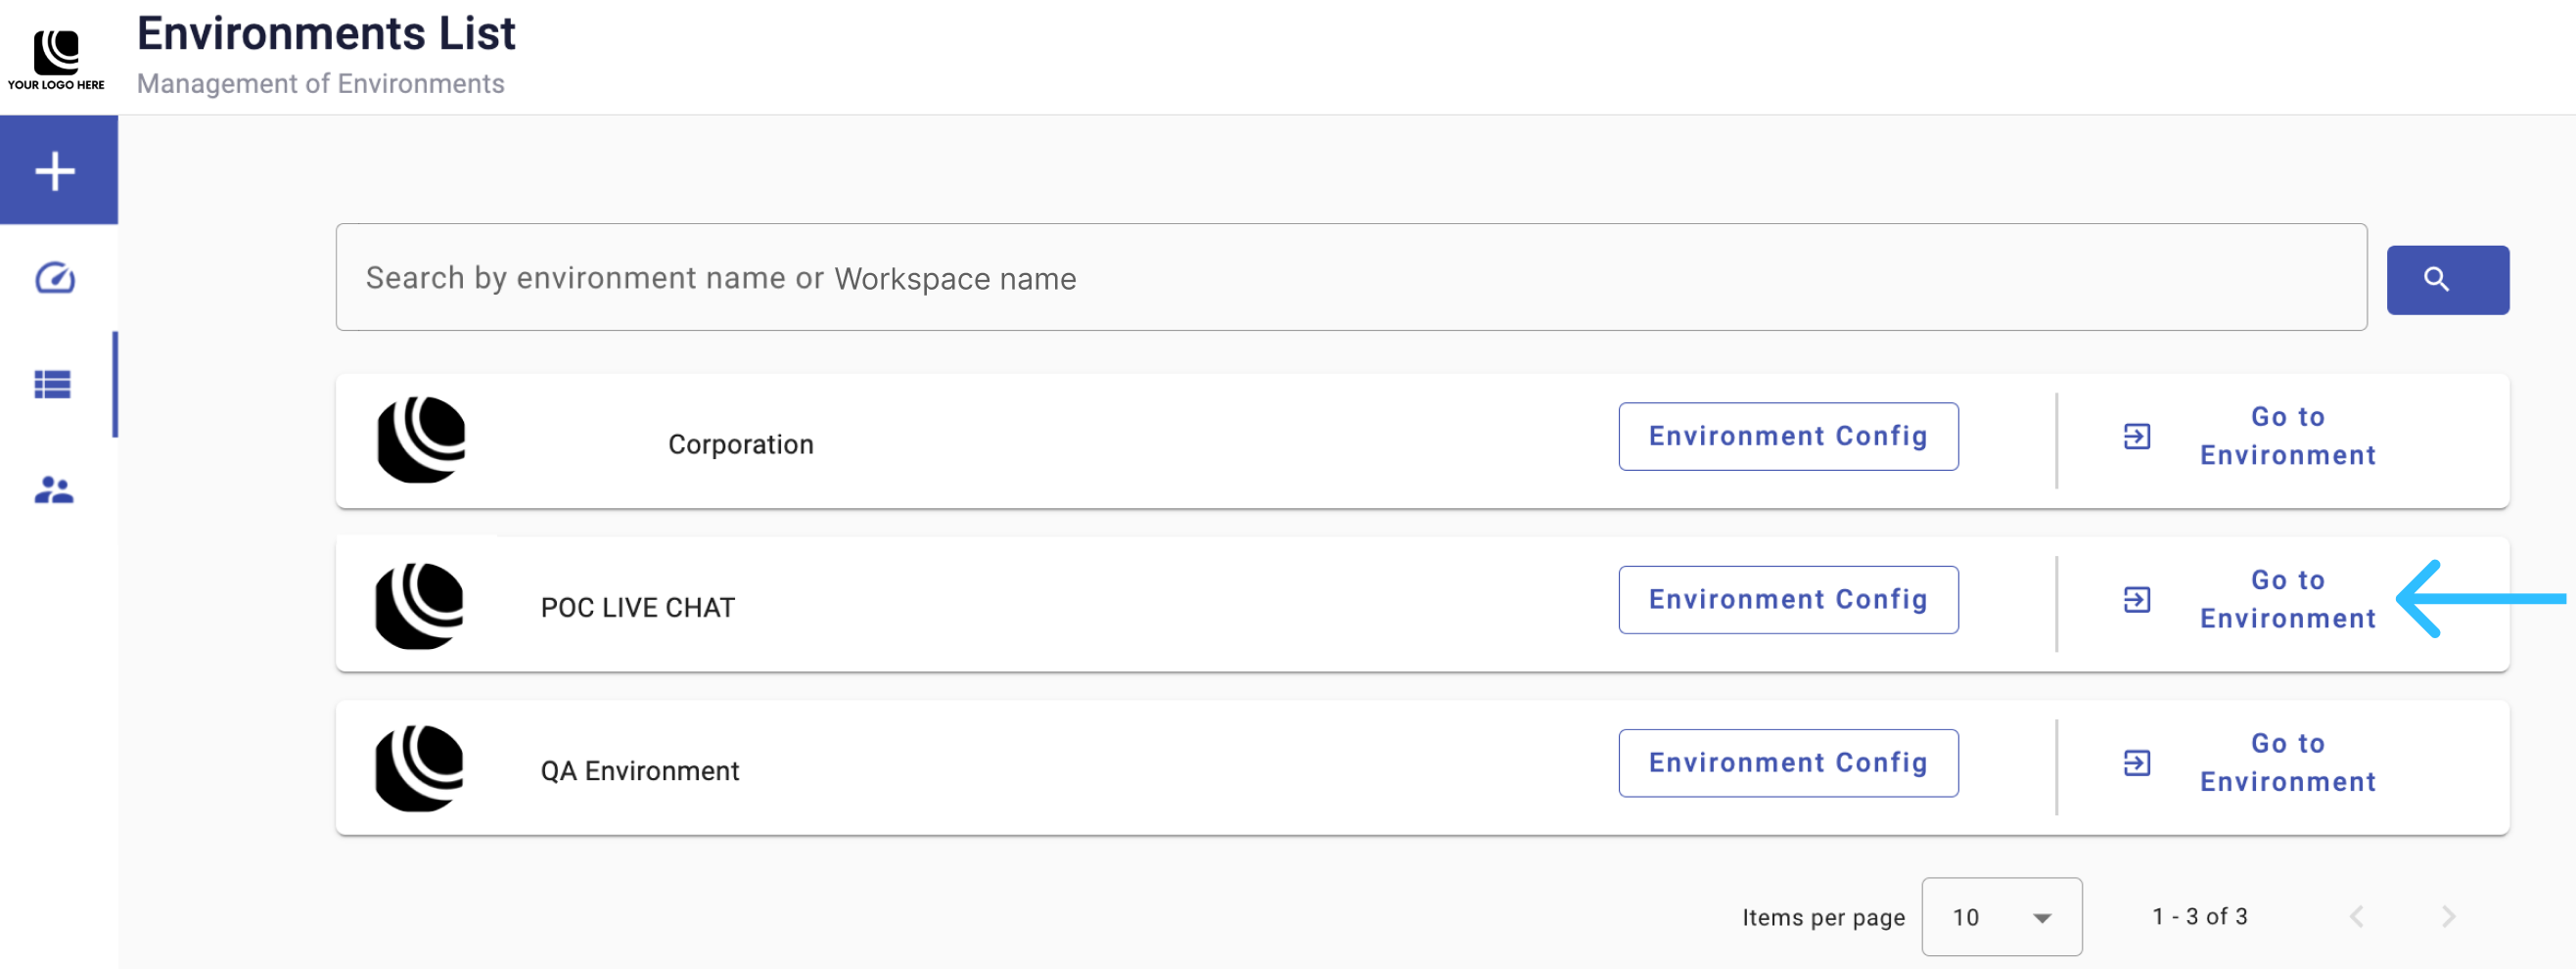
From Environments, select an environment and select Go to Environment.
-
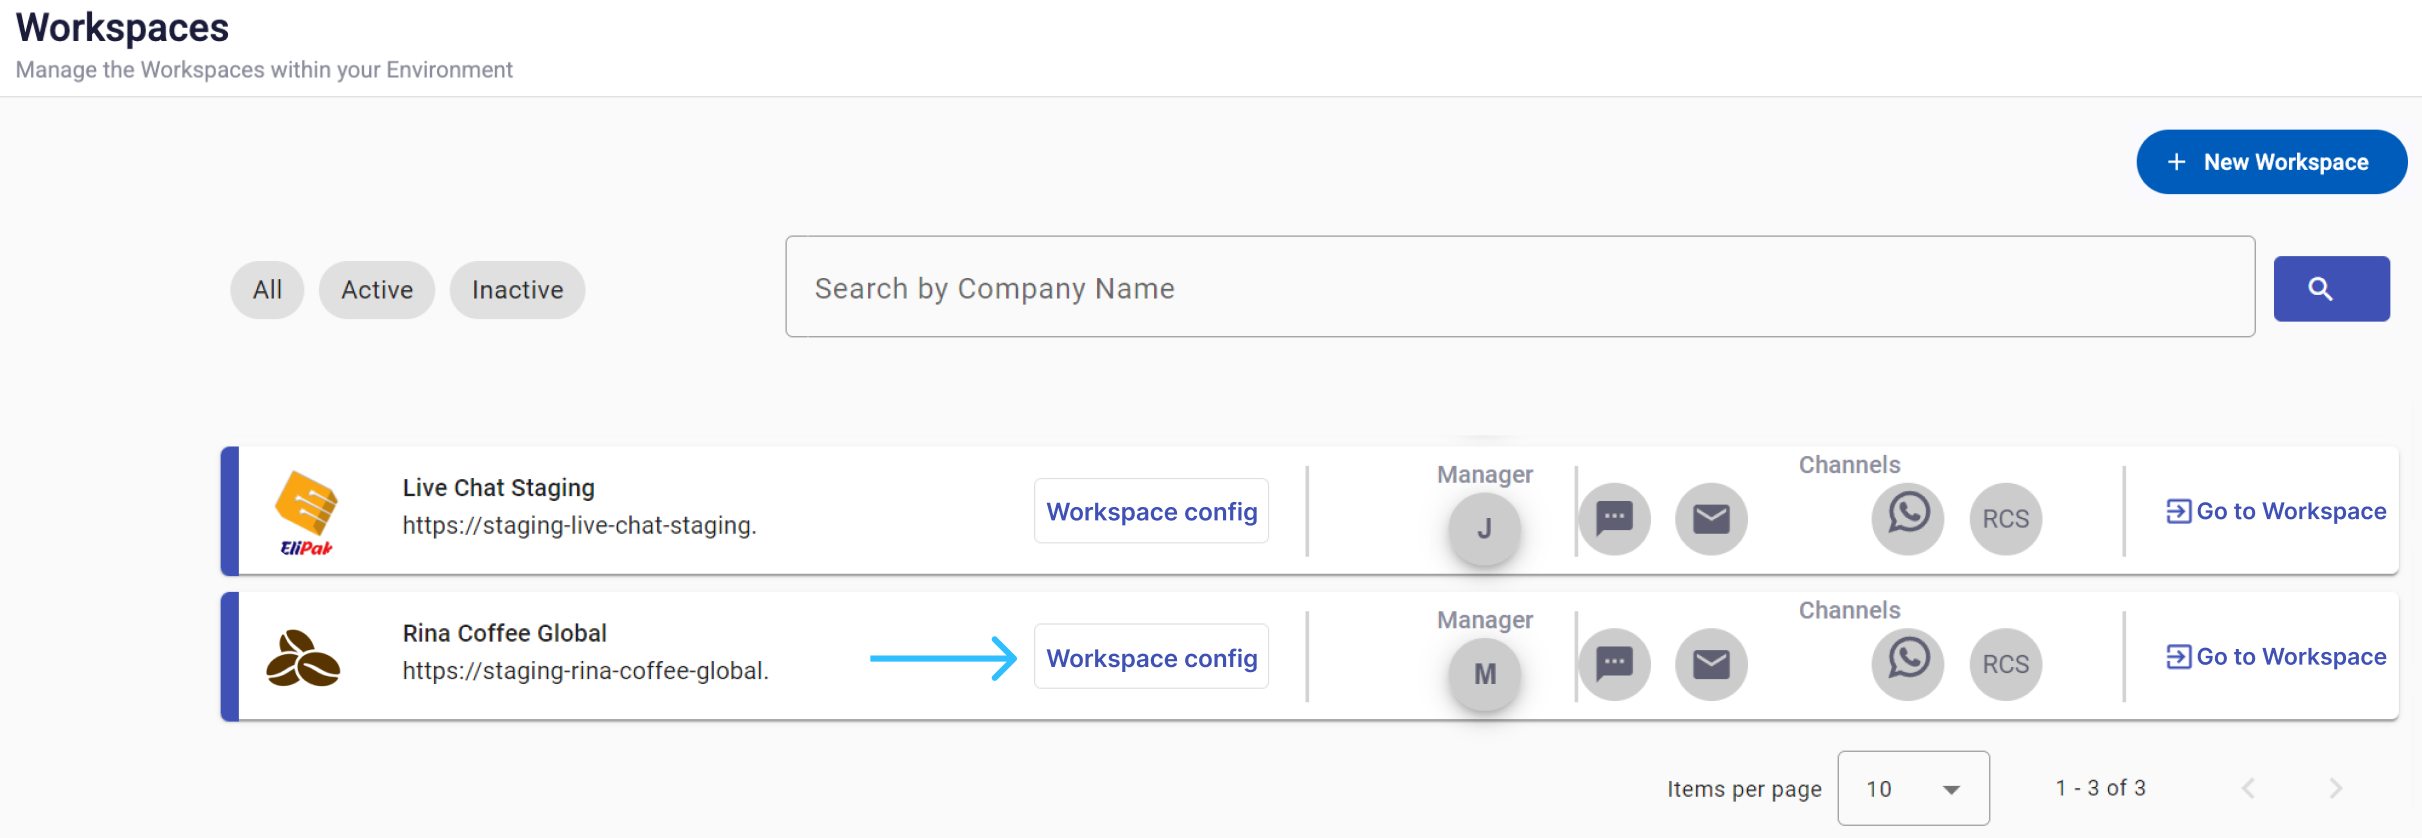
In the Workspaces list, select Workspace config for the Workspace you want to configure.
-
Open the Assign Routes tab.
The Overflow rules table
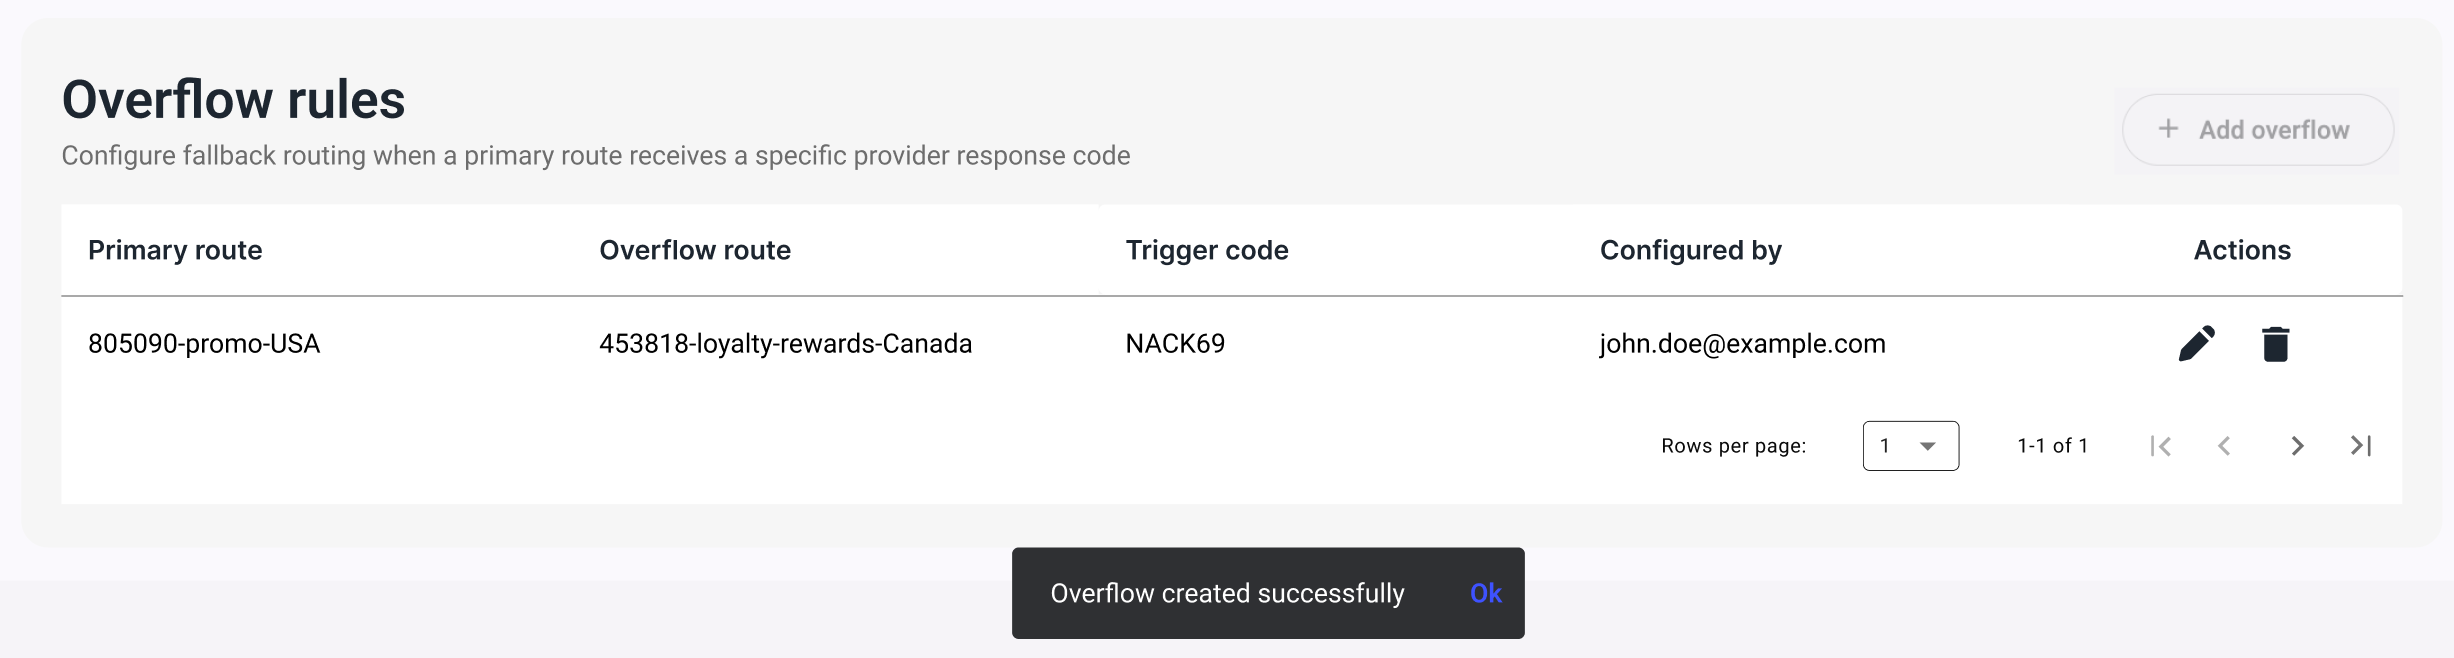
The Overflow rules section at the bottom of the Assign Routes tab lists all overflow rules configured for the Workspace.
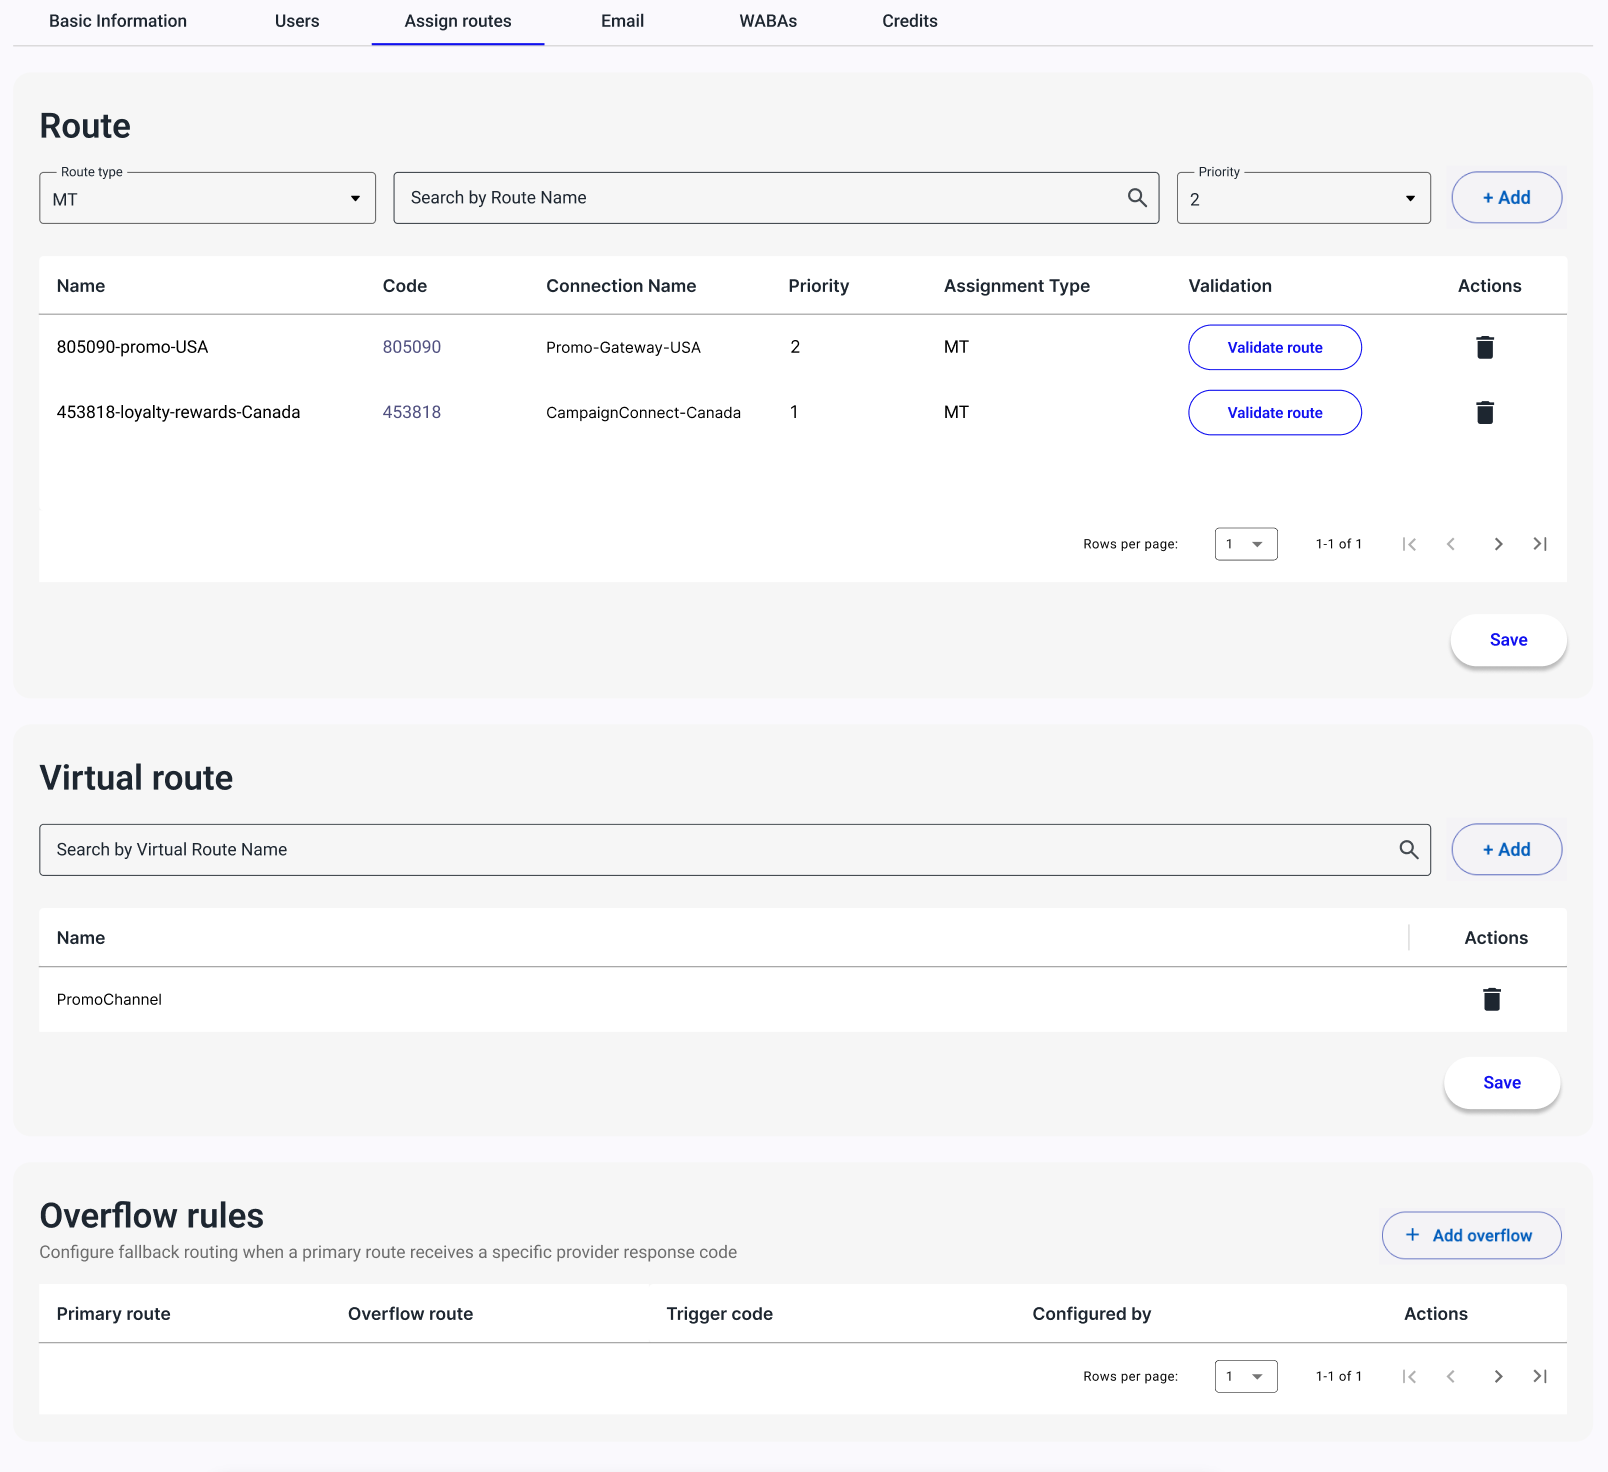
The Overflow rules table includes the following columns:
- Primary route — The route used on the first attempt.
- Overflow route — The fallback route used when the primary route returns the trigger response code.
- Trigger code — The provider response code that activates the overflow (for example,
NACK69). - Configured by — The admin user who created the rule.
- Actions — Select the pencil icon to edit the rule, or the trash bin icon to remove it.
Add an overflow rule
Before you beginThe + Add overflow button is unavailable in two cases:
- At least 2 configured routes are needed to create an overflow rule — add a second route to the Workspace before creating an overflow rule.
- All available routes have been assigned — every possible route pairing already has an overflow rule configured. Add another route to the Workspace to create more.
-
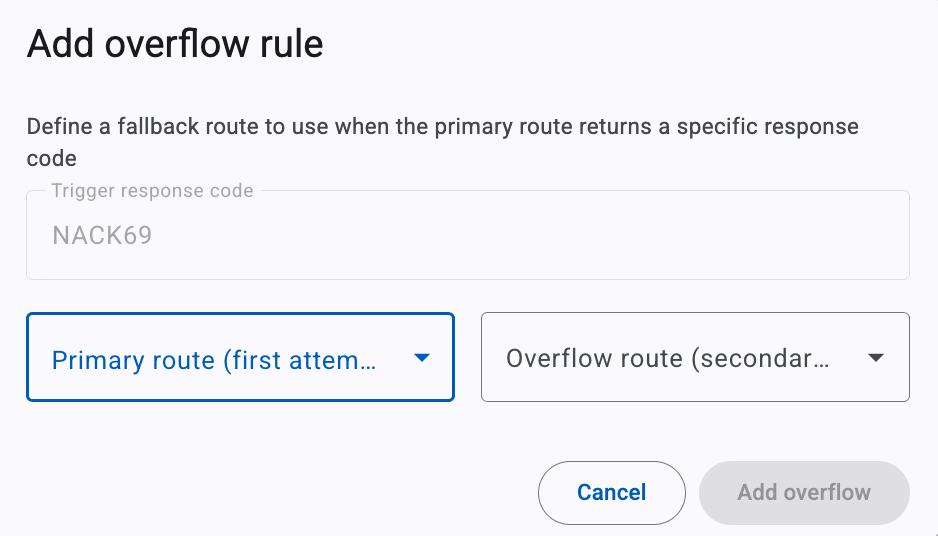
From the Assign Routes tab, in the Overflow rules section, select + Add overflow. A pop-up window will open.
-
In the Add overflow rule window, the Trigger response code that should activate the overflow (for example,
NACK69) is not editable. -
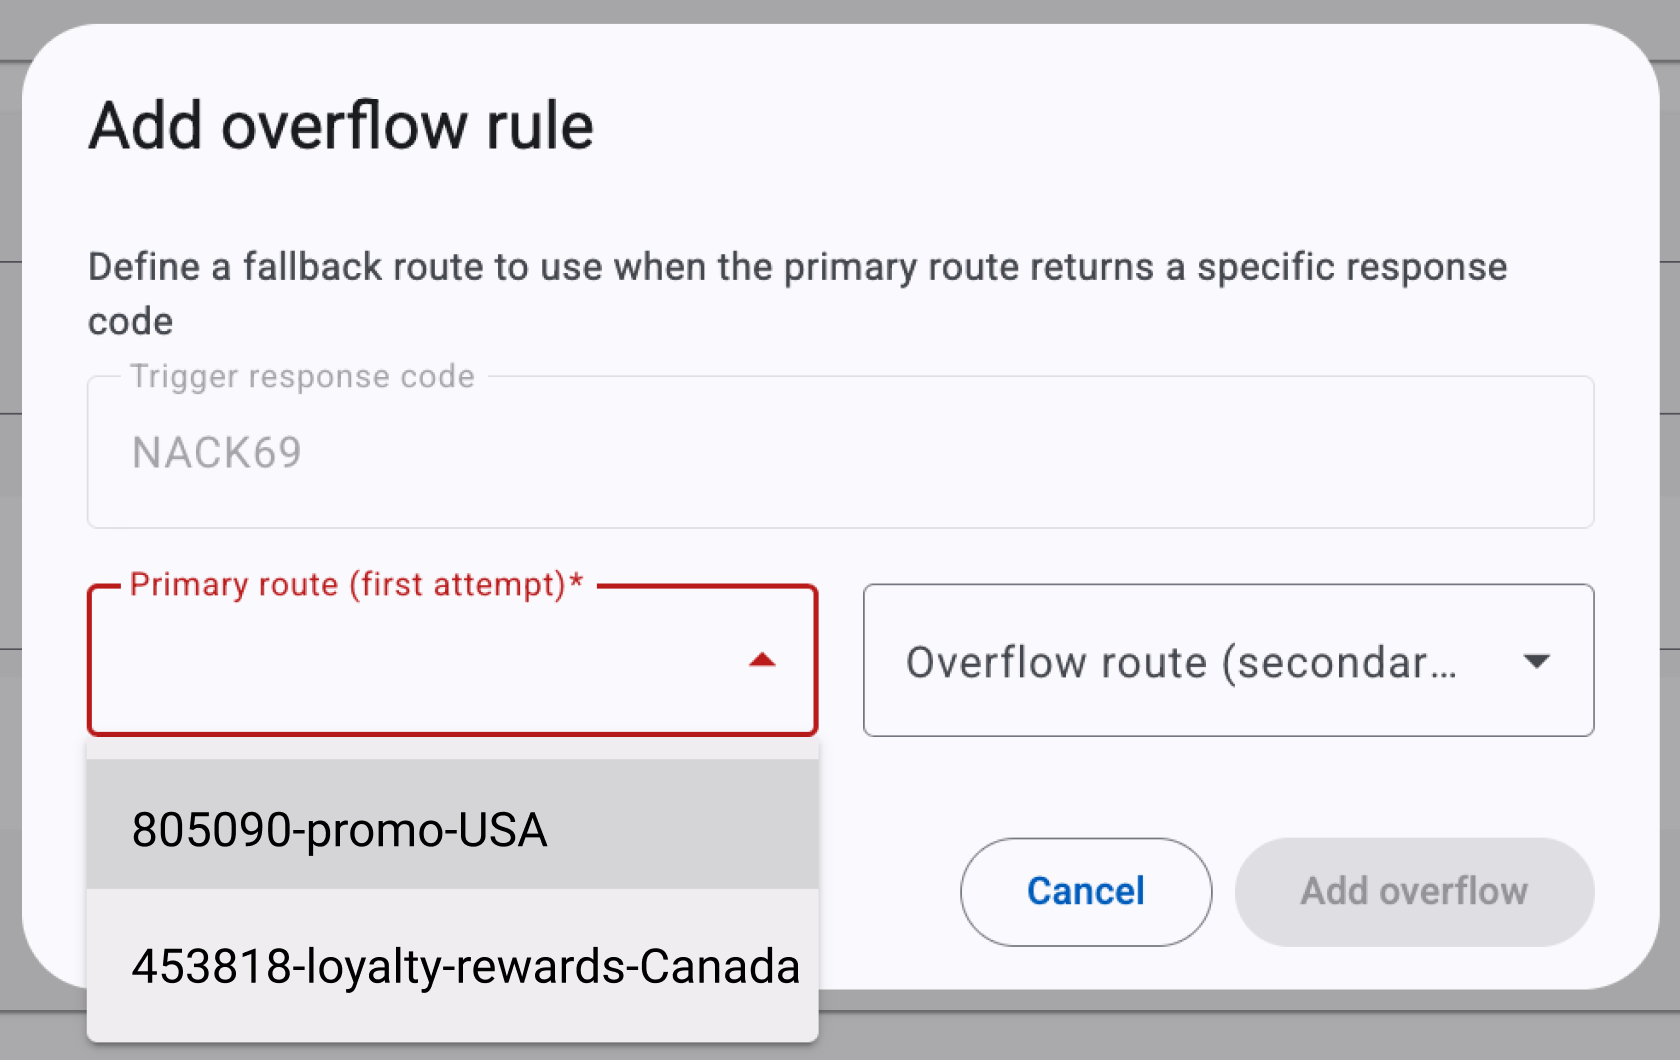
From the Primary route (first attempt) dropdown, select the route used on the first attempt.
-
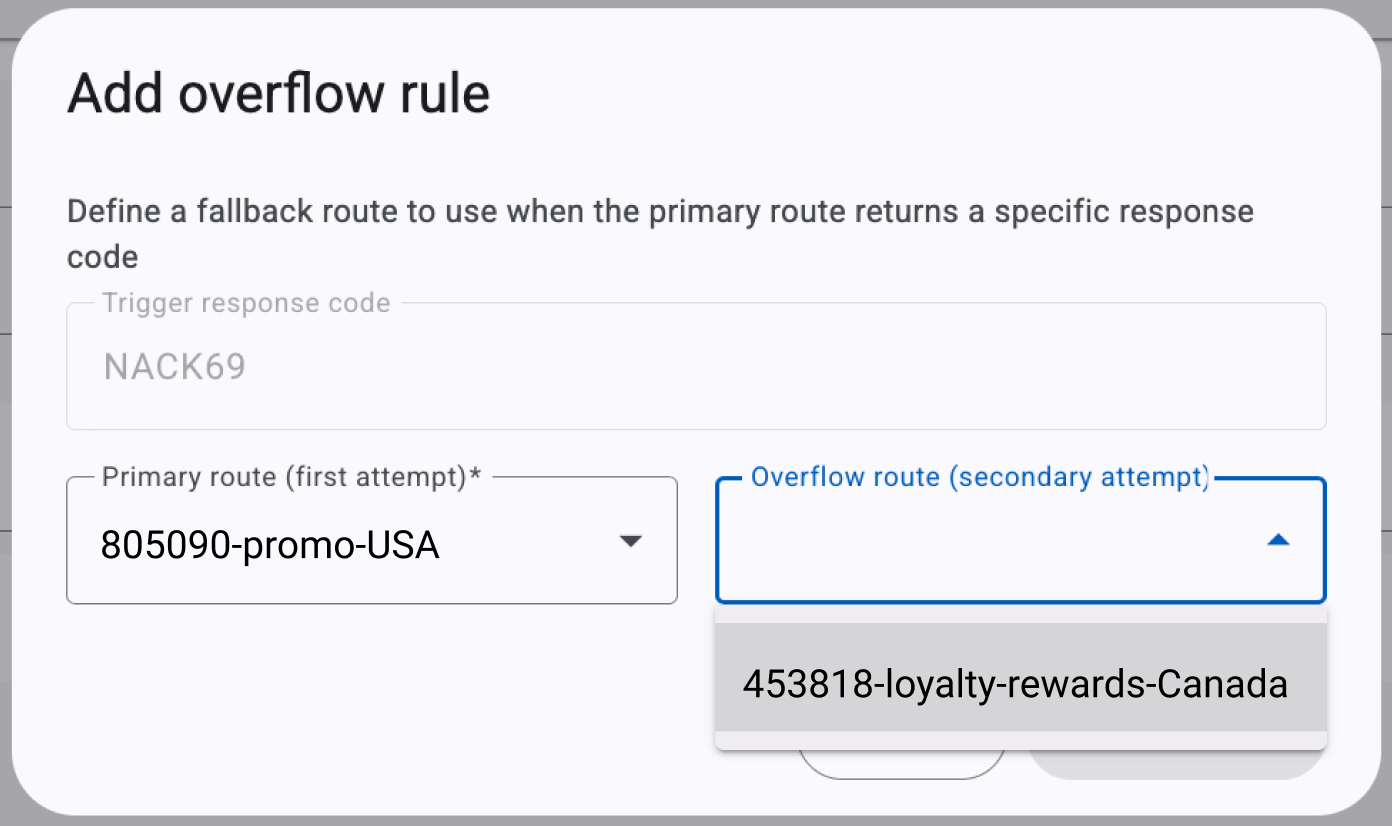
From the Overflow route (secondary attempt) dropdown, select the fallback route to use when the primary route returns the trigger response code.
-
Select Add overflow.
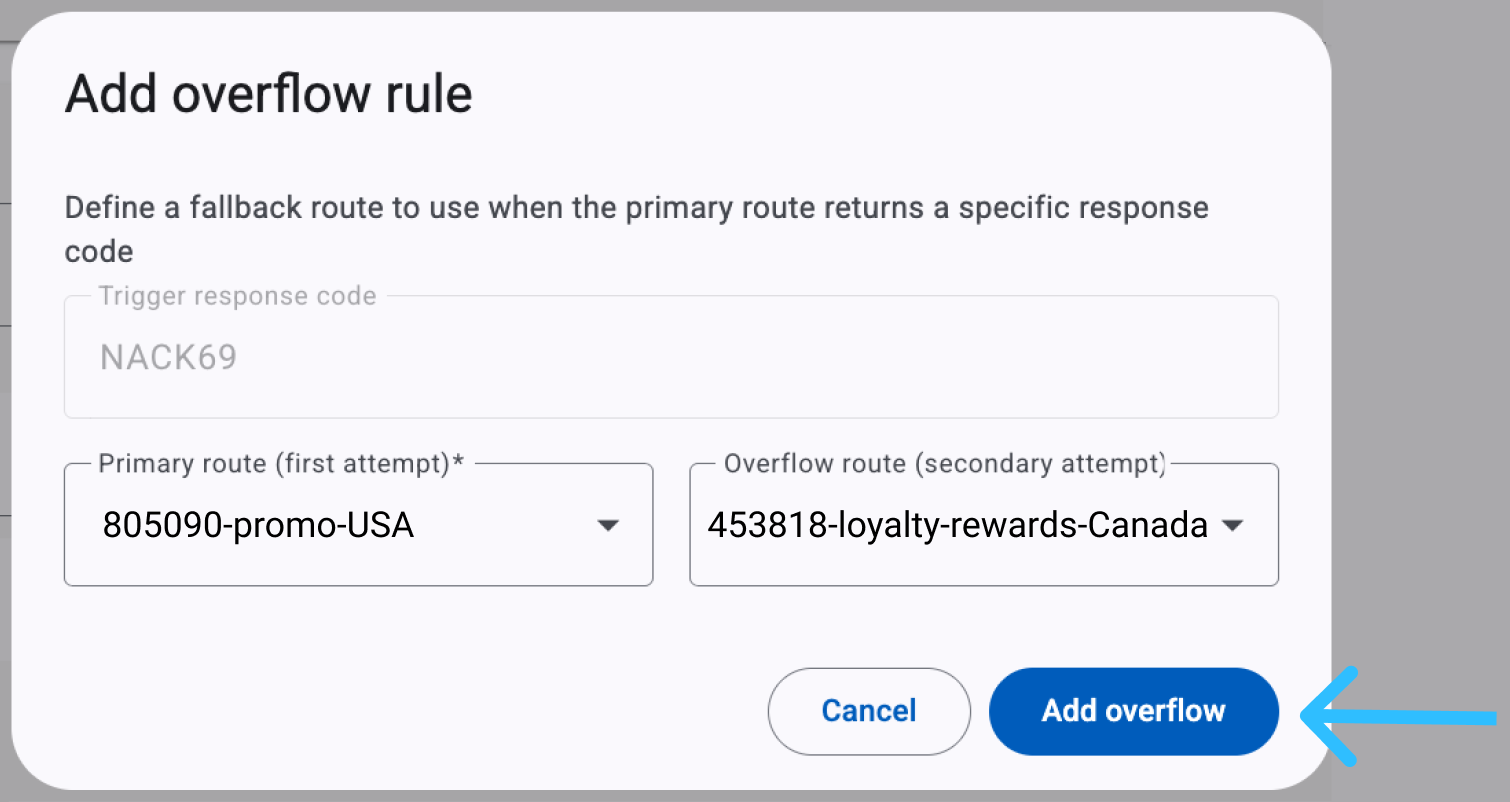
The rule appears in the Overflow rules table.
Remove an overflow rule
-
In the Overflow rules table, select the trash bin icon next to the rule you want to remove.
-
In the confirmation window, select Delete to confirm, or Cancel to keep the rule.

Removing an overflow rule stops the platform from retrying messages through its configured overflow destination when the trigger response code is received.
Routes used in an overflow rule can't be deleted directly
A route that's part of one or more overflow rules is locked against deletion in the Routes table. If you select the trash bin icon for a route that's in use, the platform shows a notice asking you to update or remove the related overflow rule first, then try again. This prevents an overflow rule from silently pointing at a route that no longer exists.
Related pages
- Assigning routes
- Environment's workspaces configuration
- Enabled channels — see the Overflow column and Sender details for a code with an overflow rule configured.
Updated about 1 month ago