
Partner-initiated process
Create a WhatsApp Business Account through your Business Solution Provider when not using Embedded Signup. For teams onboarding a WABA while retaining full account ownership.
Create a WhatsApp Business Account (WABA) through your Business Solution Provider (BSP) when you do not use Embedded Sign-Up.
Your Business Solution Provider (BSP) can initiate the WhatsApp Business Account (WABA) creation process on your behalf while your business retains full ownership of the account.
NOTEWABA approval time
Meta reviews each WhatsApp Business Account (WABA) based on its verification procedures and the submitted documentation.
Both the account status and business verification must be approved before the WABA is fully active. Approval usually takes 2 to 7 business days, but Meta manual reviews can take up to 14 days.
Until business verification is approved, the WABA has limited capabilities:
- You can send messages only within the initial limit of 250 conversations per 24 hours, without newly approved message templates.
- You cannot access large-scale messaging or advanced features until both statuses are approved.
Request a WABA
-
Contact the Support Team. Open a support ticket or contact your Account Manager. Include your Business Manager ID from Meta Business Suite and request the creation of a WhatsApp Business Account (WABA) for your company.
Your Business ID is a unique number assigned to your commercial portfolio. You may need it to grant a partner access to business information and assets, such as monthly invoices or your Meta Pixel.
To find your Business Manager ID:
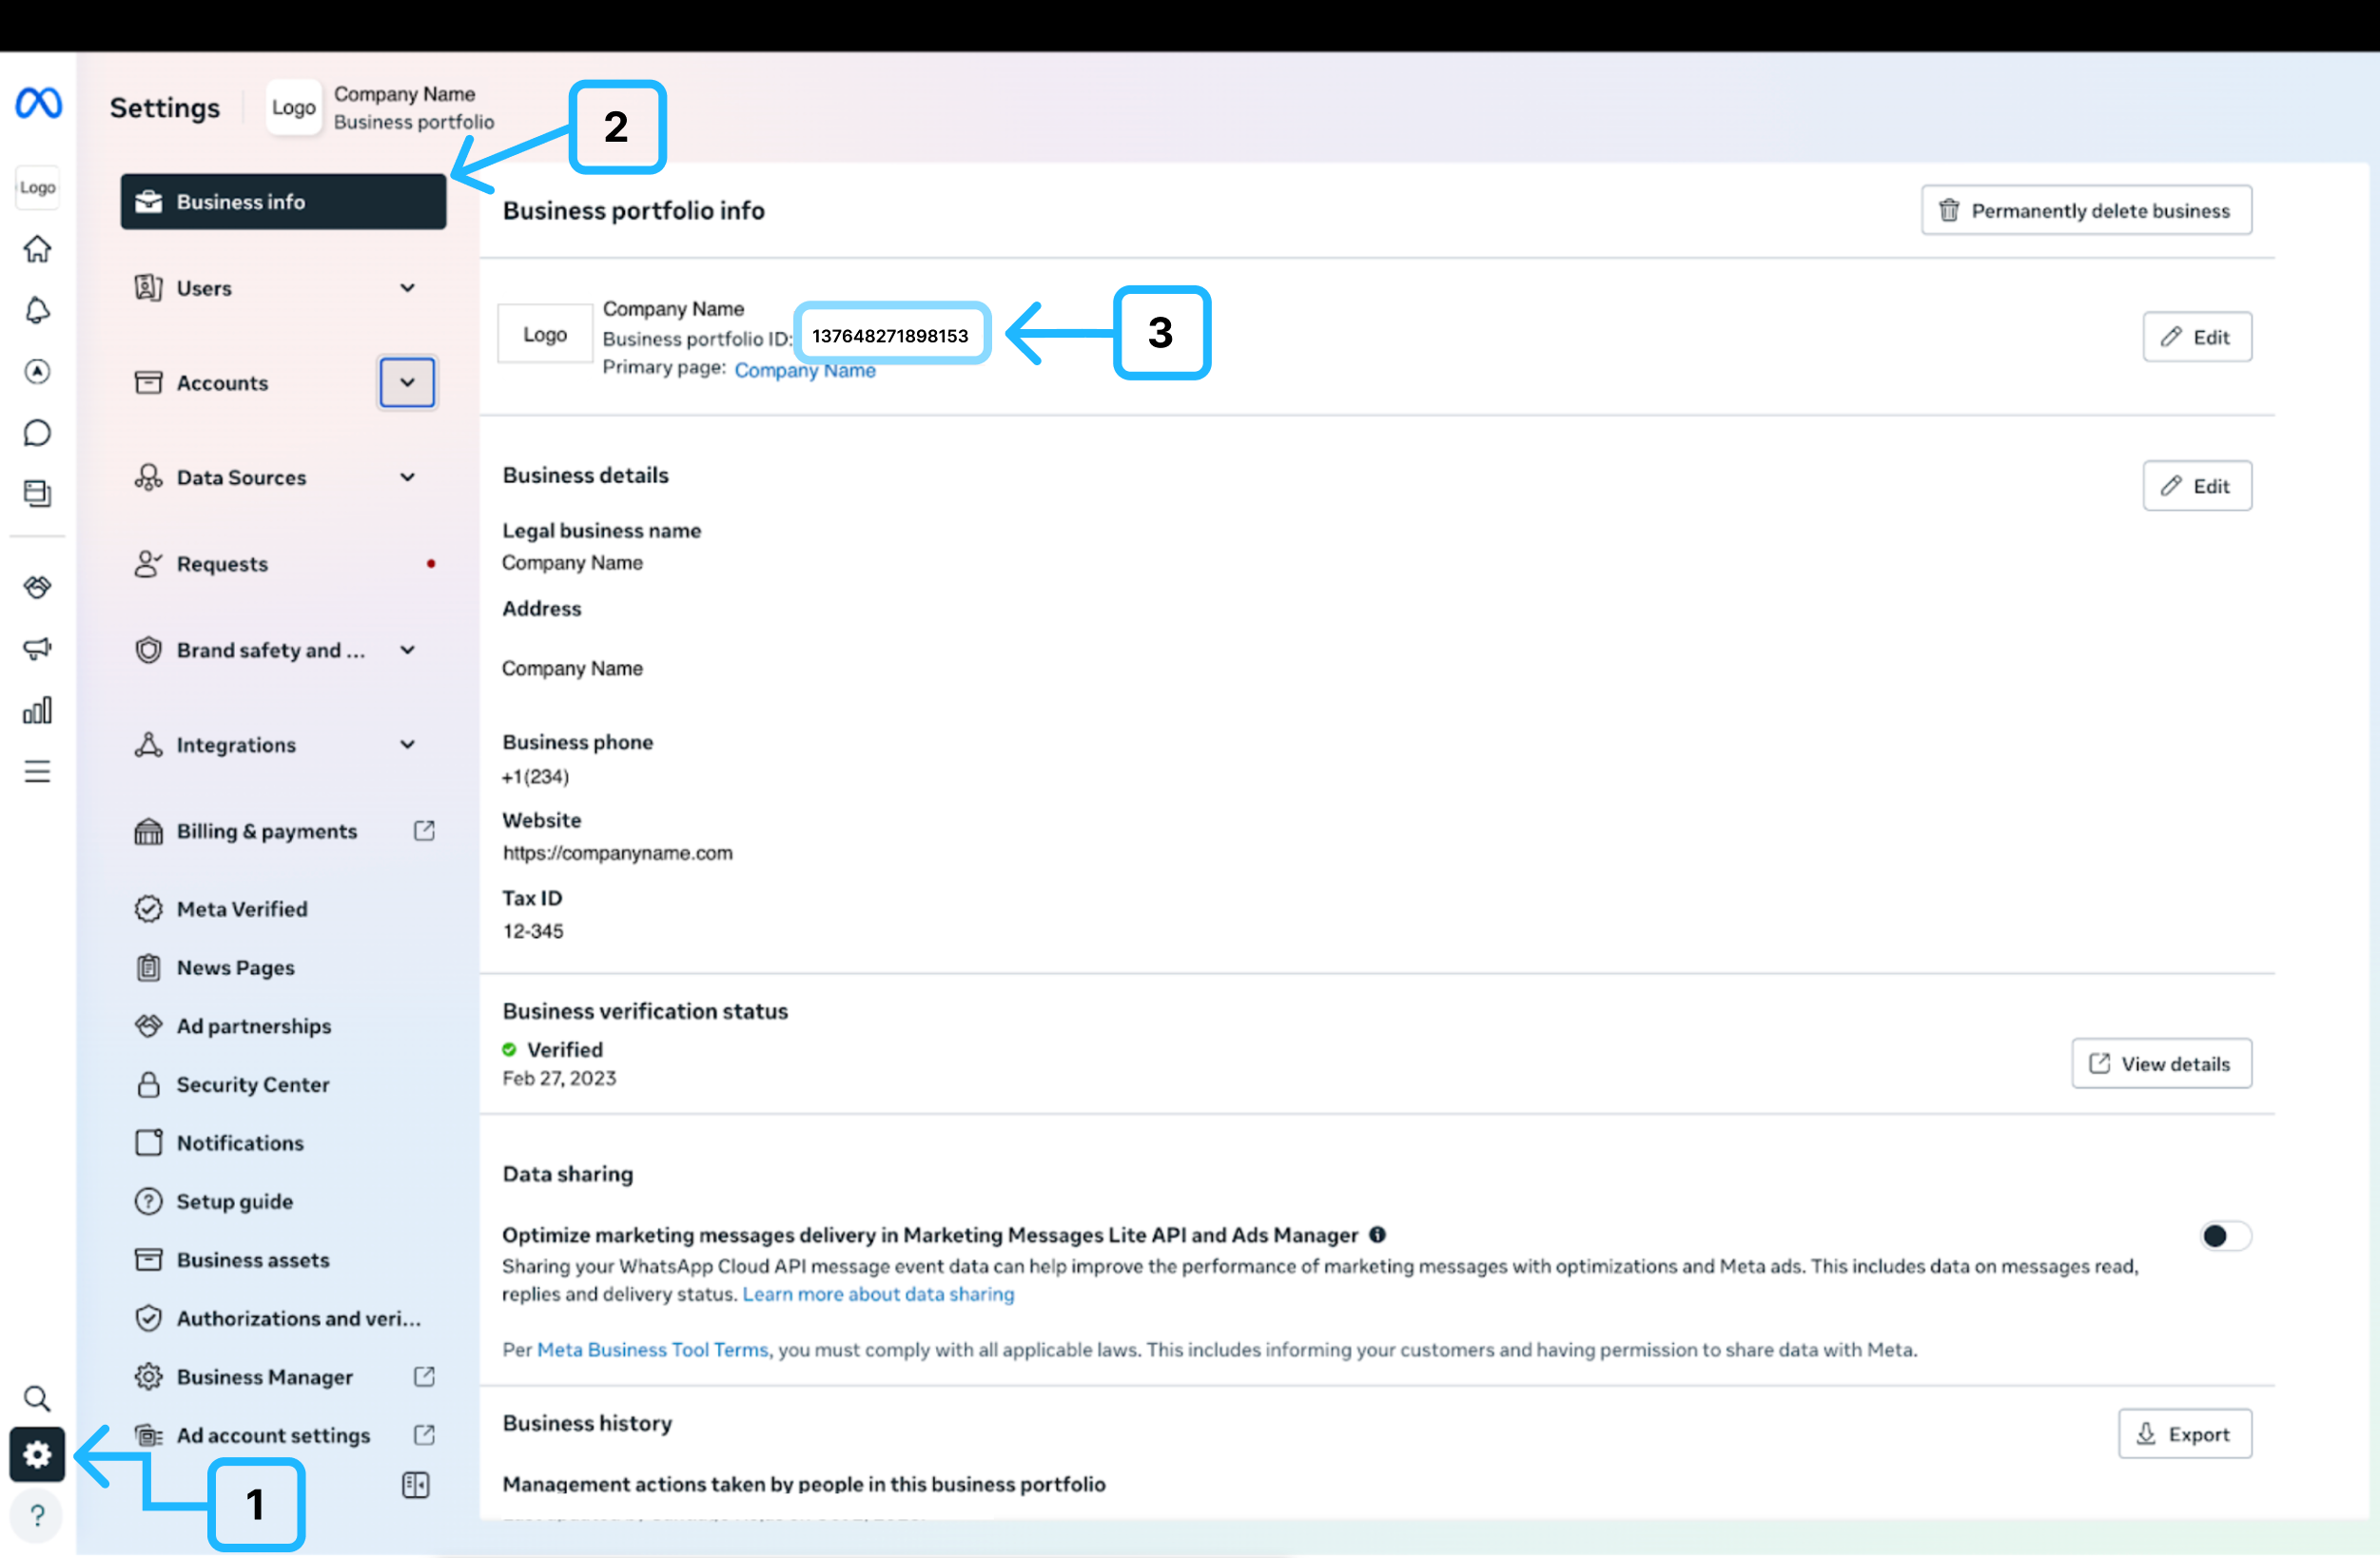
- From Meta Business Suite, go to Settings.
- Select Business Portfolio Information from the left menu.
- Find your Business ID below your business portfolio name.
-
Wait for confirmation. After your request is submitted, you will receive an email notification or support ticket confirming that the WABA creation invitation was sent to your Meta Business Suite account.
-
Accept the invitation. Locate, review, and accept the WABA creation invitation sent by your BSP.
-
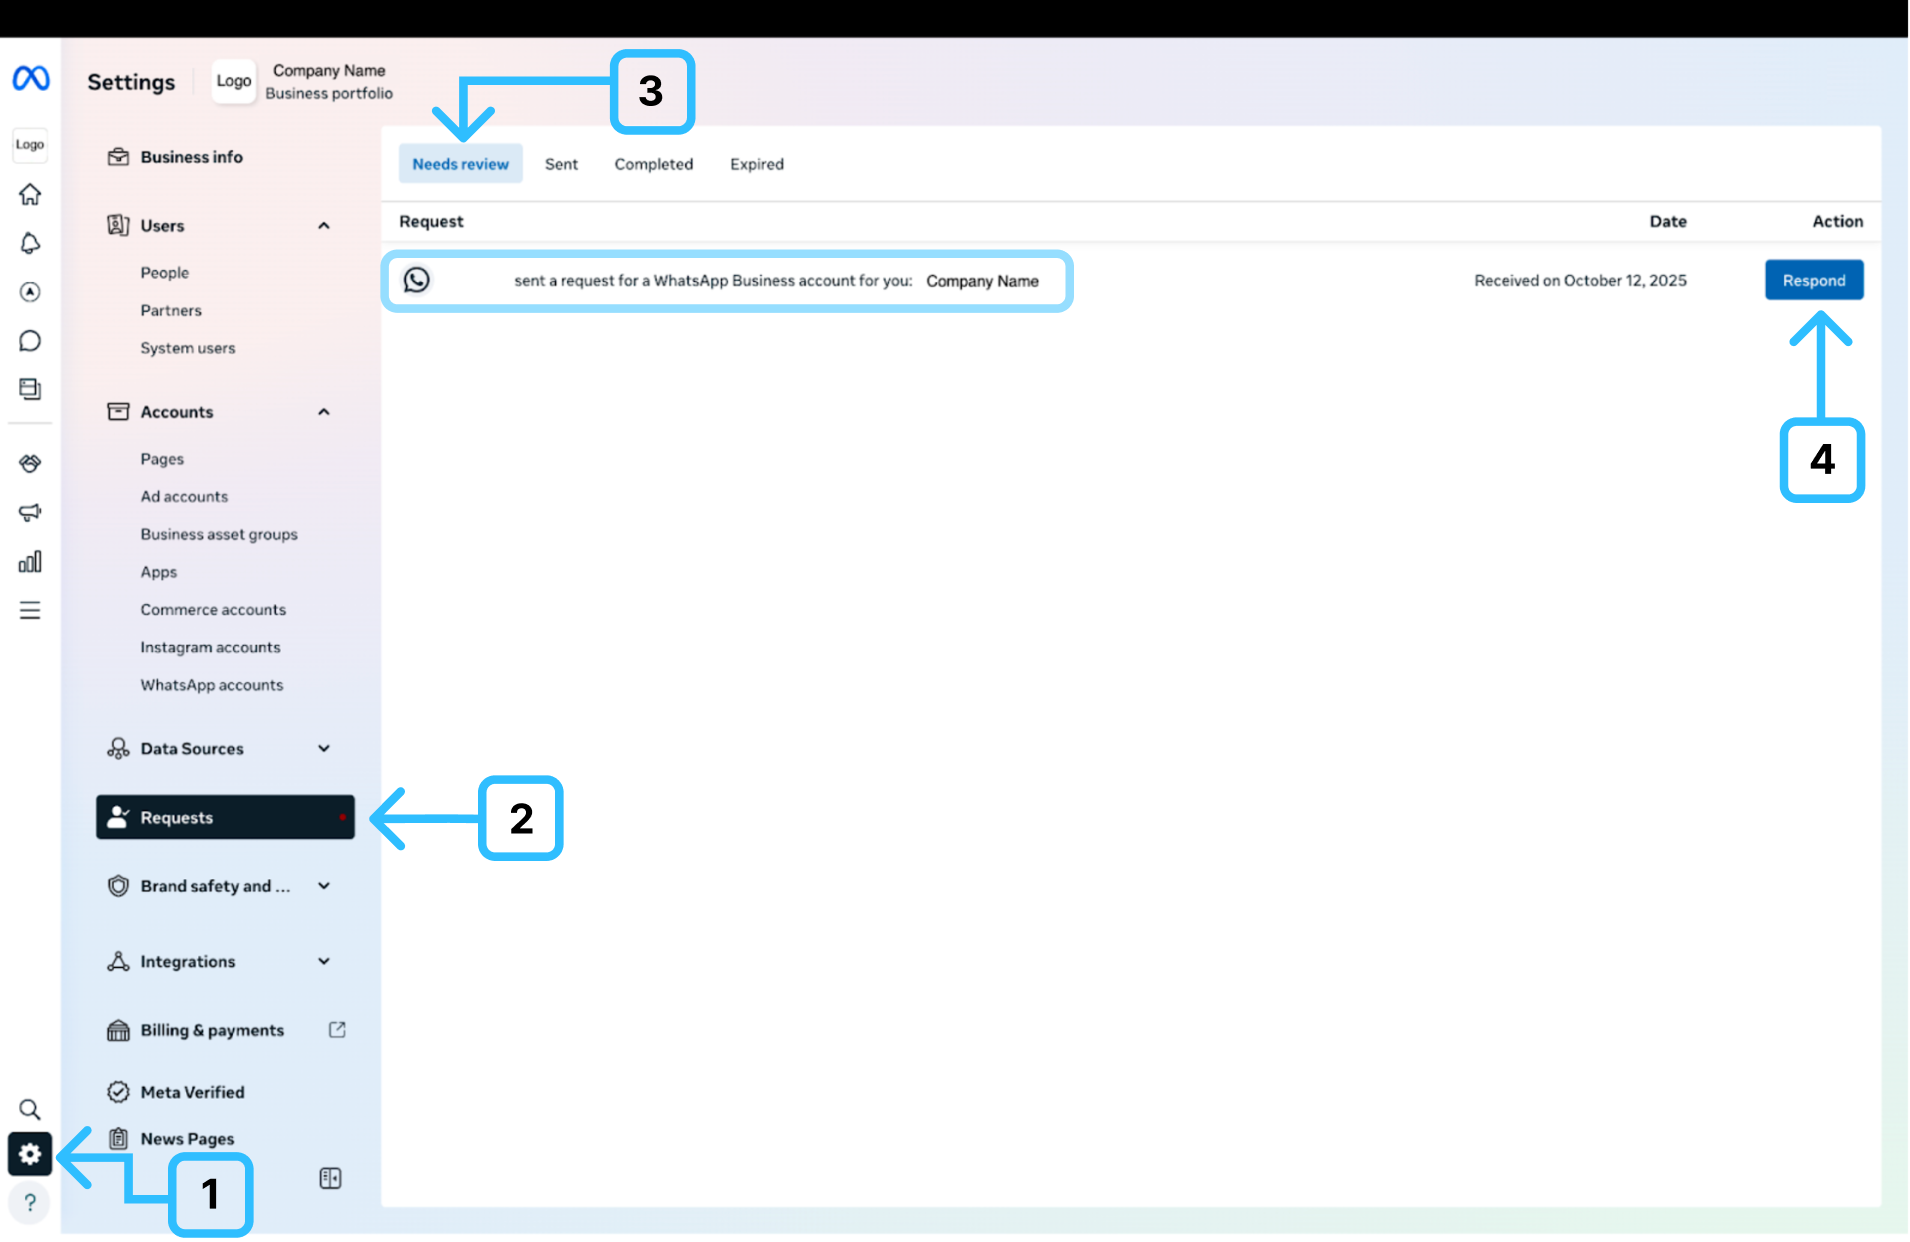
From Meta Business Suite, go to Settings.
-
Select Requests.
-
Click the Needs Review tab.
-
Click Respond next to the request from your BSP.
-
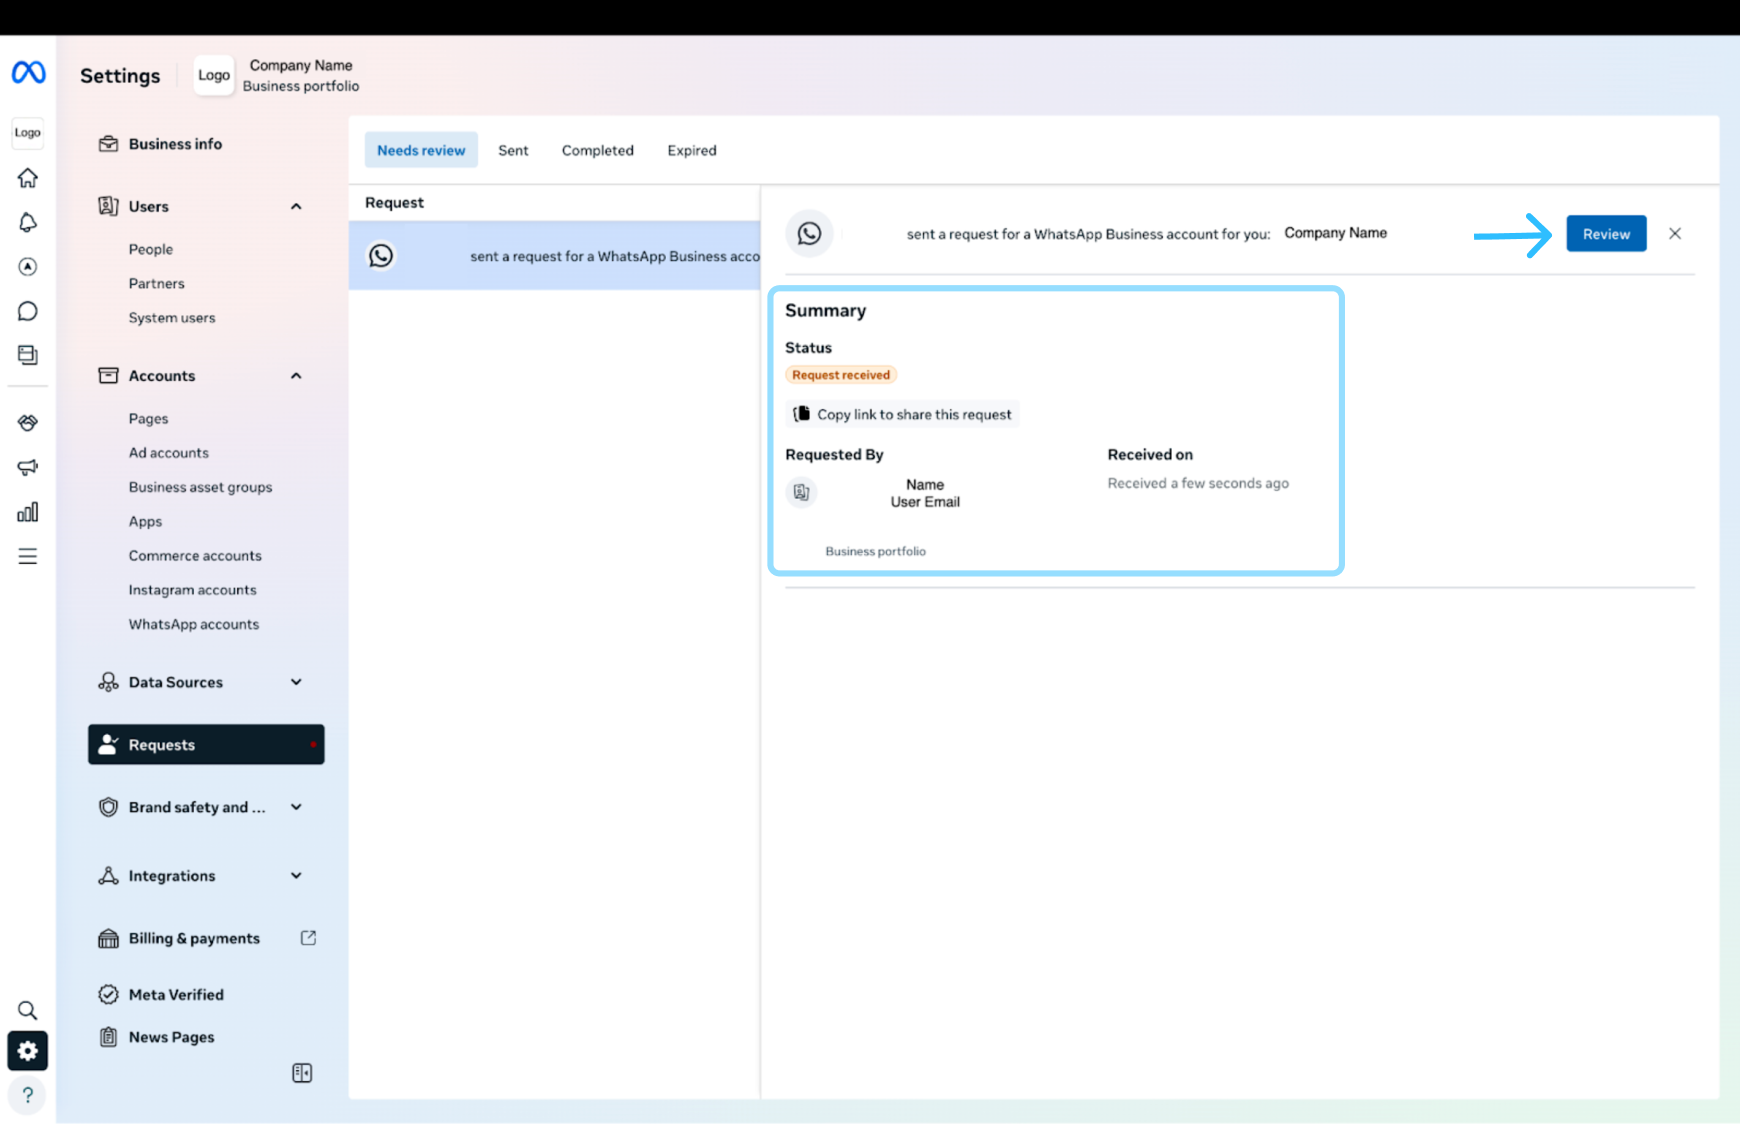
Review the request details, then click Review to start the guided setup process for your WhatsApp Business Account (WABA).
-
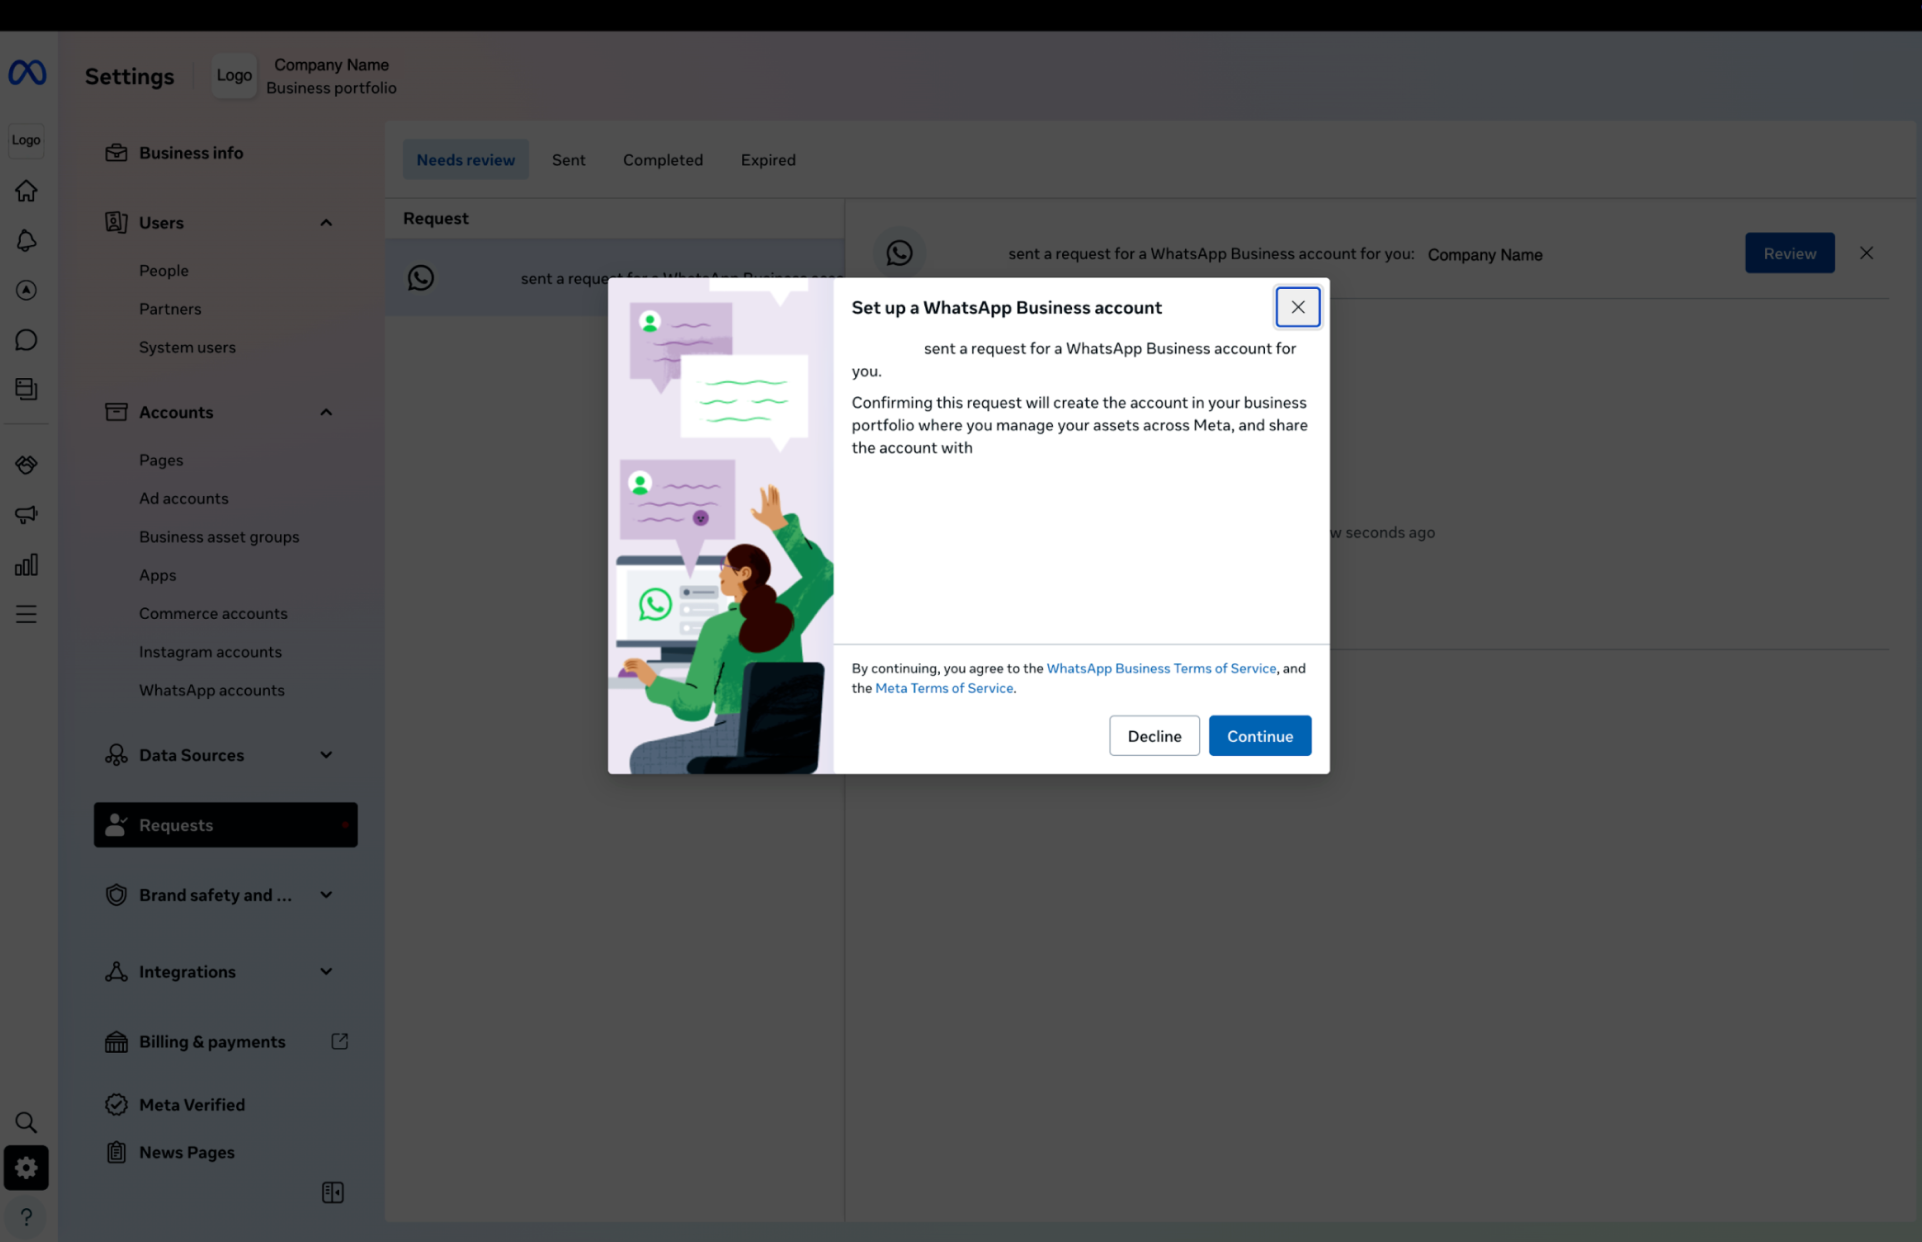
When the confirmation window appears, click Continue to proceed with the guided setup and agree to the WhatsApp Business Terms of Service and Meta Terms of Service.
-
In the Details step, confirm that the account name, display name, and business category are correct. Click Next.
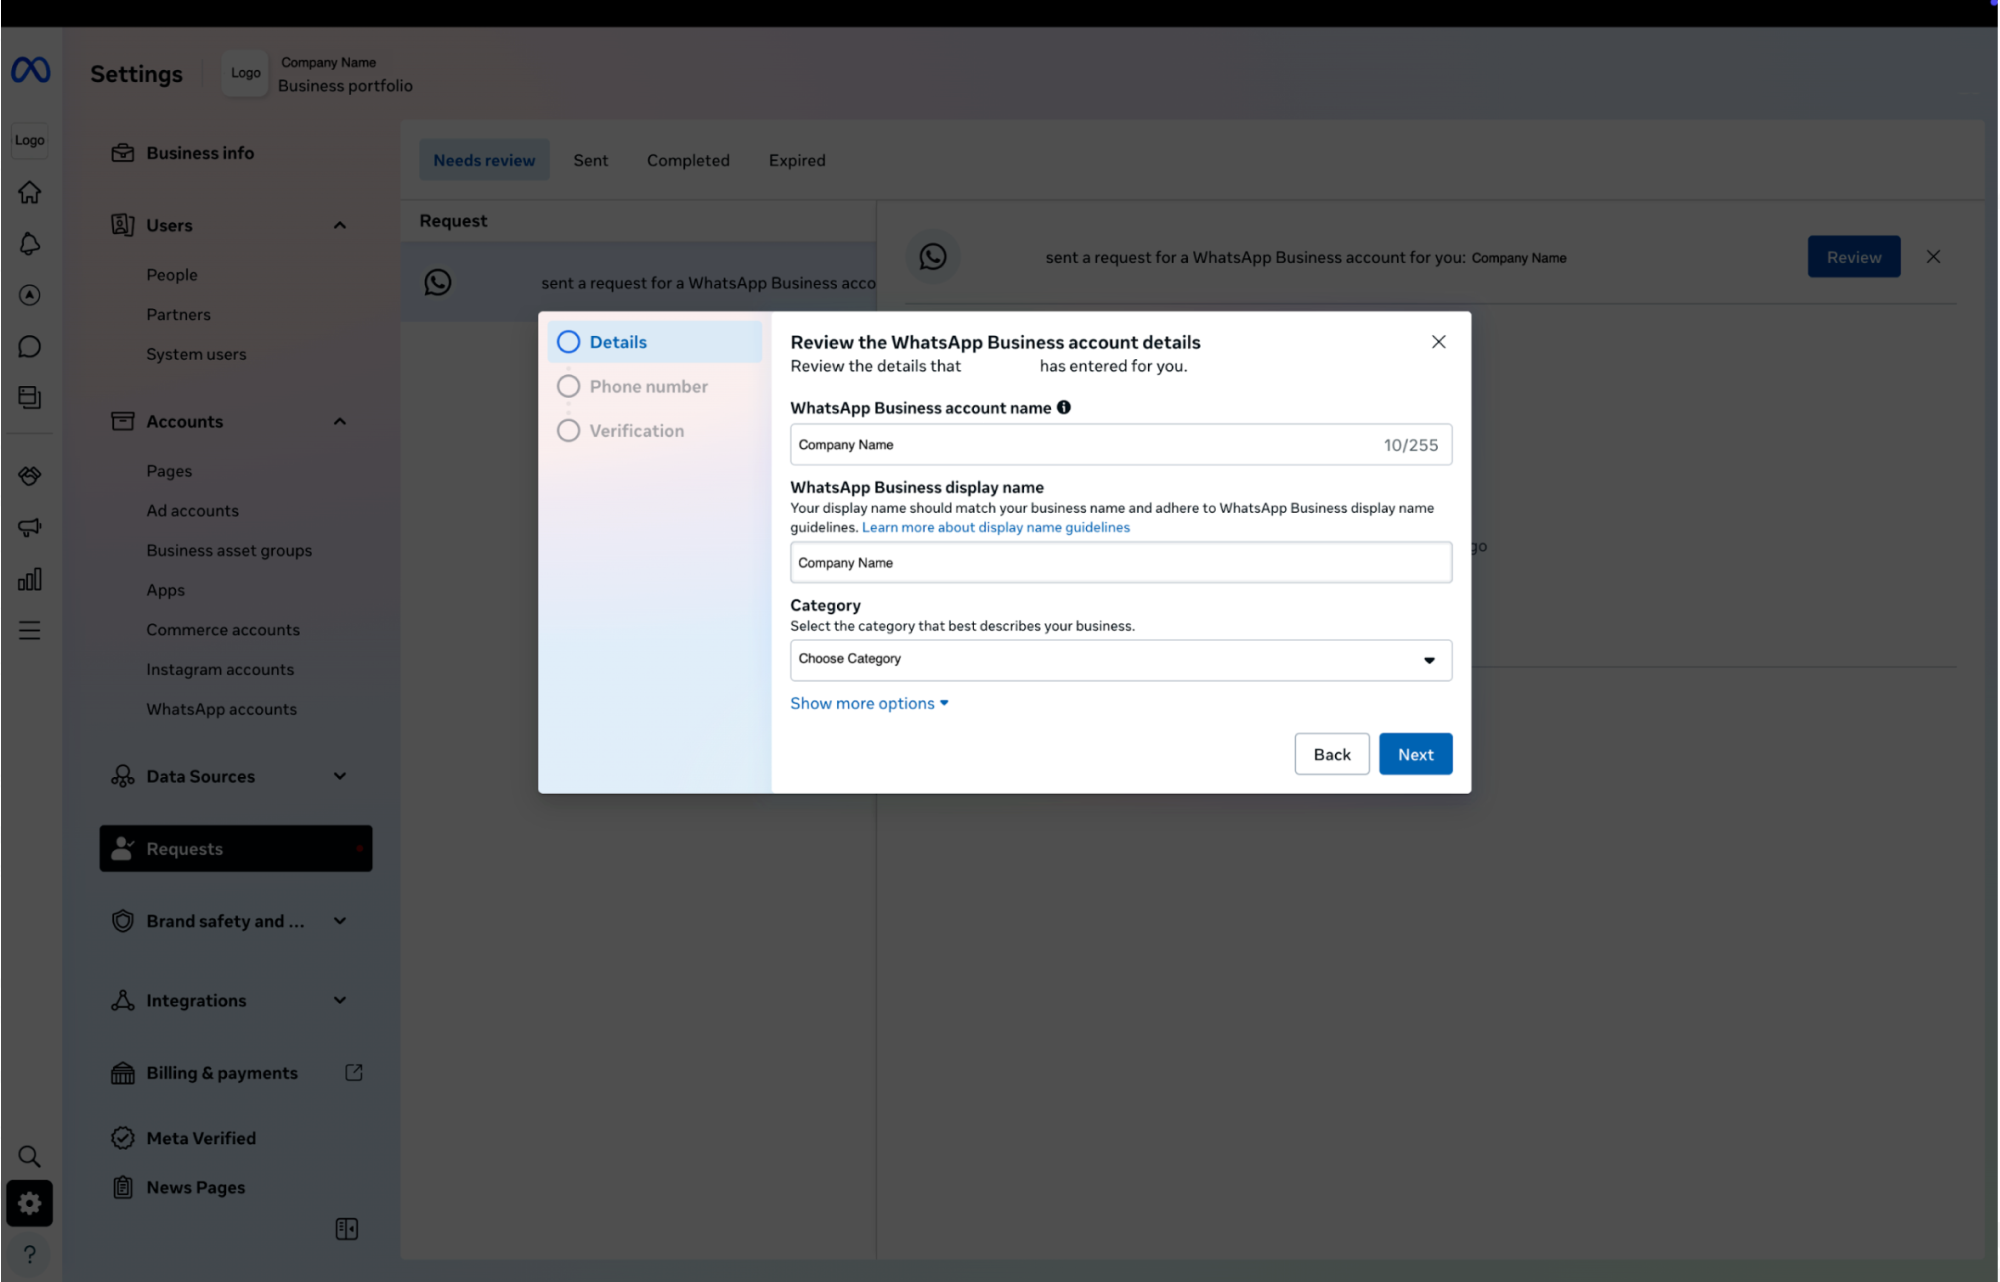
-
In the Phone number step, select Add a phone number later, then click Next.
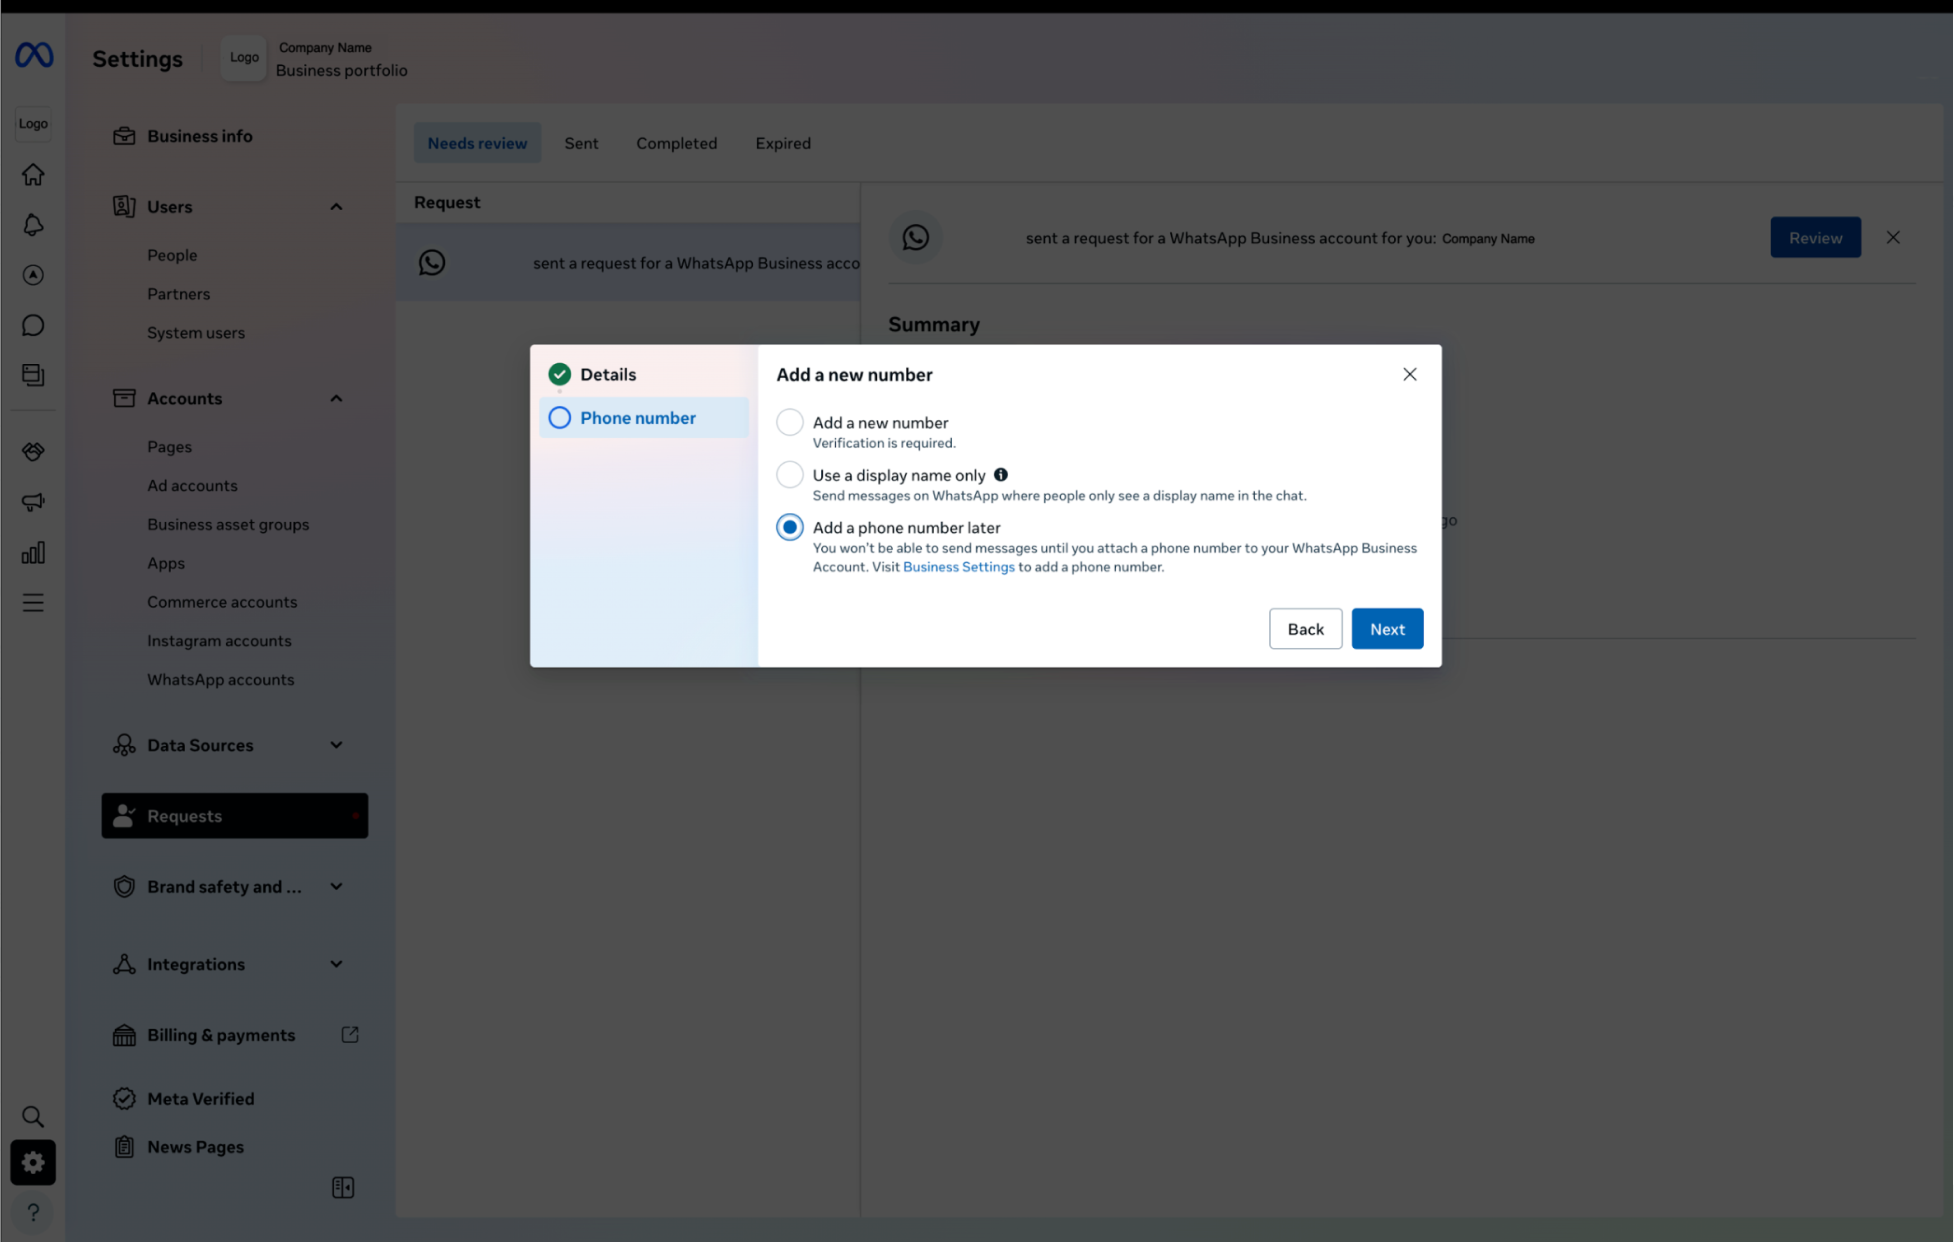
-
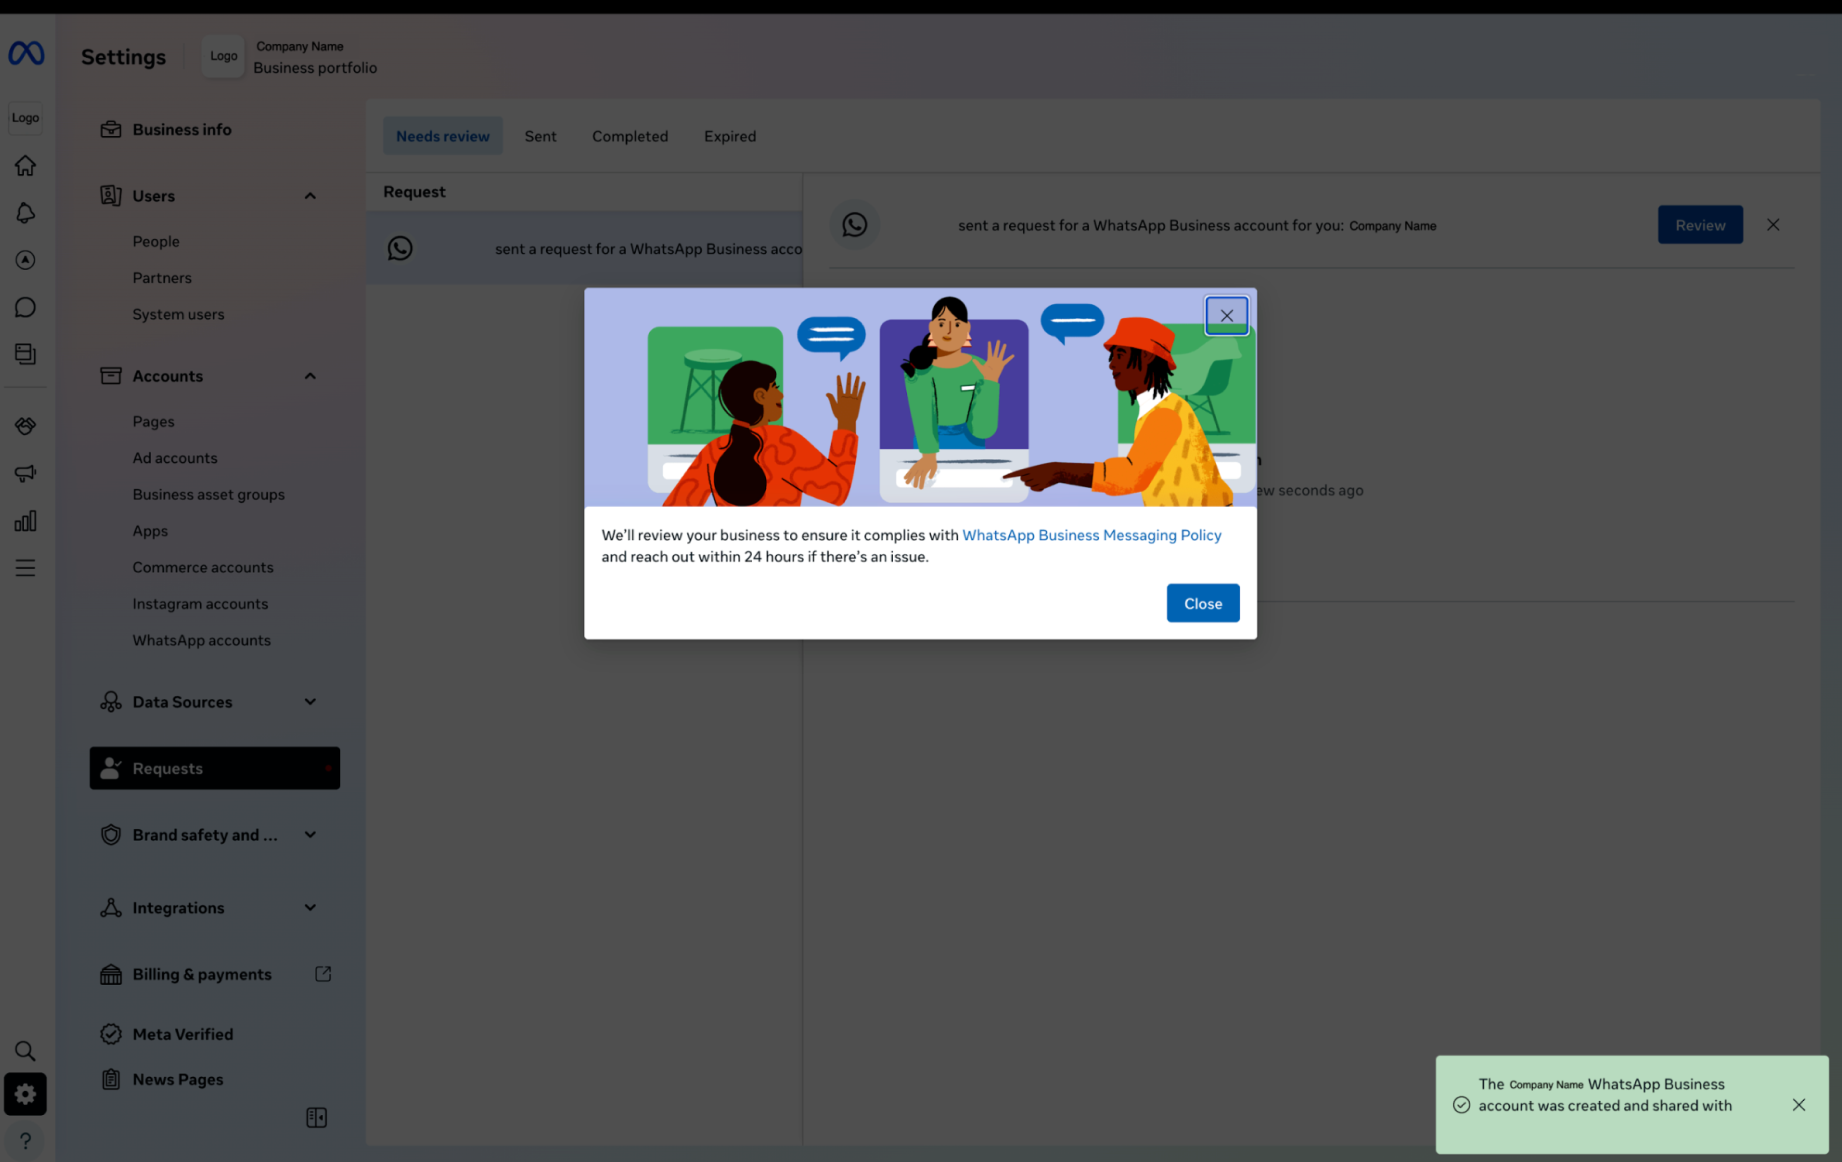
After the setup flow is complete, confirm that Meta shows the WABA as successfully created and linked to your Business Solution Provider (BSP).
Meta will review the account to make sure it complies with the WhatsApp Business Messaging Policy. Meta will notify you within 24 hours if any issues arise.
-
Optional: Add or verify phone numbers later
After the WABA is created, you can add or verify phone numbers directly in the platform. For instructions, see Add Phone Number (Sender) to WABA.
Updated 22 days ago