Web Trivia
Web Trivia is an interactive quiz experience where participants answer multiple-choice questions on various topics for a chance to win a prize. This game format is a great way to boost engagement, capture attention, and generate leads or conversions through fun, knowledge-based interactions.
Creating a Web Trivia campaign involves designing its appearance, setting up questions and answers, defining winner criteria, and configuring how users receive and experience the campaign.
The creation of a Trivia campaign follows these six steps:

- Delivery
- Web Trivia
- Content step
- Logic
- Message
- Summary
Delivery
In this step define the delivery channel and the campaign recipients.
Currently, three delivery channels are available for Web Trivia campaigns:
For more information on selecting the desired delivery channel, go to the Delivery section.
For information on selecting the desired Recipients, go to Define Recipients in the Campaign Elements section.
Web Trivia
The Web Trivia section provides the configuration elements of the first screen to be presented to the participants.

The steps to configure the design of the trivia are the following:
-
Trivia Title & Title Text Color: Type the name of the trivia that will appear in the center and choose the title text color using the color picker.
-
Header Logo: Upload a logo that stays visible throughout the trivia experience.
-
Element Colors: Use the color picker to customize the background, card, button, and text colors.
-
Footer Content: Add a footer message at the bottom of the trivia screen using one of three formats: a plain text message, an action, or a combination of the two options above.

-
Plain Text Message - A plain message footer, with an informational purpose consisting exclusively of text. For example, a message to entice the participant to continue with the trivia.
-
Action - An action footer will result in the platform invoking a parallel action to the Web trivia that will be opened in a new tab or window, depending on the device the trivia is played from. It is set by selecting Add Action Link.
-
Combination - A combination of the two will have both, informational text and a parallel action.
The plain message footer is entered in the text box with the default value of Input text which is a dummy placeholder for where the actual text should be entered to replace it. A Sample screenshot is shown below with all three possibilities.

To personalize the footer content, select the Add Action Link button. Once selected, the following Dialog will appear to select the desired action link.
Enter a Content Name (e.g., "Learn More" or "Visit Store") and select the desired action link by selecting the dropdown.

Click Add Action Link dropdown and choose one of the following options:
-
URL - Redirects users to a website. Select the URL option to add a link footer to the game.
The player selects the name of the footer you defined. Once selected, he will be redirected to the link you entered in the URL Link* text field.
-
Email - Opens the user's email app with a predefined email address. Select the Email option to add an email footer to the game.
The player selects the name of the footer you defined. Once selected, he will be redirected to the email you entered in the Send Email* text field.
-
Call : Allows users to call a predefined phone number. Select the Call option to add a phone number footer to the game.
The player selects the name of the footer you defined. Once selected, he will be redirected to the phone number you entered in the Phone number* text field. That is, if the player selects the content footer, he will call the phone number you defined.
-
Navigator Address: Redirects users to a physical location on maps. Select the Navigator Address option to add an address footer to the game.
The player selects the name of the footer you defined. Once selected, he will be redirected to the address you entered in the Search Address text field.
Once you have selected the desired Action Link, select the Save button, and the content name will be displayed in the Footer Content Editor.
In the Footer Content Editor, you can personalize the content by selecting the Bold and Cursive format or change the Footer Text Color by clicking on the Color Picker.

To change the content footer, delete the Content Name from the Footer Content Editor. Then select the Add Action Link.
-
-
Click Next to continue with the following step.
The following image identifies each field and text color added to the Trivia.
.png")
Content .
The Content step is where you define how the trivia game behaves and create the set of questions and answers that participants will see.

Trivia Content
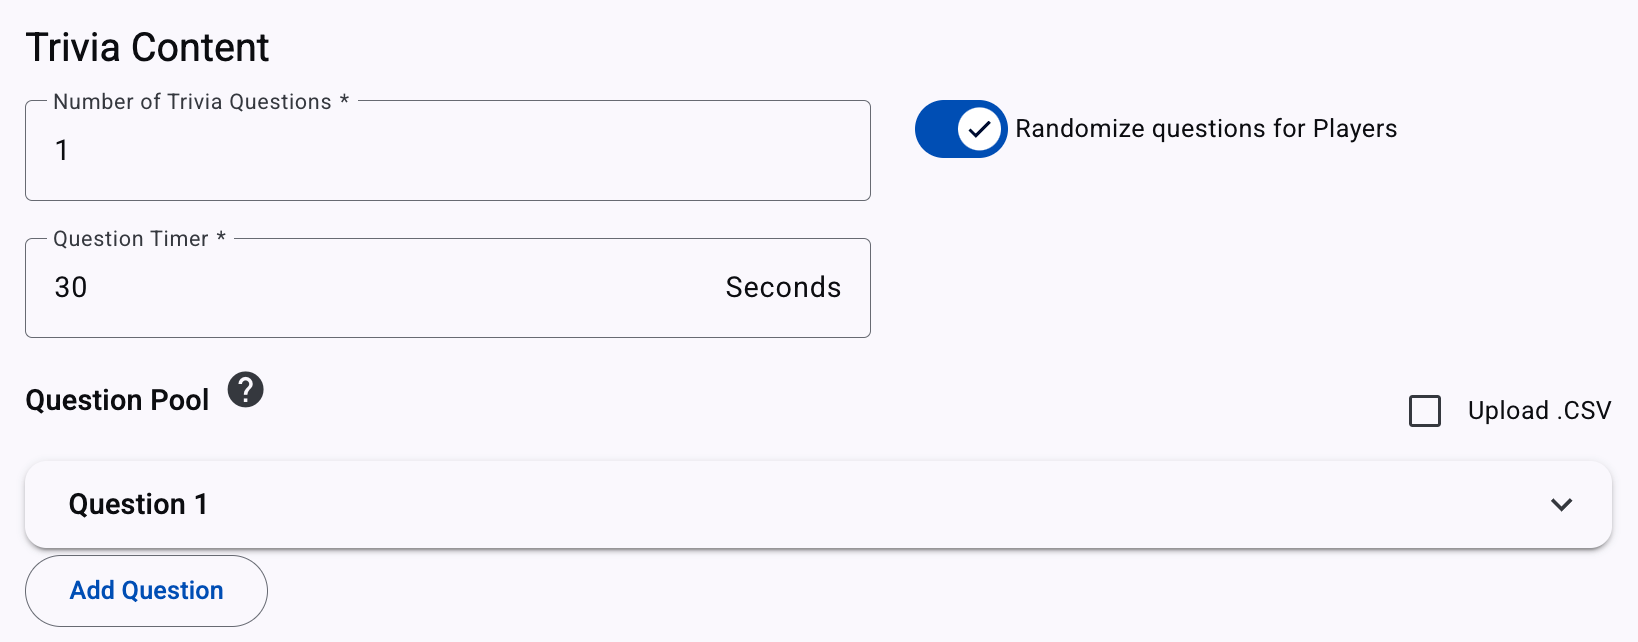
Configure the core of your trivia campaign—the actual questions and answers that participants will interact with.
-
Number of Trivia Questions: Set how many questions will be shown to the participants during the game.
NOTEThe number of Trivia Questions can be greater than Pool Questions. That is, from the Number of Trivia Questions field set the number of Trivia questions you desire to display once the participant begins the trivia although you have created more trivia questions.
-
Question Timer: Define the time (in seconds) a participant has to answer each question. This adds a sense of urgency and helps control session duration.
-
Randomize questions for Players: Activate the “Randomize questions for players” toggle to present questions in a random order for the participants. If disabled, questions will appear in the order they were created.
-
Question Pool: Create single-select questions, meaning participants select one correct option from multiple choices.

The steps to add a single question with their respective answers are the following :
- Type a new question that will be added to the Trivia.
- Type the answer(s) to the question. The de facto number of answers is 2 but you can add up to 4 answer options by selecting Add Answer.
- Click on the correct answer by clicking on the Correct check mark located next to the answer.
- To add new answers to the question, click on the Add Answer button.
- Select the Add Question button to add a new question.
-
Bulk Question Upload (CSV) (optional): If you want to upload all the questions at once using a .CSV file, refer to the Bulk Question Upload (CSV) section for instructions on how to properly format the file.
-
Click Next to continue to the next step.
Bulk Question Upload (CSV)
You can upload multiple questions at once using a .CSV file by clicking on the Upload.CSV checkmark located next to the Question Pool.

Files with .csv (Comma Separated Values) extension are plain text files that contain records of data with comma-separated values. Each line in the CSV file is a record from the set of records contained in the file. Each record is made up of fields separated by commas. For this specific scenario, each record specifies all the elements of the question: the question itself, the correct answer to the question, and all the answer options presented to the participant.
Using Excel as a reference, which is one way to create a file in .CSV format, and using the cells as the individual fields in the record, the following formatting rules need to be followed:
-
There cannot be empty rows in the file. All records in the file must be in consecutive rows starting at row 1.
-
The record that represents the first question in the pool must be in row 1, the 2nd question in the 2nd row, the 3rd question in the 3rd row, etc.
-
Each record is made up of 4 to 6 fields.
-
The fields are arranged as follows:
- The first field is where the question should be placed.
- The second field is where the correct answer is identified.
- Fields 3 through 6 are where the different answer options are entered.
Questions in the pool can have between 2 and 4 answers. For example, the screenshot below shows a CSV file with four questions, in four records. The 1st record has 6 fields, the first field being the question, the 2nd field being the correct answer out of the 4 choices in fields 3 through 6, where the 3rd field represents answer 1, the 4th field represents answer 2, the 5th field represents answer 3 and 6th field represents answers 4, in this case, the correct answer. Similarly, the second record has 5 fields, the 1st with the question, the 2nd with the correct answer, and fields 3 through 5 have three answer options. The third record has only four fields, which is the minimum since at least two answer options are required to create a multiple-choice question. The 4th record has again 6 fields in the same order as the previous records. So records in the file can be mixed with a variable number of answer options.

Once you have defined the question pool and saved the CSV file, it can uploaded to the Web trivia campaign.
A sample Question Pool template can be downloaded by clicking the button below::
To upload the .CSV file with the Question Pool, Drag & Drop the .CSV file to the designated area on the screen or click Browse Files to select the file from where it is stored.
Once the CSV file has been imported, a File Preview table will be displayed, showing the questions and answers in the file.

Logic
The Logic step defines how participants win prizes and what they see at the end of the trivia experience. This step covers three essential areas:
- Prize Configuration
- Winner Screen
- Loser Screen

Prize Configuration
Here, you set the minimum percentage of correct answers a participant must achieve to be eligible for a prize. Example: If the threshold is set to 60%, and a participant answers 3 out of 5 questions correctly, they qualify for a prize.

Ensure that the percentage entered aligns with the expected number of correct answers.
The next step is to configure the Trivia Logic to distribute the Prizes to Participants. You can find a detailed description of how to configure the prize logic and campaign prizes in the Prize Configuration section under Prize Logic and Prizes respectively.
Winner Screen
In the Winner section, configure the Winner screen to be displayed if the player gets at least the percentage required of correct answers.

In the following Winner Screen example, we mark out each winner's side images with their respective messages and colors.
.png")
The steps to configure the Winner Screen are the following :
-
Header Image: Drag & Drop the Header Image or click Browse Files to upload. This image will be displayed at the top of the winner’s screen.
-
Winner Colors: Define the Winner colors. Set the color of Background, Card, Button Text, and Button with the color selectors by using the Color Picker, and type the desired message (Winner Message) for the winner with its respective message color.
Choose a Background Color to make the winner's screen visually appealing. -
Claim Button: Enter the text of the button to claim the prize.
-
User Consent: Toggle User Consent ON to require users to accept Terms & Conditions before claiming their prize.
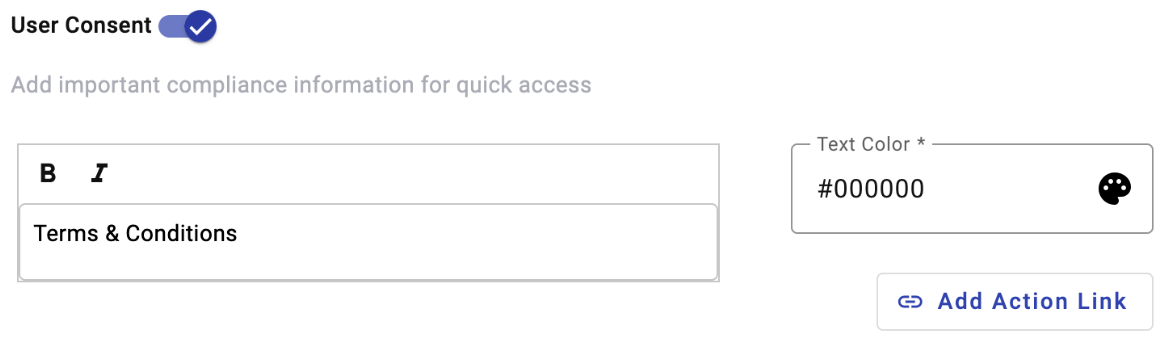
To personalize the content of the Terms & Conditions, select the Add Action Link button. Once selected, the following Dialog will appear to select the desired action link.

Click Add Action Link dropdown and choose the following option:
- URL - Choose a URL and enter the link to your Terms & Conditions page. For example, the player selects the name of the Terms & Conditions you defined. Once selected, he will be redirected to the link you entered in the URL Link* text field. The terms & conditions for claiming the price will be found in the URL.
Once you have selected the desired Action Link, select the Save button, and the content name will be displayed in the User Consent Editor.
In the User Consent Editor, you can personalize the content by selecting the Bold and Cursive format or change the Text Color by clicking on the Color Picker.

Loser Screen
This screen is shown when the participant does not meet the minimum percentage of correct answers.

In the following Loser Screen example, we mark out each loser's side images with their respective messages and colors.

The steps to configure the Loser Screen are the following :
-
Header Image: Drag & Drop the Header image to the specified area on the screen or click the Browse Files button to select the image from the computer. This image will be displayed at the top on the loser’s screen.
-
Loser Message (Optional): To display a custom message for non-winners, select the Loser Message checkmark.
Set the color of the Background, Button Text, and Button with the color selectors by using the Color Picker, and type the desired message for the loser with its respective message color.

-
Loser Image (Optional): To display a loser image instead of a text message, select the Loser Image checkmark.
Click the Browse Files button to select the image from the computer. This image will be displayed at the center on the loser’s screen.

- Redirect: Toggle Redirect ON if you want to send non-winners to another page after the game. Once you have activated the Redirect toggle, enter the redirect delay time in seconds and the redirect URL. This feature is useful for redirecting users to a discount page or a second-chance offer.
Message
In this step, the message that will be used to deliver the Campaign is defined. It is closely tied to how the campaign participation invitation was delivered. Given the delivery methods, the way the campaign participation is promoted will vary accordingly.
Promoted through SMS
For the case of a Web Trivia promoted through SMS the platform will present the following configuration screen,

For more information about the message's Content and personalized fields configuration, go to the Message Content and Message Personalization section.
Once all the message details have been addressed, move on to the Summary by clicking on Next.
Promoted through a Subscription Form
For the case of campaign promotion through a Subscription Form, there is no message to be sen,t given the nature of the entry point to the campaign. The campaign will be invoked through the Submit button of the Subscription Form after having completed it.
In consequence, the platform will deliver the following message, taking you directly to the _Summary _step.

Summary
‘Summary’ is the sixth step of the Web Trivia Campaign.
This will review and display the configured Campaign Details and set the desired activation time.

For more information about the Summary step settings, go to Summary in the Campaign Elements section.
Updated 4 months ago