Setting Webhook
A webhook is a way for an application to send real-time data to other applications as soon as an event occurs. Instead of waiting for you to request information, a webhook delivers the data to a specified URL immediately when the event happens.
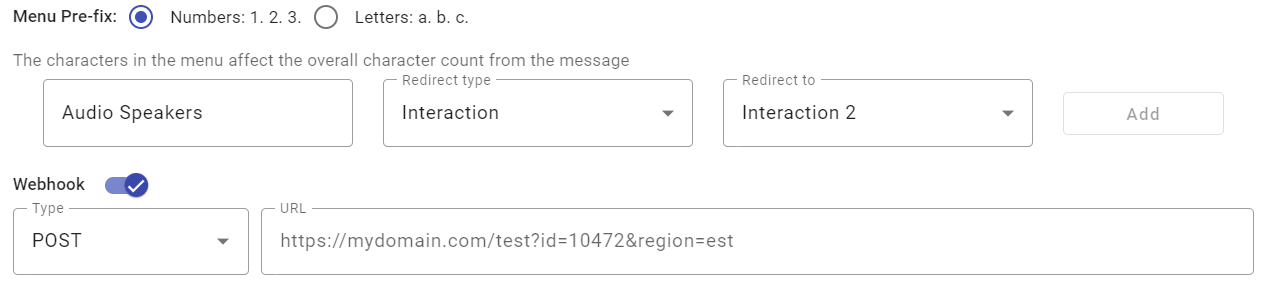
When configuring the chatbot, in the Interactions section, you have the option to enable the webhook from the Welcome Message or each Interaction.
To enable Webhook, first choose an option from the Redirect Type, then click on the Webhook toggle switch to turn it on. By default, it's always disabled.
Activating Webhook via Toggle switch
In this configuration, the webhook is invoked as soon as the end user interacts with the chatbot option. This means that the webhook is triggered immediately when the end user selects an option from the chatbot menu.
For example, when the end user interacts with the chatbot, the system sends a message asking the end user to choose an option for streaming membership: Welcome to EliPackage, enter the best option for streaming membership: 1. One month, 2. Six months, 3. One year
The webhook is invoked as soon as the end user responds with a choice.
Therefore, this event will be recorded in the (URL) that was shared by the user, in the option parameter (option chosen by the end-user) and keyword parameter (keyword entered by the end-user) from the Payload, as shown below:
{
  "campaignId": "13010",
  "label": "Welcome Message",
  "option": "One month",
  "keyword": 1,
  "phoneNumber": "+525500000000",
  "date": "2024-06-18T23:26:14.206Z"
}
After understanding how to enable the webhook, the next step is to specify the URL to which the webhook will send data. This URL must be capable of handling incoming HTTP requests.
Webhook Configuration
To enable the webhook, first you need to choose an option (Attribute, Campaign, Integration, Interaction, Live Chat) from the Redirect Type dropdown, then click on the Webhook toggle switch. Your endpoint must have a POST access method and receive a JSON body.
You must type the following URL structure in the URL placeholder:
POST https://<Your_Domain>/<Your_Path>The Webhook is divided into two components: Payload and Headers.

Payload
The URL typed is the external callback where the events of the message will be registered and published. That is, the following example parameters sent to your callback URL will be the events to be recorded in the callback once the end users begin to participate in your automation.
When selecting one of the following options (Campaign, Integration, Interaction, Live Chat) from the Redirect Type dropdown, the example parameters sent to your callback URL are as follows:
{
  "campaignId": "13010",
  "label": "Welcome Message",
  "option": "One month",
  "keyword": 1,
  "phoneNumber": "+525500000000",
  "date": "2024-06-18T23:26:14.206Z"
}| Parameter | Description |
|---|---|
"campaignId" | Unique identifier of the automation. |
"label" | Interaction of the chatbot. In this example, we are located in the Welcome Message interaction. |
"option" | The option is chosen by the end user who participates in the automation. |
"keyword" | The keyword entered by the end user who participated in the automation. |
"phoneNumber" | Phone number of the end user. |
"date" | Date when the Webhook receives the message. The date is represented with the date in UTC Zulu format: (yyyy-mm-dd-Thh:mm: ss.ssZ). |
If you want to add additional parameters, from the Body textbox, type in JSON format each parameter.
When selecting the Attribute option from the Redirect Type dropdown, the configured attributes and their parameters will be added to the callback payload::
{
  "campaignId": "13010",
  "label": "Welcome Message",
  "phoneNumber": "+525500000000",
  "date": "2024-06-18T23:22:36.560Z",
  [[attributeName]] : [[attributeValue]]
}| Parameter | Description |
|---|---|
"campaignId" | Unique identifier of the automation. |
"label" | Interaction of the chatbot. In this example, we are located in the Welcome Message interaction. |
"phoneNumber" | Phone number of the end user. |
"date" | Date when the Webhook receives the message. The date is represented with the date in UTC Zulu format: (yyyy-mm-dd-Thh:mm: ss.ssZ). |
[[attributeName]] | Attribute name. The [[attributeValue]] is the information provided by the end user in response to the attribute’s prompt. |
When the user selects an existing attribute or creates a new one, that attribute will appear in the ‘Body Preview’ of subsequent interactions where the webhook is enabled. This will occur regardless of whether the user selects an option other than ‘Attributes’ from the ‘Redirect Type’ dropdown menu. Additionally, the information requested by the attribute will be sent to the webhook.
Only one (1) attribute is allowed to be added per interaction.
In this example, the user is setting the “Welcome Message” interaction and has selected an existing attribute called “name”.
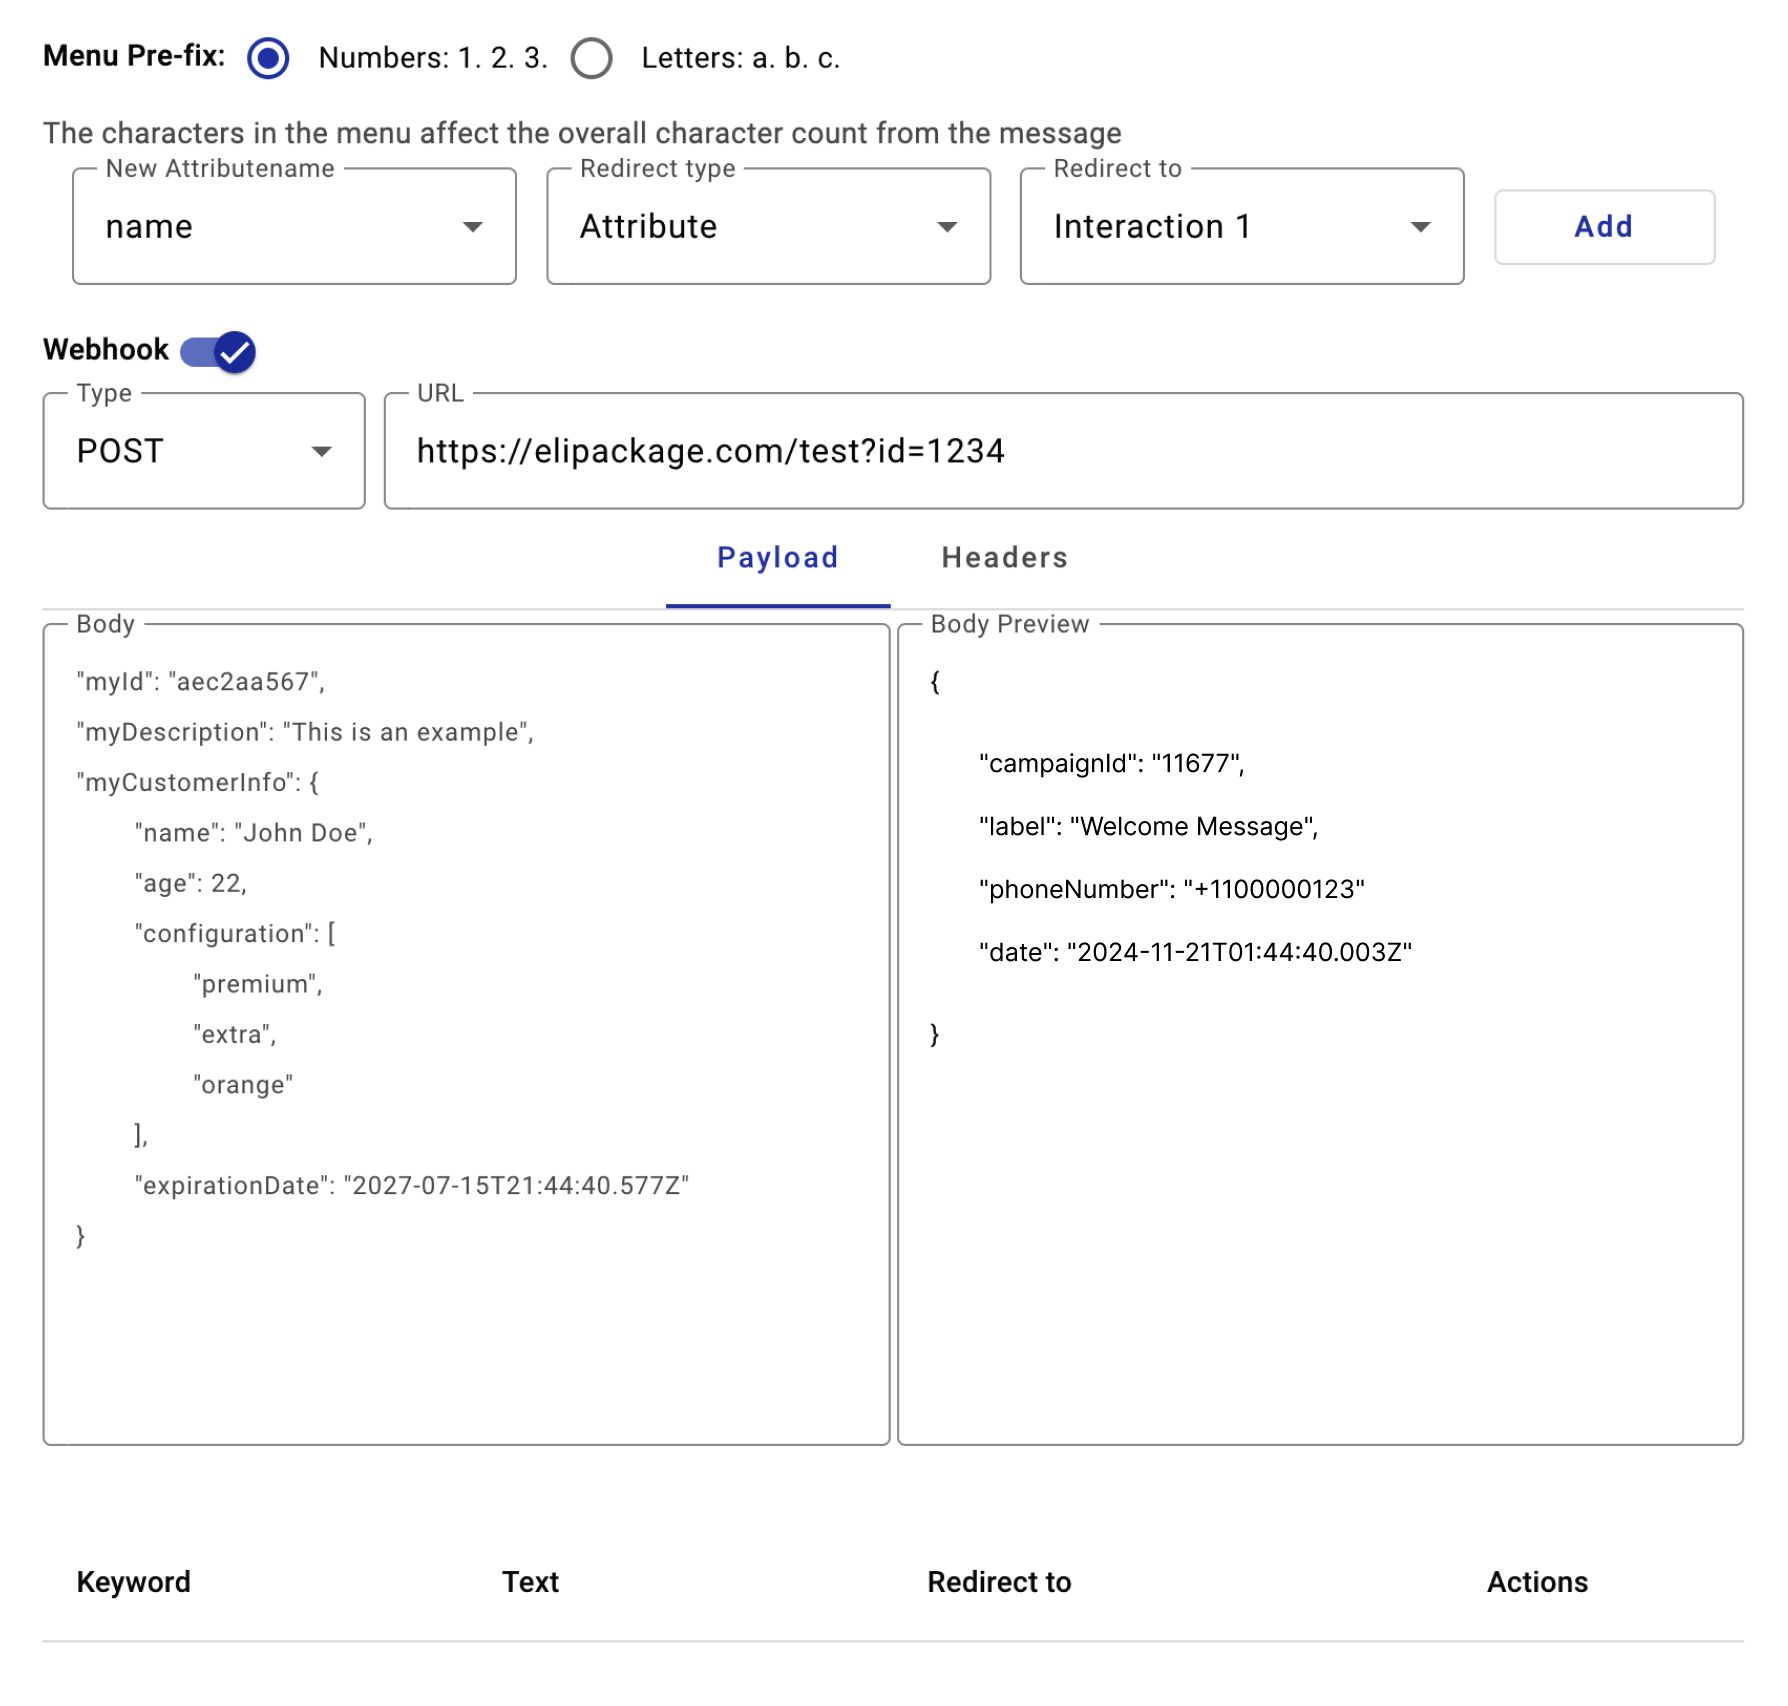
- Redirect to Interaction 1: After entering the information requested by the attribute “name”, the system will redirect the user to “Interaction 1” for further configuration.
- Activate the Webhook Toggle: The user activates the webhook toggle to enable webhook functionality.
- Input the Webhook URL: The user provides their webhook URL in the designated field.
- Add Webhook Configuration: By clicking the “Add” button, the webhook and attribute setup is completed. That is, the option that will be provided by the chatbot, in the Welcome Message interaction, has been successfully configured.
Once the “Welcome Message” interaction is configured, we proceed to add another existing attribute to “Interaction 1”. In this example, the same steps described above are replicated:
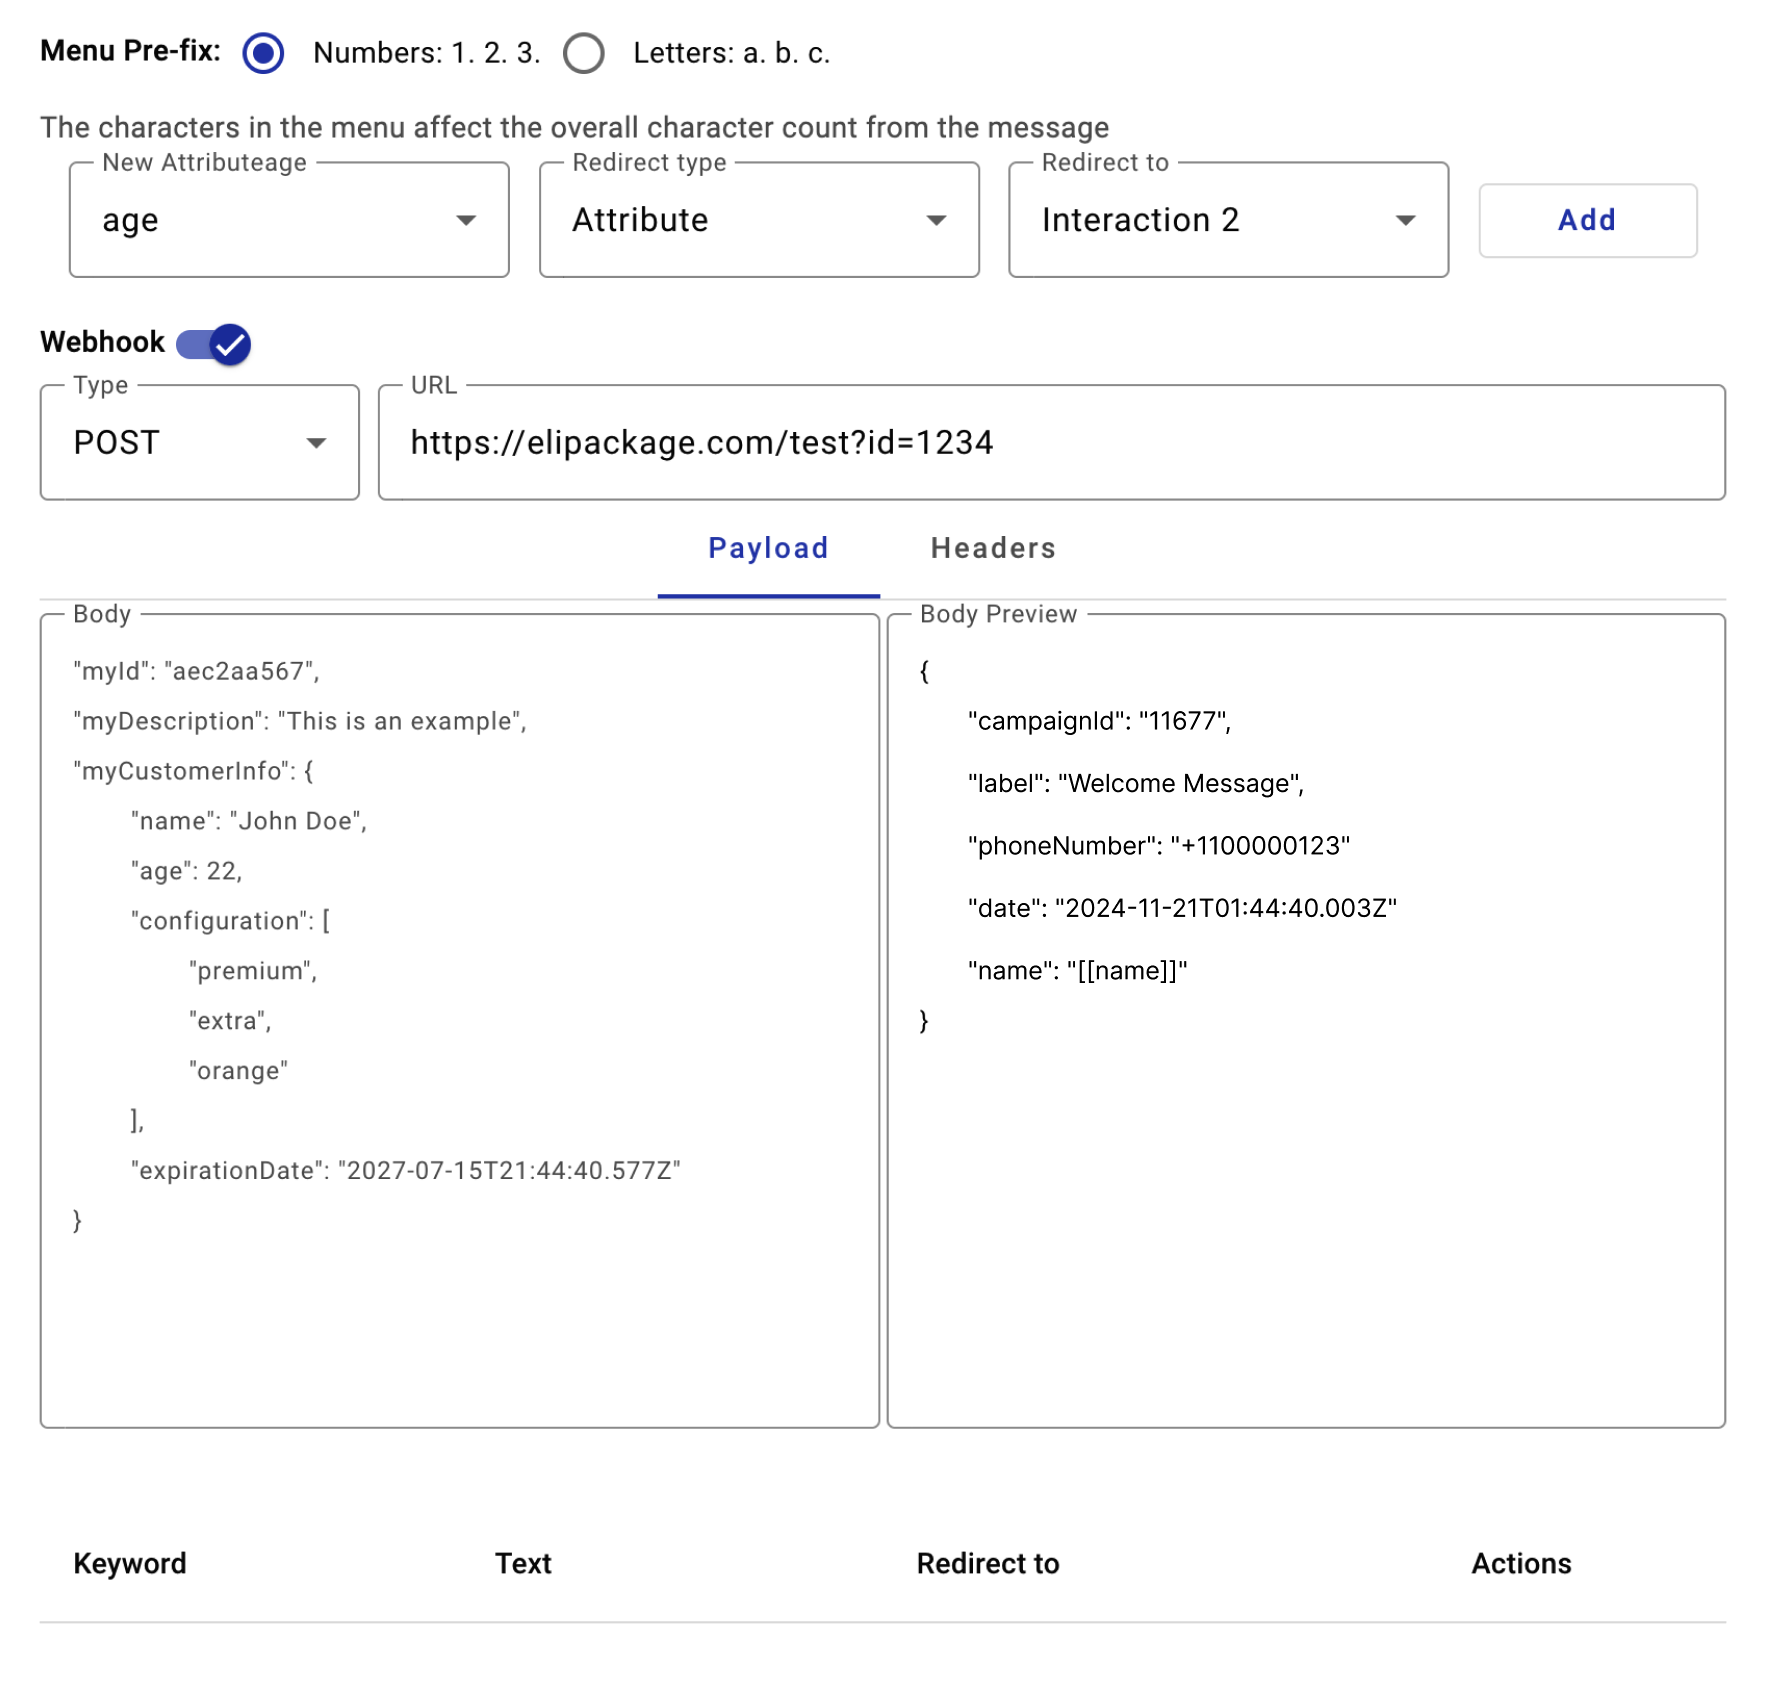
- Select the desired attribute (e.g., “age”) for “Interaction 2”.
- Activate the webhook toggle.
- Provide the webhook URL. From the “Body Preview” in the payload, we can notice the attribute
“name: [[name]]”. This indicates that the information requested by this attribute will be collected and sent to the webhook. - Click the “Add” button to finalize the option configuration.
Therefore, the attributes “name” and "age" will now be collected during both interactions and sent as data through the webhook to the specified URL provided.
NOTEThe webhook is designed to deliver the field values collected during the chatbot session. Each attribute will automatically be included in the webhook payload.
- Collection of Session Attributes: As the user interacts with the chatbot, attributes (e.g., name, email, or other data points) are collected during the session.
- Webhook Functionality Across Interactions: If the user uses the webhook functionality in any interaction, the webhook will include all previously collected session attributes in the payload.
- Comprehensive Data Delivery: This means the client will receive all the information gathered during the session, regardless of which interaction triggered the webhook.
Example
If a user enters their name in the “Welcome Message” interaction and their email, and birthday in subsequent interactions, the three (3) attributes will be sent through the webhook when it is triggered. This ensures that the client receives a complete data set from the session, allowing for seamless redirection or integration with external systems.
The Body Preview of the payload example will appear as:
{
  "campaignId": "11677",
  "label": "Interaction 2",
  "phoneNumber": "+1100000123",
  "date": "2024-11-21T05:00:23.062Z",
  "name": "[[name]]",
  "email": "[[email]]",
  "birthday": "[[birthday]]"
}
Headers
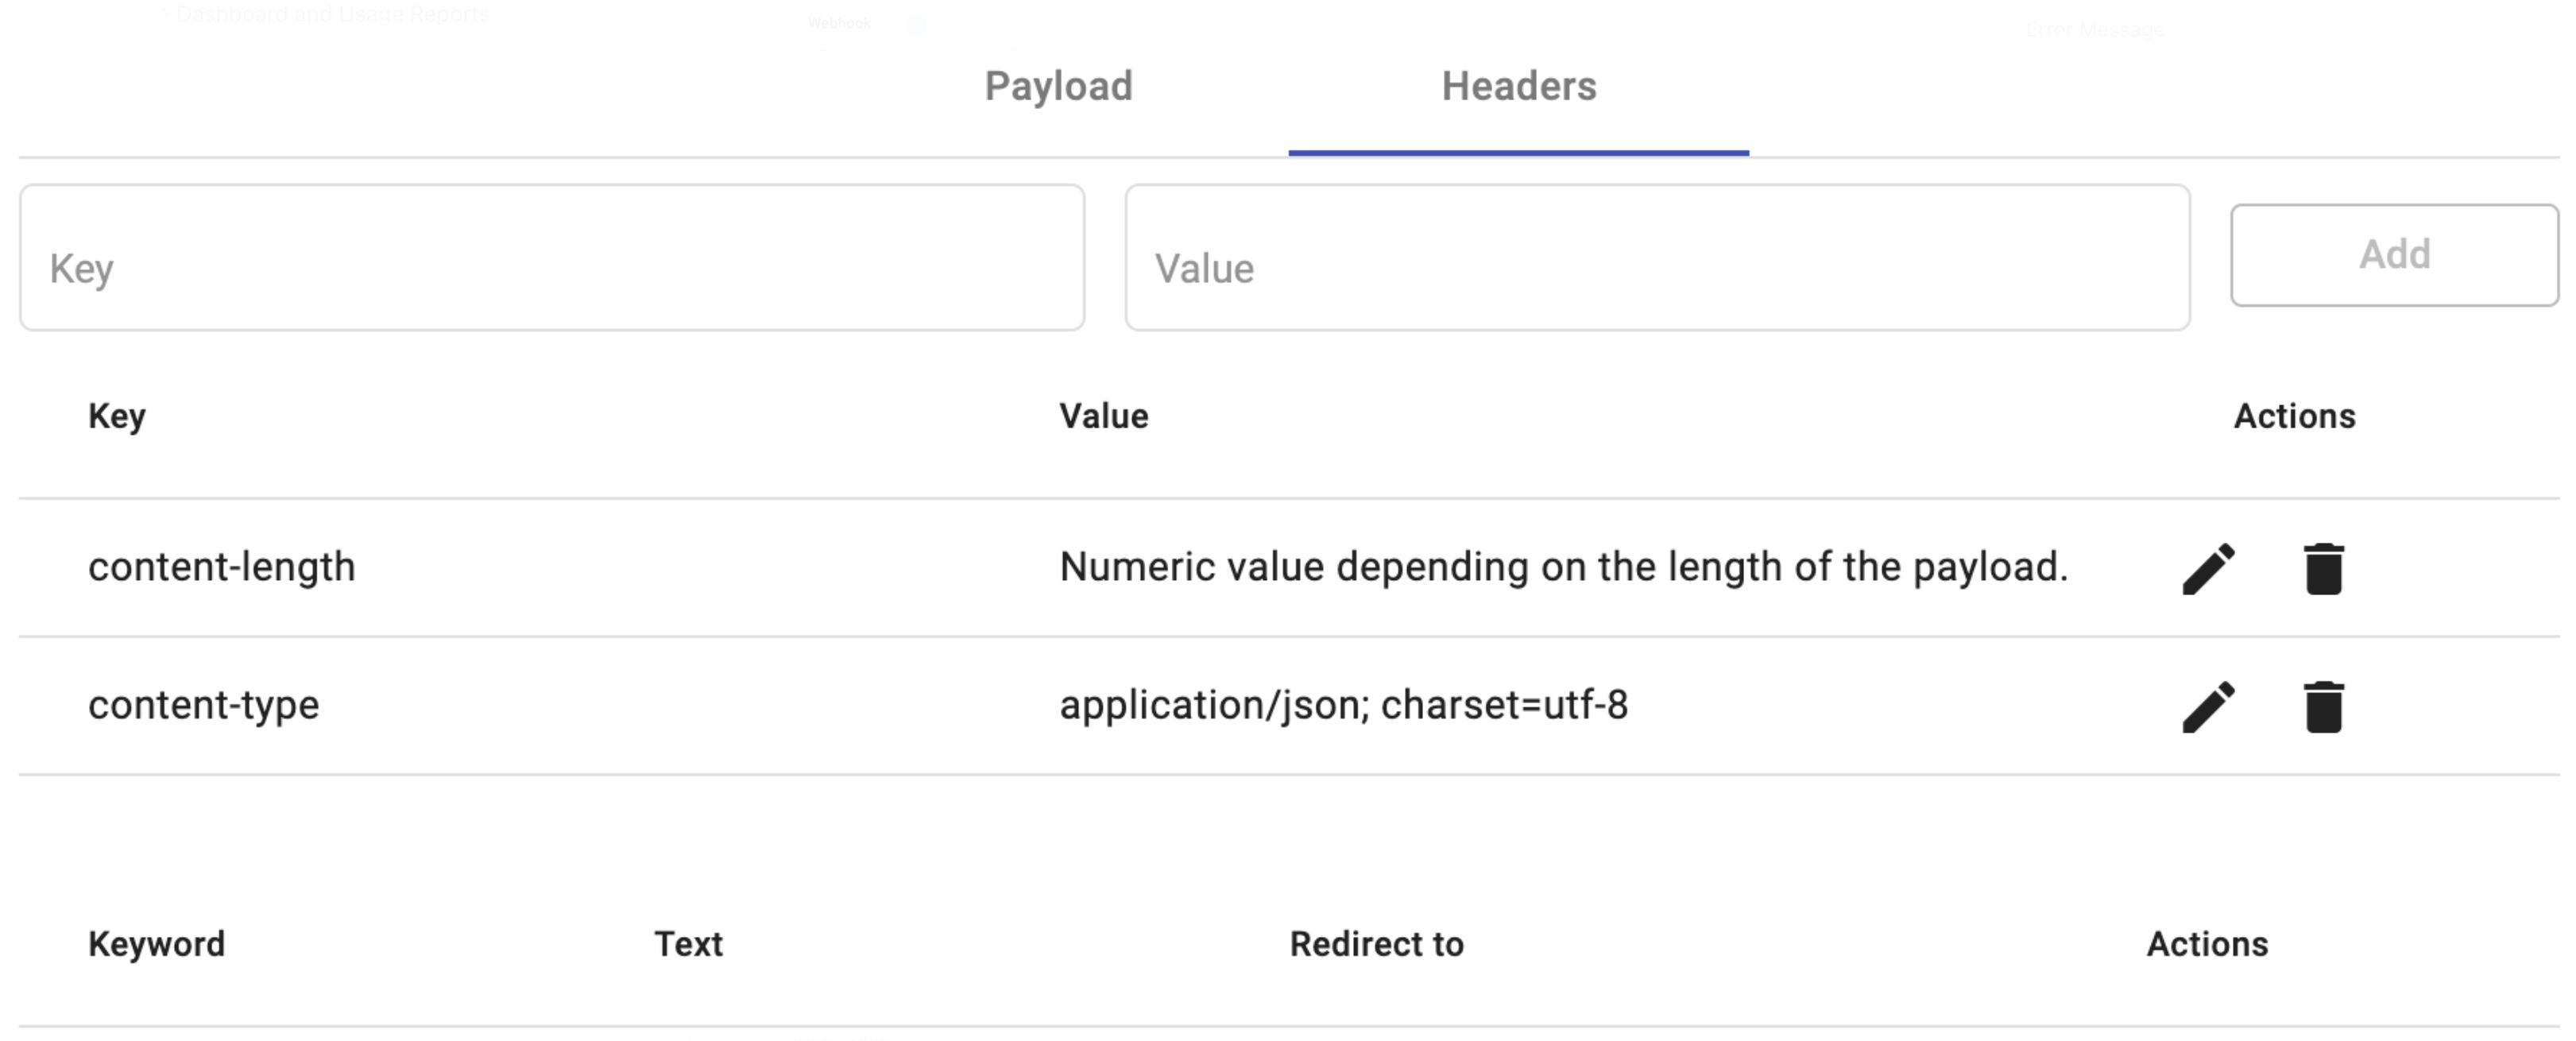
You can specify custom headers that the platform will use while sending the payload to the specified webhook endpoint. Custom headers give the destination application an option to authenticate your webhook requests and reject any that do not contain these custom headers.
The headers use key-value parameters that are sent as part of the webhook request. The values of these key-value pairs are visible and editable in the webhook editor by selecting the Edit icon once the key-value has been added. And, you can delete the key value by selecting the Delete icon.

As the Header example, the following headers key-value will be sent with all requests:
Updated 3 months ago