Add Email Sender
You use the Email tab to add and manage email senders for sending bulk messaging. You send bulk emails from verified email addresses to maintain deliverability.

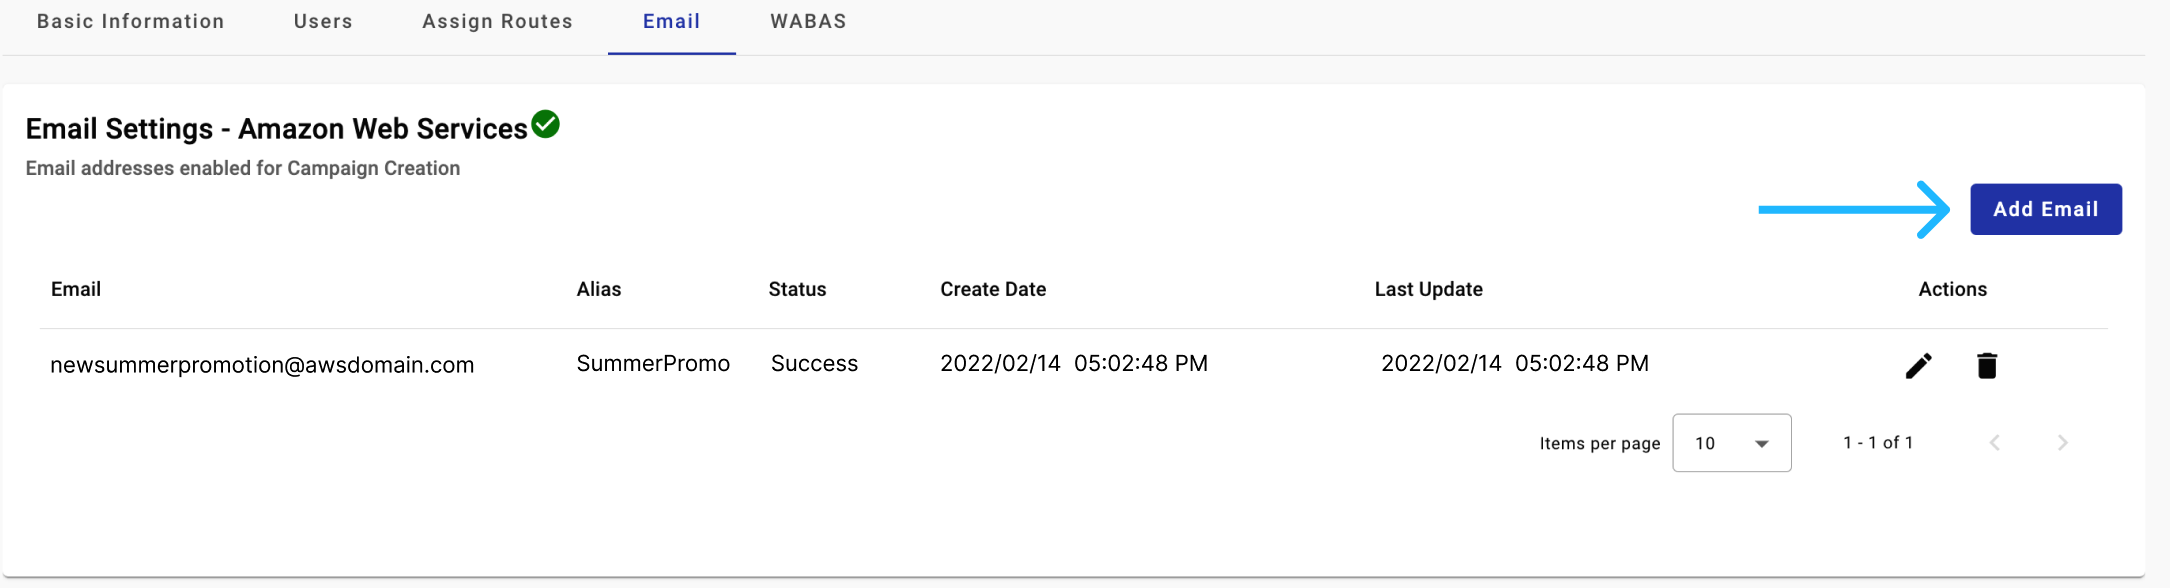
You see the following columns in the Email Settings - Amazon Web Services table:
- Email — You see the specific sender email address used for sending messages.
- Alias — You see a name for the sender email address to identify the sender within the platform.
- Status — You see the current status of the email address. The available statuses are:
- Success — The email address is properly set up and ready for use.
- Pending — The email address is under review for activation.
- Create Date — You see the date and time when the sender email address was configured and added.
- Last Update — You see the date and time of the most recent update to the email address configuration.
- Actions — You edit or delete the email address entry. You select the Pencil icon to edit the sender's email address. You select the Trash can icon to remove it.
Add Sender Email to the Workspace
You add a new sender email to the Workspace using the following steps:
-
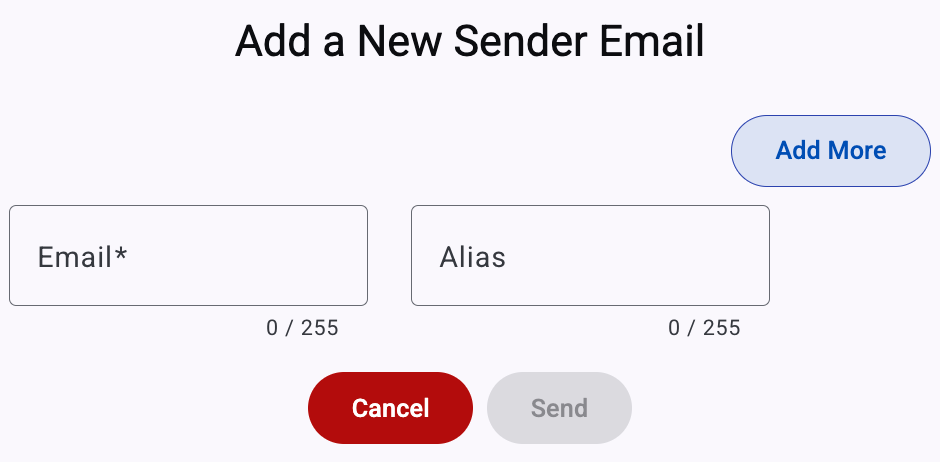
Add Email: Select the Add Email button on the right side of the Email Settings table.
You see the Add a New Sender Email pop-up window where you enter the required values.
-
Enter Sender Email: In the Email field, enter the sender email address you want to add. This field is required. The email address must be correctly formatted.
-
Enter Alias: In the Alias field, enter a name or alias for the email address. The alias identifies the sender's email within the platform.
-
Add More Sender Emails (Optional): If you need to add multiple sender emails at once, you select the Add More button. Additional fields appear for entering more email addresses and aliases.
-
Submit the Form: After you fill in all required fields, you select the Send button to save the new sender emails to the Workspace.
You see the sender email addresses in the Email Settings table with a Pending status. After the support team approves them, the status changes to Success and the addresses are ready for use in the Workspace.
Updated 17 days ago