Notifications Manager
In this tab, you manage and add the email addresses responsible for dispatching notifications to users. You see key details about each email sender in the Email Sender Notifications table.
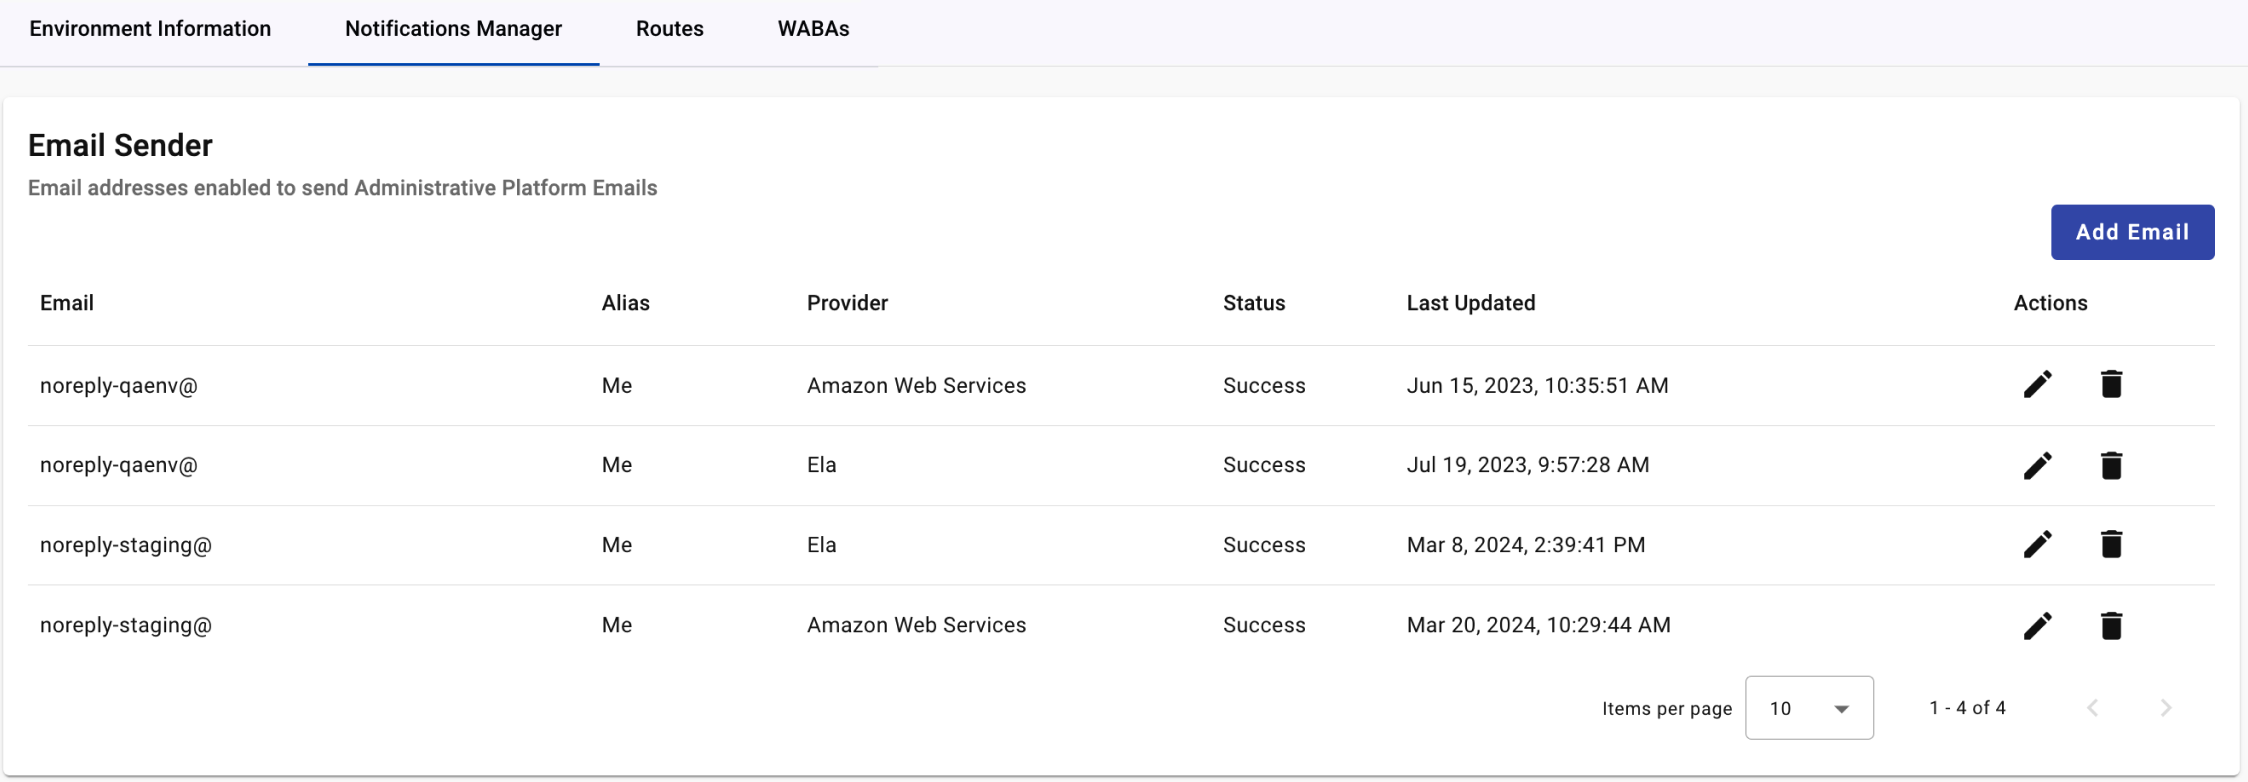
You work with seven columns in the table —
- Email — You see the actual email addresses configured to send out notifications.
- Alias — You see a recognizable name associated with the email sender, such as the company name.
- Provider — You see the email service provider — for example, Amazon Web Services or Elastic Email — so the source of the email is transparent.
- Status — You see the status of each email sender, indicating a successful setup or any issues that need attention.
- Last Updated — You see the date of the most recent changes, allowing you to track updates made over time.
- Actions — You use the tools in this column to edit or delete email senders, ensuring the correct email sender is always in use for notifications.
You use this table to establish a designated email sender from which the platform distributes all notifications to users. Notifications cover the following scenarios:
- Exporting reports
- Recovering passwords
- Exporting contacts
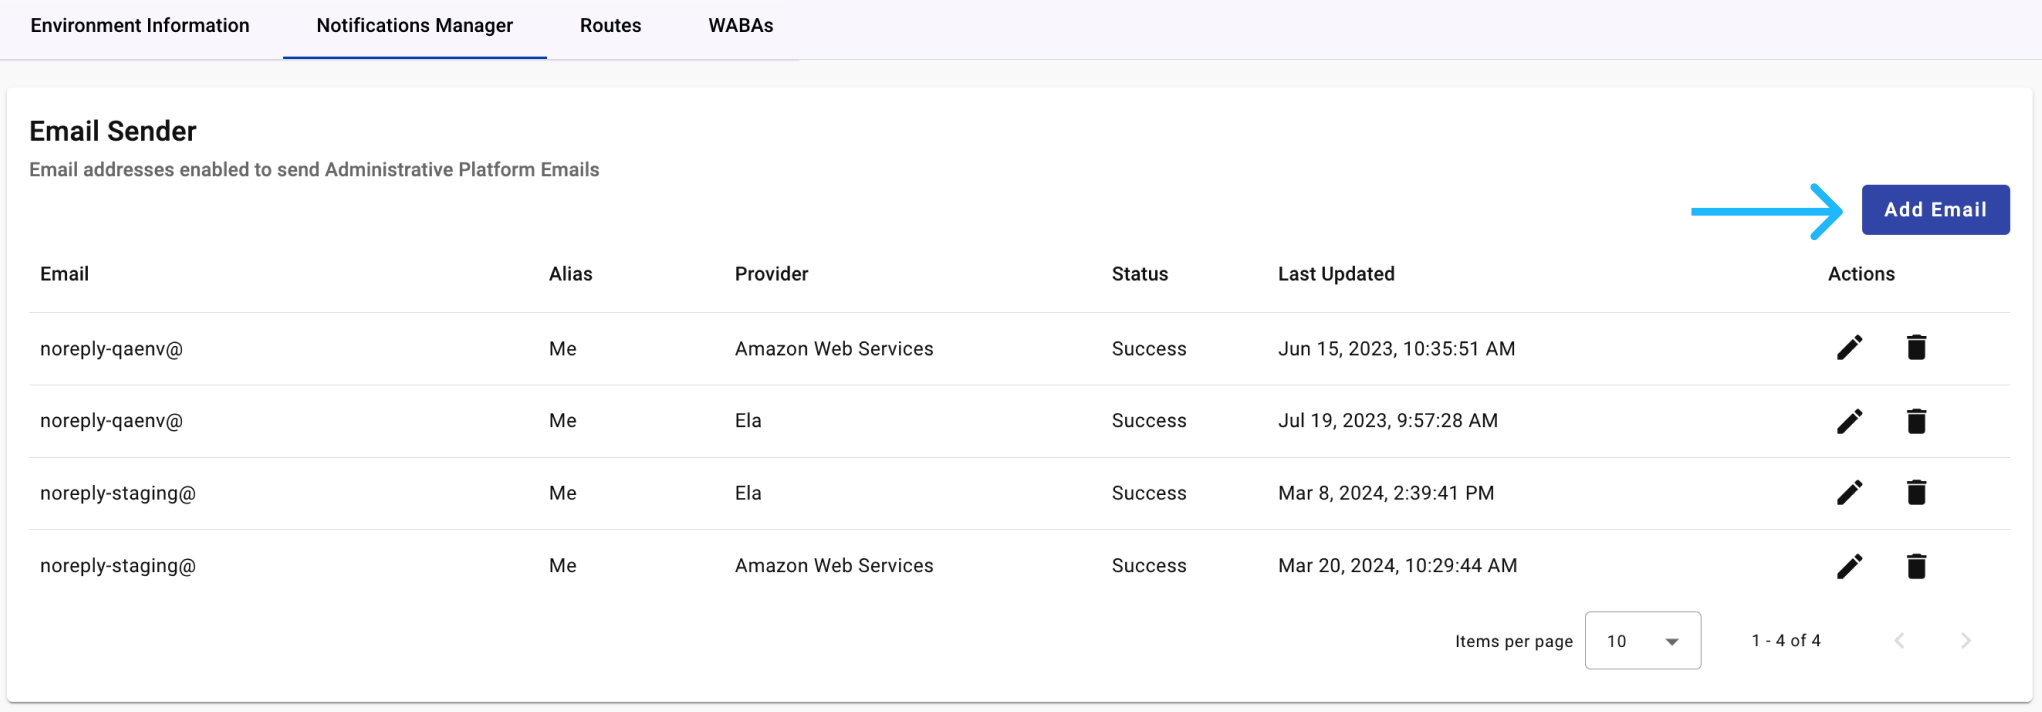
You add a new email sender by selecting the Add Email button.
You add one or more email sender notifications using the following fields —
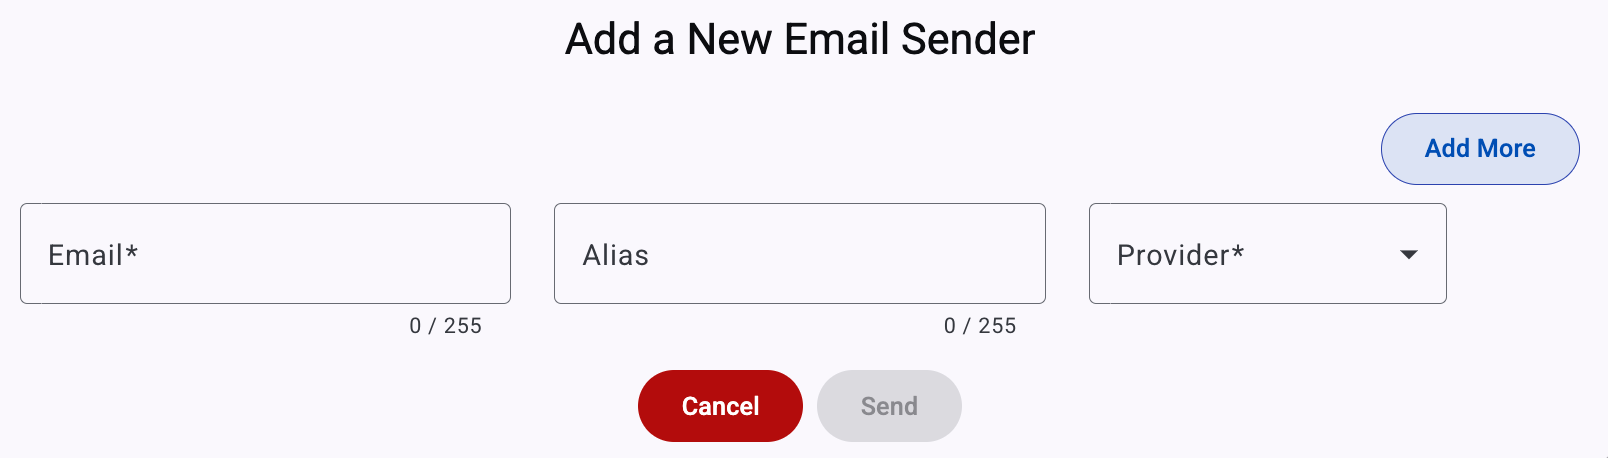
- Email field — You enter a valid email address you have access to, as verification may be required.
- Alias field — You provide an alias for the email sender. This alias displays as a recognizable name for the sender.
- Provider dropdown menu — You select the email service provider you want to use. This is the service that dispatches the emails.
- Add More Senders — You select the Add More button after each entry to add multiple email senders. You repeat the fields for each new sender.
- Add the Email Sender — You select the Send button to add the email sender to your list.
Once you add the email senders, you see them displayed in the Email Sender Notifications table.
Updated 8 days ago