E-swipe
E-Swipe campaigns enable businesses to create interactive and engaging experiences through swipe-based interactions. This campaign type allows you to:
- Enhance User Engagement – Encourage users to swipe through content, promotions, or gamified experiences.
- Increase Conversions – Use swiping mechanics to drive users toward specific actions.
- Collect User Insights – Track user behavior and interactions to refine marketing strategies.
This campaign is ideal for promotions, loyalty programs, gamified surveys, and interactive storytelling.
After you have selected New Campaign, entered the Campaign Name, and selected E-swipe from the campaign options, you are brought to the E-swipe campaign creation section, which has the following steps,

- Delivery
- Design
- Message
- Summary
Delivery
You define the Delivery Channel and the campaign Recipients in the Delivery step.
Currently, three delivery channels are available for the E-swipe campaign:
For more information on selecting the desired delivery channel, go to the Delivery section.
For information on selecting the desired Recipients, go to Define Recipients in the Campaign Elements section.
Design
Configure the swipe content using either:
- A pre-existing template (via Open Template Gallery) for faster setup.
- Step-by-step manual setup, adding images or videos.

Selecting Template
This step makes it easier to configure your campaign, as it only requires two steps to review and modify the configuration.
Immediately above the emulated phone screen, you will find Open Template Gallery,
- Select Open Template Gallery. A popup window will open with templates previously created on the platform.

- Select the template for your campaign, followed by Confirm.
All of the template's information, including the images, will be set up in the different areas of the design section. Review it thoroughly and modify it as needed.
You will get the following notification if you haven't previously saved templates.

Step-by-step configuration
The step-by-step configuration is similar to the effort involved in building a template. The steps are:
- Enter the E-swipe Name. The name will appear at the bottom of the swipe content of the campaign (different from the campaign name).
- Select the E-swipe Type dropdown:
- Image : This option uses a sequence of images displayed as the end-user swipes the screen.
- Video: Displays a sequence of videos hosted on Youtube URLs.
- Define the Background Color by using the Color Picker.
In the Swipe Content,
-
Click the Add Swipe Content button to open the content editor.

-
Depending on the Swipe Type selected (image or video), follow these steps:
-
For Images:
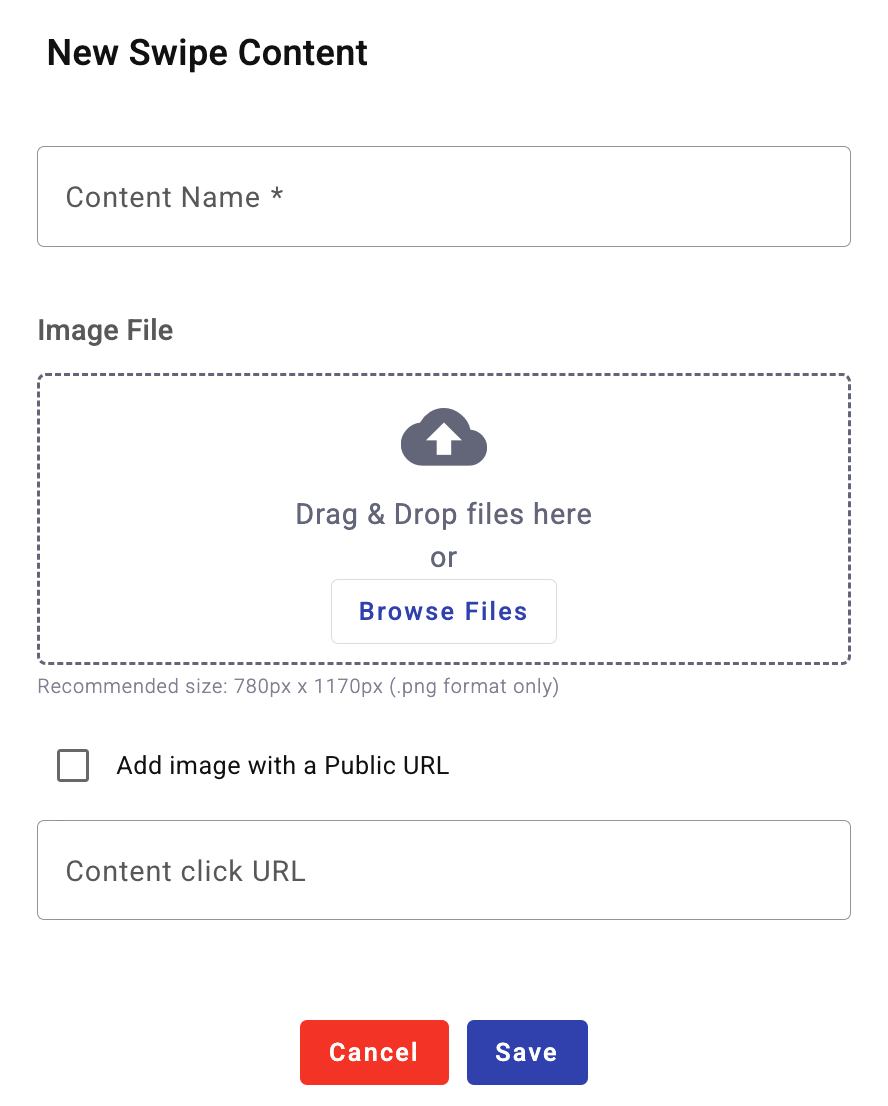
- Enter a content name.
- Upload an image via Drag & Drop or Public URL.
- (Optional) Add an external URL to link the content.
- Click Save and repeat for each image.
-
For Videos:
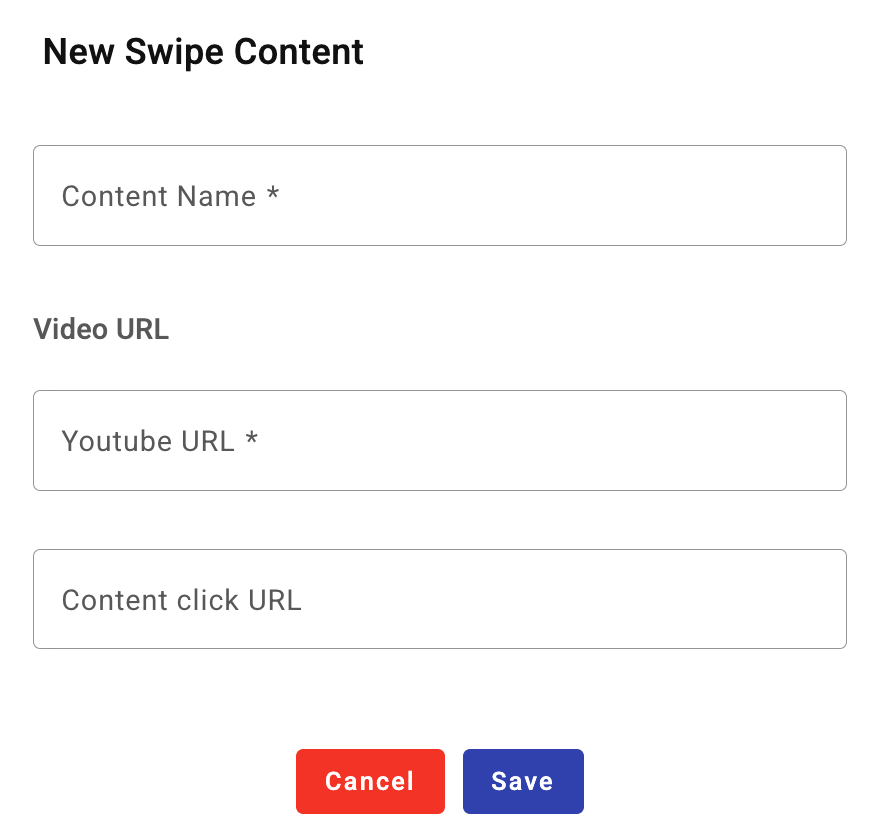
- Enter a content name.
- Add a YouTube video URL.
- (Optional) Include a URL associated with the content.
- Click Save and repeat for each video.
-
-
Once all swipe content is added, click Next.
Message
Create and personalize the message used to deliver the campaign to the recipients.

For more information about the message's Content and personalized fields configuration, go to the Message Content and Message Personalization section.
Once all the message details have been addressed, move on to the Summary by clicking on Next.
NOTEIf you have selected Subscription Form as delivery channel, you can not configure the delivery message, because the URL of the campaign will be set in the subscription form report that you selected in the Live Forms section.
Remember, once you open the URL of the subscription form you selected from the Live Forms section, it will display a form. Once the form is filled out, the submit button is selected and this E-swipe will be downloaded automatically.

Summary
Review and finalize the campaign settings
This will review and display the configured Campaign Details, set the desired activation time and campaign expiration.

The Campaign URL Link Expiration section is where you configure options related to the expiration of the campaign.
- Set an expiration time scheme through Choose a Date or Set a duration radio buttons.
- Insert an image for when the campaign has expired in the Expired Campaign Image.
- Define the redirect URL Expired Redirect URL for once the campaign has expired.
For more information about the Summary step settings, go to Summary in the Campaign Elements section.
Updated about 2 months ago