Delivery and Triggers
The Delivery step is where you define the interaction channel for the chatbot and the keywords that customers use to invoke it.
Delivery channel
You define the Delivery Channel and the automation Recipients in the Delivery step.
Currently, two delivery channels are available for the Chatbot automation:

Delivery covers channel selection details.
Define recipients
For SMS, two recipient options are available as shown below.

For SMS and WhatsApp as delivery channels, the Keyword option is available. In either case, the platform provides a Keyword entry section, such as the one shown in the example of the following image.
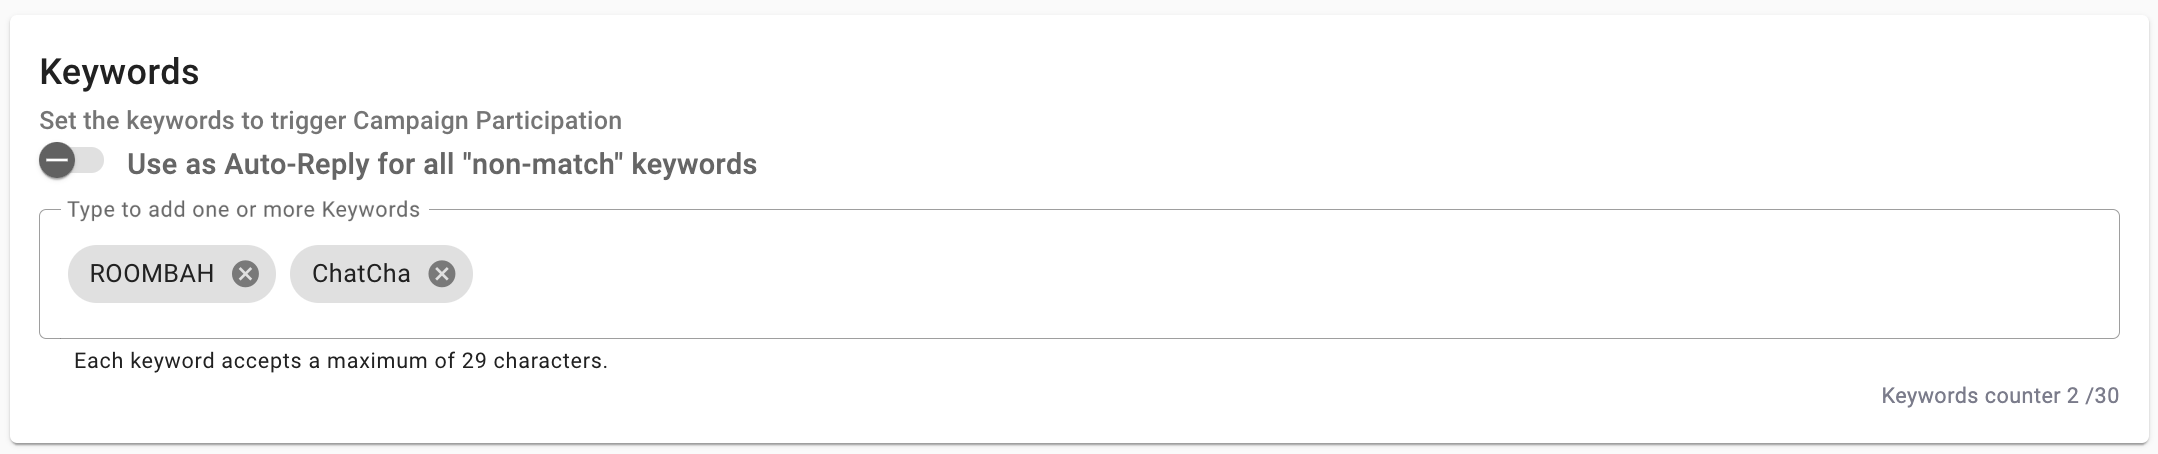
NOTEEach keyword accepts a maximum of 29 characters.
Up to 30 keywords can be defined to invoke the service.
The 'Auto-Reply' feature is available if no keyword is needed. If the contact enters any keyword not previously defined or configured in automations, the chatbot sends the Welcome Message configured in the Interactions section. This feature acts as a pre-start of the automation for any undefined keyword.
To use this feature, you slide the toggle to the right. Before doing so, consider the following:
-
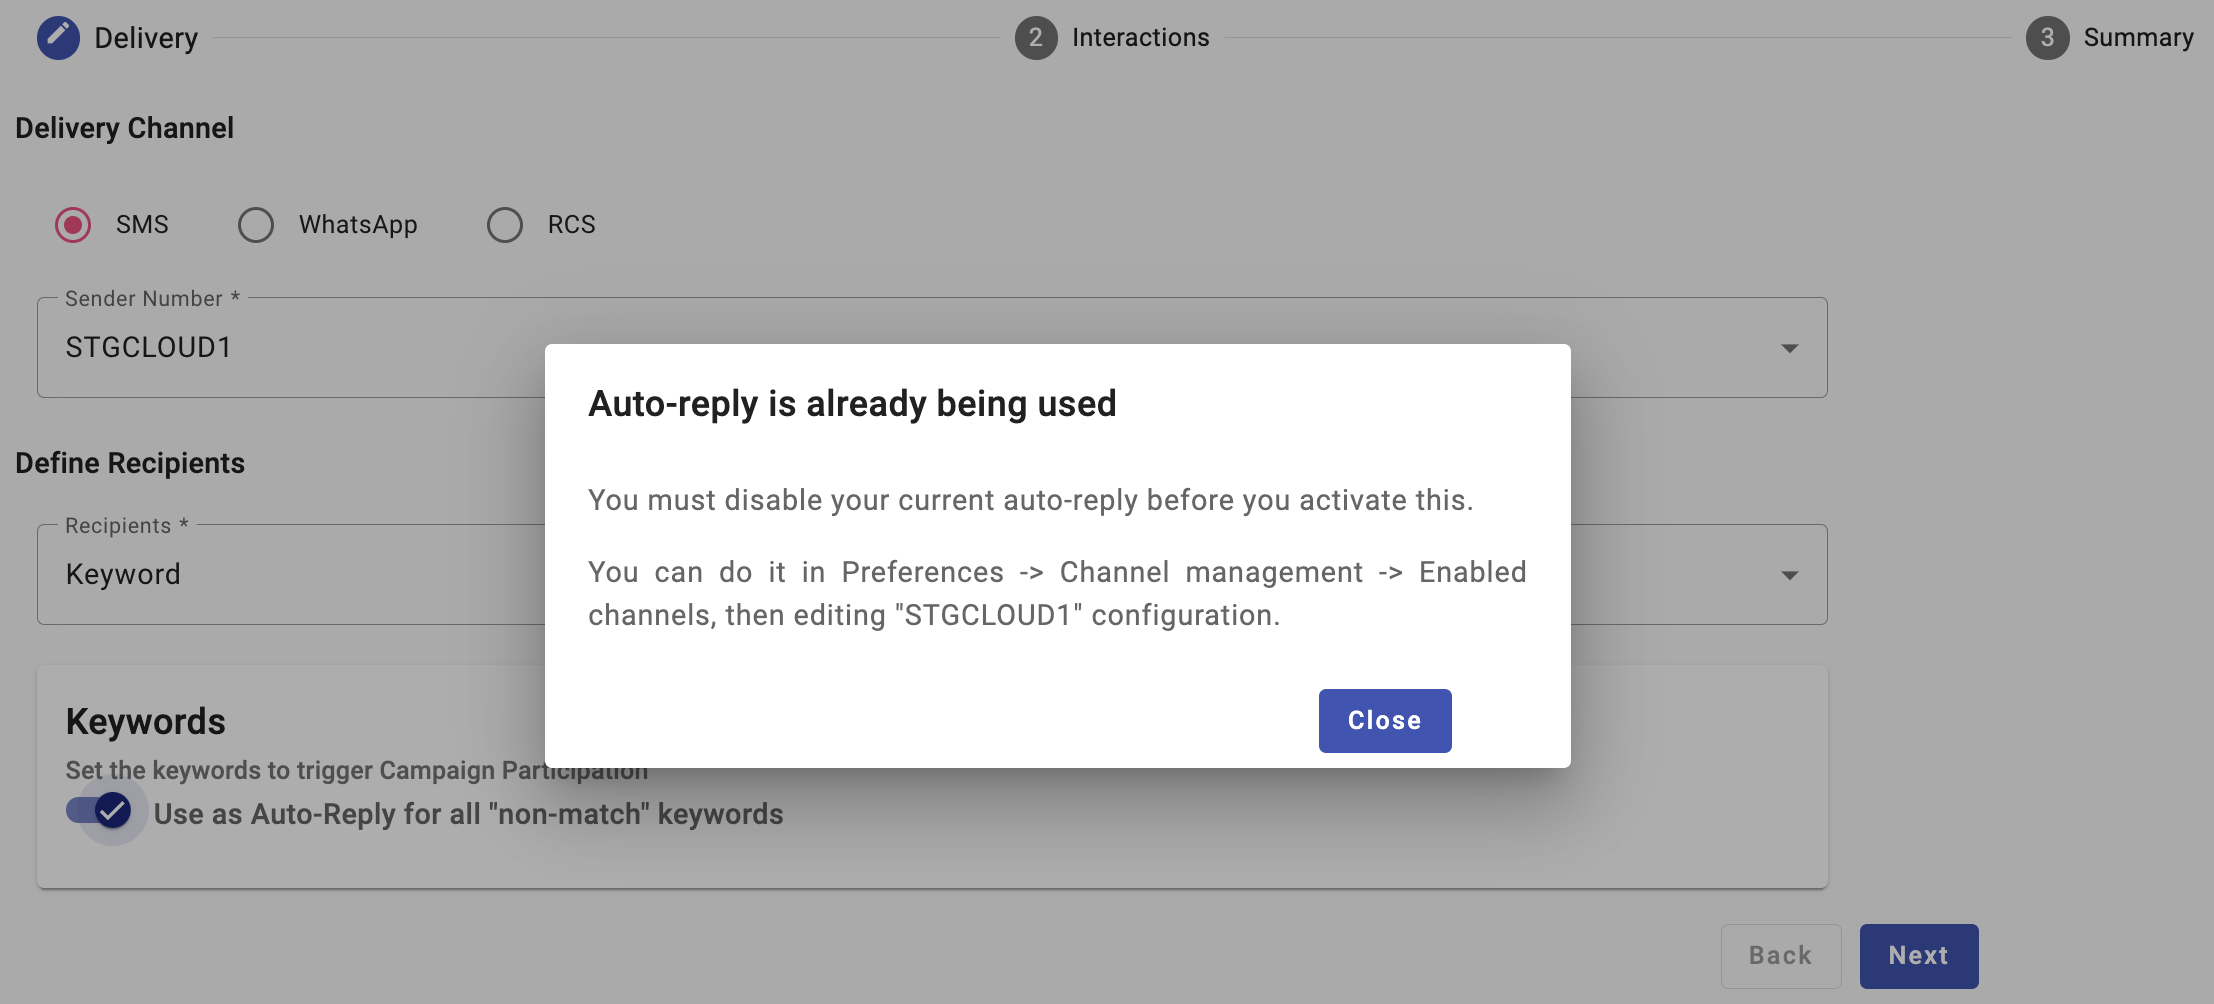
If another automation has activated the 'Auto-Reply' function with the same sender number and channel type, this feature is not available. To enable it, you disable the 'Auto-Reply' from the automation already in use.
To identify which automation uses the 'Auto-Reply' function, slide the toggle to the right. A pop-up message displays the automation name and its ID.

-
If a sender number is already activated by the 'Auto-Reply Message' function, the 'Auto-Reply' feature is not available. To enable it, you disable the 'Auto-Reply Message' by editing the sender number from the Sender Number Configuration (Channel Management tab) located in the Preferences section.
To identify which sender number uses the 'Auto-Reply Message' function, slide the toggle to the right. A pop-up message displays the sender number.
The setup consists of the following steps:
- Select the service channel through the radio buttons
- Select the number for SMS. In the case of WhatsApp, the WhatsApp account is the default option.
- Select the API Endpoint (available for SMS), Keyword(s) (available for SMS and WhatsApp), or 'Auto-Reply' function.
- Enter the Keyword(s) to set the Keywords to trigger automation participation.
- Select Next.
The API Endpoint option removes the need to define Keyword(s) in this step. Keywords remain the method in all instances to invoke the chatbot.
Keyword configuration considerations
When planning multiple chatbot automations using the same sender ID and channel type, consider how keywords are configured for each automation:
- Auto-Reply and keyword conflicts: Enabling the "Auto-Reply" feature causes any incoming message or keyword to trigger the chatbot. This means "Auto-Reply" is not available in a second automation using the same channel and sender ID.
- Specifying keywords for activation: Instead of "Auto-Reply," you define specific keywords that trigger the chatbot. End users initiate communication with the chatbot by sending one of these specific keywords.
- Auto-Reply vs. keyword activation: The "Auto-Reply" feature allows any keyword to trigger the chatbot. If this option is already used by another chatbot automation, you define specific keywords to trigger the chatbot. If the end user enters a keyword other than those specified, they are redirected to the chatbot that has the "Auto-Reply" option enabled.
In this example, three chatbot automations — named "Audio," "Sales," and "Computers" — are configured with the same sender ID ("12345") and channel type (WhatsApp).
- Audio automation: This automation is configured with two specific keywords:
"Speakers"and"Amplifiers". When the end user enters any of these keywords, the chatbot associated with this automation is triggered. - Computers automation: This automation is linked to three specific keywords:
"Cables","Monitors", and"Mouses". When the end user enters any of these keywords, the chatbot associated with this automation is triggered. - Sales automation: This automation uses the "Auto-Reply" option. Any keyword not matched with the other two automations triggers this chatbot.
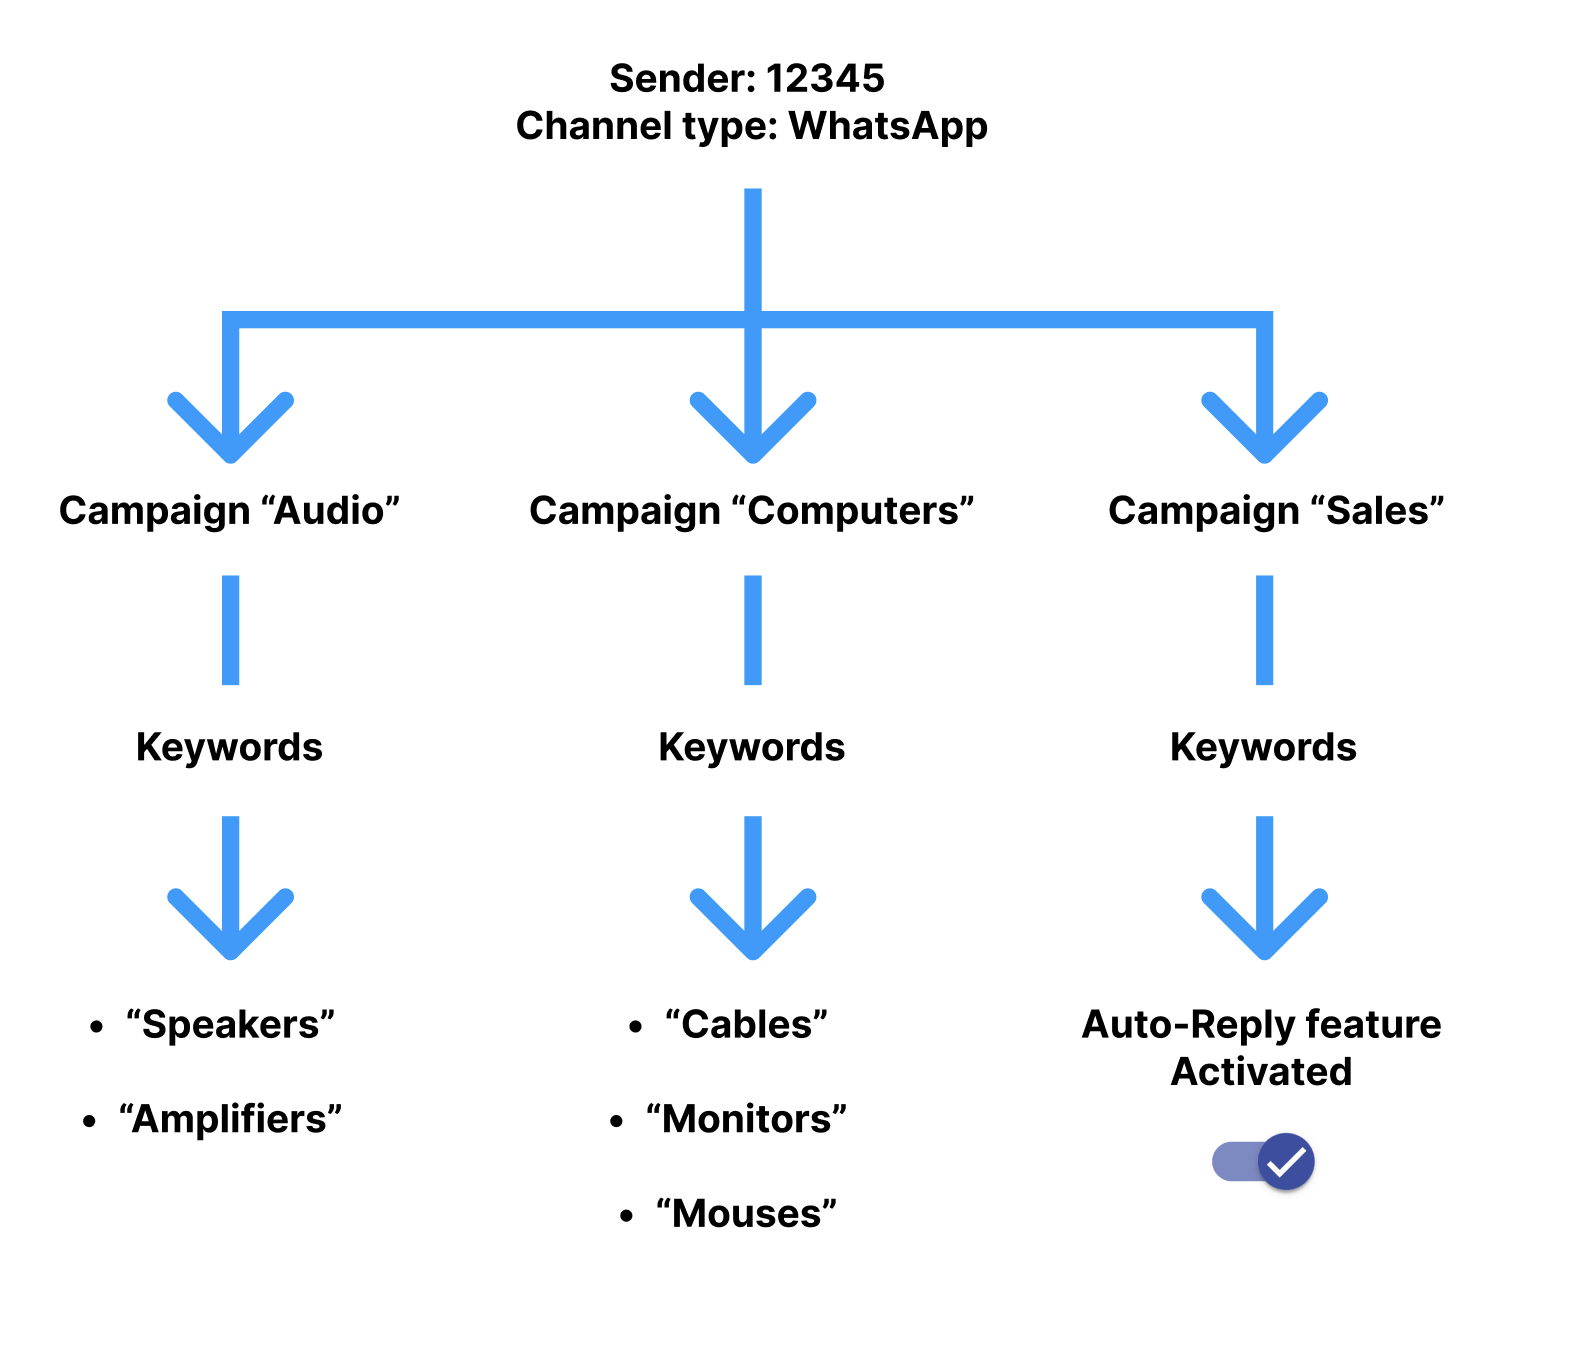
The diagram shows the interaction process. Depending on the keyword entered, the end user is directed to the corresponding chatbot. If an end user types a keyword other than "Speakers", "Amplifiers", "Cables", "Monitors", or "Mouses", they are redirected to the "Sales" automation. This setup ensures each chatbot automation captures only its targeted keywords, while all other inputs default to "Sales" through its "Auto-Reply" setting.

Updated 8 days ago