Invite Users to the Platform
Invite users to the Communications Platform with roles and permissions across four hierarchical levels.
From the Users tab, you click Invite User to invite users to the platform.

A dialog appears for entering the user's information and specifying permissions. You complete the following steps:
-
Enter the name of the user. (Up to 250 characters)
-
Enter the user's Email address. (Up to 30 characters)
-
Enter the user's Phone Number.
-
Set the user's permissions by selecting the Role dropdown:
Role Permissions Description Platform Access Administrator This role is granted full administrative privileges across both platforms: the Communications Platform and Live Chat. They can manage services, users, contacts, settings, broadcasts, and automations. They have unrestricted access to all system sections, features, and configuration options of both platforms. Communications Platform & Live Chat Operator Operators are assigned only within the Communications Platform. Operators can perform specific operational tasks within the system, but cannot manage user accounts or access the Settings section. This role is ideal for users who require limited but functional access without administrative capabilities. Operators are not permitted to access LiveChat. Communications Platform Viewer This user type has view-only access to the Communications Platform with limited permissions. They can browse broadcast data, automation data, and dashboards, but are restricted from creating, editing, deleting, or sharing any broadcast or automation. Communications Platform Agent Agents are dedicated users of the Live Chat platform. They are responsible for handling real-time customer interactions and conversations. Agents do not have access to the Communications Platform or any of its associated functions. Invitations must be issued to assign users to this role. Live Chat
NOTEPlease note that you can send the invitation to a specific number of agents, as requested by the total agents you specified to the support team to add to the Live Chat. If you want to increase the number of agents, please contact the support team.
For each agent you want to invite, you select the Add More button.
For each agent you want to include, you select the Agent option from the Role dropdown menu. A counter on the right side shows the total number of available agents remaining. The counter decreases for each agent added.
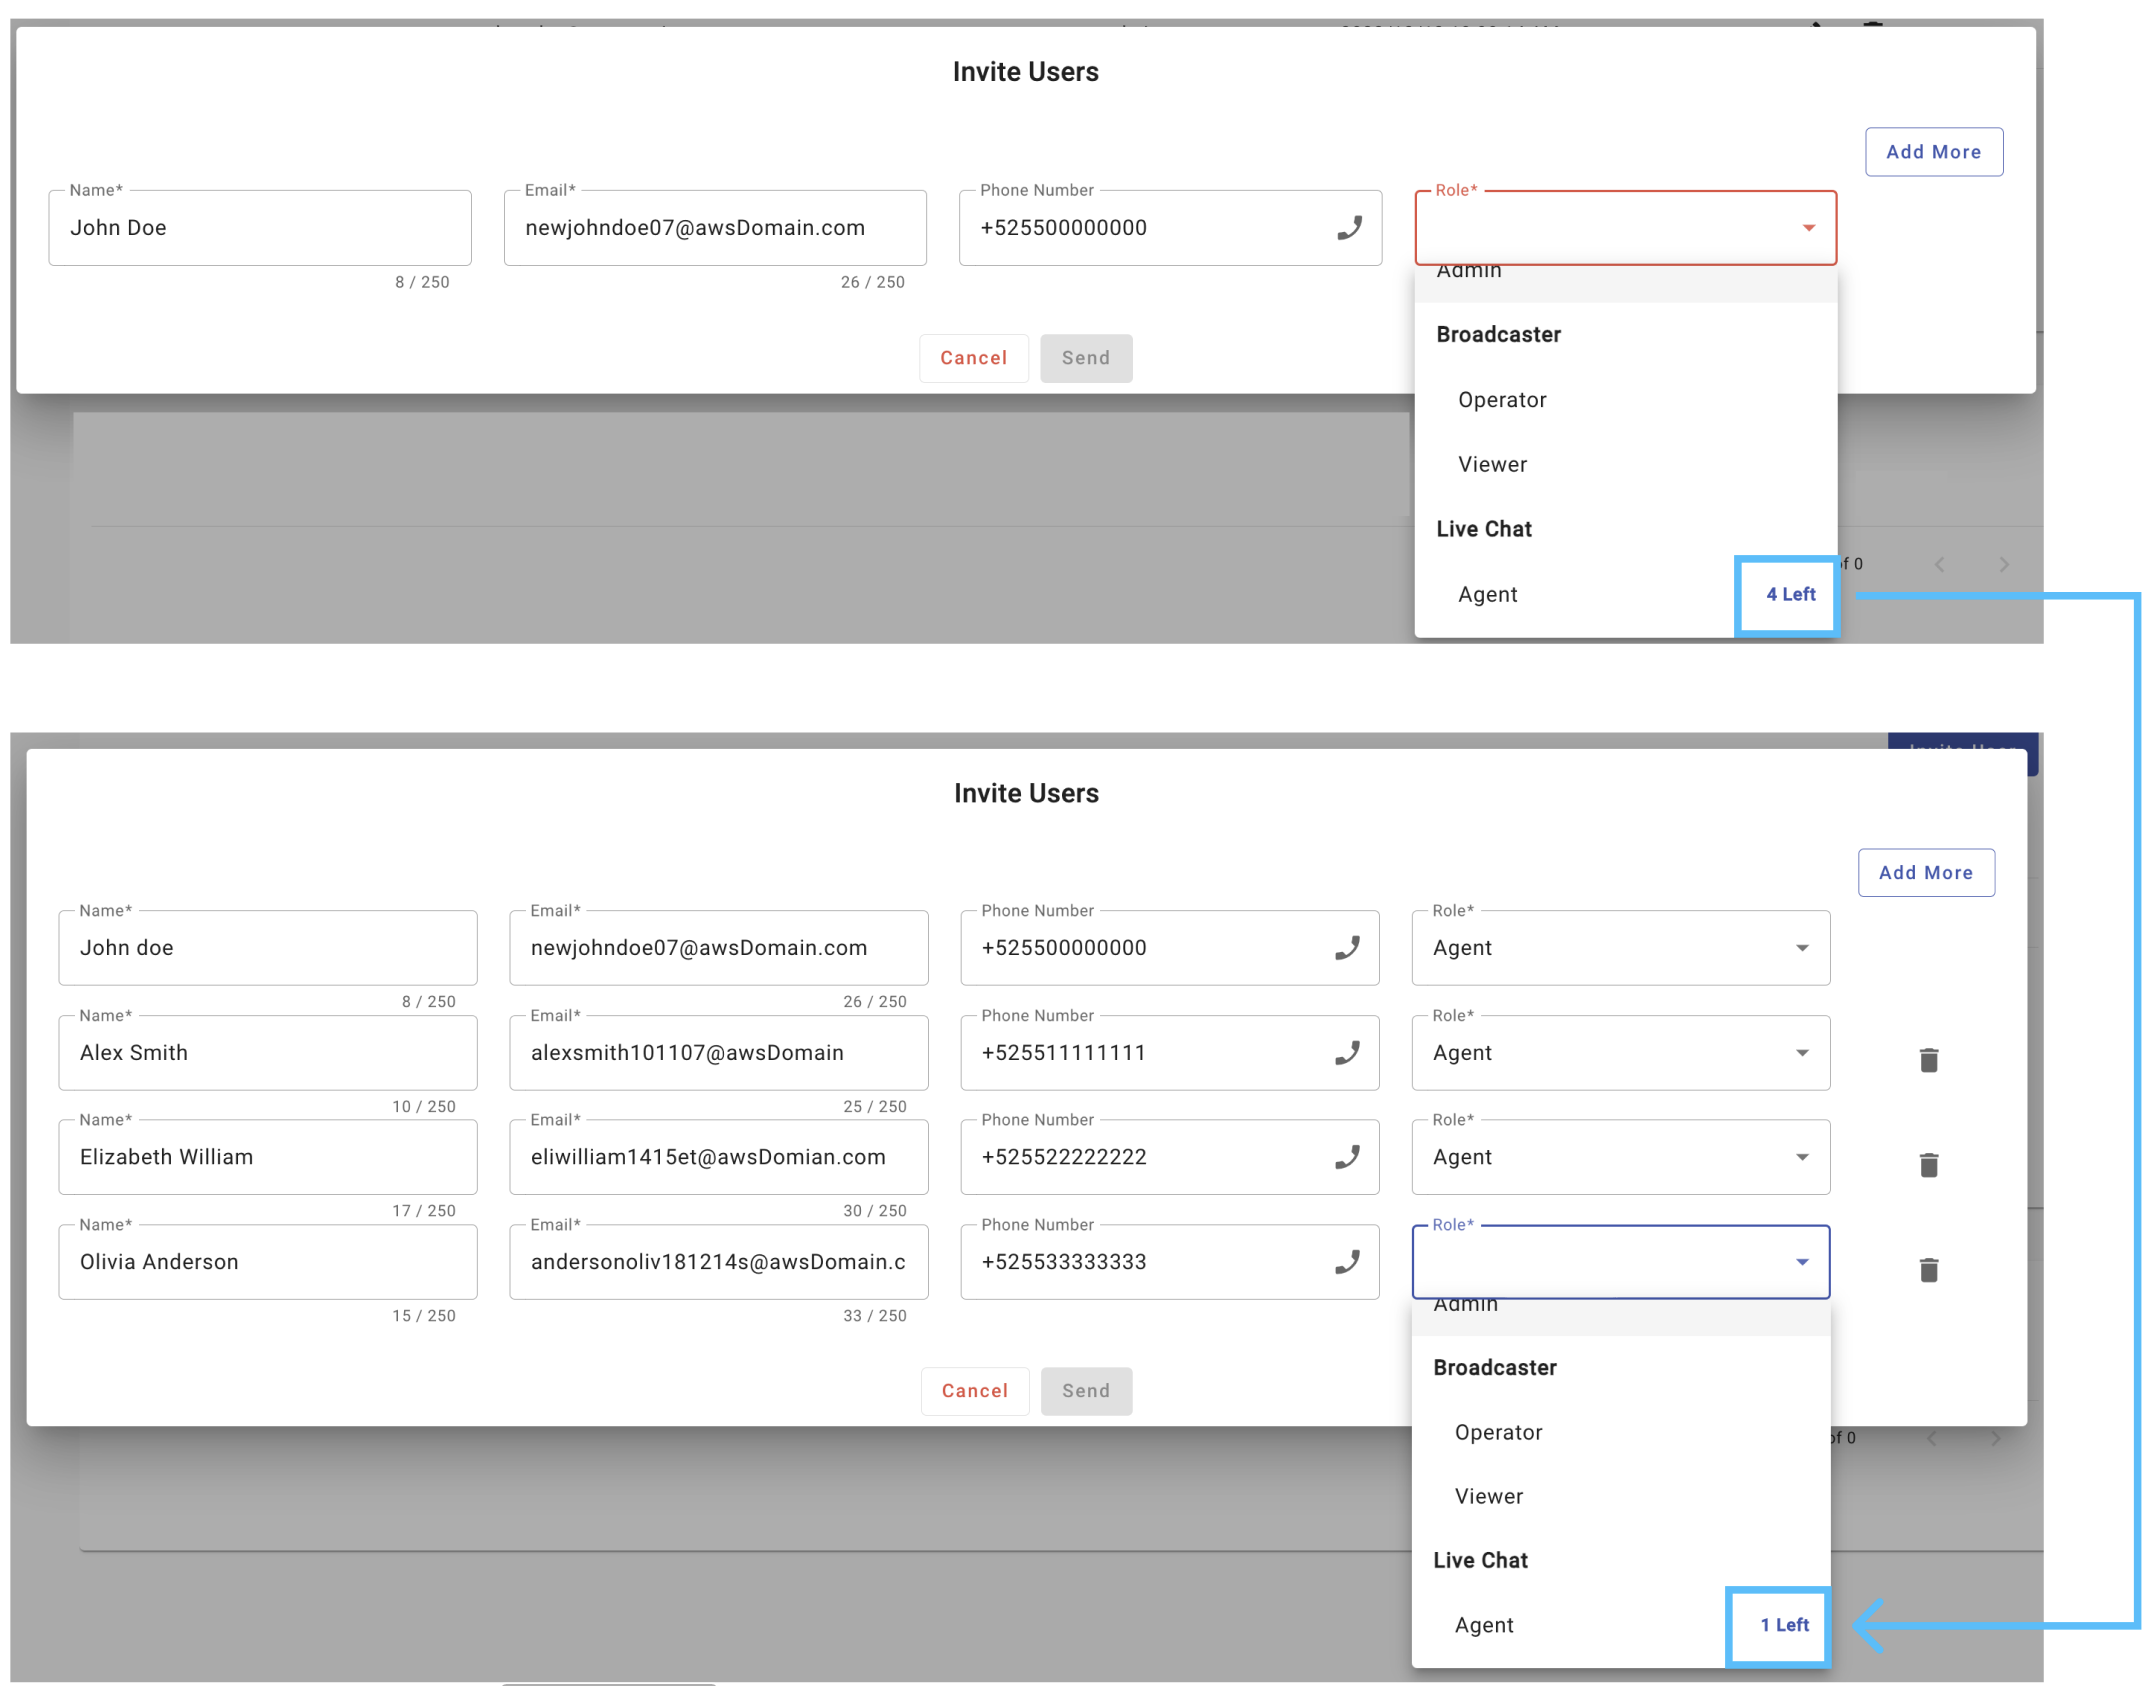
When you finish adding the agents, you cannot add more unless you request the support team to increase the agent count.
The agents receive an email notification confirming their assignment as an Agent to a Workspace.
The agent selects Complete Account Registration and enters the email address the invitation was sent to. The agent sets a password for live chat access. After clicking Sign up, the agent is redirected to the Live Chat platform.

- Select Invite to invite the user to the platform. If you want to add another user, select +User.

After you click Invite, you select Close. The dialog closes and the platform sends the user an email to set up their account.
While the user accepts the invitation and sets up their account, they appear in the Pending Invitations section. From the Pending Invitations section, you view the invitation date in the Date column. You delete any invitation by selecting the Delete icon in the Actions column.

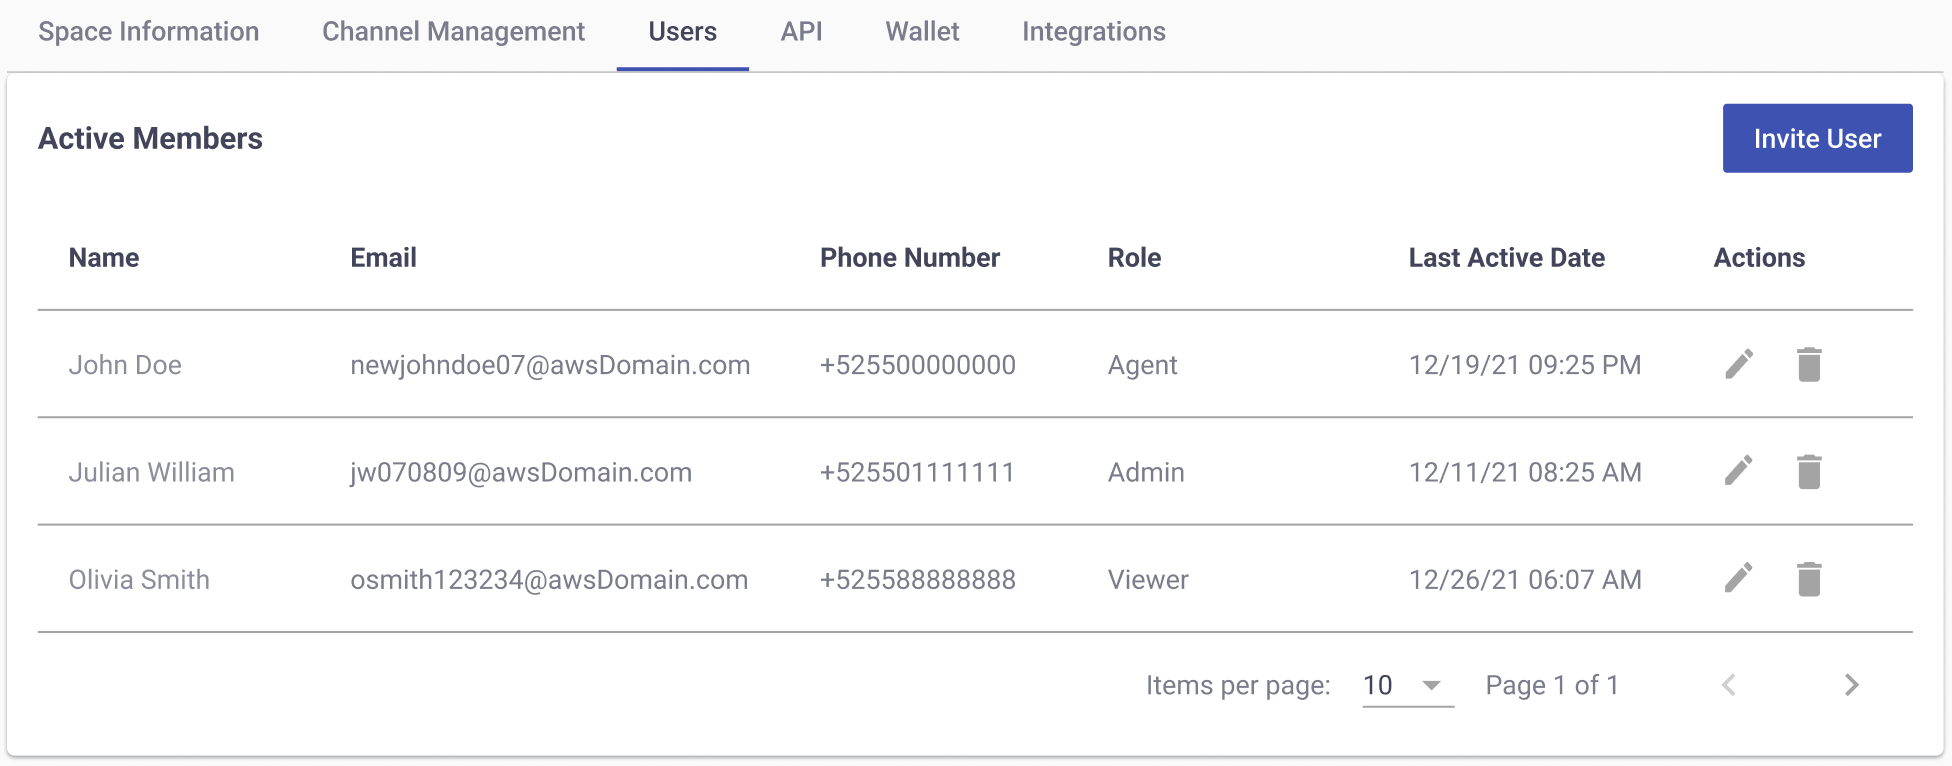
Once the user sets up their account, the platform places them in the Active Members section. The Active Members table records each user's last connection date in the Last Active Date column.
To modify an active member's details — name, email, phone number, or role — you click the Edit icon in the Actions column. To remove an active member, you click the Delete icon. After you confirm, the user loses access to the platform.
Updated 5 days ago