Live Chat Configuration
You activate Live Chat from Administration Console using the steps in this section. You complete the following tasks:
- Selecting the Workspace where the Live Chat is accessible.
- Activating the Live Chat feature and setting the total number of agents available.
- Sending invitations to Agents.
You configure and activate the Live Chat using the following steps:
-
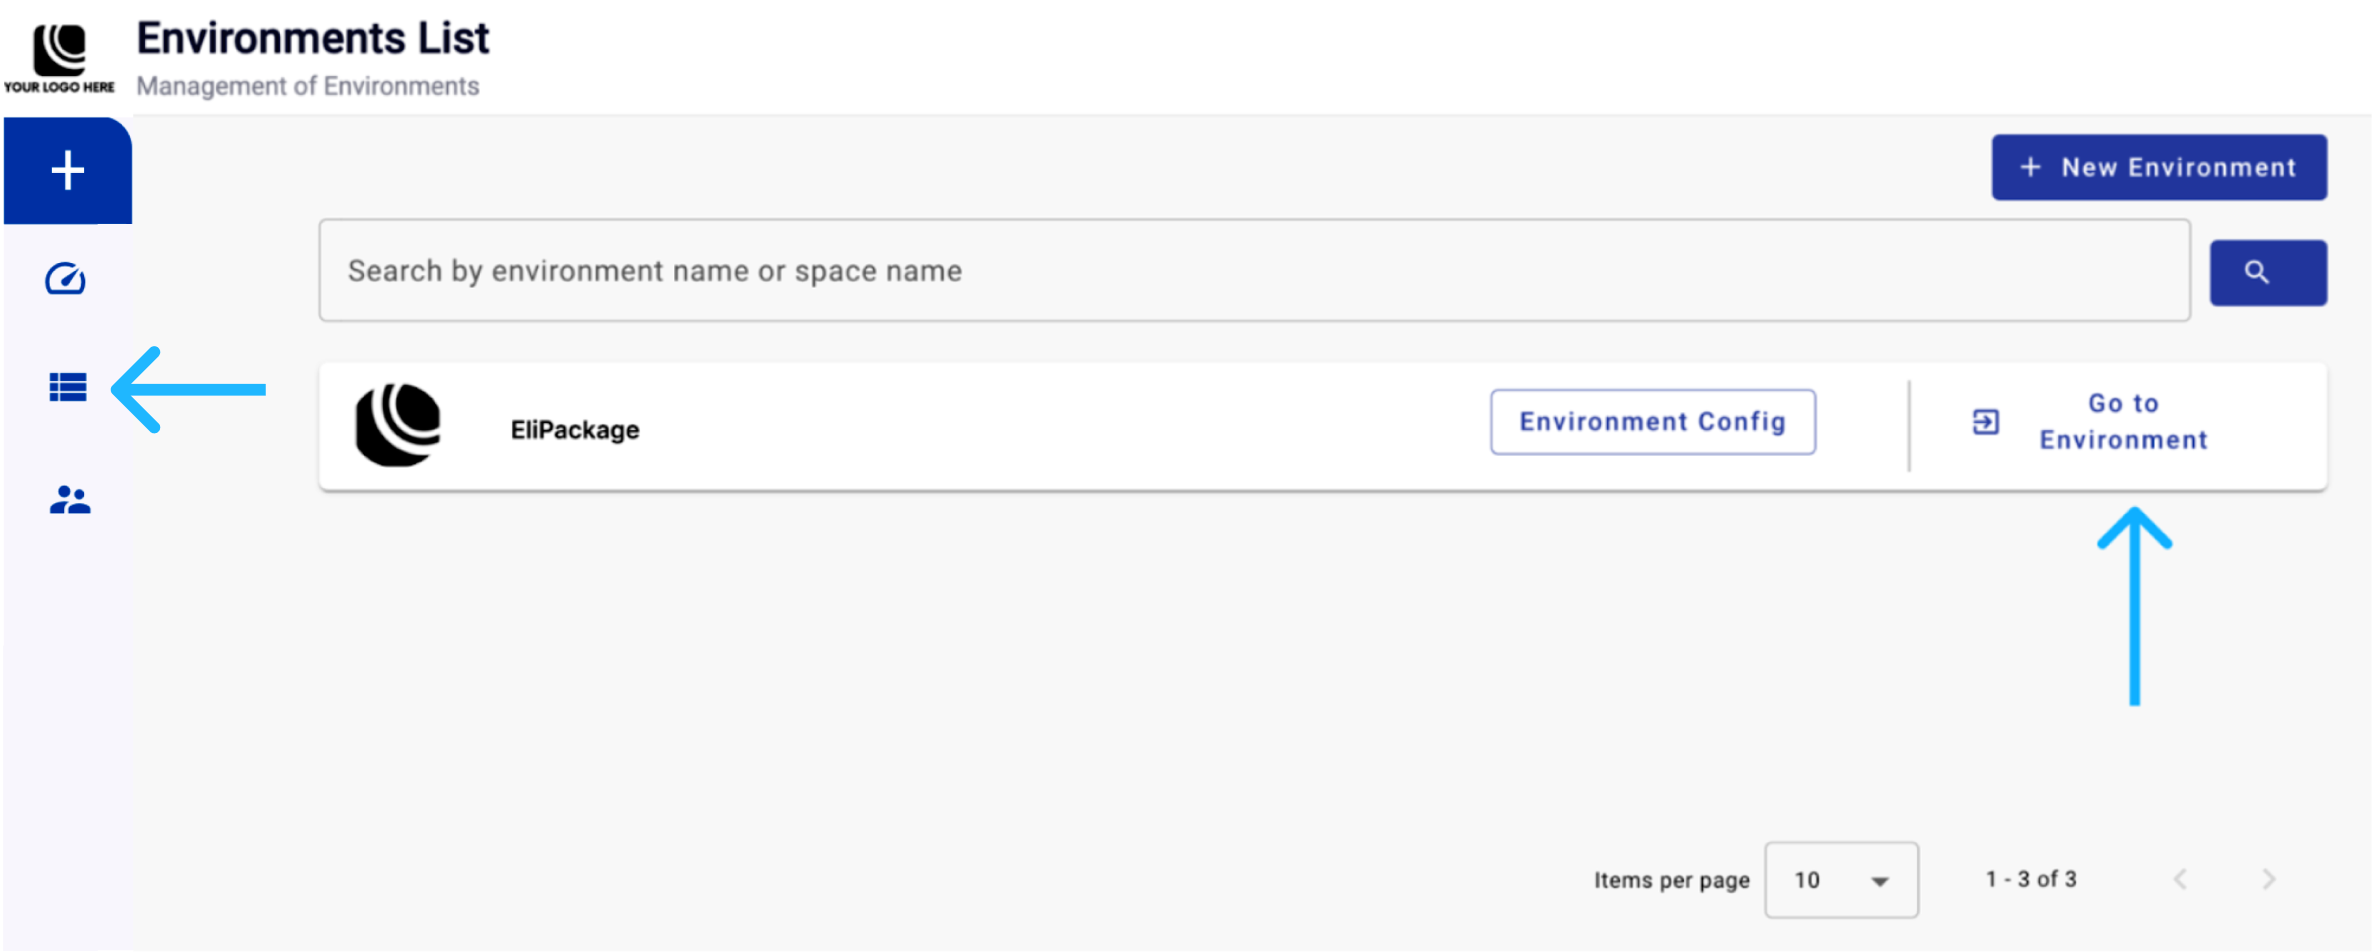
From the Administration Console, navigate to the Environments section. Choose the Environment that contains the Workspace where you want to enable the Live Chat. Select the Go to Environment button to proceed.
-
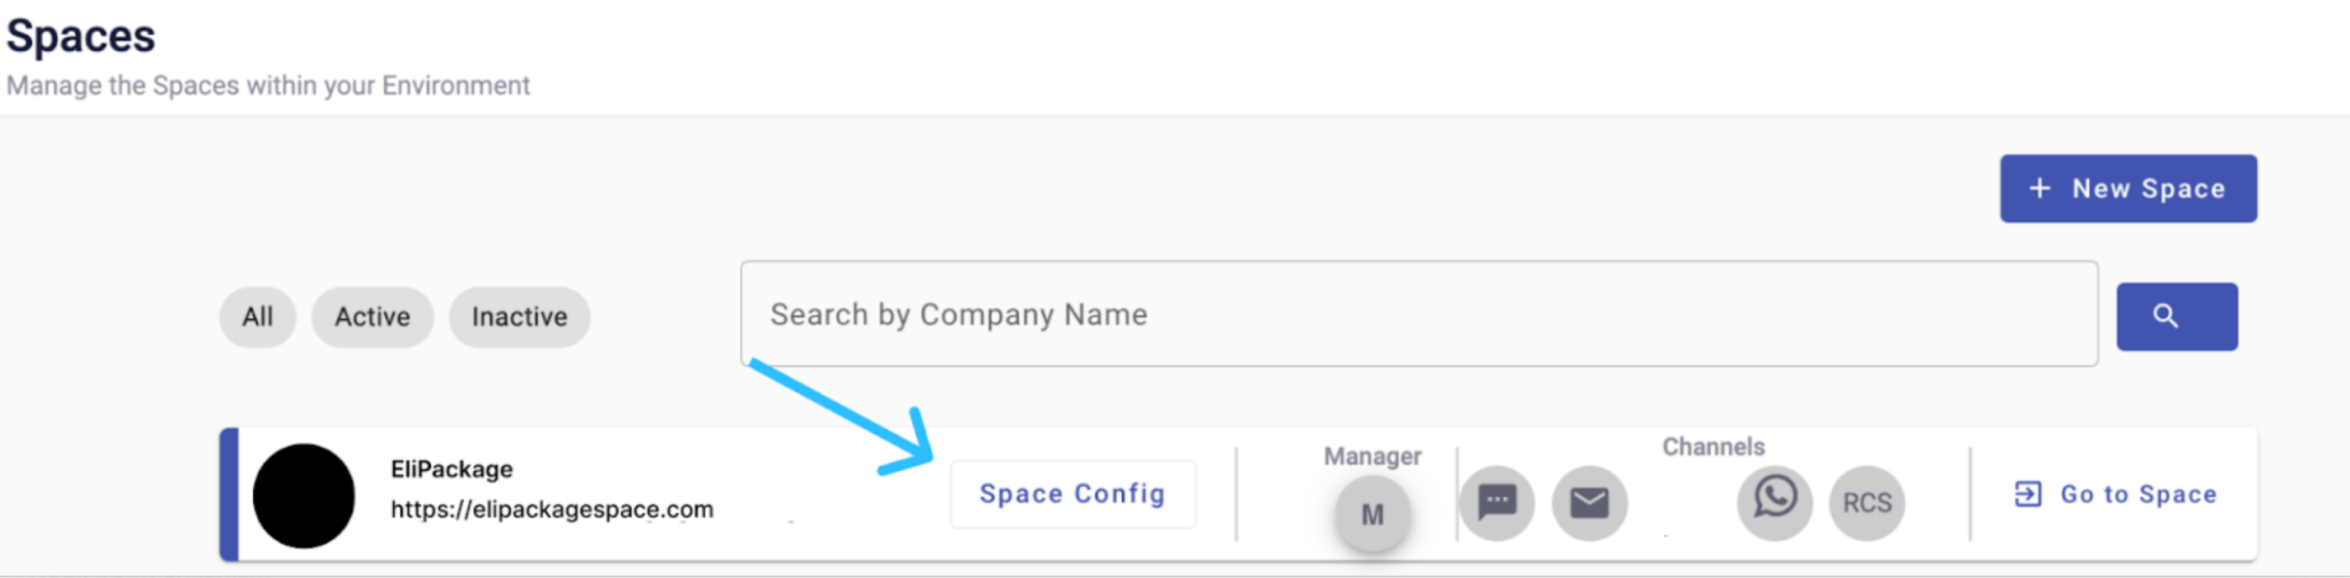
Select the Workspace of your choice by selecting the Space Config button.
-
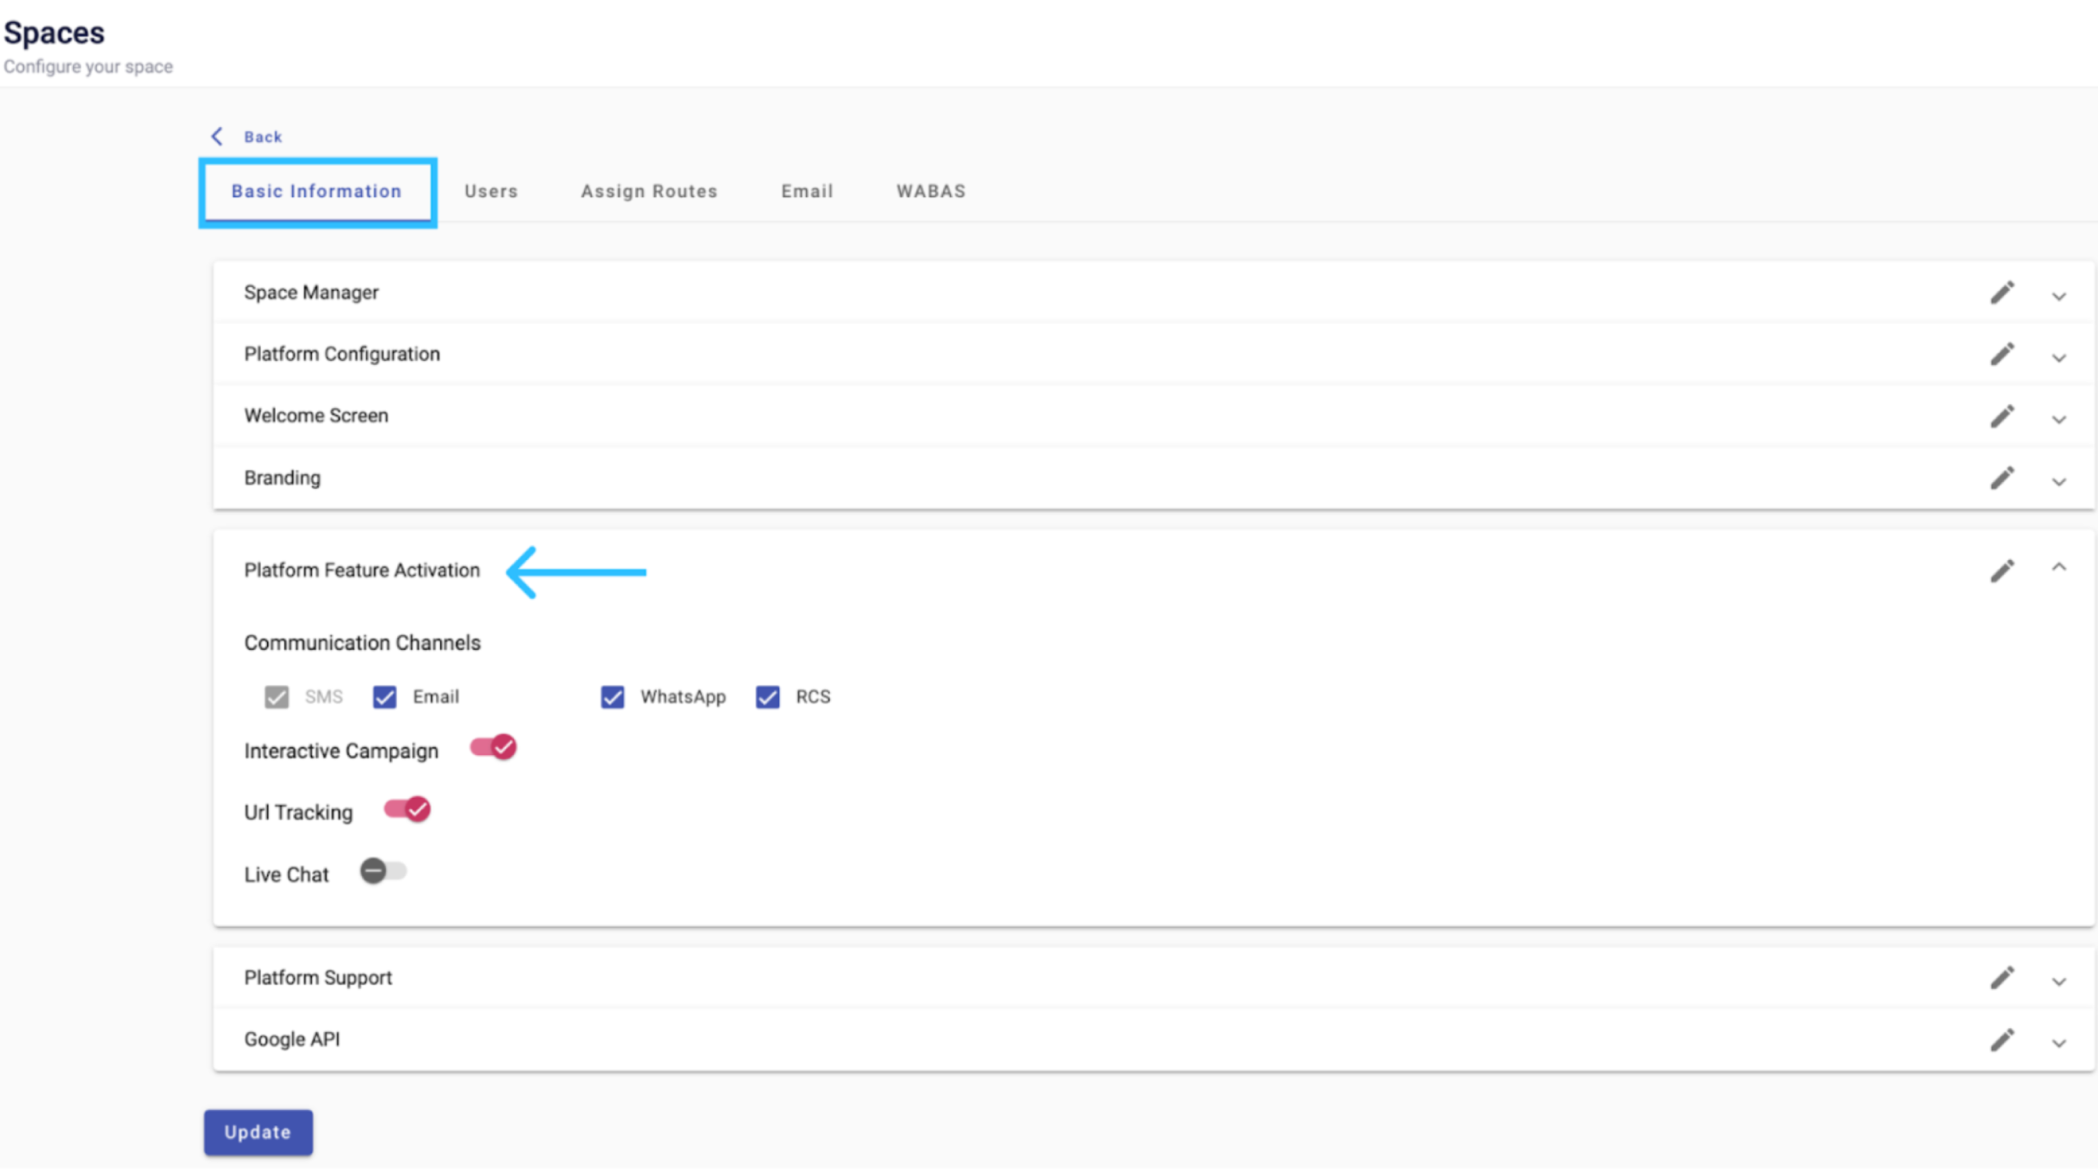
You see the next page. You select the Basic Information tab and the Platform Feature Activation dropdown menu.
You activate or deactivate Workspace functionality from here, such as broadcasts, automations, URL Tracking, and Live Chat.
NOTE
If the Live Chat is deactivated, the users with the Agent role will be removed.
You slide the toggle to the right to activate the Live Chat. You type the total number of agents and select the Update button.
In this example, 4 agents are configured.
To reduce the total number of agents, you remove agents from the Active Members table by selecting the Delete button. You then decrease the total number of agents.
Otherwise, the platform displays the message: "Number of current agents greater than those configured for Live Chat".
If the invitations were sent through Administration Console, you see the Active Members table on the Users tab. If sent through Communications Platform, you see it in the Users tab from the Preferences section.
NOTE
Upon selecting the Update button, the Live Chat icon will be available within the Communications Platform.
-
You send invitations to the agents you configured in the previous step. You add agents using one of two methods:
- Inviting them through Administration Console
- Inviting them through Communications Platform
When using Administration Console, you select the Users tab and select the Invite User button.
When using Communications Platform, you go to the Preferences section, select the Users tab, and select the Invite User button.
You follow the same steps regardless of which platform you use.
After you select the Invite User button, you see an invitation form. You type the following information for each agent:
- Entering the Name
- Entering the Email address
- Entering the Phone Number
- Selecting the Role
You select the Add More button for each additional agent.
-
You select the Send button to send the invitations, then select the OK button to confirm.
You see the invited agents in the Pending Invitations table. Each agent who accepts the invitation appears in the Active Members table.
Invited agents receive an email indicating that they were assigned as an Agent to a certain Workspace.
The agent selects the Complete Account Registration button. You enter the email address used for the invitation and set a password for accessing the Live Chat.
-
The agent selects the Sign up button and goes to the Live Chat platform.
Updated 15 days ago