Subscription Form
A Subscription Form Campaign allows businesses to collect user information through a customized web form. The data gathered is added to the platform’s Subscribers List and can be used for future campaigns and user engagement.
Optionally, the platform will allow you to set up a Digital Coupon, E-Swipe, Reveal, or Web Trivia campaign after the user completes the form. To view the details, go to each of those Subscription Form sections.
- Customizable Fields: Name, Email, Phone Number, etc.
- Follow-Up Campaigns: Optionally set up Digital Coupon, E-Swipe, Reveal Content, or Web Trivia after form submission.
The creation of a Subscription Form involves three steps,

- Design - Customize the form’s layout and fields.
- Field Matching - Link form fields to the Subscriber List.
- Summary - Review and activate the campaign.
Design
The Design step includes:
- Form Name – Identifies the form.
- Data Collection Fields – Define user input fields.
- Appearance Settings – Customize branding, colors, and the button.
- Preview – See how the form will look on a mobile device.
-
Form Name: Enter a Form Name to identify it within the platform
-
Data Collection Fields: This section defines what information users must provide.
The Data Collection Fields table is composed of the following columns:
- Field Type – Text, Email, Phone Number, etc.
- Field Name – Label displayed to the user.
- Placeholder – Example input text.
- Required? – Decide if the field is mandatory.
There are some additional aspects to the creation of forms that you can make use of to have tighter control of the data that is being entered. For the case of a Text Field Type, you can define the allowed character sets and the minimum and maximum length of the field through the three vertical dots that appear at the far right at the time of defining the Text Field Type.

Clicking the three dots will display the character set options and lengths shown below.
Remember that the data that is being gathered with the form will populate your subscription list, and both the form and the subscription list need to be kept aligned so that you can derive the maximum benefits from it. This brings us to Field Matching.
-
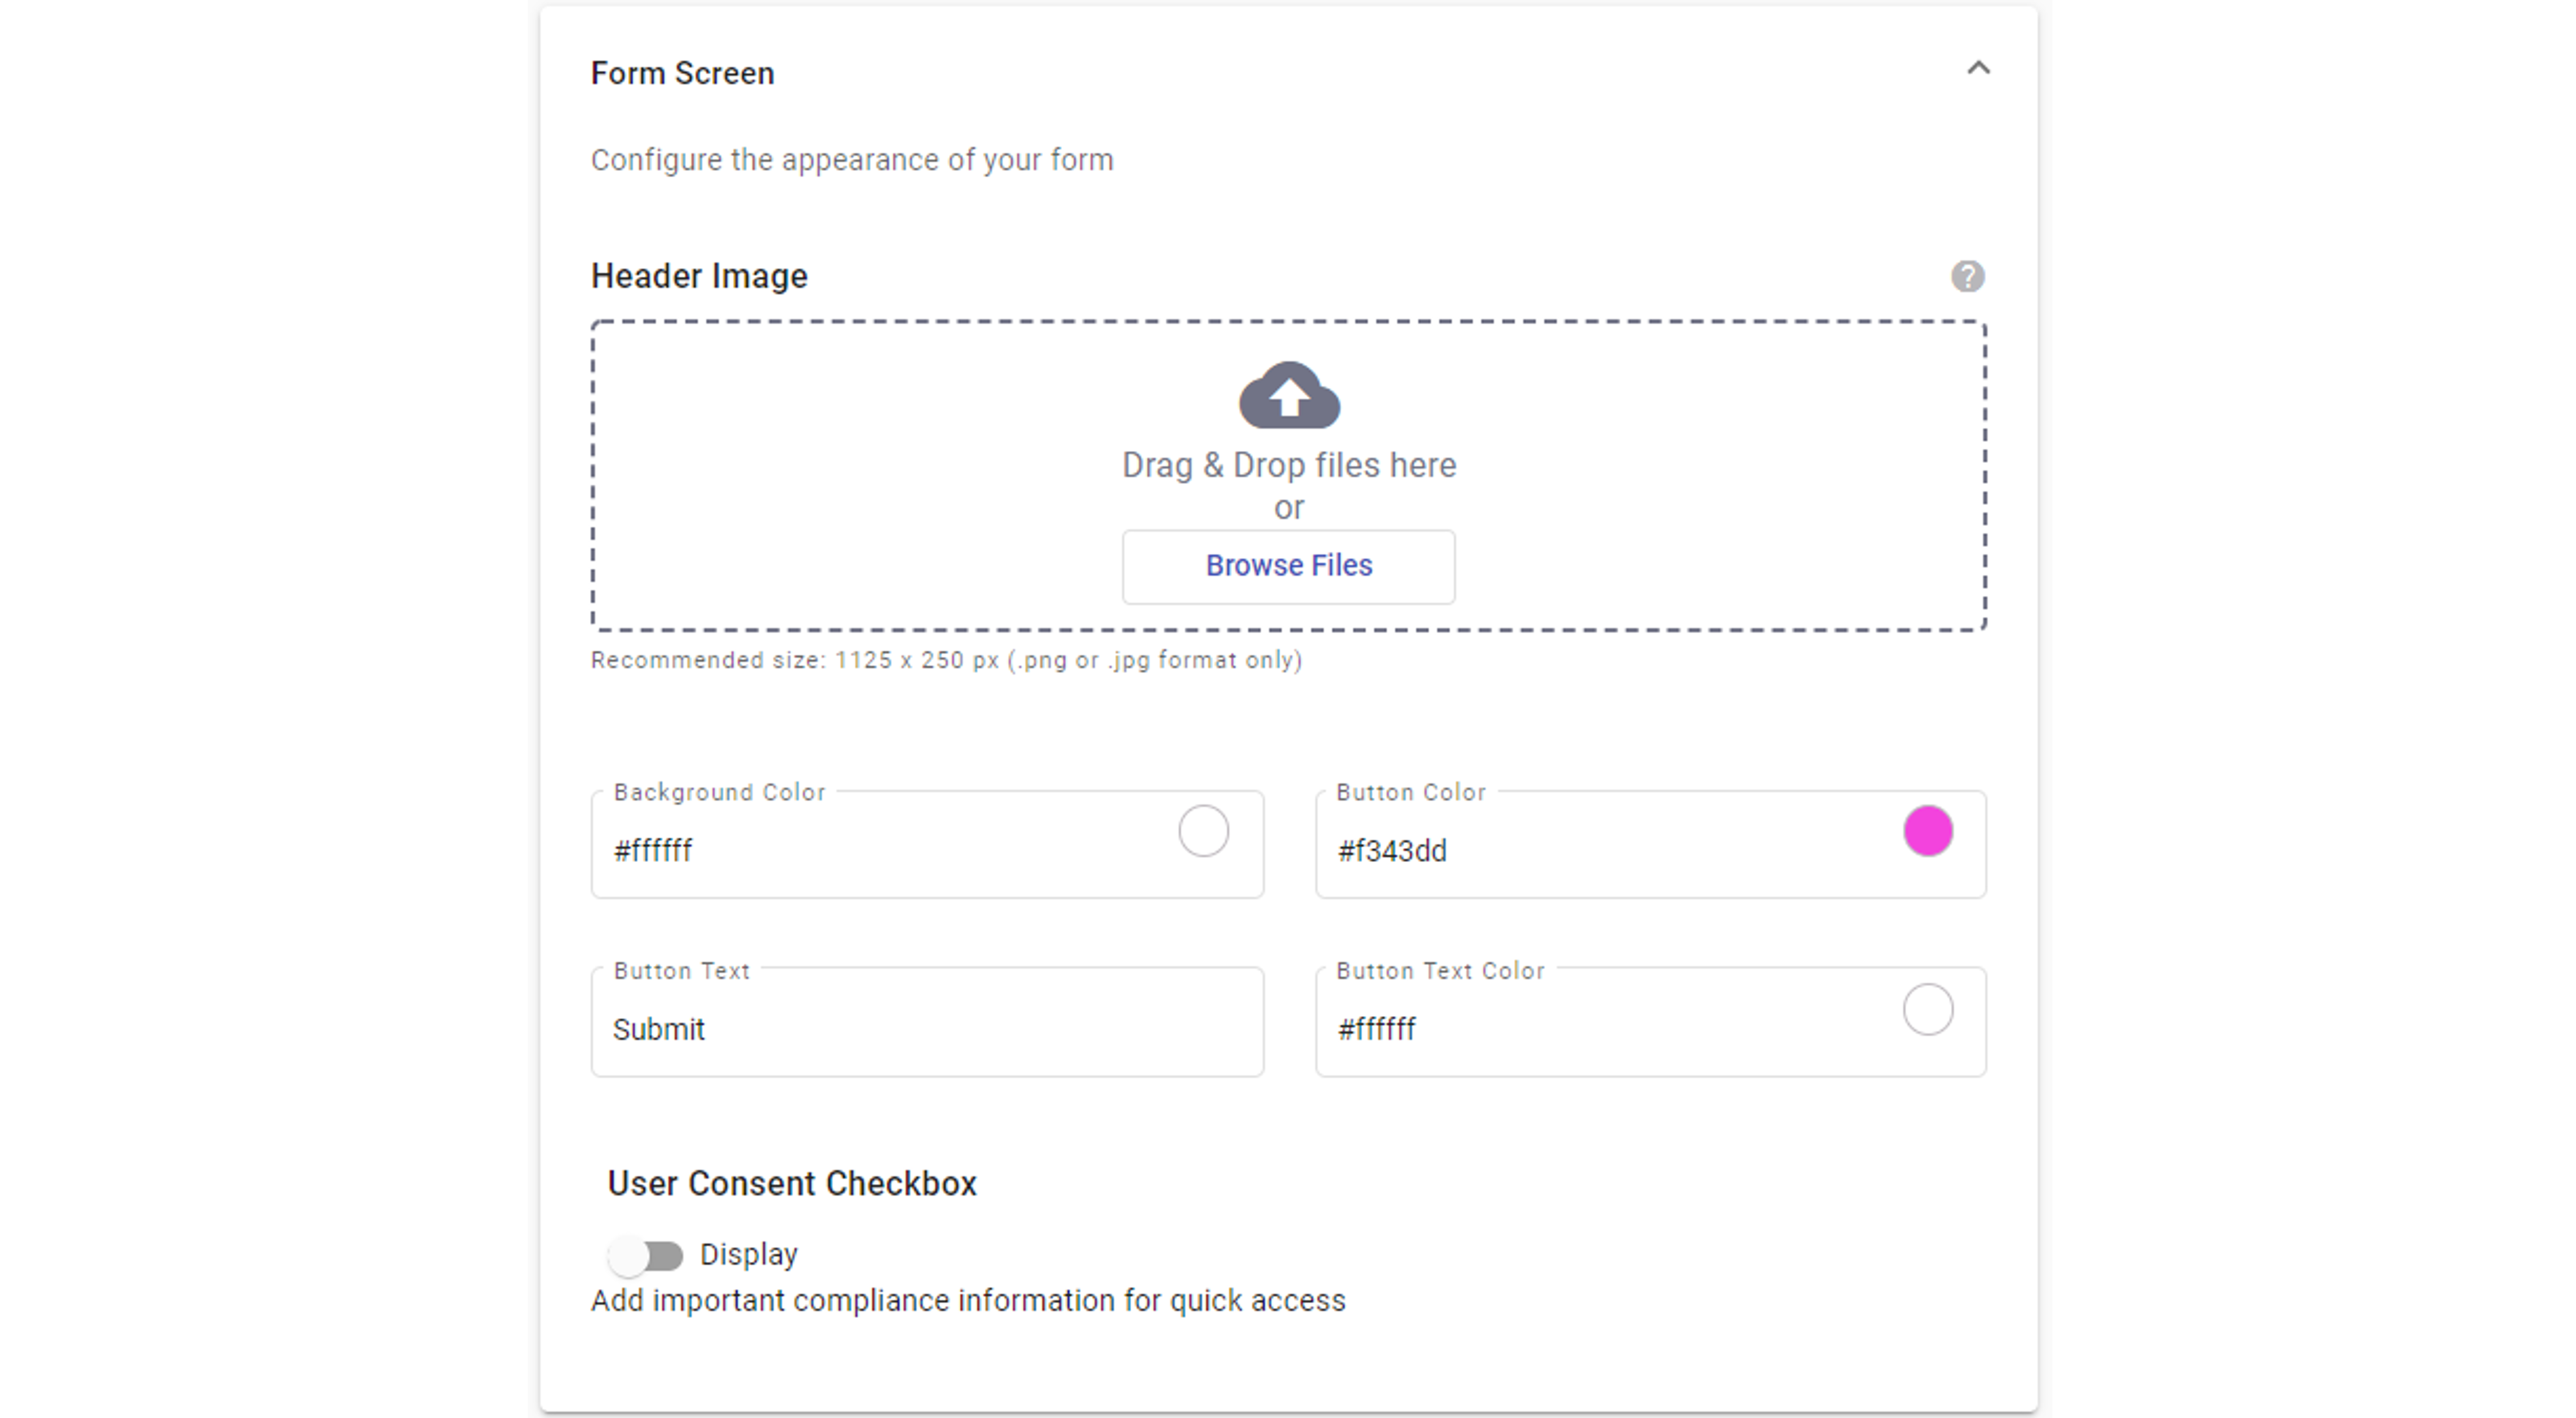
Appearance Settings: This section allows you to customize the visual design of the form to match your brand’s look and feel. This section is divided into two parts:
-
Form Screen – Customizes the initial form layout where users enter their information. That is, it is the main interface where users input their details.

You can configure:
- Form Header Image – Upload a custom image that appears at the top of the form.
- Background Color – Set a color for the form’s background.
- Button & Text Colors – Adjust the colors of the form's buttons and text.
- User Consent Checkbox – Add an optional checkbox for user agreement or legal compliance.
-
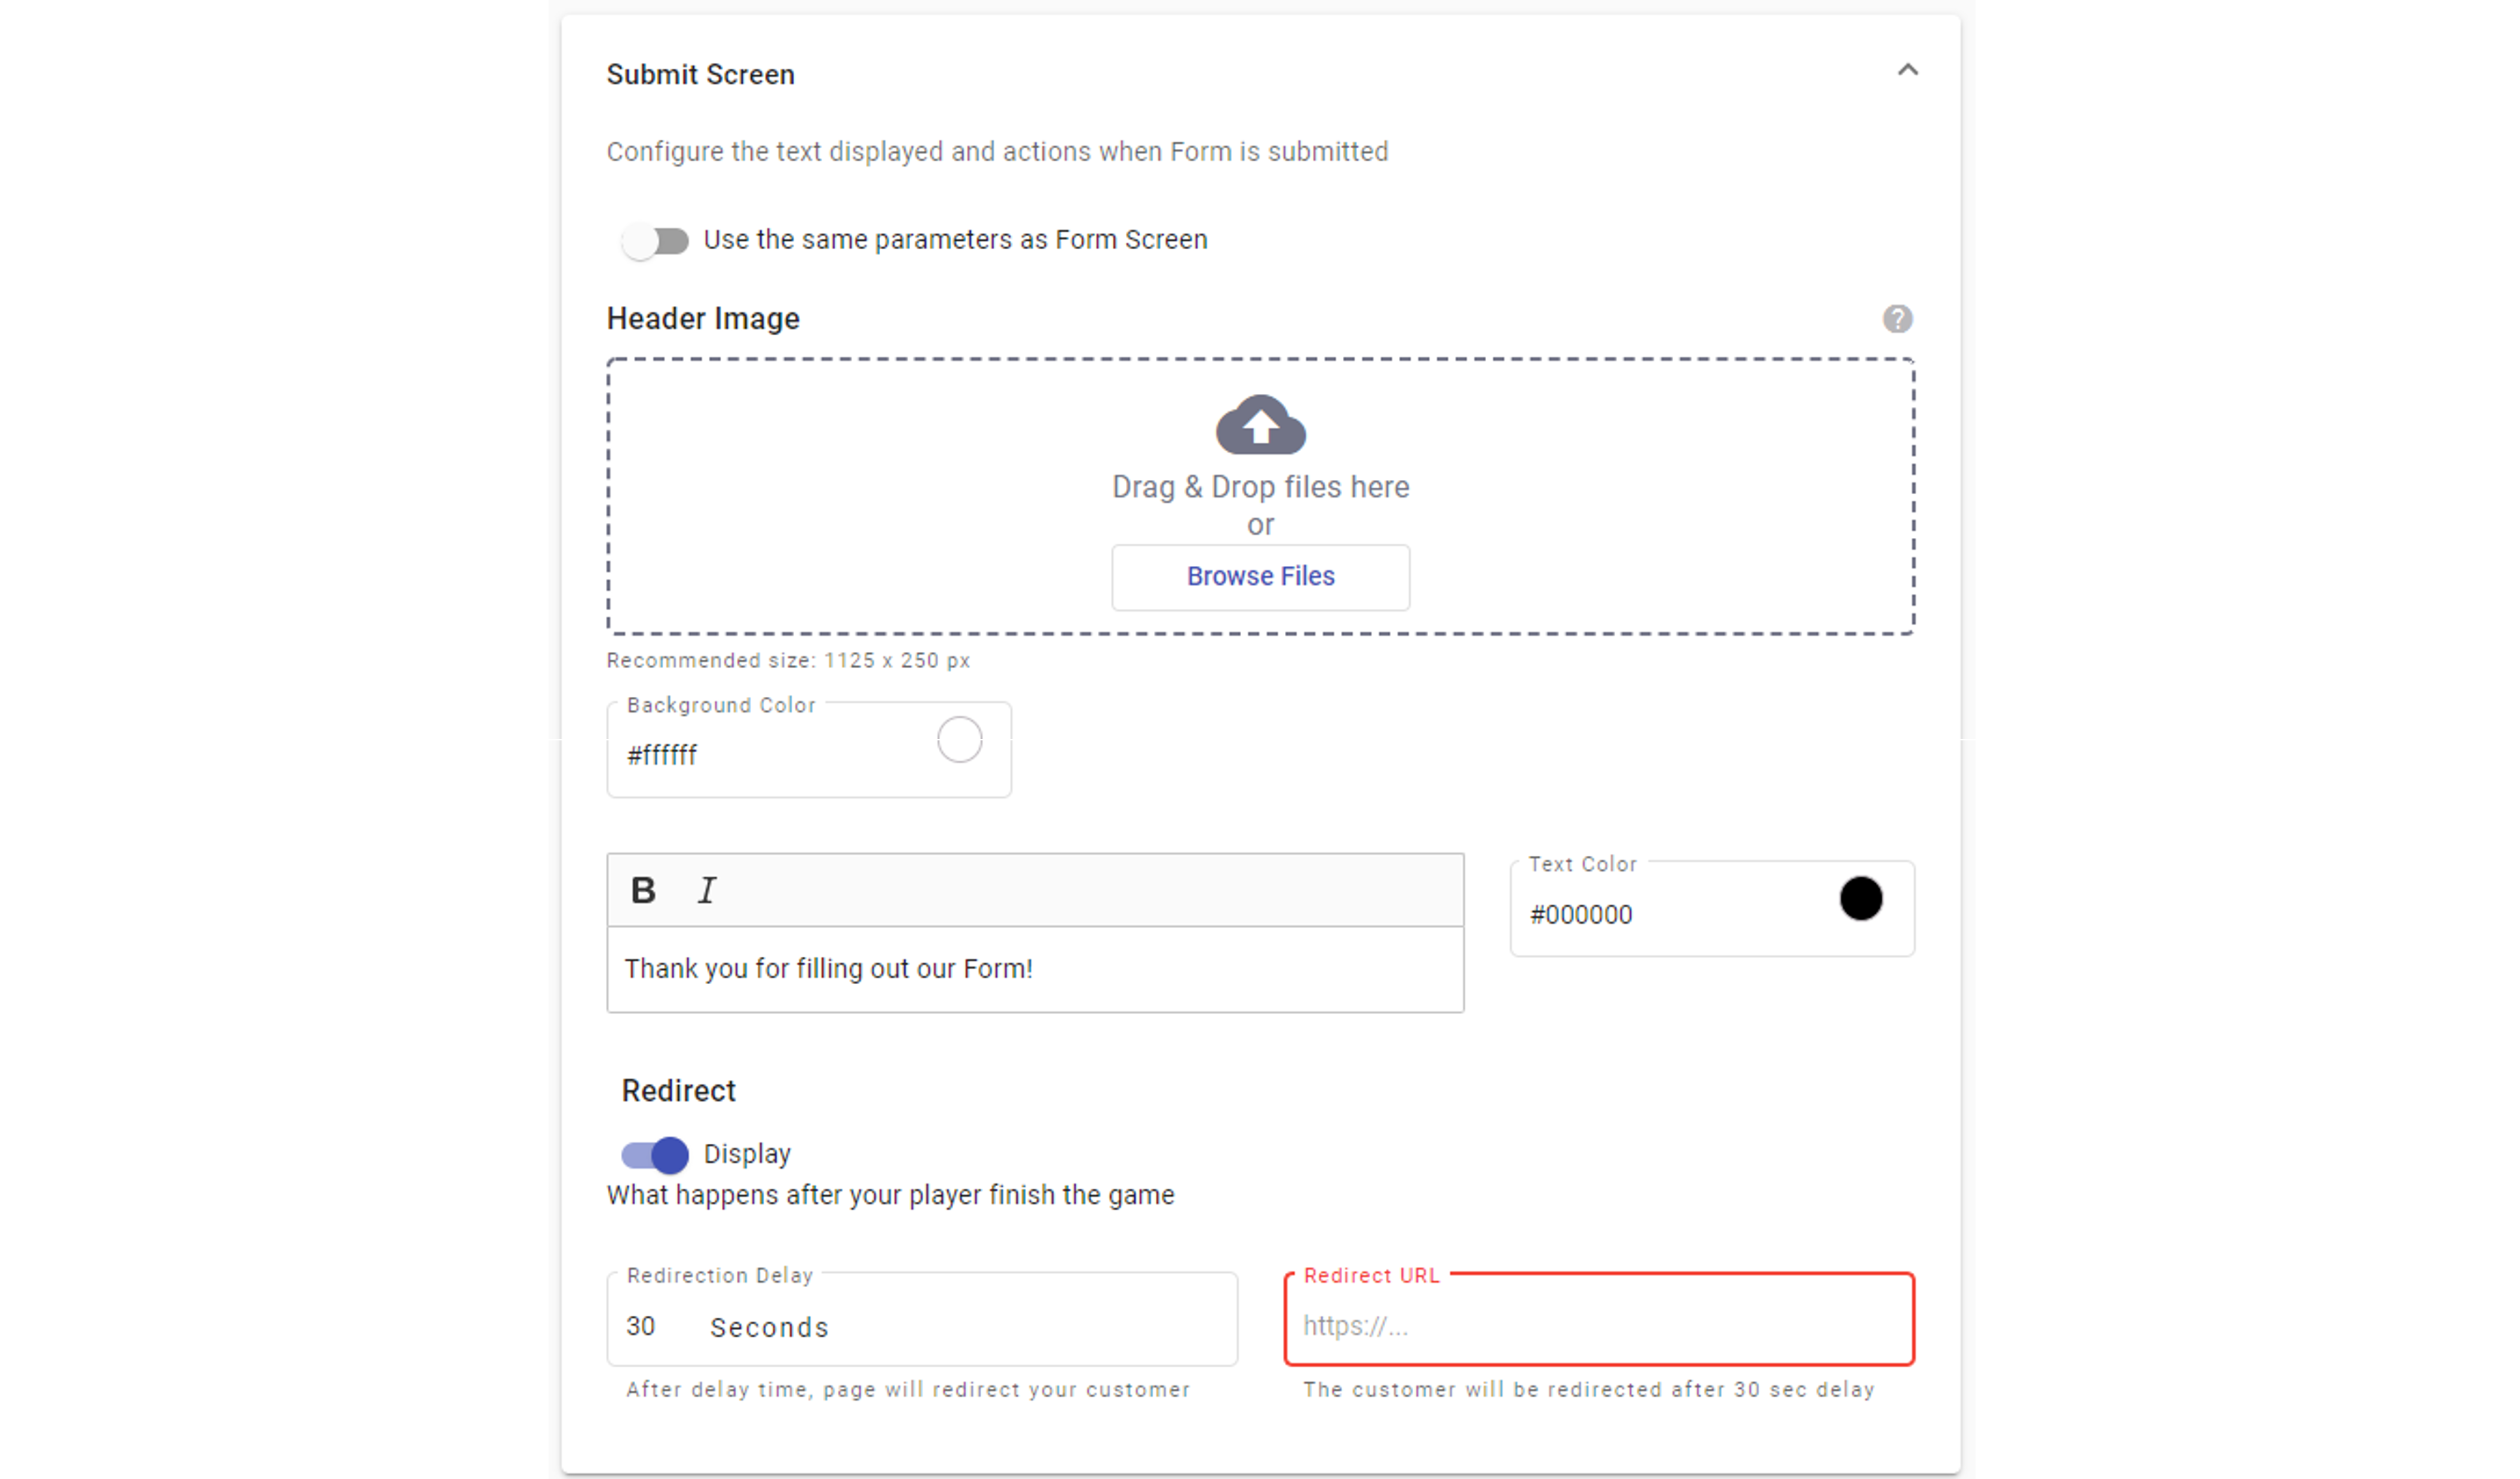
Submit Screen: Defines what happens after the user submits the form.

You can configure:
- Same Look & Feel as Form Screen - If you want to use the same parameters as the Header image, and background color of the Form screen, enable the toggle.
- Success Message – Display a confirmation message after submission and define the text color of the message.
- Redirect Users to Another Page – Enable the toggle if you want to send users to a new page or follow-up campaign.
- Reaction Time Delay – Control how long the success message appears before redirecting.
-
Field Matching
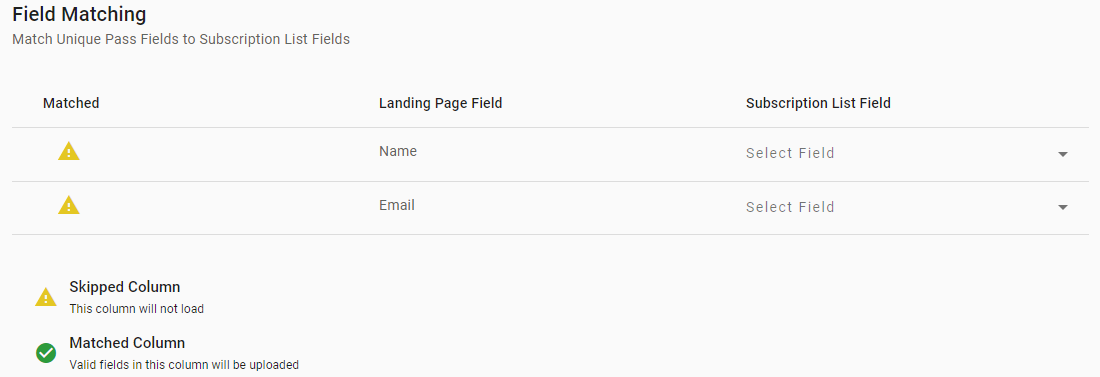
In this step, form fields are mapped to existing fields in the Subscriber List. That is, the Fields that have been created in the Form must be matched to the Subscription List Fields that currently exist in the platform. For this, a table with three columns is used to establish the match between the Form entries and the Subscription List Fields in the platform. Initially, there has been no match established, so the table will look as follows.

- The Matched column shows the condition between the Form entry and a Subscription List Field with a default value of Skipped, as shown by the icon meanings underneath the table.
- The Landing Page Field column shows the names used in the Form entries.
- The Subscription List Field column has dropdown menus that allow you to match the Form Field against the Subscriber List Field, with a default value of Select Field. To match fields between the Form and the Platform, click on the Subscription List field. The platform will display the existing fields.
Be aware that you are telling the platform that the fields are compatible. So, any data that is collected through that Form field will have to be of the expected type. The platform can enforce some verifications of the entered data on some field types, such as phone numbers and emails, but you can implement some constraints as well by the settings options in the character sets allowed, and the character length limits of the entries.
Furthermore, if the form field is not present in the platform and the information in it needs to be added to the platform list, you have the option of creating the new field at the moment the matching is being done through the +Create field option as the last option of the Select Field dropdown menu.
Once the Field Matching is completed, select Next.
Summary
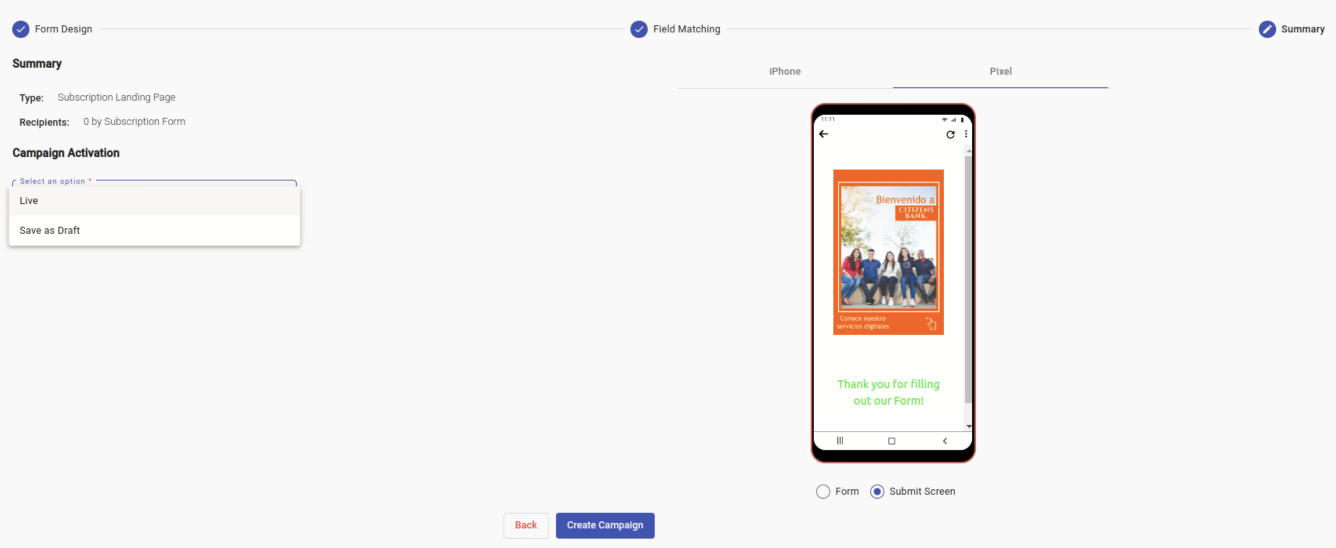
This is the third step of the Subscription Landing Page Campaign creator, where you can review the Campaign Details and set the desired activation as follows:
In the Campaign Activation section, Select an option will allow you to pick one of two actions for the campaign: to go Live (Launch the campaign immediately) or Save as Draft (Keep it for later editing).

For more information about the Summary step settings, go to Summary in the Campaign Elements section.
When you deliver the Campaign, you can view the data and analytics (Report) by going to the Interactive Campaign Reports section.
Updated 27 days ago
