WhatsApp Message Templates
Message Templates open marketing, utility, and authentication conversations with customers. Unlike free-form messages, message templates are the only message type you send to customers who have not messaged you in the last 24 hours.
Message Templates must be approved before they can be sent in a message. In addition, message templates may be disabled automatically based on customer feedback and engagement. Once disabled, a message template cannot be used until its quality rating improves or it no longer violates the business or commerce policies.
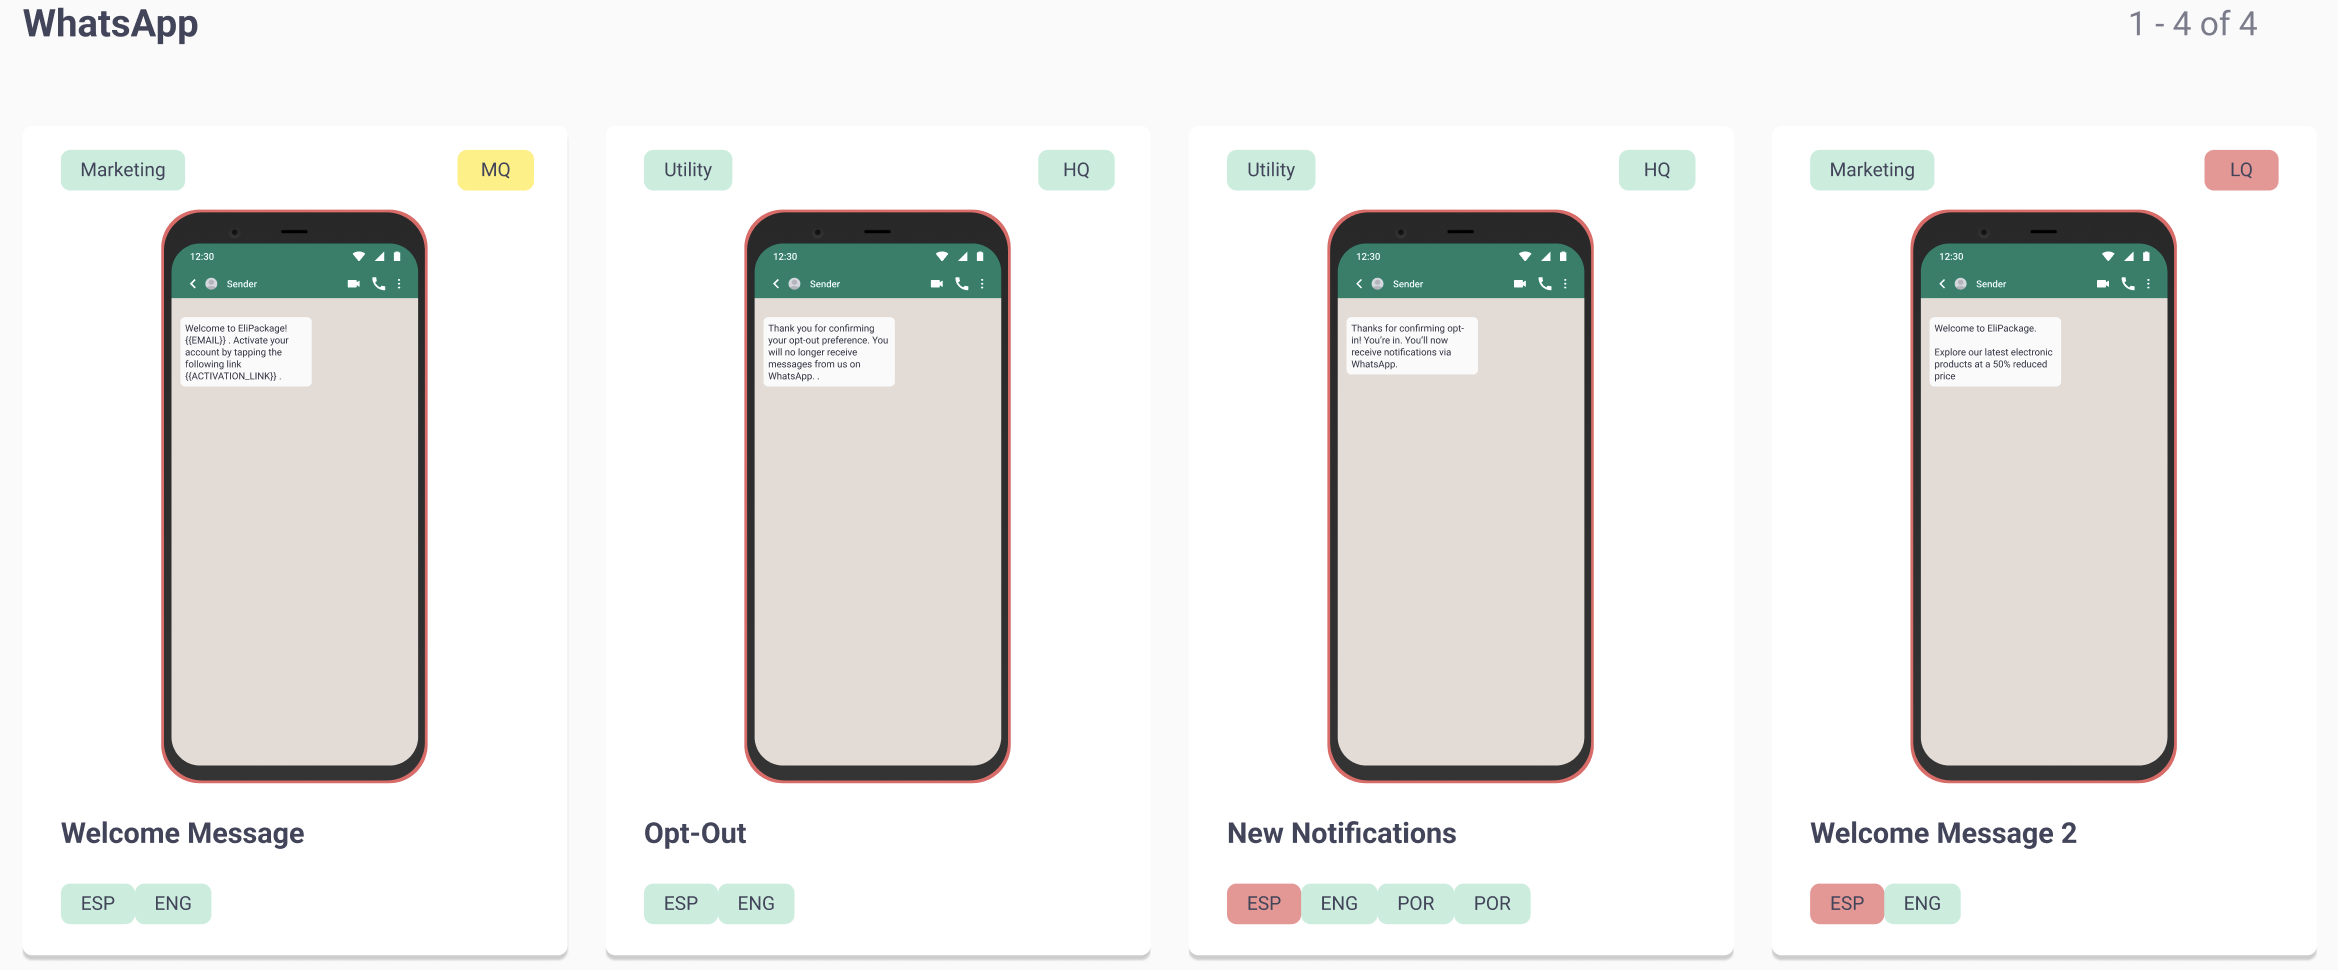
WhatsApp message templates come in three distinct types, each designed for a specific use case with different policies and delivery rules:
-
Marketing: Marketing message templates deliver promotional content, such as product announcements, special offers, newsletters, or personalized recommendations.
Common use cases include:
- Flash sales or discount notifications
- Product launches or back-in-stock alerts
- Event invitations or personalized promotions
-
Utility: Utility message templates deliver transactional or informational updates related to an ongoing interaction with the user. These message templates must be strictly non-promotional and provide expected or requested updates.
Common use cases include:
- Order confirmations or shipping updates
- Appointment reminders or payment alerts
- Account updates or ticket status notifications
-
Authentication: Authentication message templates verify a user's identity during login or account access processes. These message templates typically include a one-time passcode (OTP) and are subject to stricter formatting requirements defined by Meta.
Approval ProcessOnce you have created your message template you can submit it for approval. It can take up to 48 hours for an approval decision to be made by META.
If your message template is approved, it's status will be set to Active - Quality pending and you can begin sending it to customers. If it is rejected, you can edit it and resubmit for approval.
For WhatsApp, Meta has established guidelines that must be followed to ensure continuous operation of your WhatsApp account. Other platform channels have no such restrictions.
As these guidelines evolve, they expand capabilities into previously restricted areas. Stay updated on the WhatsApp Business Policy and WhatsApp Commerce Policy by selecting the link below.
Keep updated on the WhatsApp Business Policy and the WhatsApp Commerce Policy in detail by clicking here.
WhatsApp originally offered a single message template type for transactional customer service exchanges. This release includes all categories supported by WhatsApp.
As before, some basic but important rules must be followed.
User consent management: Opt-in must be explicit through a defined process that clearly states the purpose of upcoming communications. Opting out must be equally clear. The process must be as transparent as possible for users.
You obtain an opt-in for each category of messages you send (e.g., order updates, relevant offers, product recommendations).
WhatsApp requires all customer exchanges to fulfill three basic elements:
- Expected: Customers who have opted in expect your messages.
- Relevant: Messages are personalized to the recipient, concise, and include clear next steps.
- Timely: Messages arrive when they are relevant.
All message templates are vetted for compliance with Meta's policies and undergo an approval process. Any changes will require the same approval process before it can be used.
Before you begin
Complete the following prerequisites before creating WhatsApp message templates:
WhatsApp Message Template StatusOnce the WhatsApp has been created, META will assign a quality status to the WhatsApp message template, to know more about these status we recommend you go to the WhatsApp Message Template Quality Status section.
Creating a WhatsApp Message Template
You create a WhatsApp message template using the following steps:
-
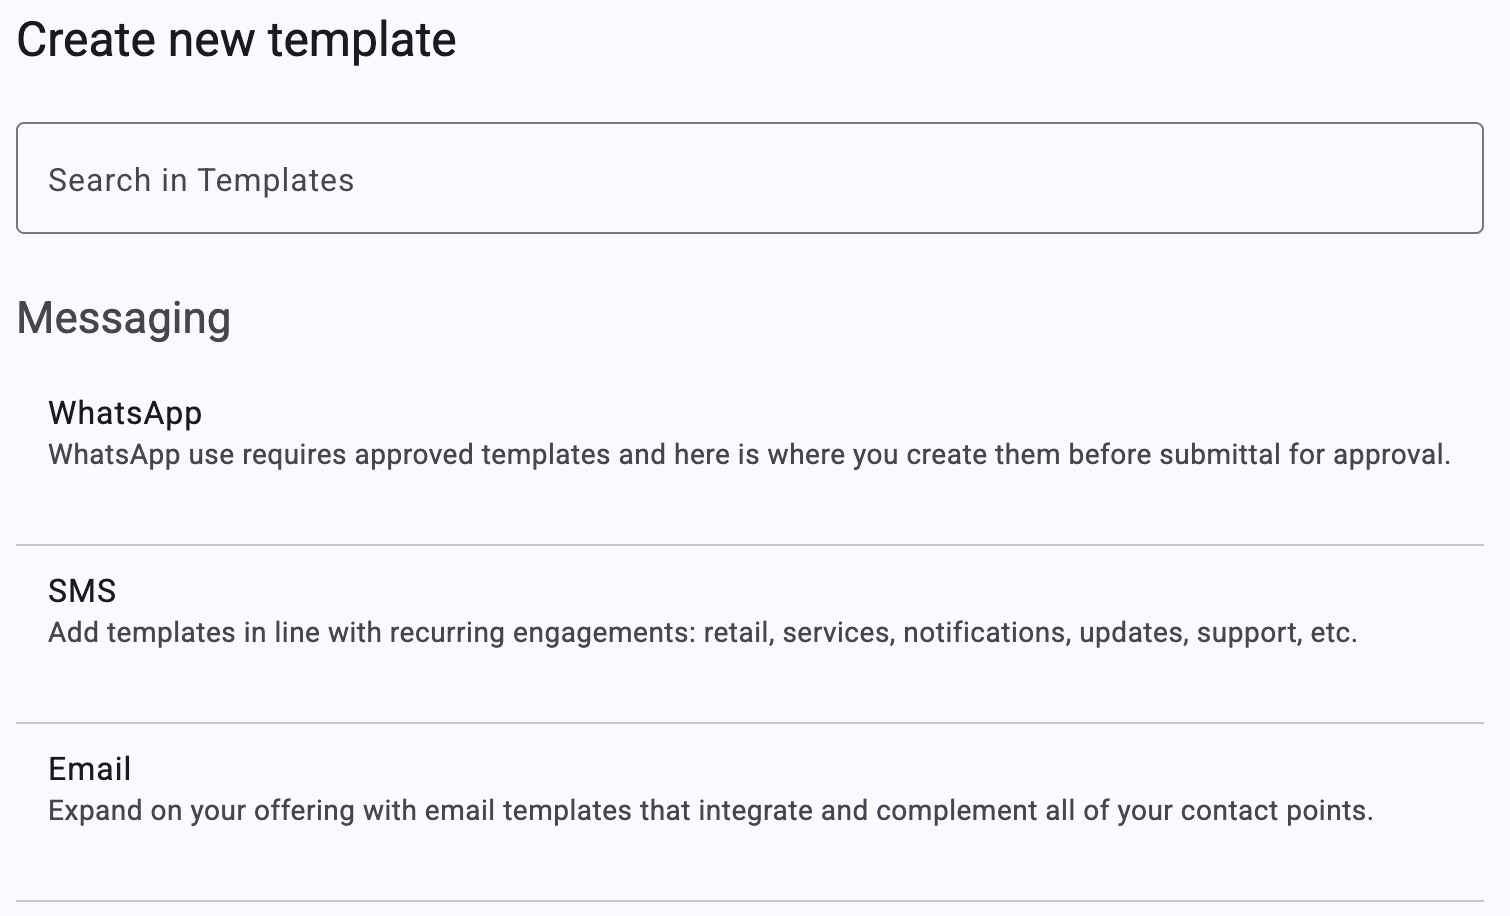
Select +New Template, located at the top of the Message Templates section.
-
In the pop-up window that follows, select the WhatsApp option.
-
The platform will display another pop-up with a list of existing message templates and their status (Approved, Rejected, Pending). You start from a blank message template.
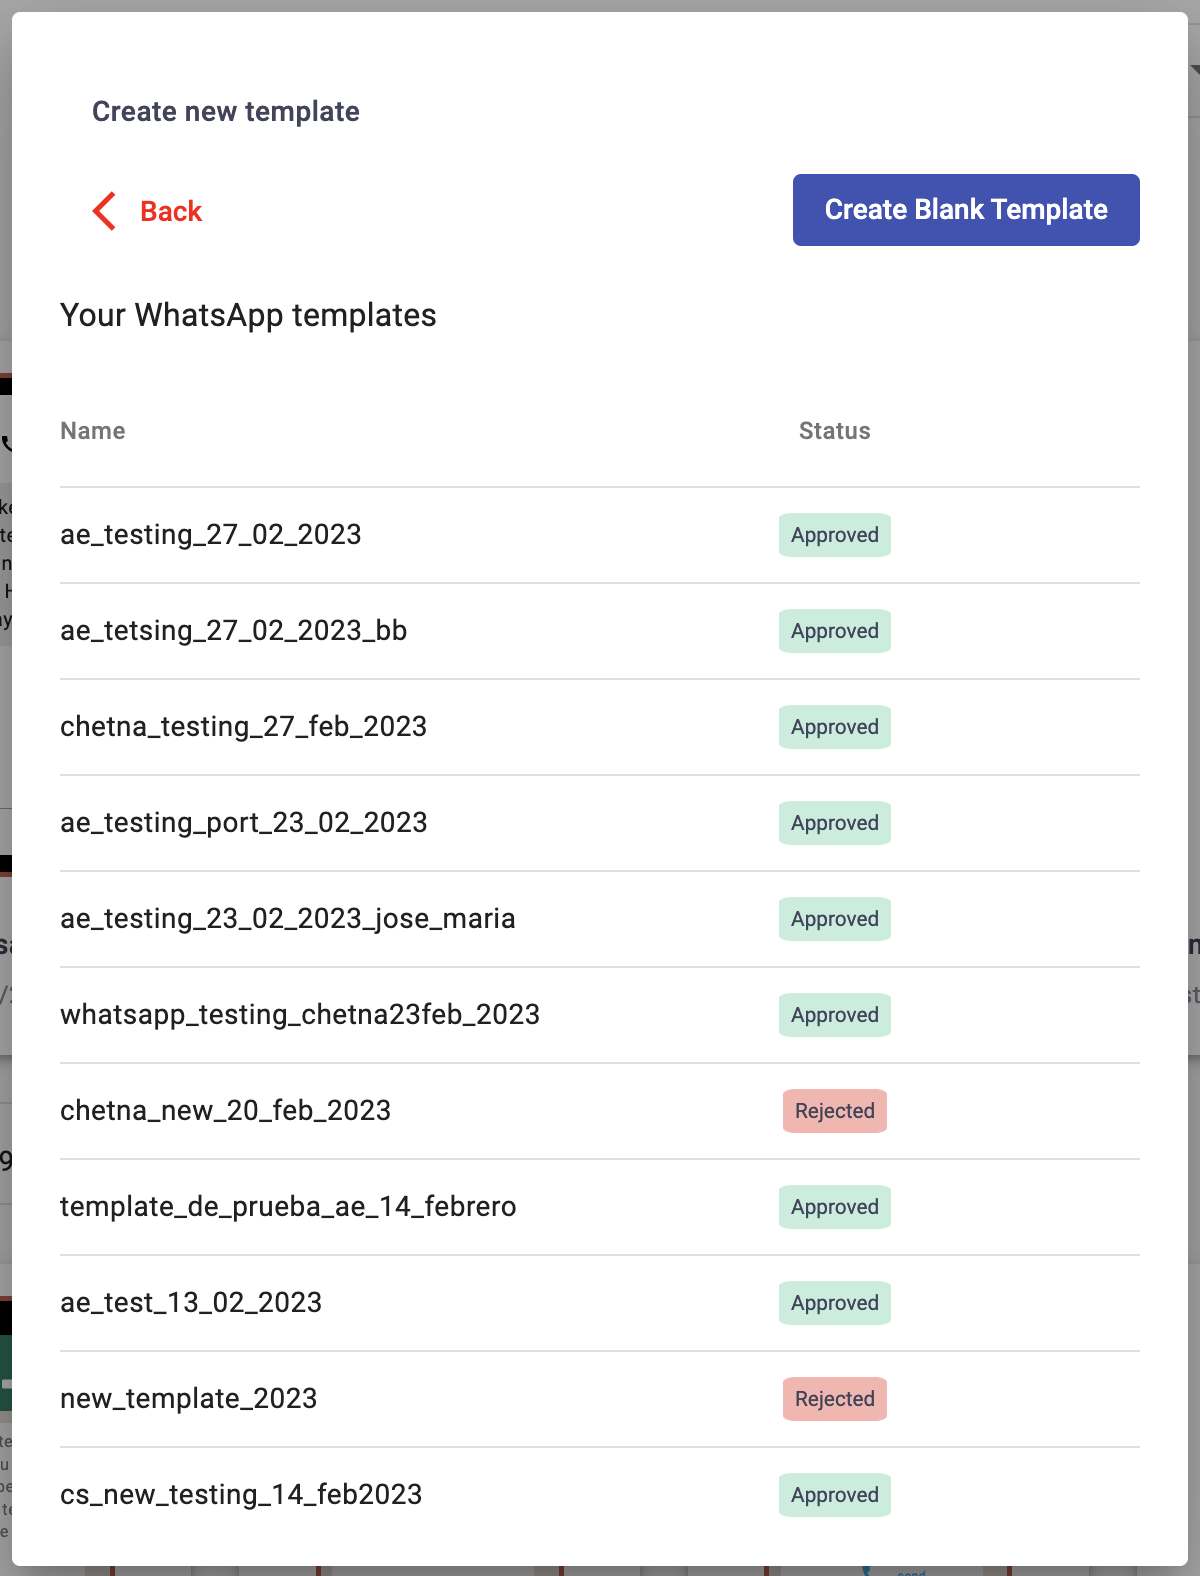
If you select Create Blank Template, you define every aspect of the template. In either case, the platform takes you to the Create a new WhatsApp template section to configure all template parameters.
The message template creation section consists of two steps:
- Metadata — You set the category (Authentication, Marketing, or Utility), message template name, and languages in this section.
- Personalize — You customize the template by adding a header, body text, footer, and optional buttons. You input message content per language, add variables for dynamic text, and preview the message on iPhone and Android.

Updated 18 days ago