Trivia
Trivia is a game format where participants answer questions on various topics to win prizes. It’s a fun, interactive way to engage customers, boost brand awareness, and drive traffic—ideal for marketing campaigns, live events, or promotions.
Our Trivia game is fun and easy to play. It helps you generate brand interaction and increase traffic. Messaging Quizzes are perfect solutions for digital marketing, live events, or engaging customers.
For example, participants join by sending a keyword (e.g., MOVIE) to a shortcode and receive trivia questions. In Code Prompt mode, a different trivia question can be returned each time the participant plays the game.

The creation of a Trivia campaign follows these five steps:

- Delivery
- Trivia
- Logic
- Message
- Summary
Delivery
You define the Delivery Channel and the campaign Recipients in the Delivery step.
Currently, three delivery channels are available for the Trivia campaign:
For more information on selecting the desired delivery channel, go to the Delivery section.
For information on selecting the desired Recipients, go to Define Recipients in the Campaign Elements section.
Trivia
This step is where the trivia content is created. Set the trivia content with questions to test your readers on how much they know about any topic(s) your content is about.

Auxiliary Messages
From the Auxiliary Messages section, configure the desired messages that will be sent to the participants when they start interacting with the trivia.
Two types of messages guide participants through the Trivia experience: Welcome Message, Feedback Messages, and Auxiliary Message.
Welcome Message
Set the welcome message for the trivia. This message will be displayed before starting the trivia.
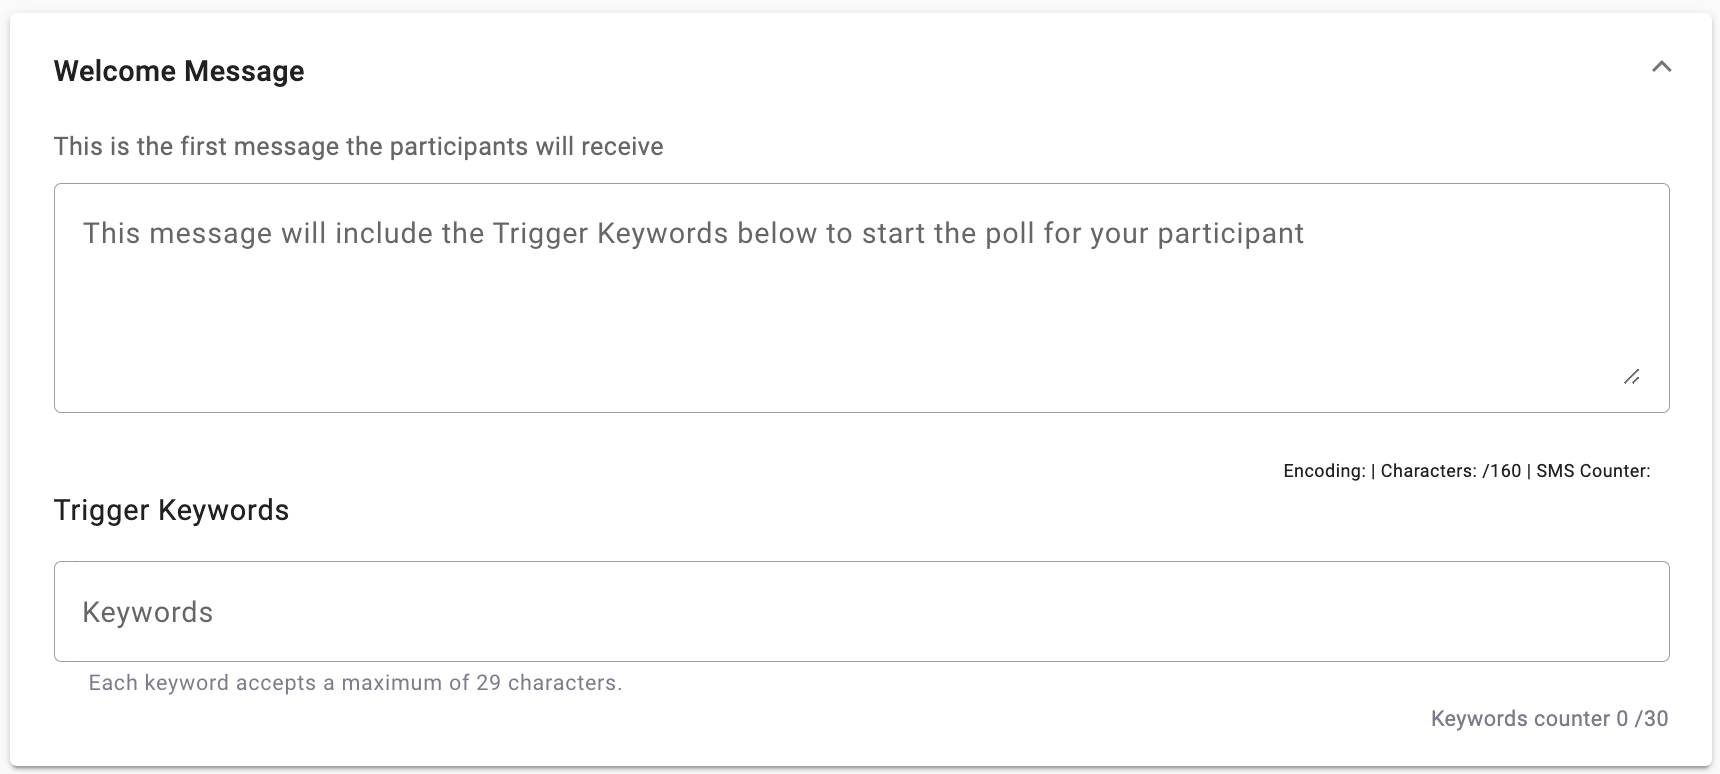
When the participant sends the predefined keyword, the platform will respond with the Welcome Message contents which should, ideally, give instructions on how to play the trivia. This is the first message a participant will receive before actually entering the trivia.
From the Trigger Keywords section, define your keywords for your campaign. That is, set the keywords to trigger Campaign Participation.
For example, when the participant sends the PlayTrivia keyword (Trigger Keyword) to the shortcode 8080, the first question will be displayed.

ON THE WELCOME MESSAGEThe Welcome Message does not apply for Trivia campaigns when Keywords are used as the entry point to the campaign.
Feedback Messages
Set the response messages when the participant answers a trivia question correctly or incorrectly.

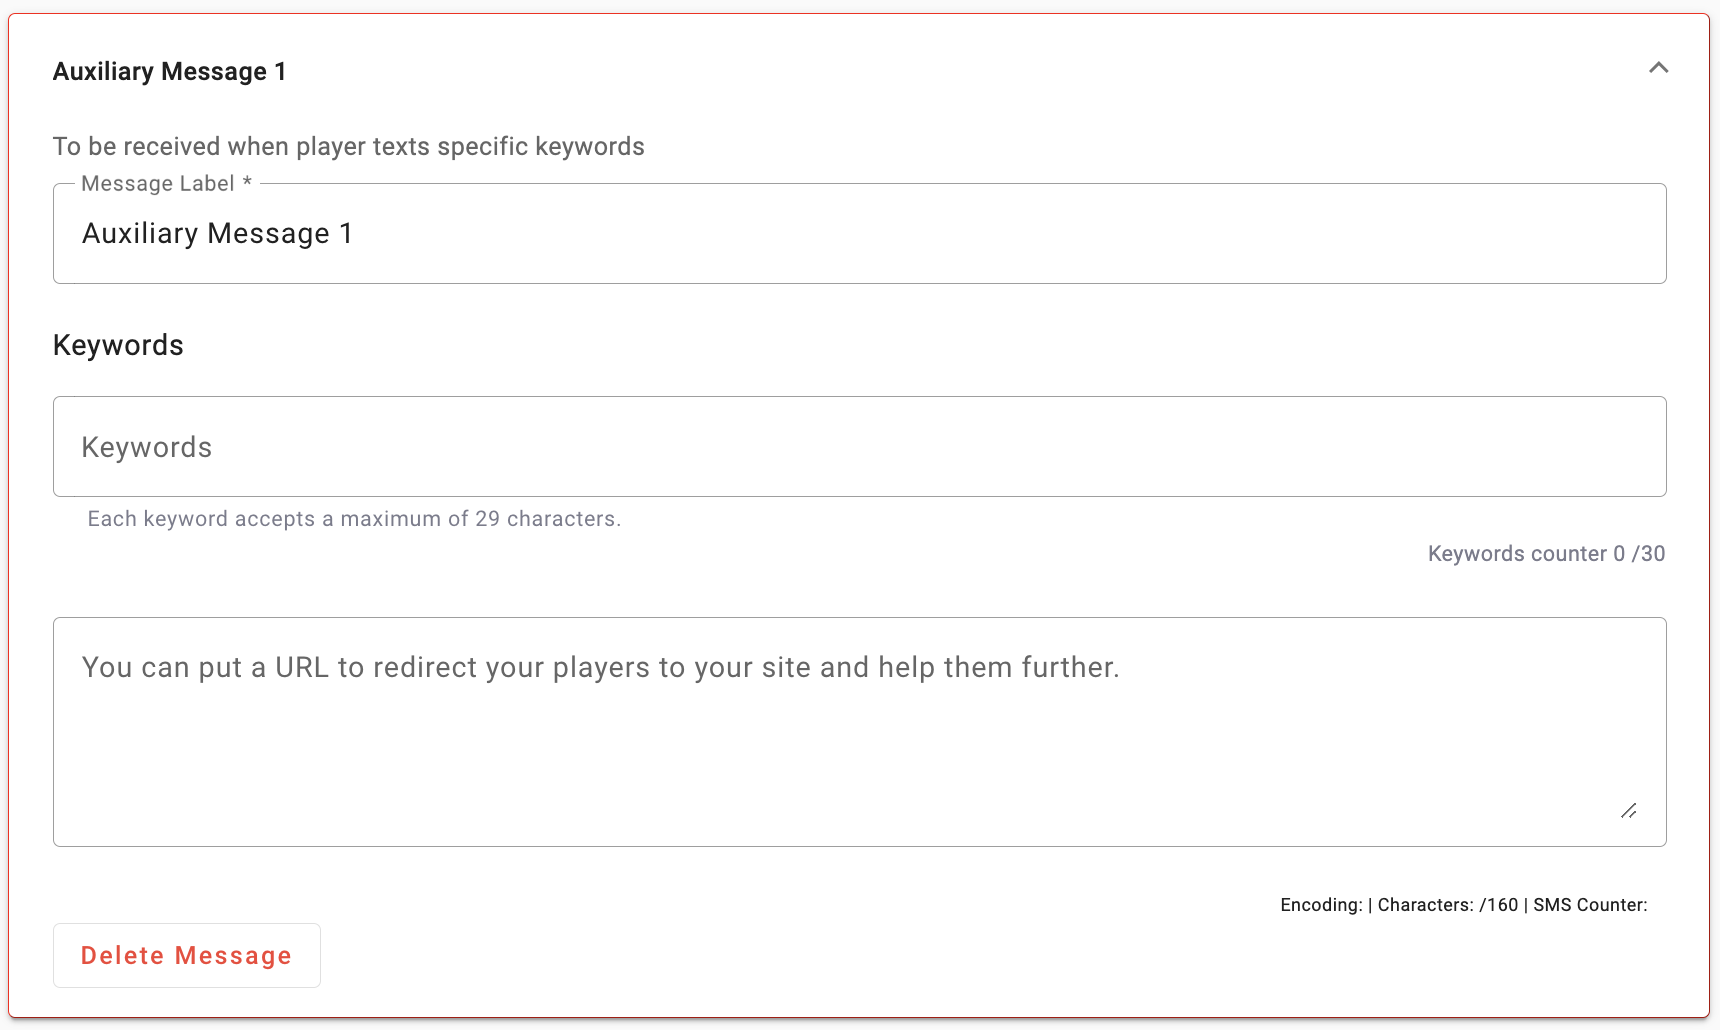
Auxiliary Message:
Optional messages triggered by specific keywords.
If you wish to set an auxiliary message when the participant texts specific keywords, select Add Message located under the Feedback Messages. You can also enter a URL to redirect your participants to your site and provide additional help.
Trivia Content
Configure the core of your trivia campaign—the actual questions and answers that participants will interact with.

-
Number of Trivia Questions: Set how many questions will be shown to the participants during the game.
NOTEThe number of Trivia Questions can be greater than Pool Questions. That is, from the Number of Trivia Questions field set the number of Trivia questions you desire to display once the participant begins the trivia although you have created more trivia questions.
-
Randomize questions for Players: Activate the “Randomize questions for players” toggle to present questions in a random order for the participants. If disabled, questions will appear in the order they were created.
-
Question Pool: Create single-select questions, meaning participants select one correct option from multiple choices.

The steps to add a single question with their respective answers are the following :
-
Type a new question that will be added to the Trivia.
-
Choose the prefix format for answers:
-
Numbers (e.g., 1, 2, 3). For example, each question has three answer options and each option has an associated number prefix. Therefore, if the participant selects option number 2, he must enter the number "2".

-
Letters (e.g., A, B, C). For example, each question has three answer options and each option has an associated letter prefix. Therefore, if the participant selects option letter C, he must enter the letter "C".

-
-
Type the answer(s) to the question.
-
Click on the correct answer by clicking on the Correct check mark located next to the answer.
-
If you desire to add a new answer, select the Add Answer button.
-
Select the Add Question button to add a new question.
-
-
Bulk Question Upload (CSV) (optional): If you want to upload all the questions at once using a .CSV file, refer to the Bulk Question Upload (CSV) section for instructions on how to properly format the file.
-
Click Next to continue to the next step.
Bulk Question Upload (CSV)
You can upload multiple questions at once using a .CSV file by clicking on the Upload.CSV checkmark located next to the Question Pool.

Before uploading the .CSV file, you should take under consideration these instructions to add multiple questions to the file:
- Use the first column to add the desired multiple questions.
- The second column must indicate the correct answer to the question you added earlier in the first column.

The column B corresponds to the position of the correct keyword.
For example, the number 1 located in column B, tells us that Rome is the correct answer because it is in position 1. That is, column C contains three possible answer options:
1; Rom
2; Mad
3;Mia
Each option contains one or more keywords the user can enter to answer the question. Each option is separated by a single vertical bar character "|", which allows us to know the position of the correct answer.
Option “1; Rom” is in position 1.
Option “2;Mad” is in position 2.
Option “3;Mia” is in position 3.
Therefore, the option “1;Rom” is the correct answer and is located in the position 1. For this reason, the number 1 corresponding to the position of the correct option is written in column B.
In the previous example, Column "C" corresponds to the options or keywords the participant can enter to answer the question. For example, the question has three answer options. Each option is separated by a single vertical character "|".
In each answer option, set one or more keywords that the user must enter to answer the question. Each keyword is separated by a single semicolon character ";".
The columns D, E, and F are intended for the options that will be displayed to the participant.

Once you have finished defining the multiple questions with their respective answers, save the .CSV file as a new one.
NOTE
Dont add a header or title to your .CSV columns
Don't forget to mark the correct answer for each question.
Be sure to save the file in .CSV format.
The steps to upload the .CSV file which contains the multiple questions once selected the Upload.CSV checkmark are the following :
-
Drag & Drop the .CSV file to the specified area on the screen or click the Browse Files button to select the file from the computer.
-
Once you have uploaded the CSV file, the Field Preview screen will be displayed to match the uploaded file’s Columns to the Question and Answer List Fields. That is, when a CSV file has been uploaded to Add Questions with their respective answers, the Columns that exist in the uploaded file are matched with the Question and Answers Fields in the platform.

In this section, the Mobile Trivia Composer allows you to view the Questions and Answers you added to the Trivia.
In the following example, we mark out each question and answer added to the Trivia.

Logic
The Logic step defines how participants can win a prize based on their trivia performance. This step is essential to ensure fair and consistent prize distribution.
The Trivia prize awarding scheme is configured, involving setting up the three sections of Prize Configuration:
- The percentage of correct answers to win a prize,
- The Prize Logic, and
- The Prizes.

Here, you set the minimum percentage of correct answers a participant must achieve to be eligible for a prize. Example: If the threshold is set to 60%, and a participant answers 3 out of 5 questions correctly, they qualify for a prize.

Ensure that the percentage entered is in line with the expected number of correct answers.
The next step is to configure the Trivia Logic to distribute the Prizes to Participants. You can find a detailed description of how to configure the prize logic and campaign prizes in the Prize Configuration section under Prize Logic and Prizes respectively.
Message
In this step, the messages that will be delivered to the participants who answered the trivia correctly or incorrectly are configured.

For more information about the message's Content and personalized fields configuration, go to the Message Content and Message Personalization section.
Once all the message details have been addressed, move on to the Summary by clicking on Next.
Summary
This will review and display the configured Campaign Details and set the desired activation time.

You can view the following elements of the campaign configuration:
- Blocks Used: in this case, given the campaign, it shows SMS Trivia
- Number of Recipients: the recipients targeted in the campaign based on the selection at the initial definition
- Applied Filter: Any filter or segment that was applied to the campaign
The three areas that require configuration in the Summary step are:
- Campaign Expiration,
- Campaign Activation
For more information about the Summary step settings, go to Summary in the Campaign Elements section.
To view the report elements of a Web Polls & Surveys campaign, go to the Interactive Campaign Reports section of this User Guide.
Updated 2 months ago