SMS
After selecting New Broadcast/Automation, entering the Broadcast/Automation Name, and selecting SMS, you are brought to the SMS broadcast creation. The steps to create an SMS broadcast are the following:

Each completed step will be marked with a checkmark.
Please refer to the SMS Status section for a detailed explanation of message status. The first section outlines the sequence of status values for outbound messages, while the second section details the nine potential final statuses once a message is sent.
Detail
In the Detail step,
- In Sender Number, select the number from the offered options that you will be using in your broadcast.
- Select Next.

Recipients
In the Recipients step,
- Select the Contacts List dropdown menu.
- Select one of the options offered.
- Select Next.

For more information on selecting the desired Recipients, go to Define Recipients in the Messaging Elements section.
Message
In the Message step, you will compose the content of the message to be delivered.
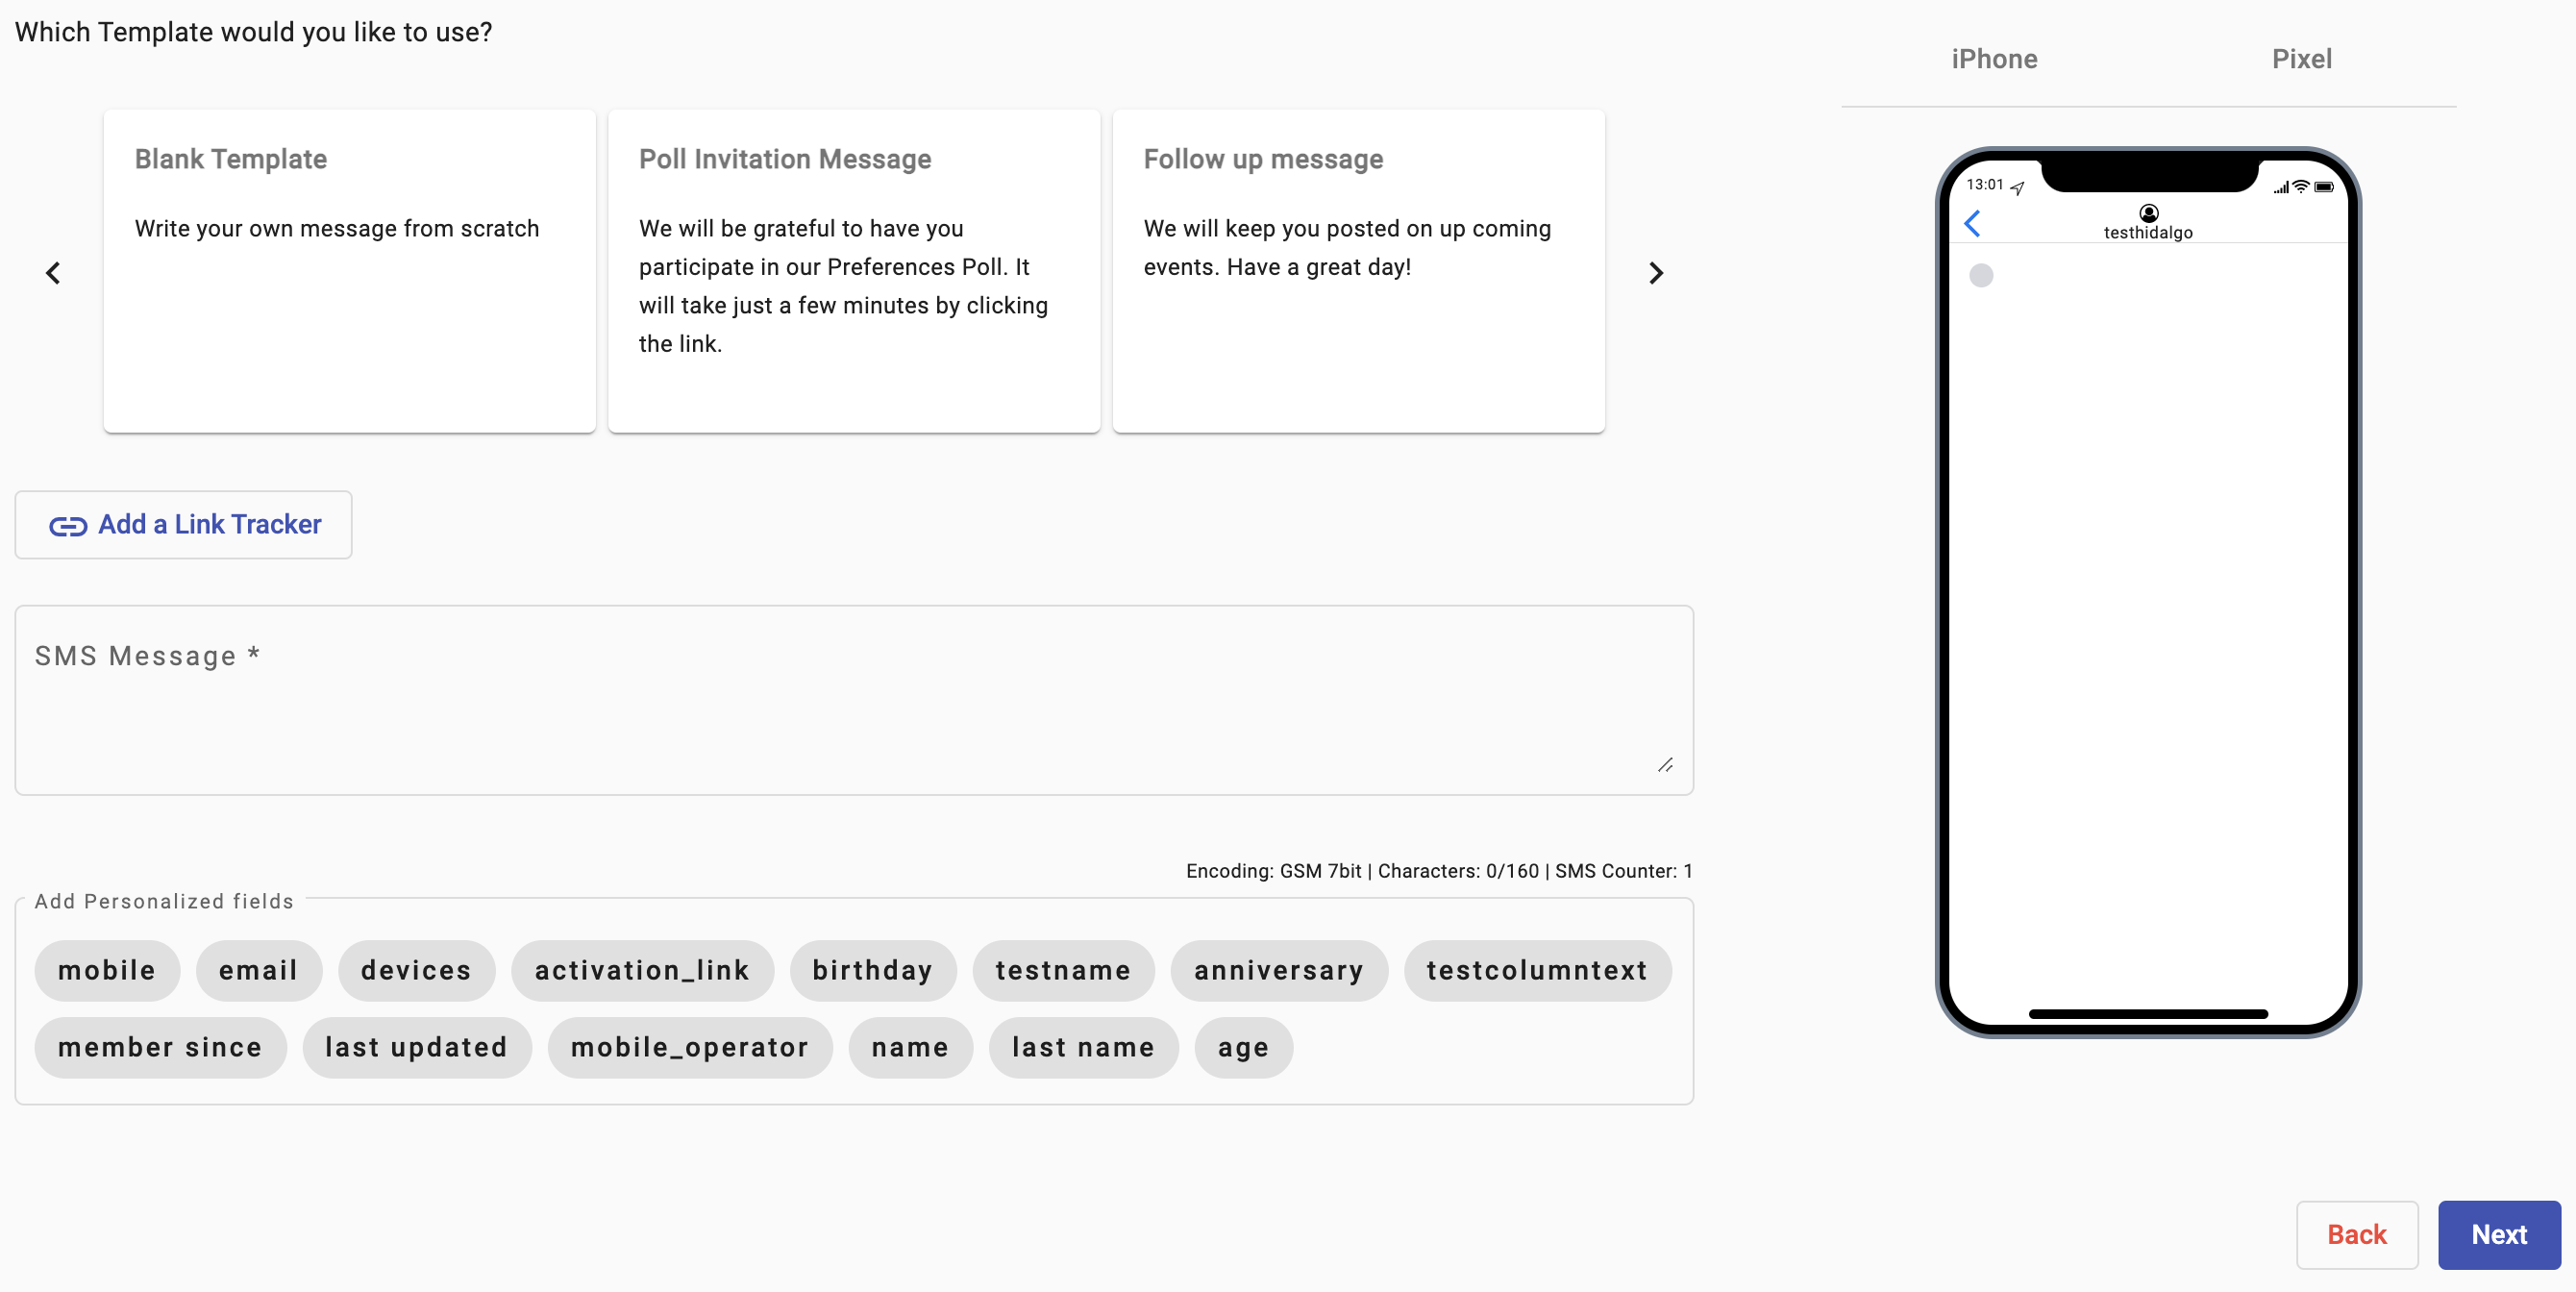
The steps to add and personalize the message content are the following:
- Select Message Template: Select one of the previously created message templates at the panel's top or create a message on the fly.
- Add a Link Tracker. Allows adding a URL that recipients can tap to take a redirect. For more information on adding a link tracker to the SMS message body, go to the Link Tracker section.
- Message body: Type the message directly into the SMS Message box.
NOTE
In the lower section of the SMS Message box, it shows the message GSM 7 bit encoding format, a character counter, and number of messages to be sent to each recipient using the message that was entered., including the text of the personalized field. So you must be vigilant that the current max length to enter the message content is 160 characters. If the message content contains a total of 170 characters, the message will be segment and the broadcast will deliver 2 messages to each Recipient. That is, every time the total number of characters is exceeded, the SMS counter will be incremented.
For details about character encoding and how special characters affect SMS segmentation, see the Encoding & Optimization for Multilingual SMS section.
- Add Personalized Fields (Placeholders). Messages can be personalized using placeholders in the message content. For more information on how to add personalized fields to the SMS message body, go to the Message Personalization section.
Once all the message details have been addressed, move on to the Summary by clicking Next.
Summary
In ‘Summary,’ the final step of the SMS campaign creator is where you can
- Review Messaging Details
- Select/unselect configured link tracking settings
- Set the delivery timetable
- Set the message delivery throughput
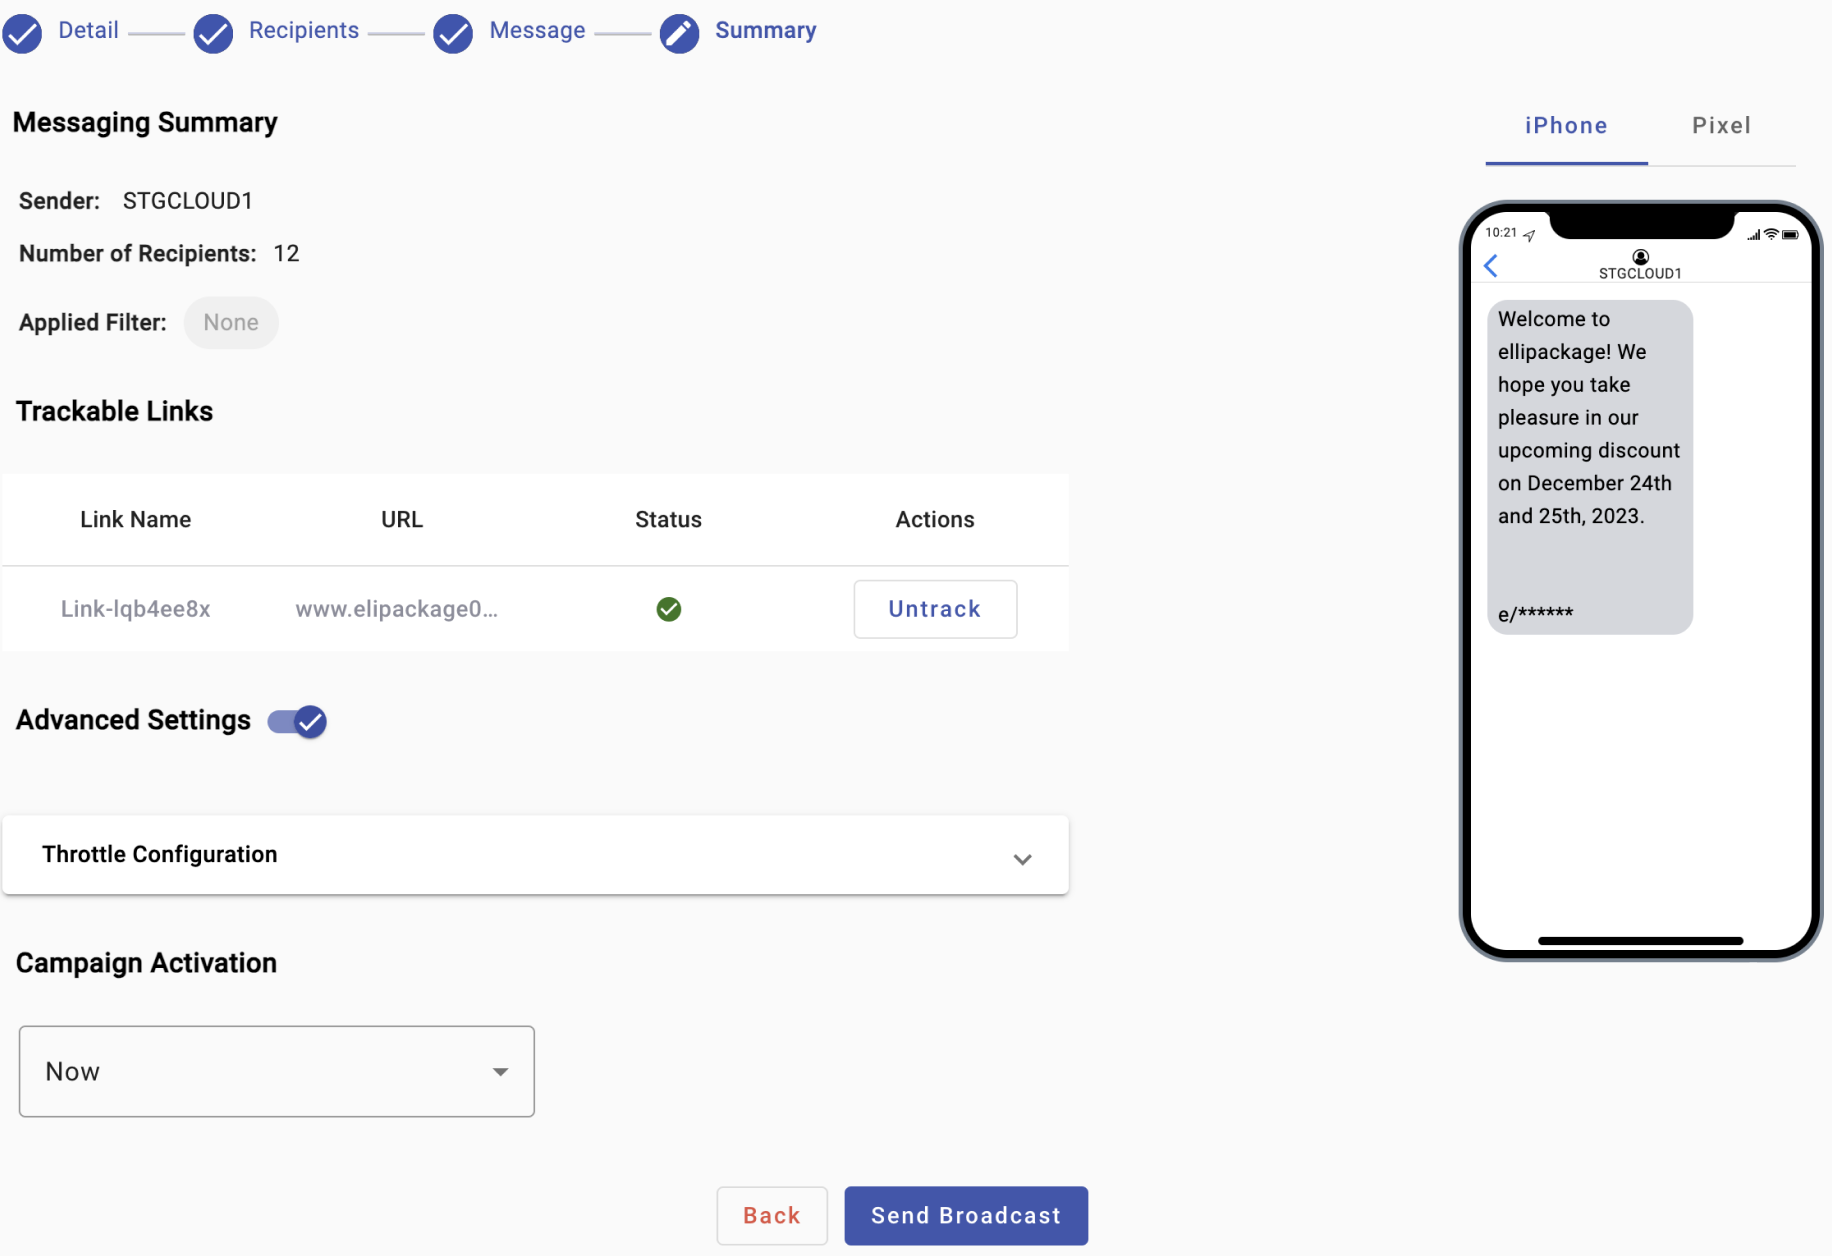
The Messaging Overview offers a quick way to double-check the Sender Number, the number of recipients, whether filters are applied, and the message contents in the emulated device screen.
For more information about the Summary step settings, go to Summary in the Messaging Elements section.
SMS Broadcast by file
SMS Broadcast by file is a particular case of sending bulk SMS messages by using an uploaded file, in CSV format, that satisfies the following criteria:
- It has to include the mobile phone numbers of the recipients
- The file columns must have headings
- One of the columns has to include the message contents, which optionally can have personalized fields that:
- Have been previously programmed into the platform
- Coincide with the file column headings, and
- Are enclosed in square brackets within the body of the message like so [[personalized field]].
A sample file could be as follows:

As seen from the image above, the file conforms to the criteria mentioned previously. It has a set of headers under which the "mobile" header contains the mobile phone numbers in the appropriate format, and it has a "message" header, which specifies the message to be delivered to the recipients.
For the configuration under the message column header in the file above, the message that will be delivered for the first record of the file will look something as shown below.
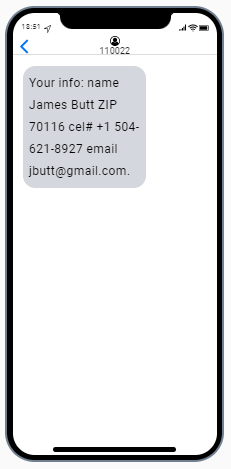
Similarly, all the other record entries in the file will follow suit and replicate the message format shown with the information corresponding to each recipient.
Having set the groundwork to set up the file, the procedure for creating the broadcast is straightforward as it is similar to the scheme used for a regular broadcast.
Steps to create an SMS broadcast by File
Delivery & Recipients

As before, go through the sequence of steps for sending SMS Notifications, covering Detail and Recipients, since they are common to all SMS broadcasts we have described:
-
Select the New Broadcast Create option from the Navigation sidebar,
-
Enter the name of the broadcast and select SMS from the options offered.
-
Once in the broadcast creator section, select the Sender Number from the dropdown menu and click Next.
-
At the Recipients step, from the Contacts List dropdown menu, select Upload a CSV List
-
Confirm the consent pop-up window if the conditions are satisfied.
-
Upload the .CSV file created following the criteria described earlier.
-
After the Uploading File pop-up shows the process has been completed, close the window.
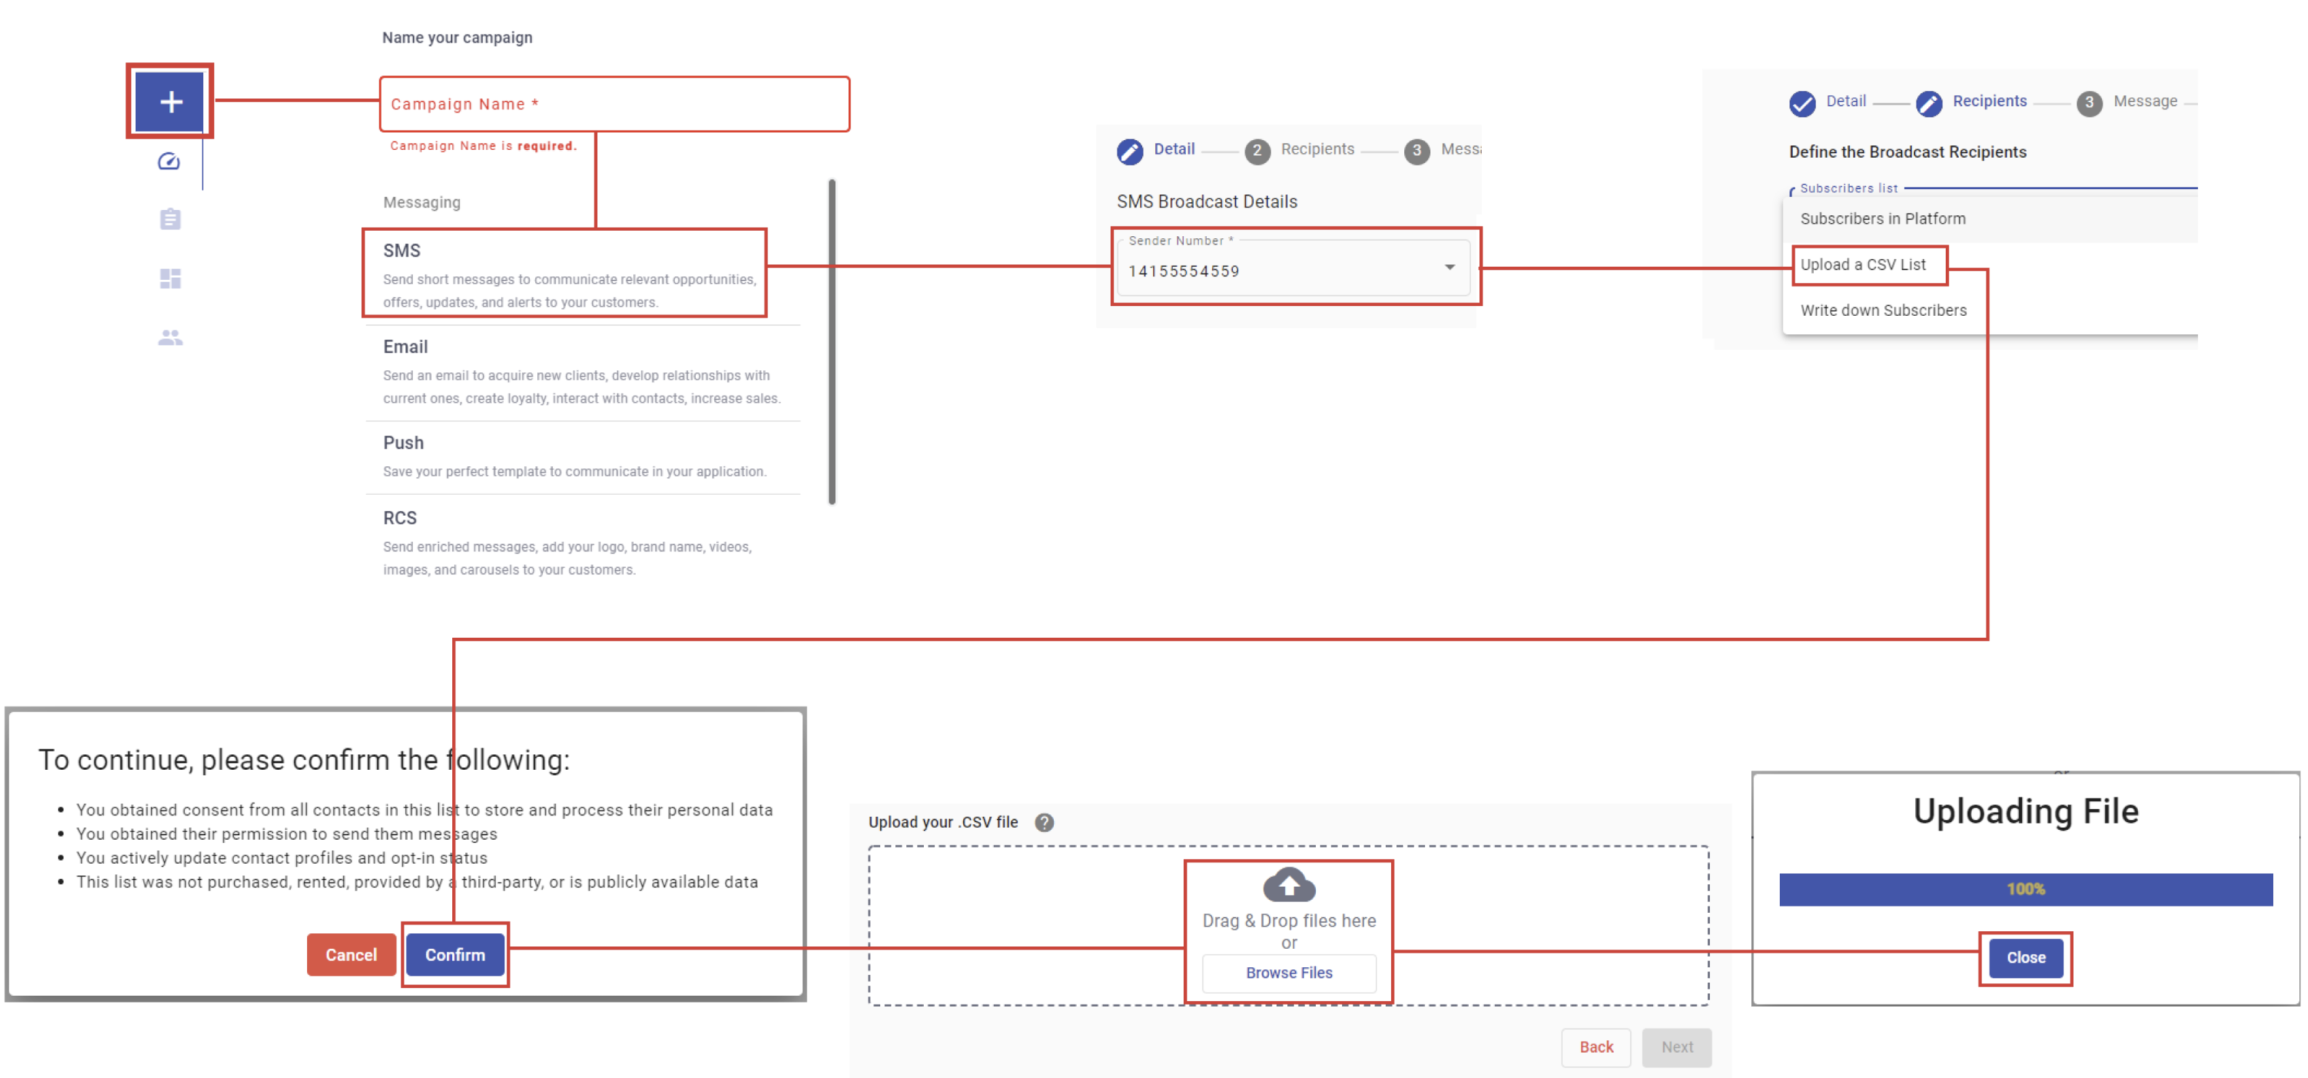
Up to this point, all the steps for creating the SMS broadcast have been identical to those of any Broadcast of the Upload a CSV List variety, with an outcome like the one displayed in the screenshot below.

Under the file drop box area, as before, is the dropdown menu to select the column in the file where the mobile numbers are located, and beneath it is Check if your CSV file contains a Message Column.
For the SMS Broadcast by File option, the last check box must be checked.
After checking the box, there will be two dropdown menus instead of one. Each dropdown will display the column headings available in the file to pick the relevant field necessary for the validation process. See the example below:

Once the selection is made, the validation of the file information, based on the selected entries for mobile and message, will begin by clicking on the Load Contacts button.

The result of the file validation process will yield:
- Contacts that contain valid mobile numbers
- Contacts that have the mobile number field empty
- Contacts that have invalid numbers
This information is displayed in the three contact validation boxes shown below, along with a Message Preview with the contents of the message column from the uploaded file:

At this point, we have covered the first two steps of the procedure: Detail and Recipient.

To proceed with the configuration, select Next.

Message
The Message step procedure is skipped when the message has already been defined in an SMS Broadcast by File scenario.
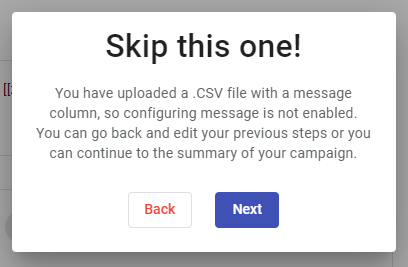
In its place, this dialog box pops up, highlighting this fact, offering to continue forward or to go back, in case it is required.

Summary
The Summary step in the SMS broadcast by file is, as in the other cases, where you can:
- Review broadcast Details
- Set the delivery timetable
- Set the message delivery throughput
Broadcast parameters are shown in the Messaging Overview.
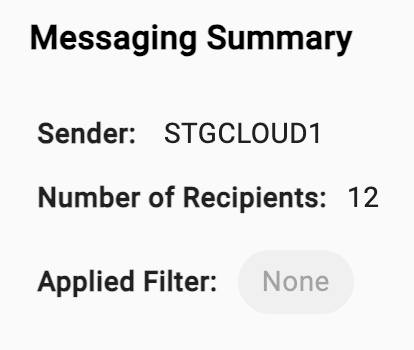
The delivery timetable is defined in the Broadcast Activation section, where you can set the delivery time from the three options in the dropdown menu:

As before, the resulting outcome of the activation options are:
- For "Now", the broadcast begins delivery immediately.
- For "Schedule", the delivery timetable is set through a date/time picker, and the broadcast will be saved with a state of Scheduled.
- For "Save as Draft", there is no delivery timetable defined, and the broadcast will be saved as Pending.
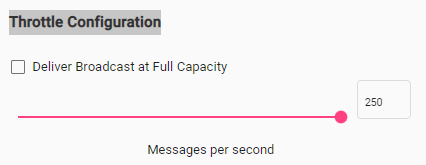
The message throughput is set under Throttle Configuration with a default value of 'Full Capacity', which translates to 250 messages per second. To reduce the sending rate, uncheck the Deliver Broadcast at Full Capacity box and set the value either by thumbing on the slider at the bottom or by entering it in the box at the far right.
Edit SMS Broadcast
To be able to edit the SMS broadcast, the message must not have been sent yet. That is, once the user has completed each step, and the broadcast activation has been saved as "Draft" or "Schedule", you will be able to edit each step configuration of the broadcast.
The steps to edit an SMS broadcast are the following:
- Click on the Analytics & Reporting icon and select the Messaging tab. Then, locate the broadcast saved as Pending (Draft) or Schedule status and click on the Analytics & Reporting button.
- From the broadcast card, click on the Edit button. Once clicked, it will redirect you to the last step of the broadcast configuration.
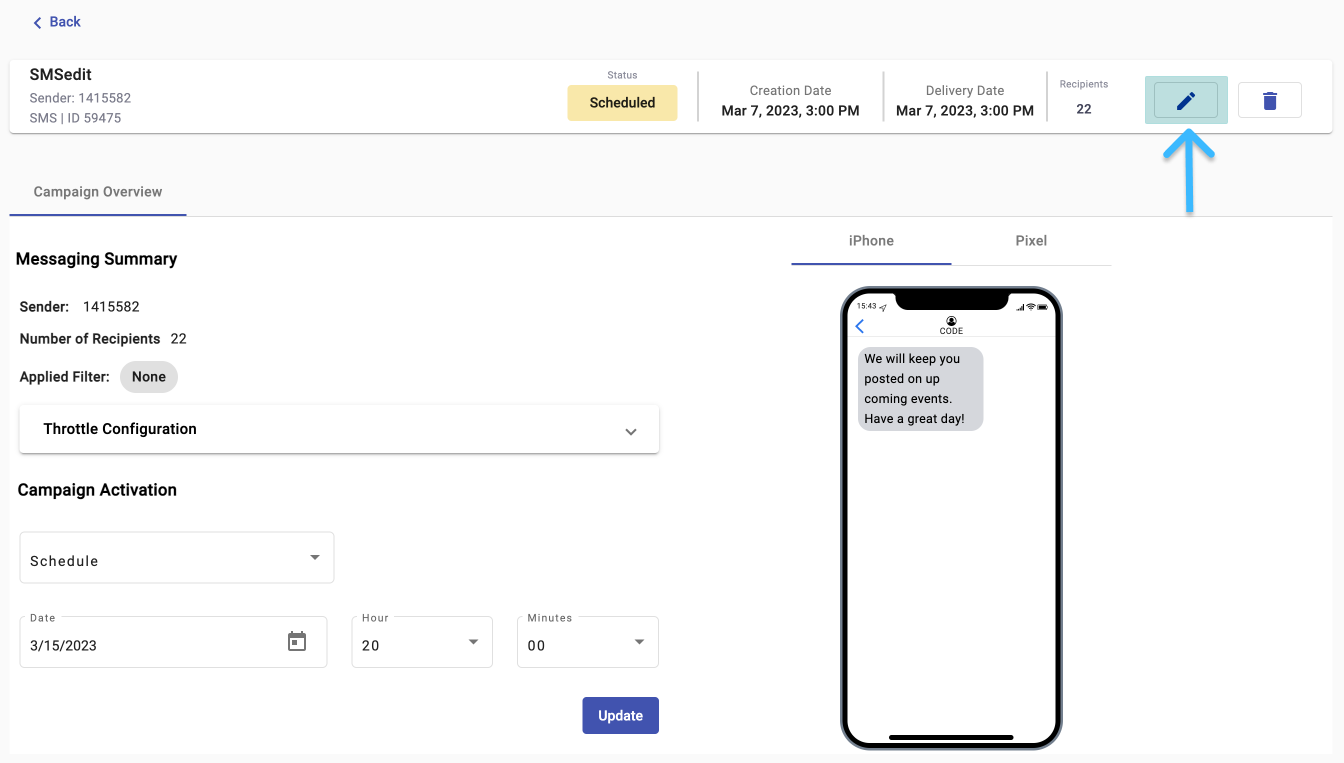
You can edit the:
- Sender number.
- Recipients who will receive the SMS broadcast.
- Message with/without link tracker.
- Throttle configuration.
- Broadcast activation.
Once finished with the edition, select the Broadcast Activation button located in the Summary section.
Updated 6 days ago
