Bright Pattern
Bright Pattern Integration
Bright Pattern is the first integration shown in the Integrations main pane. It is an omnichannel contact center solution supporting Voice, IVR, Email, Chat, SMS, MMS, and Messengers.
It provides customers and agents consistent, personalized communication across all channels. A mobile app extends contact center capabilities to every agent.
Integration between Bright Pattern & Chatbot Service
A Bright Pattern account is required before the integration becomes operational. You integrate it into the platform using the following steps:
- Select the Bright Pattern card from the pane.
- Select Next.
The platform takes you to a window showing the Bright Pattern integration details. Two configuration steps follow: Bright Pattern Information for the account, and Connections for the platform communication channels.
Bright Pattern Information
You need both of the following:
- The Tenant URL, and
- The Scenario Identifier
The Tenant URL and Scenario Identifier will be of the form shown in the figure.

You enter them in their designated entry boxes.
NOTEOnce you've set up your Bright Pattern account and the required settings, Bright Pattern should provide you with the Tenant URL and Scenario Identifier; otherwise, please contact Bright Pattern support to request both credentials to integrate with us.
Connections
You select the platform channels for interactions in the Connections step. A pull-down menu shows the available platform channels for the Bright Pattern integration. The screenshot below shows an example.
NOTEIf you want to engage (integrate) Bright Pattern with a Chatbot Service automation, do not add any connections to the Bright Pattern.
The channels to be used in the Bright Pattern integration cannot be shared with the platform Keyword or Chatbot type automations as it would create an operational conflict.
Two types of channel connections are available:
-
SMS texting
-
WhatsApp
Additional channel connections may be added in future releases.

NOTEConnections may reference senders that are also used in other platform features, such as auto-replies or keyword automations.
Connection conflicts are evaluated during activation, not during configuration. This means that connections can be added successfully even if they later fail to activate.
To configure the connecting channels,
- Select the desired connection from the Available Connections dropdown menu. The left side of the connection shows the channel type. The right side shows the connection code.

- Select the Add + button to add the connection.
You repeat this step for every channel that is part of the integration. The platform includes the selected channels in the table immediately below the menu.

After you define both Bright Pattern Information and Connections, you select Save.
If you are integrating Bright Pattern with a Chatbot Service automation, you enter the required fields without adding any connection and select Save.
The following steps cover enabling the Bright Pattern integration with and without connections:
Bright Pattern Integration with Connections
The saved integration appears under the Integrations tab as a card. The card shows the Tenant URL, Scenario ID, connection types, and delete or activate options.

You activate the integration by selecting Start ▶. The integration card updates to show its active state with connection icons in blue.

Hovering the pointer over the connection icons in the card shows the number/code associated with that connection.
Once the integration is active, the Stop under Actions will return it to the inactive state.
WARNINGWhen activating a Bright Pattern integration with connections, the platform attempts to activate:
- The integration itself
- Each configured connection independently
The platform no longer blocks activation before attempting it. Instead, activation outcomes depend on the result of each connection.
The following scenarios may occur.
No connections activated: If none of the configured connections can be activated:
- The integration remains inactive
- An error message is displayed
- No connections are enabled
Partial connection activation: If at least one connection is successfully activated and others fail:
- The integration becomes active
- A message is displayed indicating that not all connections were activated
- Connections that encountered errors remain inactive
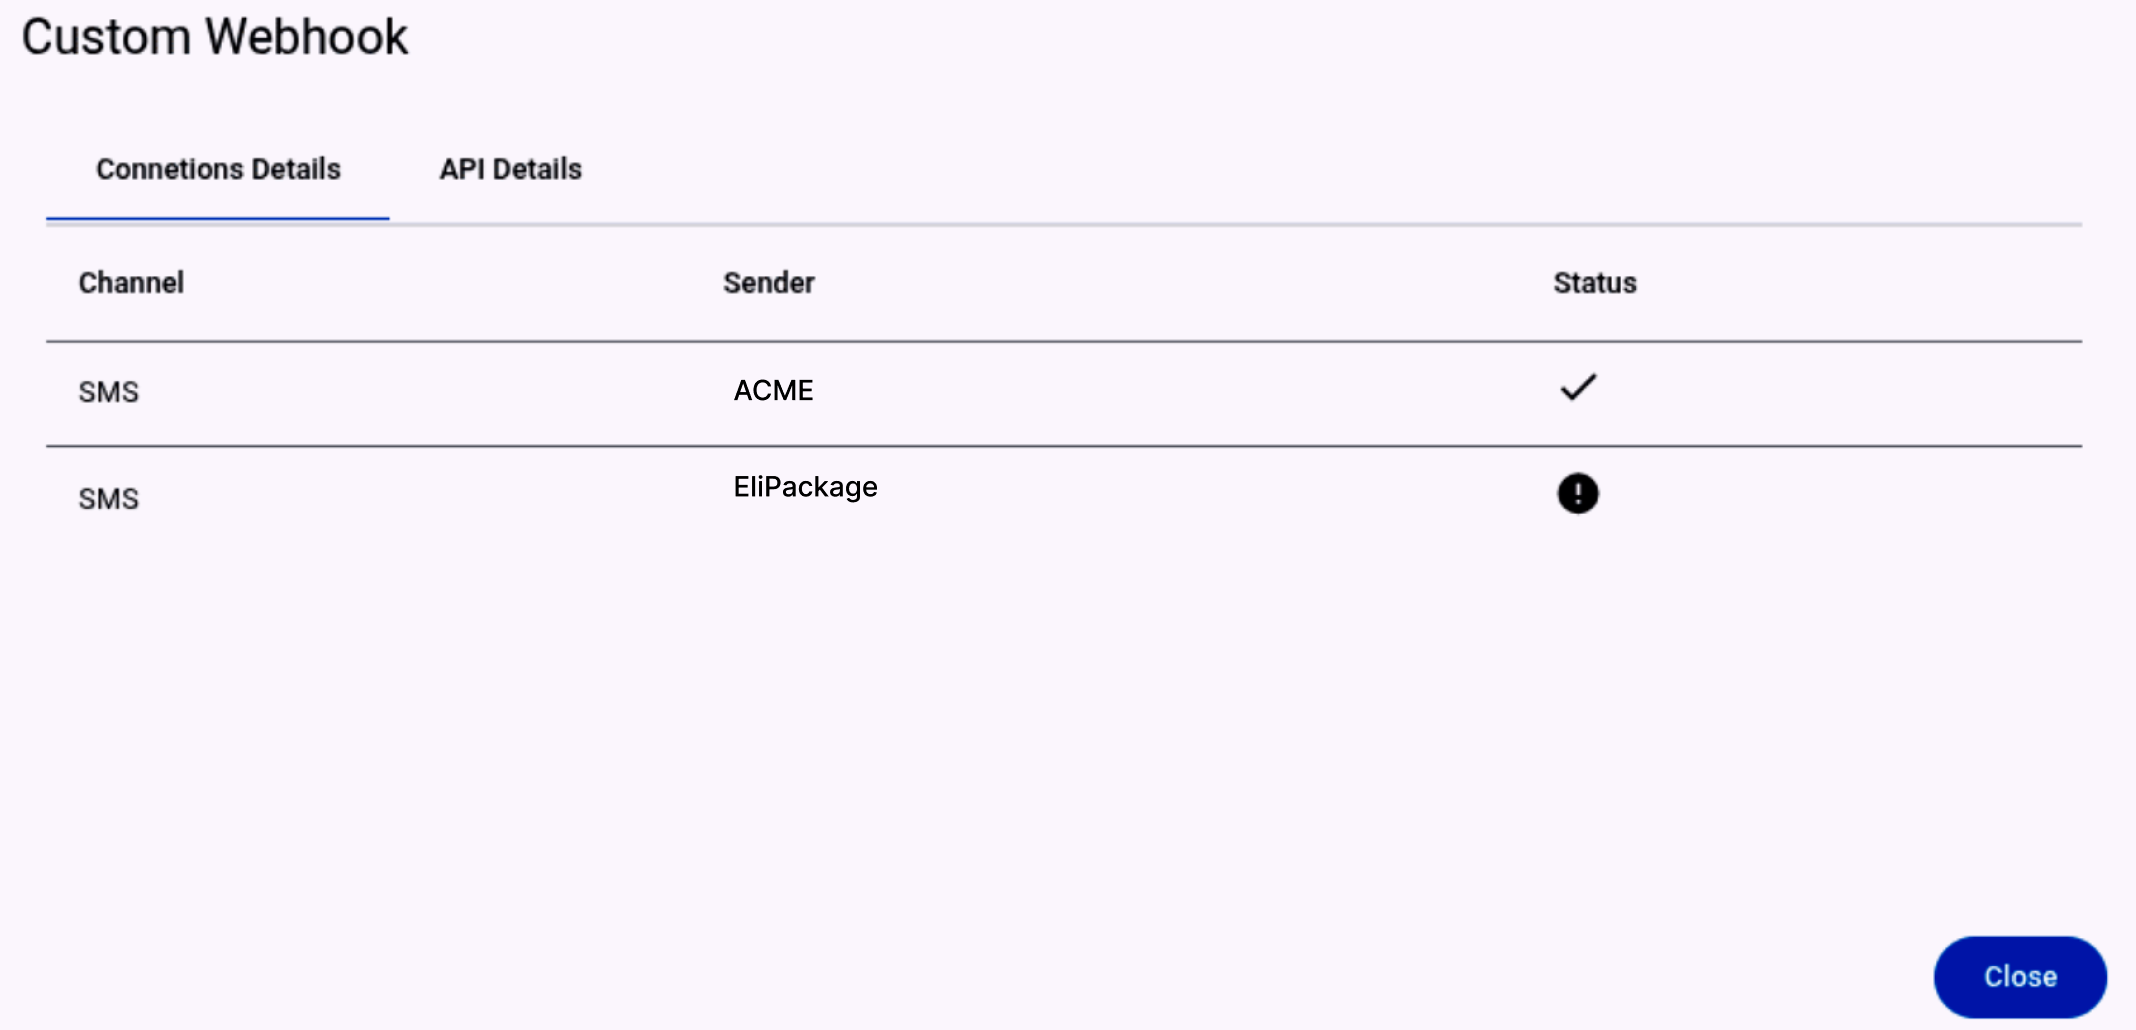
Therefore, when an integration is activated with partial connection errors, a snackbar notification is displayed. This message includes a link that opens the Connections Details dialog.
The Connections Details dialog shows:
- Each configured connection.
- Its activation status, which means what connections are active or inactive.
This dialog is the same one accessible through the Details icon on the integration card.
A common reason for connection failure is when a sender already has an active auto-reply or is being used elsewhere in the platform.
Bright Pattern Integration with Chatbot Service
After you add the Bright Pattern integration without connections, you enable the integration between Bright Pattern and the Chatbot Service automation.
The saved integration appears under the Integrations tab as a card. The card shows the Alias, Tenant URL, Scenario ID, and delete or activate options.
You activate the integration by selecting Start ▶. The integration card updates to show its active state.

After the Bright Pattern integration is enabled, you integrate the Chatbot automation with Bright Pattern. The Chatbot section covers configuring a chatbot automation that uses the Bright Pattern integration.
NOTEThe Bright Pattern integration must be Active to be associated with a Chatbot Service automation.
After you create the Chatbot service and enable it in Live status, the integration card updates to show the Campaigns icons.

After you select the Campaigns icon, you see which automations the Bright Pattern integration is linked to. A dialog appears with the following information:
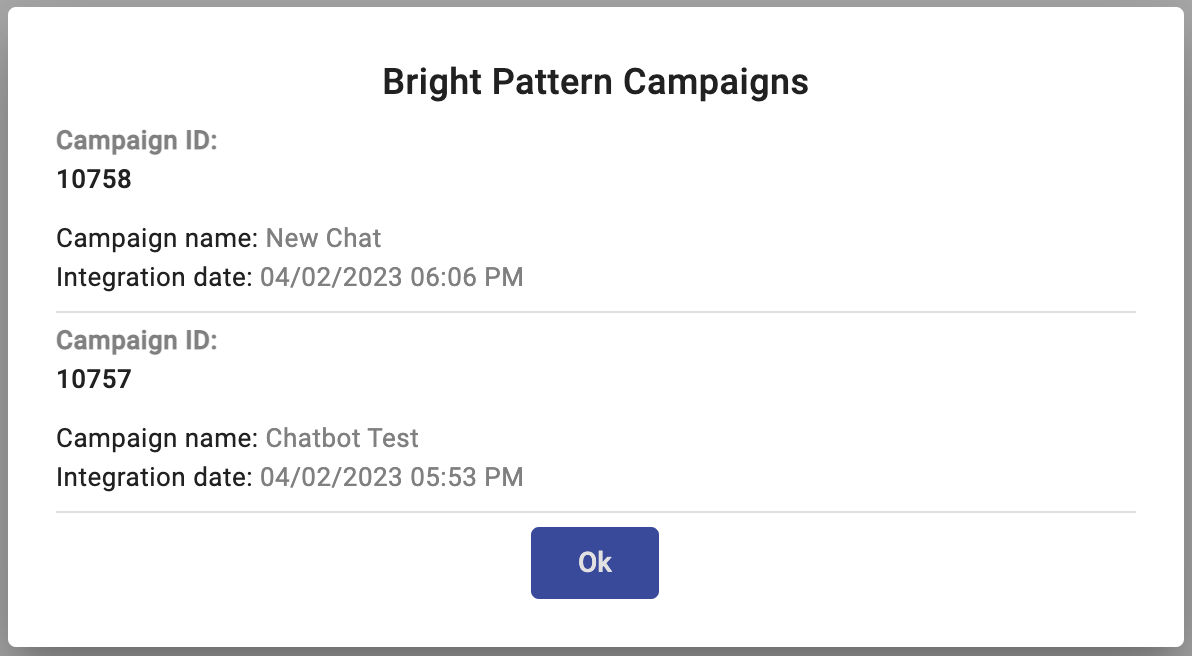
The top of the dialog shows the integration type and Alias.
- Campaign Id: Unique identifier of the automation.
- Campaign Name: Name of the automation.
- Integration Date: Date when creating the automation linked to the integration and enabling it in Live status.
Considerations
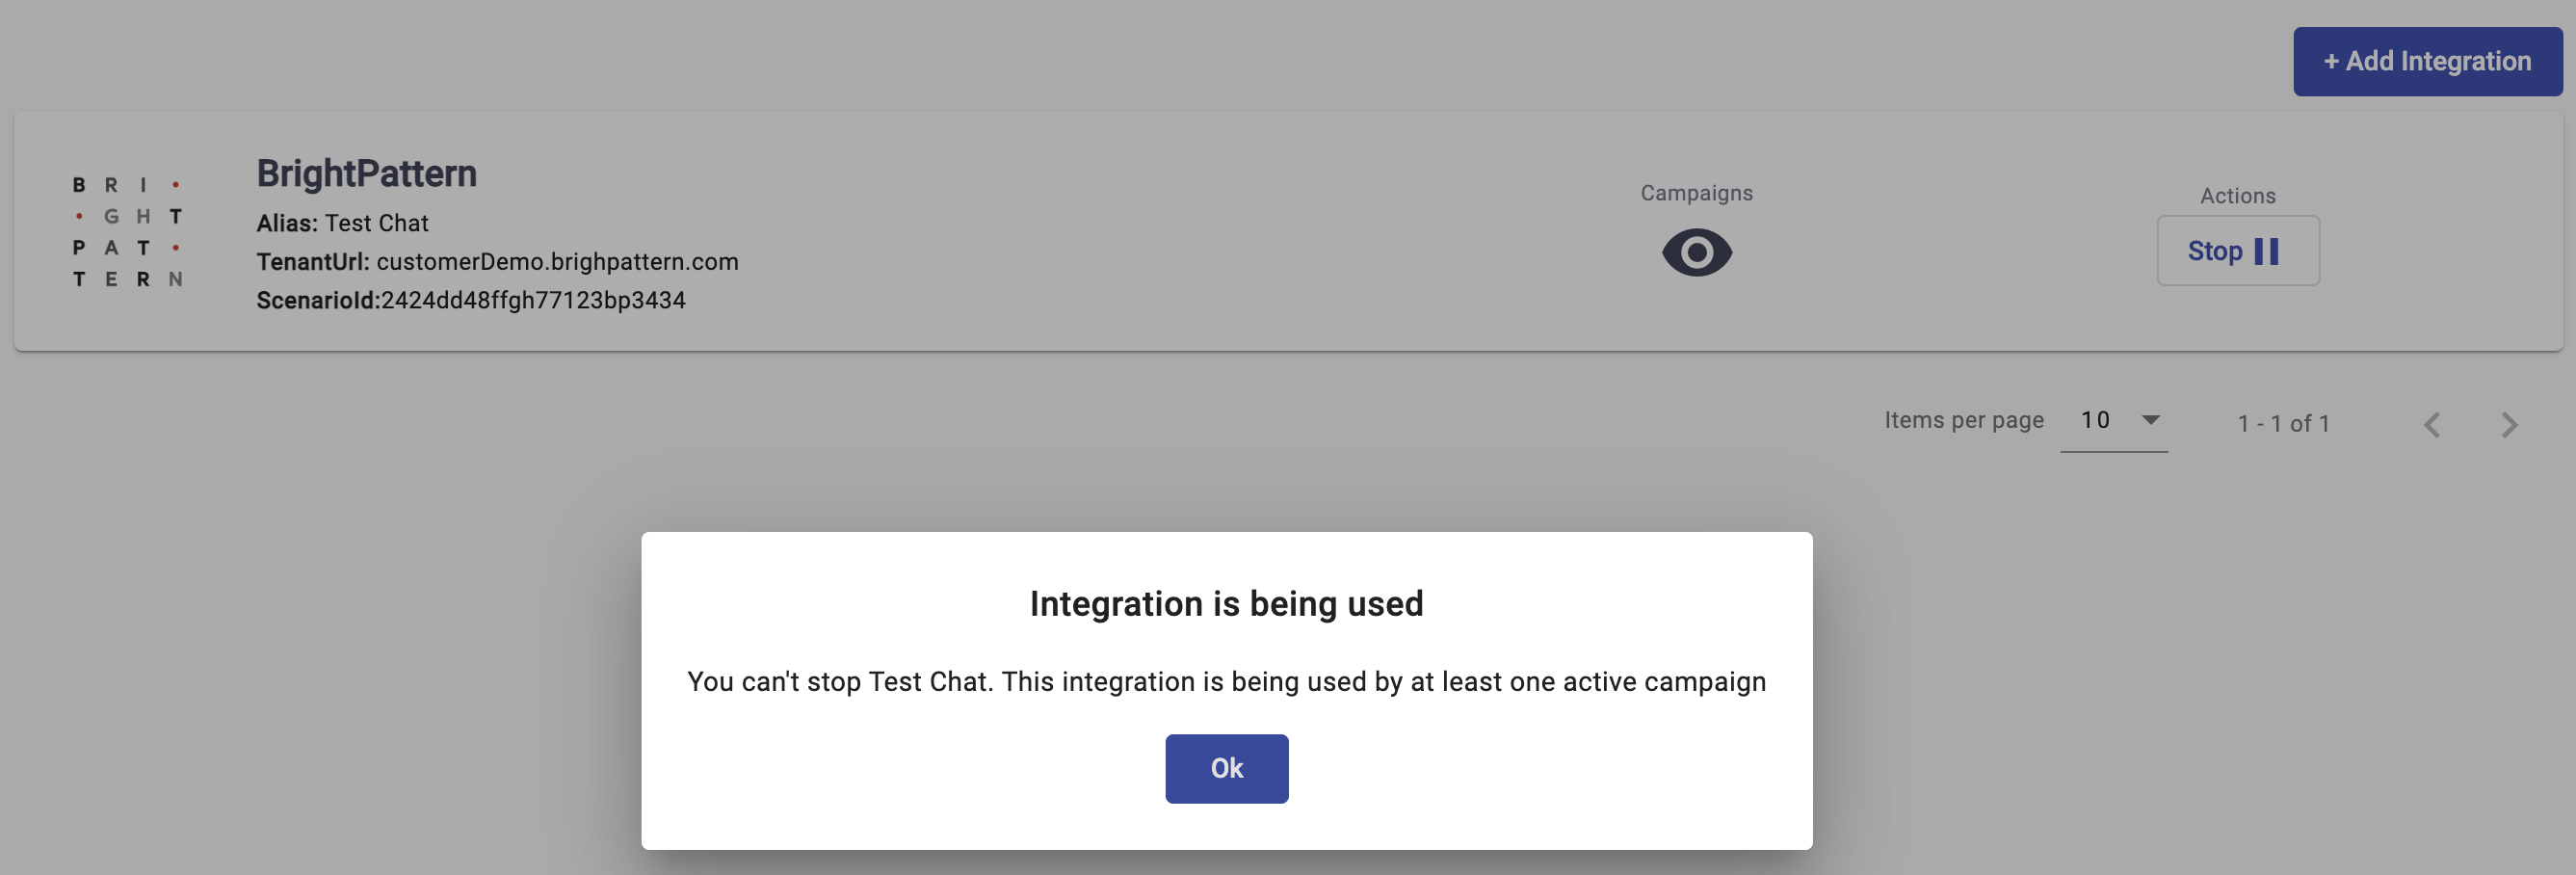
If the Bright Pattern integration is linked to any automations, you will not be able to pause (stop) the integration. If you try to pause it, a dialog appears indicating the action is not permitted.
You remove the Bright Pattern integration associated with automations using the following steps:
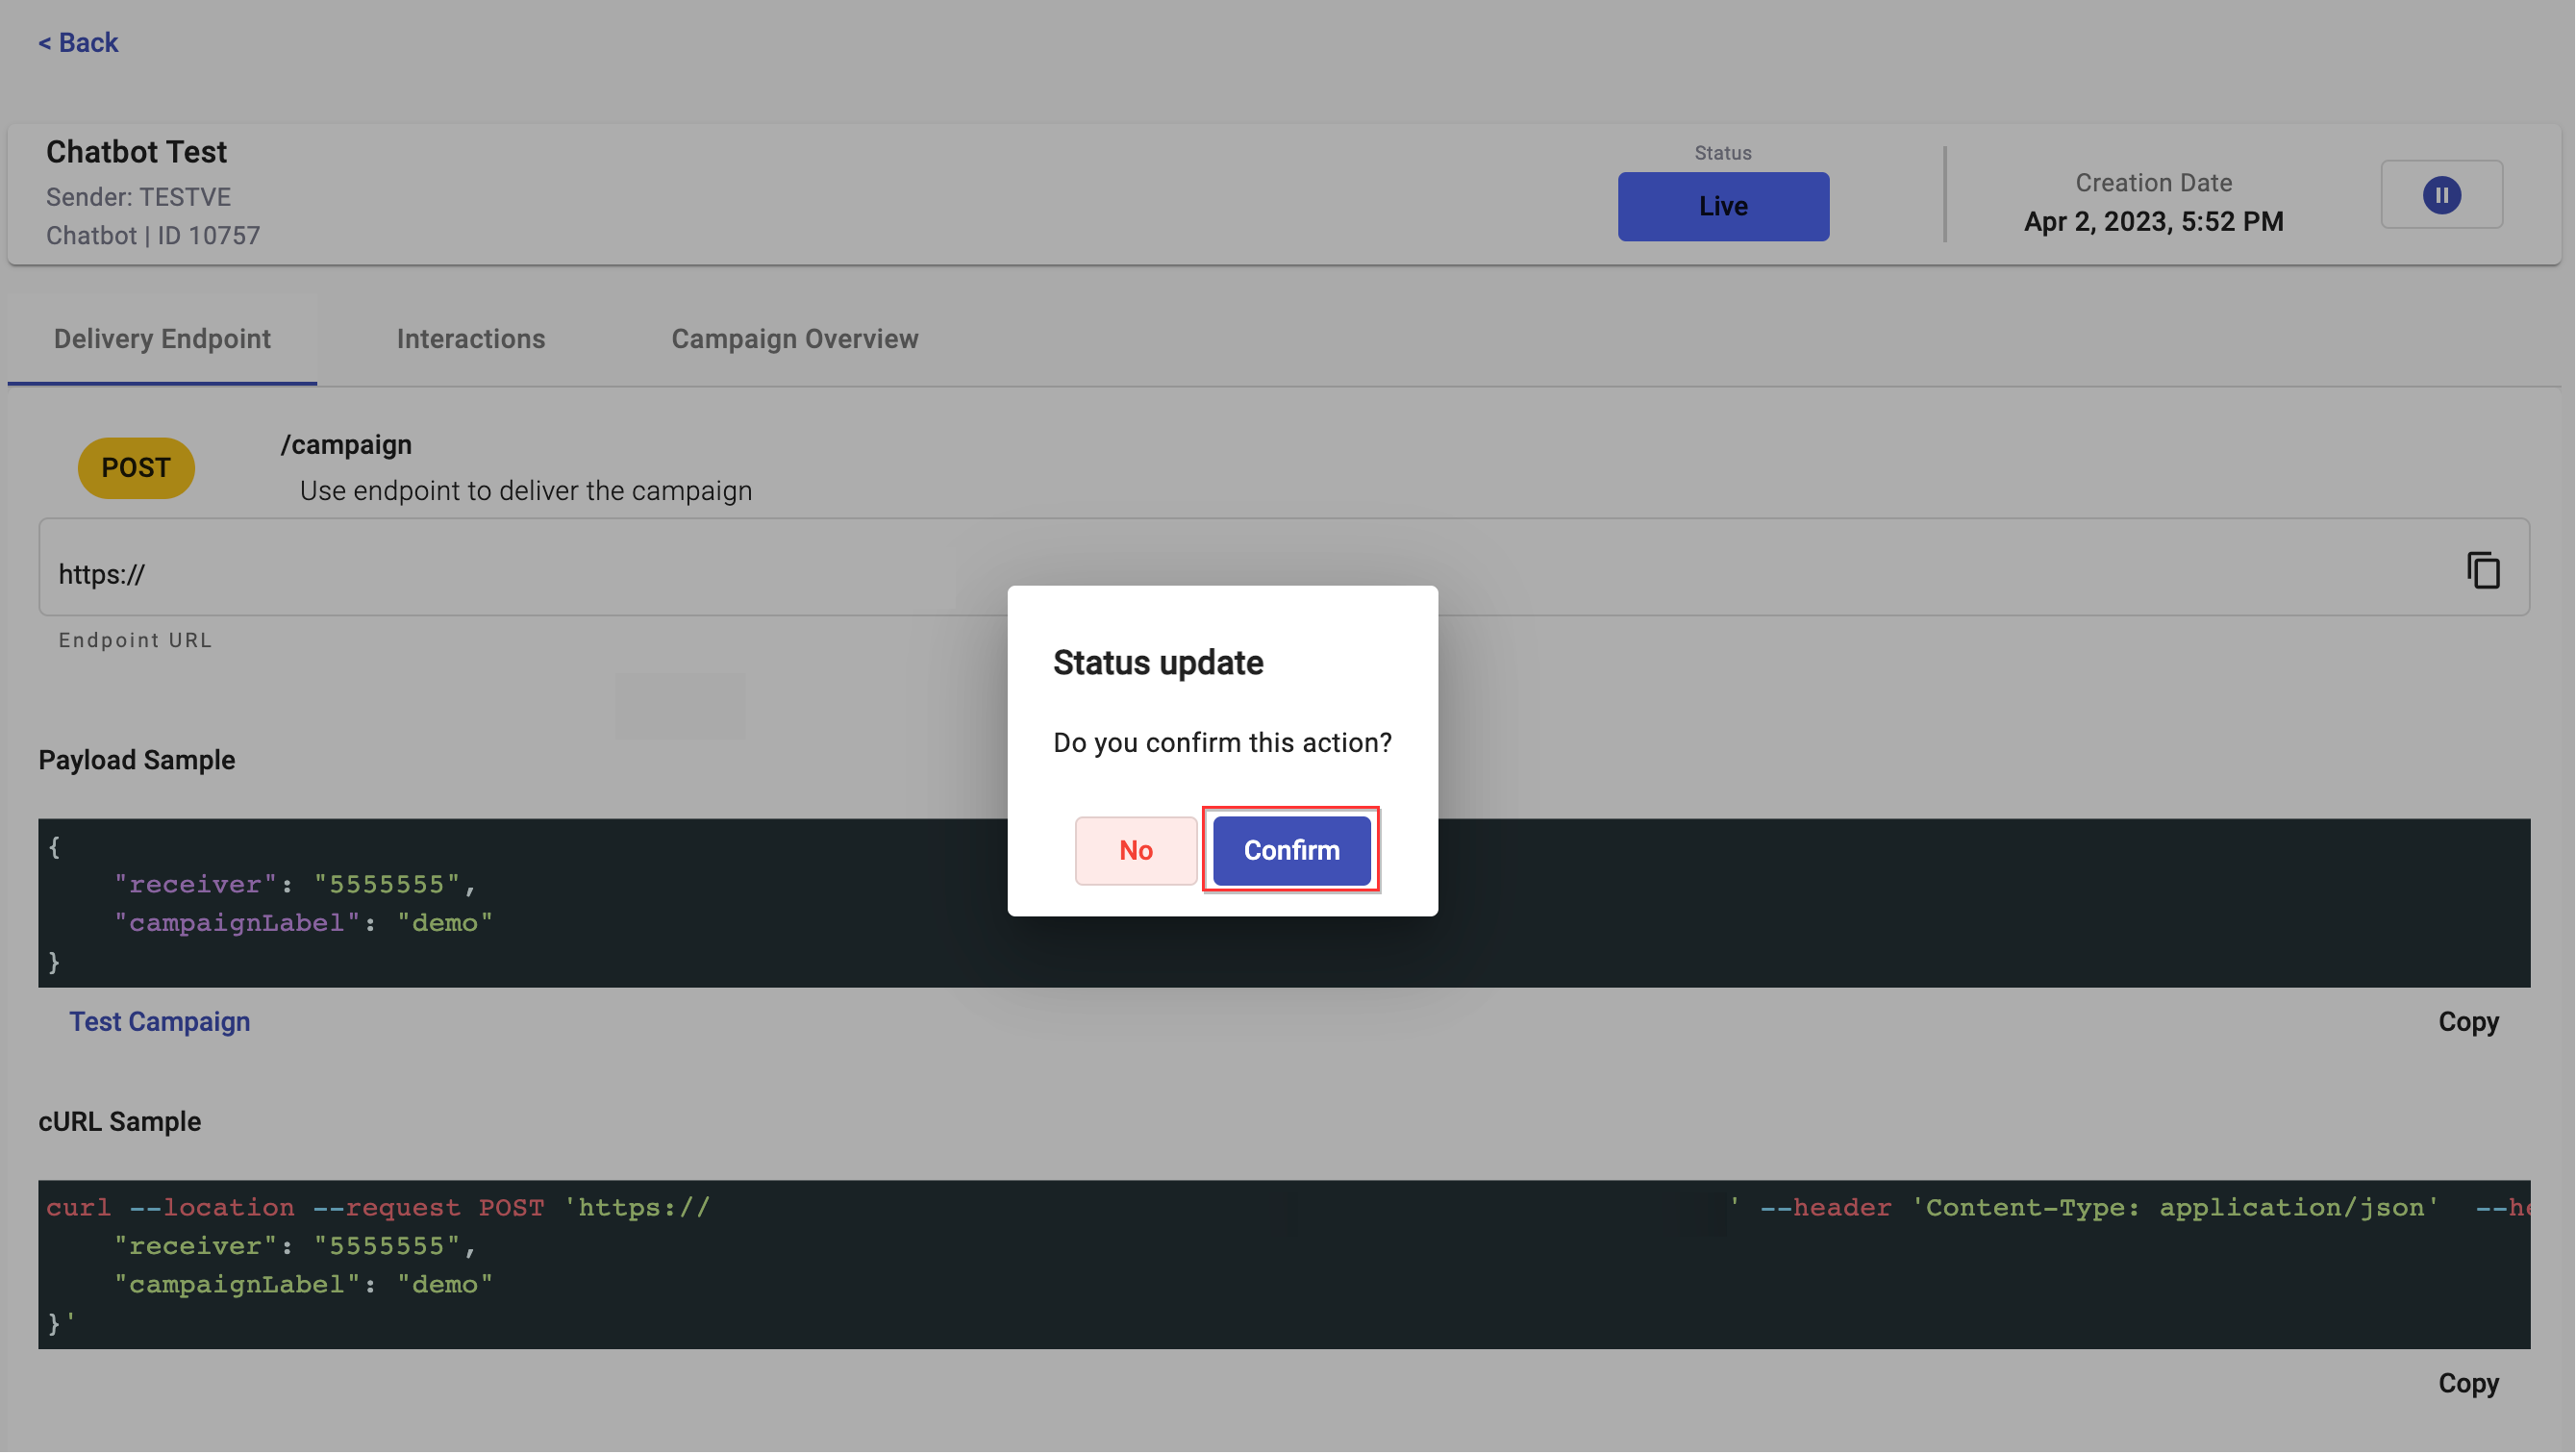
- To remove the Bright Pattern integration, you first disable the automations linked to the integration. To do it, go to the Live automations associated with the Bright Pattern integration. Then, select the Report button and click the Pause button. A dialog appears to confirm the action. Select the Confirm button.
-
Finally, go back to the Integrations tab from the Preferences section and select the Pause button.
In case you want to delete the integration, select the Delete icon from the Actions buttons.

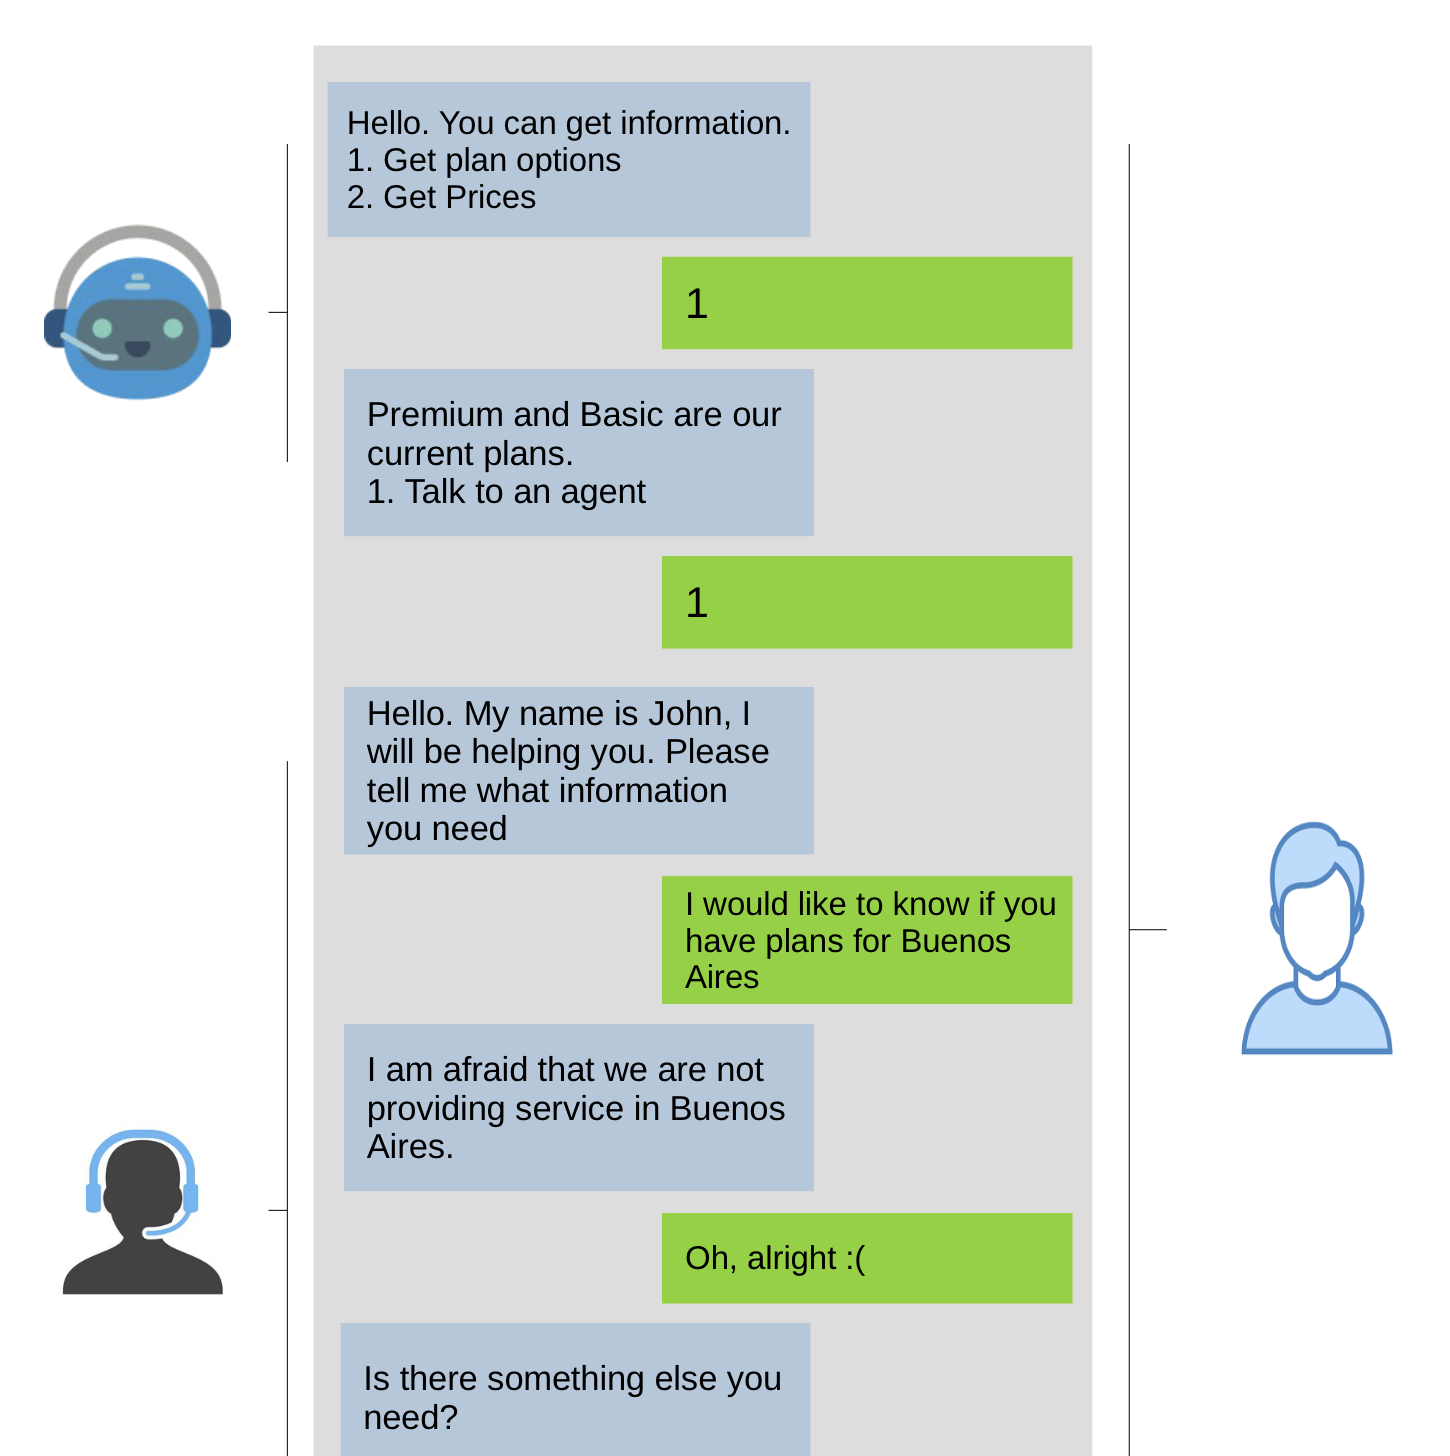
Viewing message exchanges
The Bright Pattern integration shows message exchanges between Bright Pattern and the platform in the Logs section. For example, if a customer sends an SMS MO message, Bright Pattern replies according to the configured account settings. Both messages appear in the logs section as shown below:
.png")
You view the messages exchanged over connection channels under the message logs in the Messaging dashboard. At the bottom of the Messaging dashboard, you select View all Logs.

The platform takes you to a customizable messaging log table where you filter by different criteria.

You select the date range filter, then enter LiveChat in the Search entry box. This attribute appears under the Campaign ID column and identifies the Bright Pattern integration. The platform shows message exchanges by connection type for that date range.
The screenshot below shows a message log with two connections — SMS texting and WhatsApp — as part of a Bright Pattern integration.

To view message exchange details, you select the eye icon 👁 at the far right of the message of interest. The platform shows the details of that exchange in a pop-up window.

Updated 9 days ago