Creating and Manage Tags
Create tags to organize Live Chat conversations and view tags in the Live tab.
Create tags to organize Live Chat conversations and help agents identify conversation topics faster.
Tags are labels that agents and teams use to categorize conversations and analyze trends across support requests.
Create a tag
- Go to Preferences.
- Open the DATA dropdown menu.
- Select Tags.
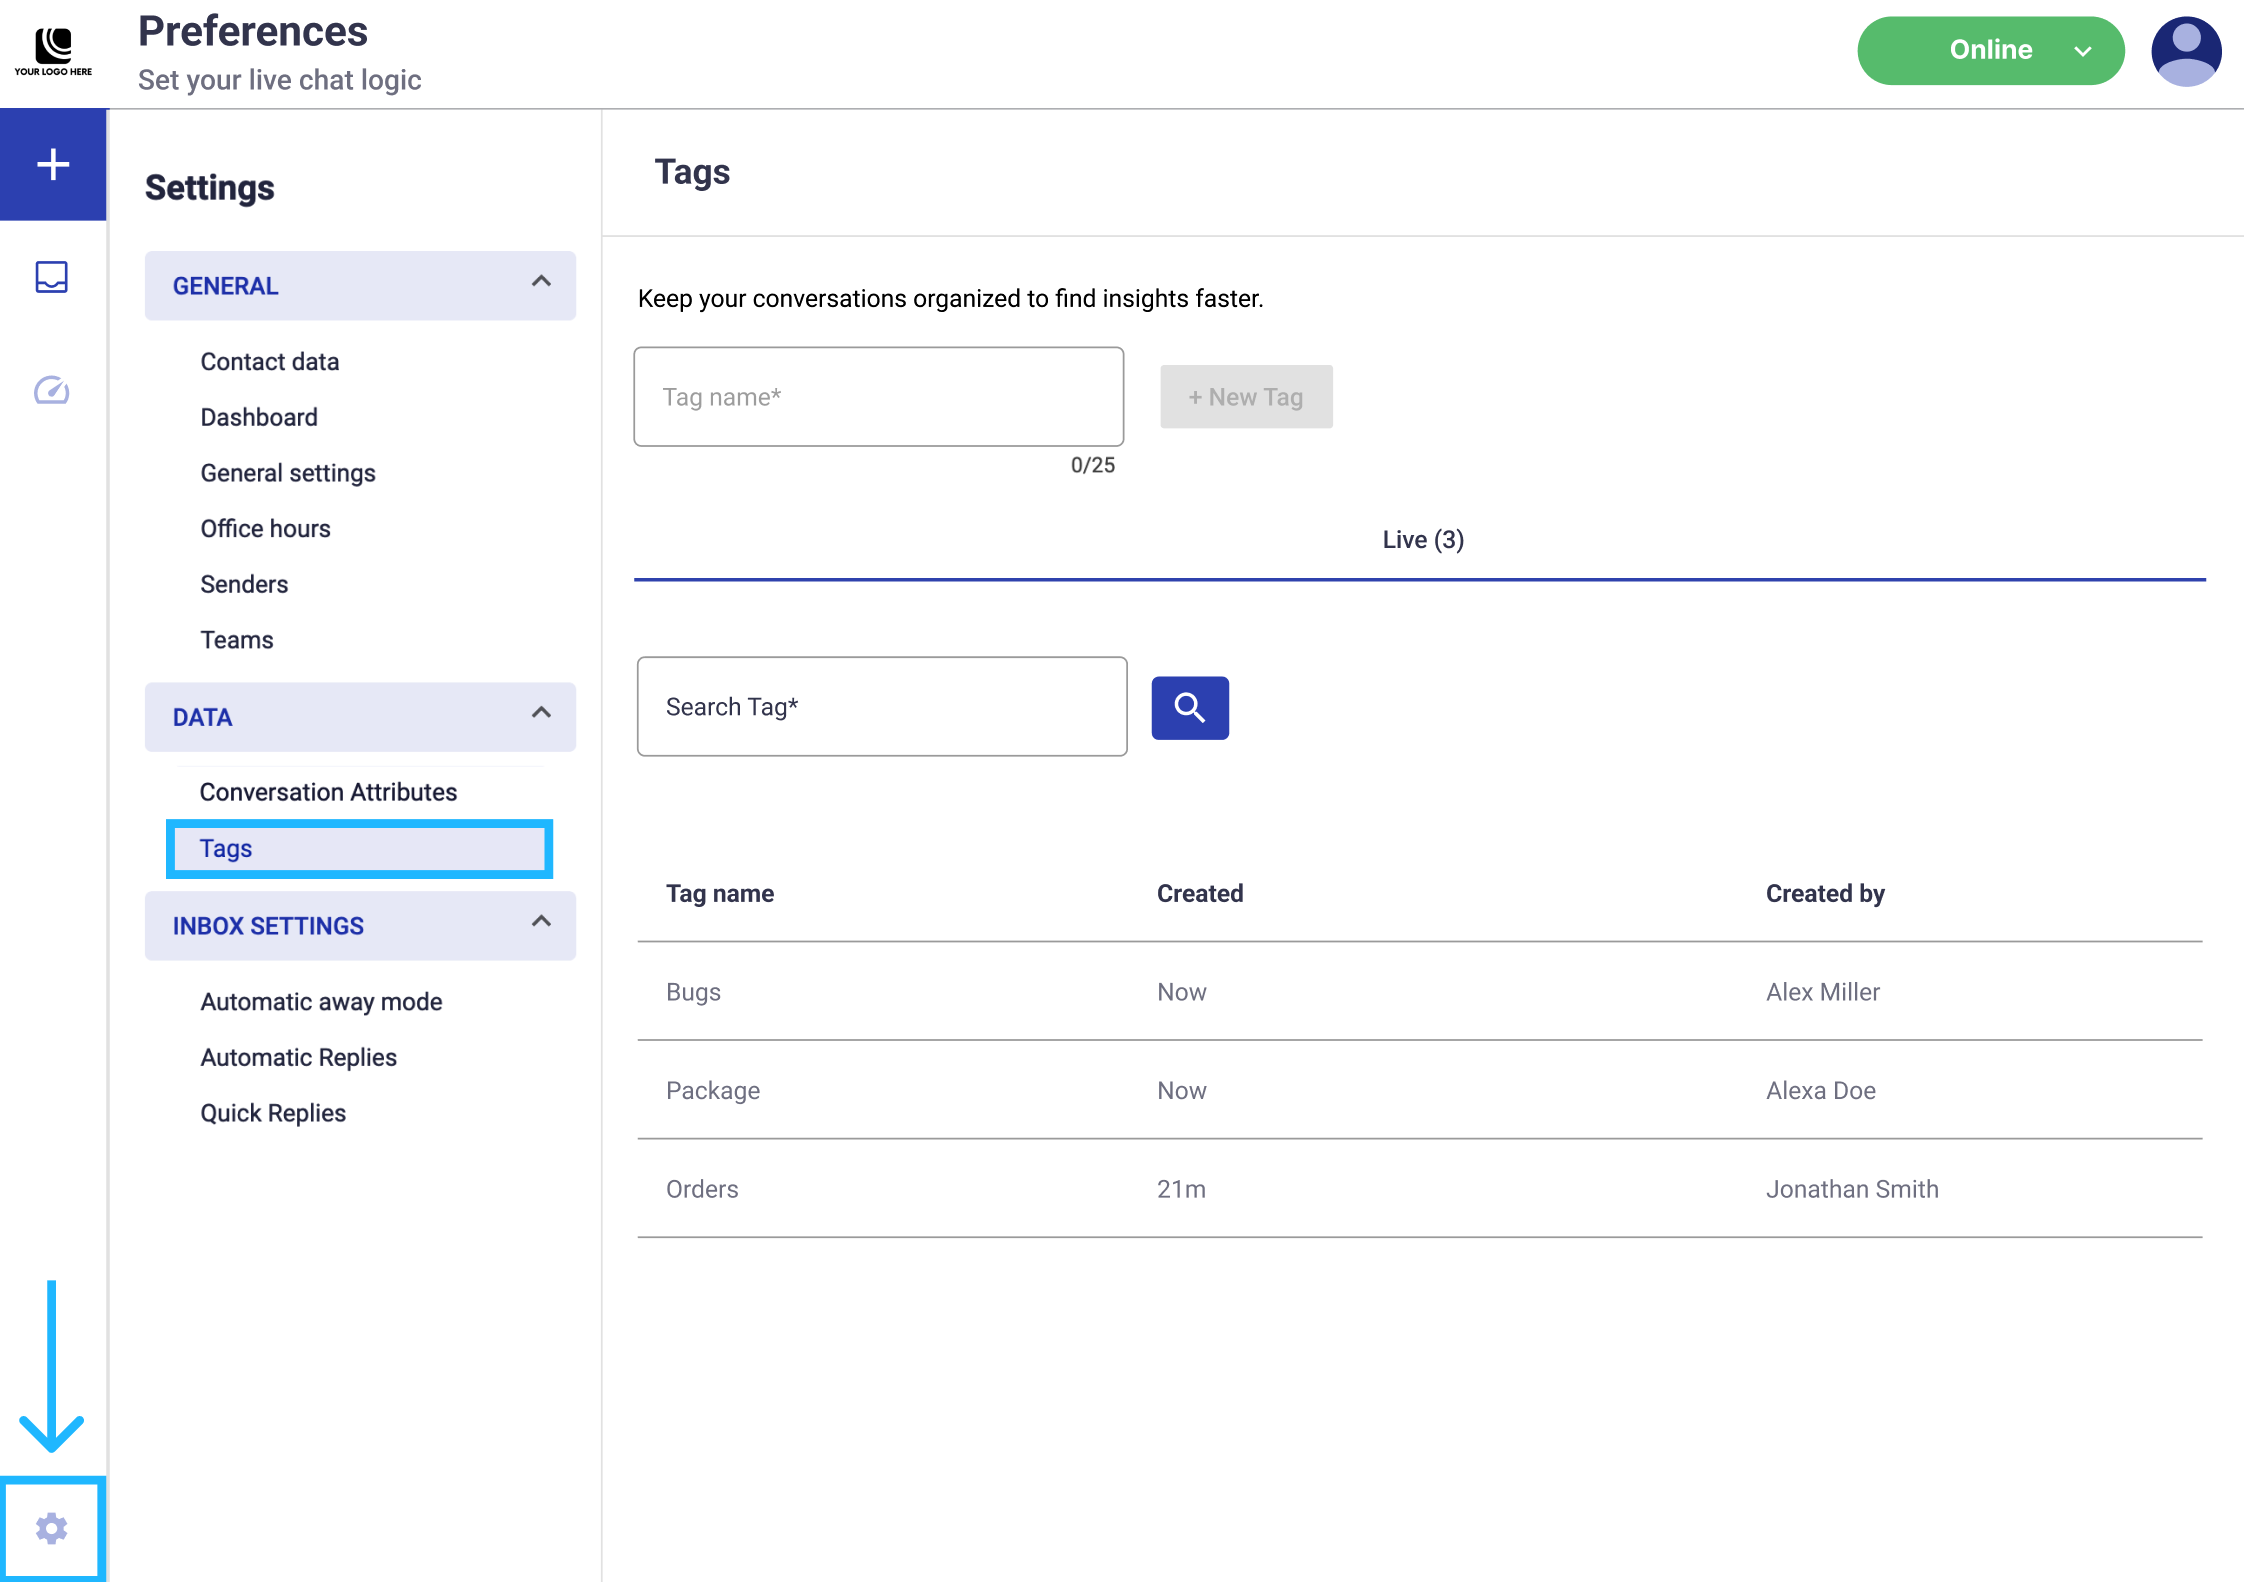
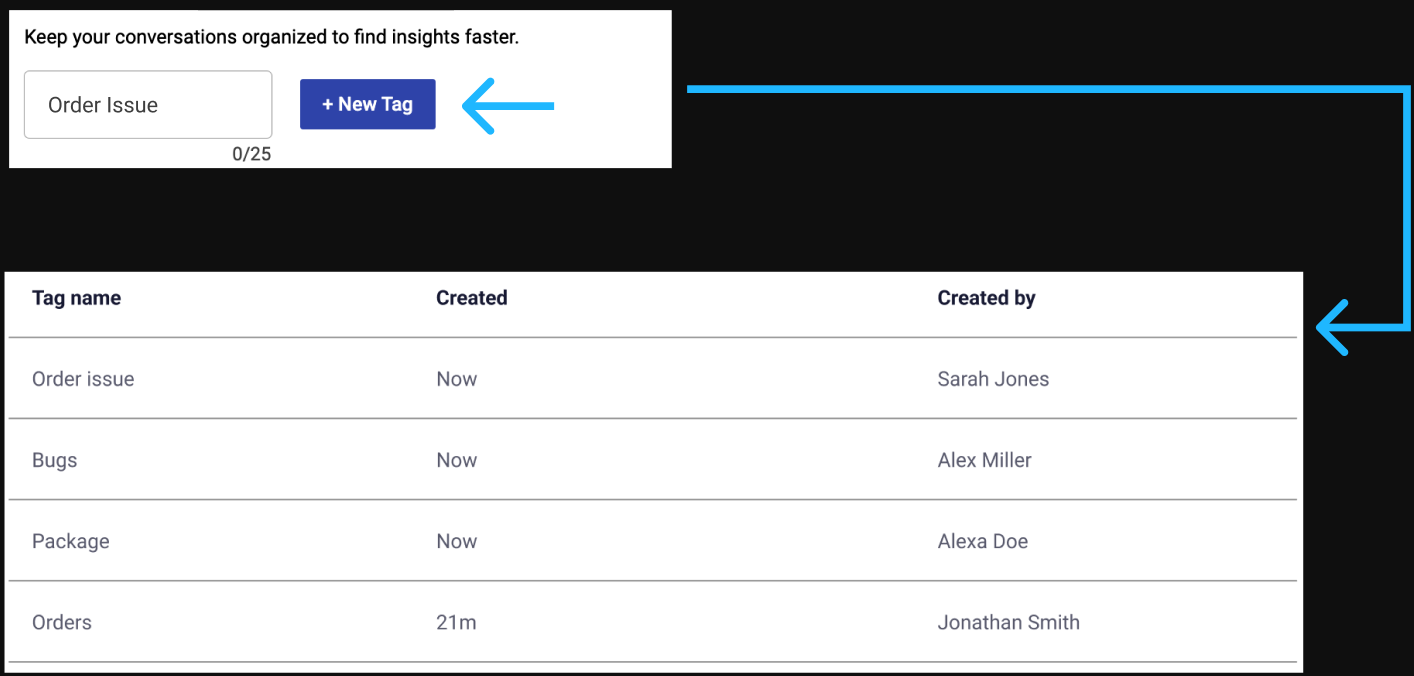
- Enter a tag name at the top of the page.
- Click + New Tag.
Each tag can contain up to 25 characters. Use short, descriptive labels that clearly identify the conversation topic.
Tags can include alphanumeric characters, spaces, and symbols.
After you create a tag, it appears in the Live tab.
View live tags
Use the Live tab to view and search tags that are currently in Live status.
From this tab, you can:
- Select a tag from the Details panel to tag a conversation.
- Click the Ellipsis icon to tag messages during customer conversations.

The Live tab table includes these columns:
- Tag name: Name of the tag.
- Created: Date and time the tag was created.
- Created by: Name of the admin who created the tag.
Updated 18 days ago