Initial Setup
Set up Live Chat by activating the feature, provisioning a bidirectional sender, inviting agents, and choosing how users reach an agent.
Set up Live Chat by activating the feature, provisioning a bidirectional sender, inviting agents, and choosing how end users reach an agent.
Complete the following tasks:
- Activate Live Chat for your Workspace through the support team.
- Provision a sender that supports bidirectional SMS or WhatsApp messaging.
- Invite agents who will assist your customers.
- Choose how users reach Live Chat: through a chatbot campaign or a direct connection.
Activate Live Chat feature
Contact the support team to enable Live Chat for your Communications Platform Workspace. Provide the Workspace name and the total number of agents who will be available.
The support team will ask whether you want to use an existing bidirectional SMS or WhatsApp sender, or provision a new sender.
NOTEReview Live Chat Access Conditions and User Engagement before you select a channel.
After the support team enables Live Chat, access it at https://livechat.messangi.com/. Only Workspace admins can access Live Chat from Communications Platform.

Provision a sender
Live Chat supports SMS and WhatsApp. The configured sender determines which channel end users use to communicate with your agents.
Choose one of the following options:
NOTESenders are available for interactive and messaging campaigns and are not assigned exclusively to Live Chat by default. The end user, chatbot, and agent use the same channel and sender throughout a conversation.
Request a new sender
Request a bidirectional sender from the support team for your SMS or WhatsApp channel. The sender must support both Mobile Terminated (MT) messages, which you send to end users, and Mobile Originated (MO) messages, which you receive from end users.
- For SMS, the sender is the message source address shown on the recipient’s device. It can be a phone number, a shortcode (1–6 digits), or a longcode (7 or more digits).
- For WhatsApp, the sender is the phone number your business uses to send and receive WhatsApp messages.
The support team configures the sender and makes it available for Live Chat. After configuration, find and manage the sender in Channel Management in Communications Platform.
Use an existing sender
Use an active, bidirectional SMS or WhatsApp sender already available in your Workspace. After Live Chat is enabled, choose how that sender routes end users:
- Configure a chatbot that transfers end users to a Live Chat agent.
- Connect end users directly to a Live Chat agent without a chatbot.
Choose the option that matches your expected conversation volume and the complexity of customer inquiries.
Send invitations to agents
Invite the agents who will assist customers after the support team enables Live Chat.
Choose one invitation method:
- Provide the support team with each agent’s name, email address, and phone number.
- Send invitations from Communications Platform.
To send invitations yourself:
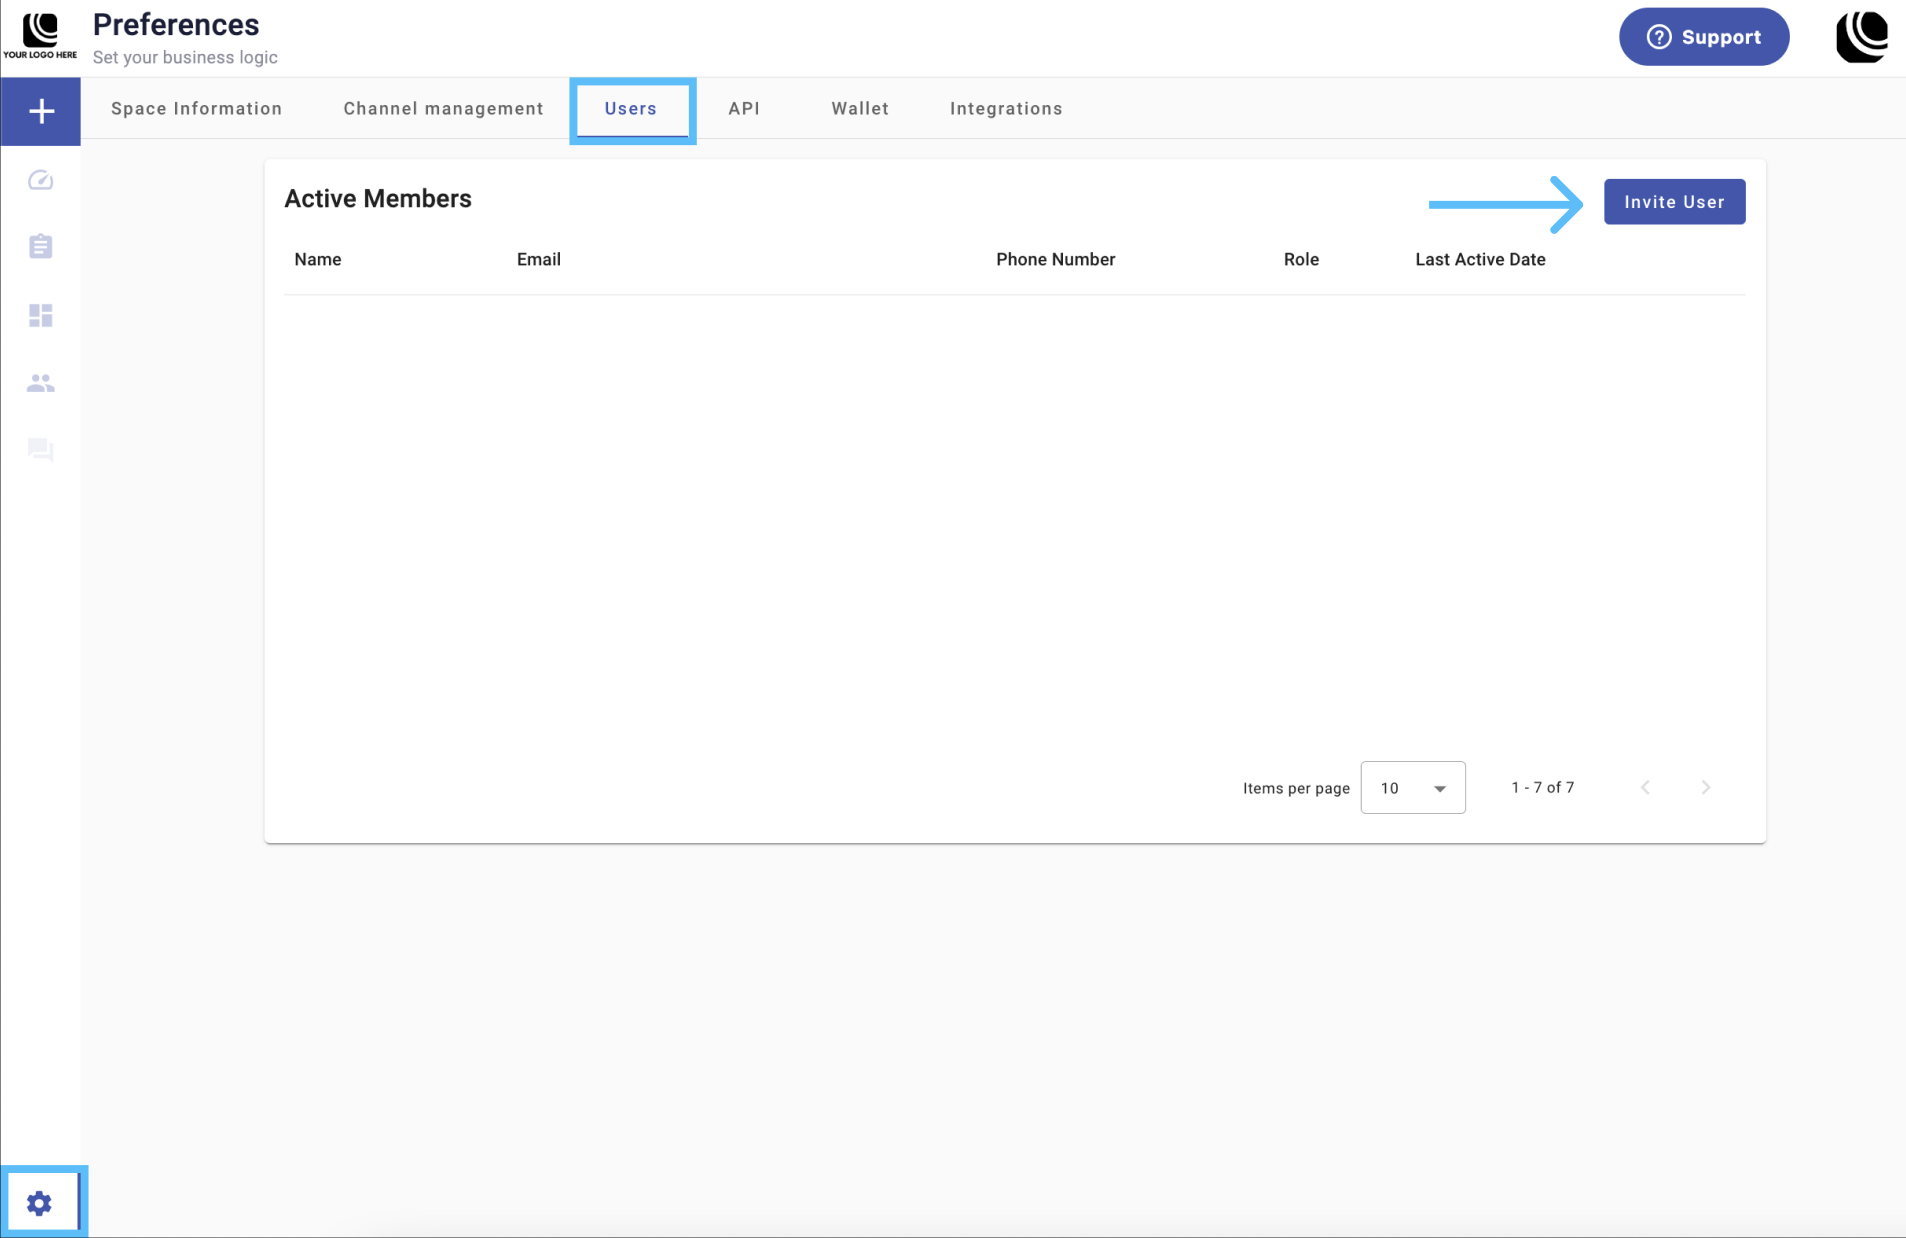
- Go to Preferences.
- Select the Users tab.
- Select Invite User.
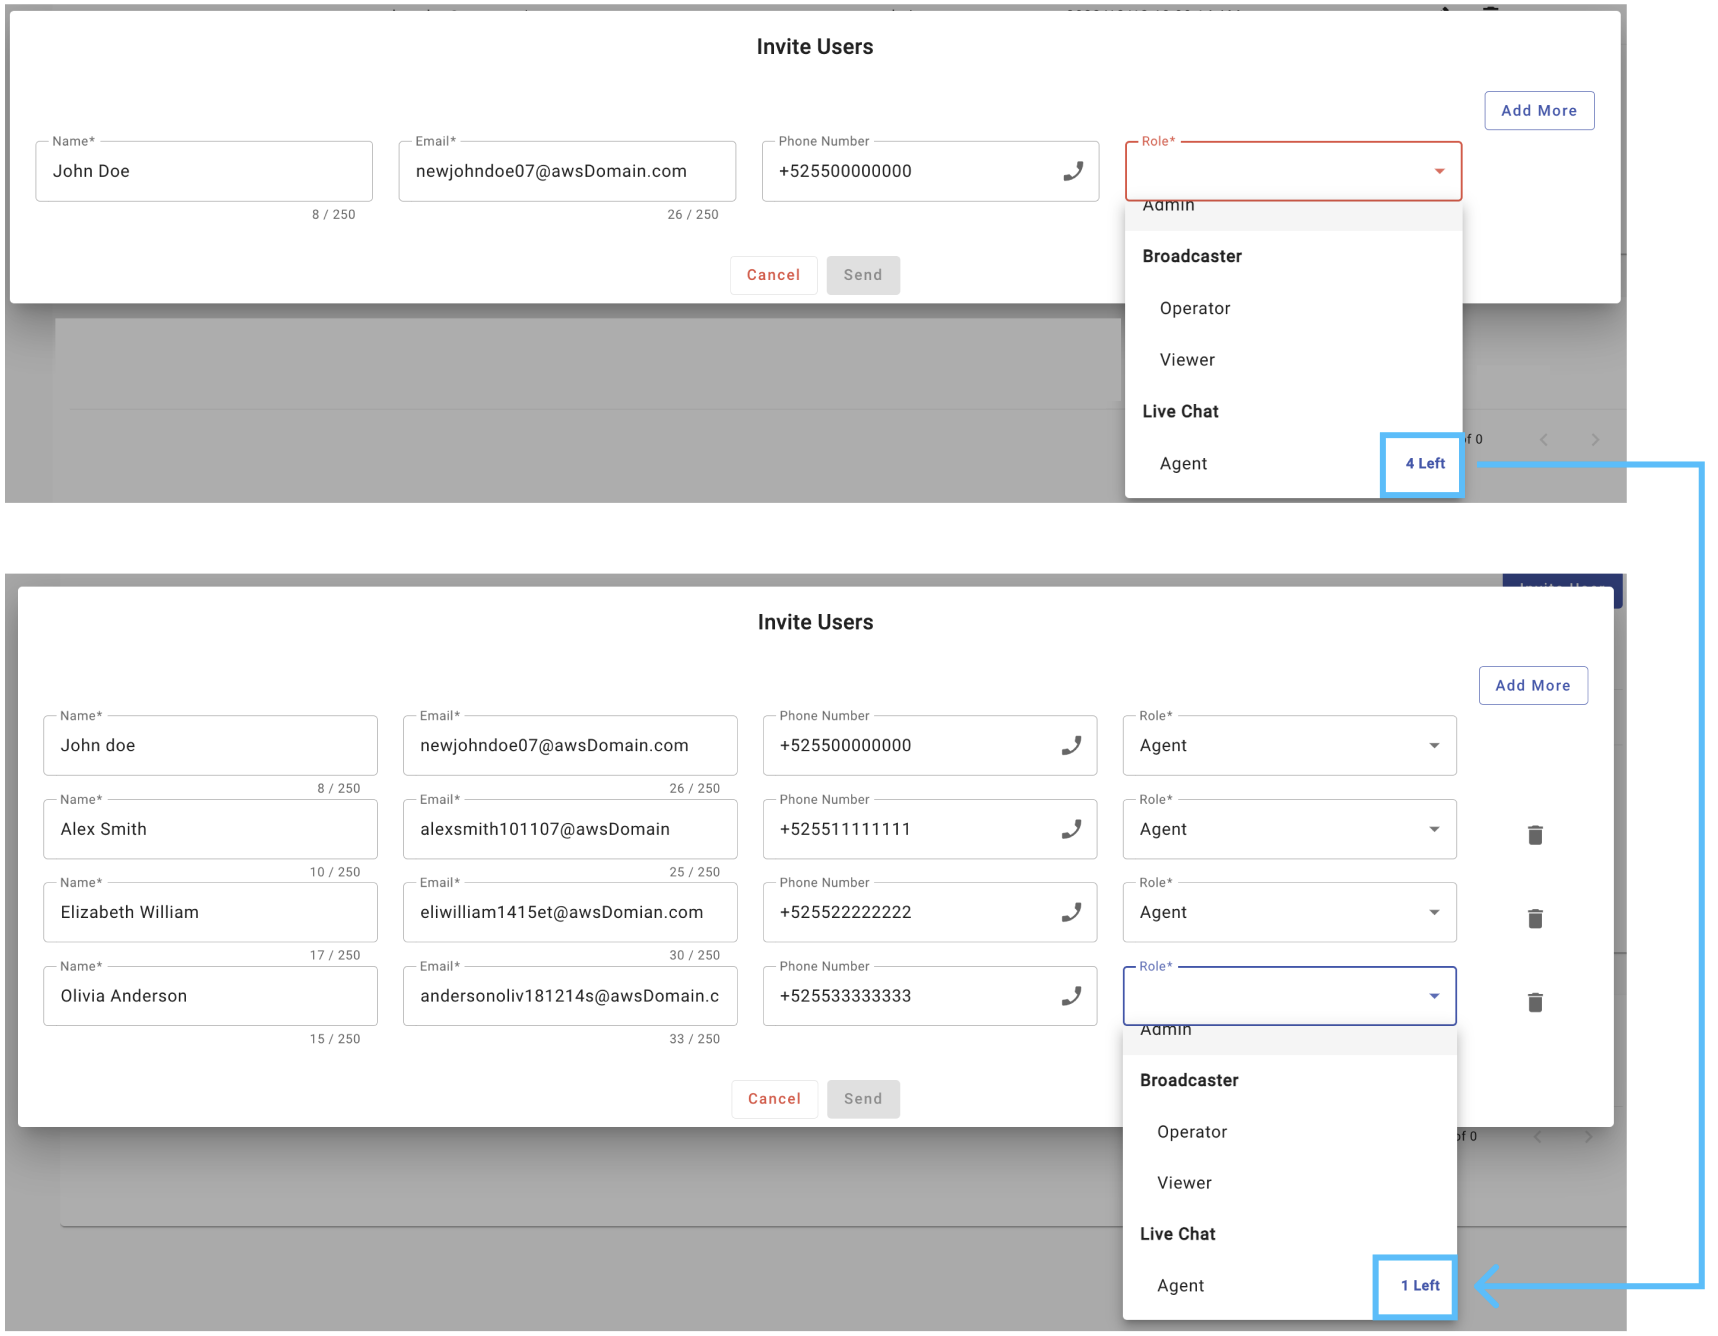
- Enter the agent’s name, email address, phone number, and role.
- Select Agent from the Role dropdown.
- To add another agent, select Add More.
- Select Send.

NOTEYou can invite only the number of agents requested during Live Chat activation. The form shows the remaining invitations and reduces the count each time you add an agent. Contact the support team to increase the number of Live Chat agents.
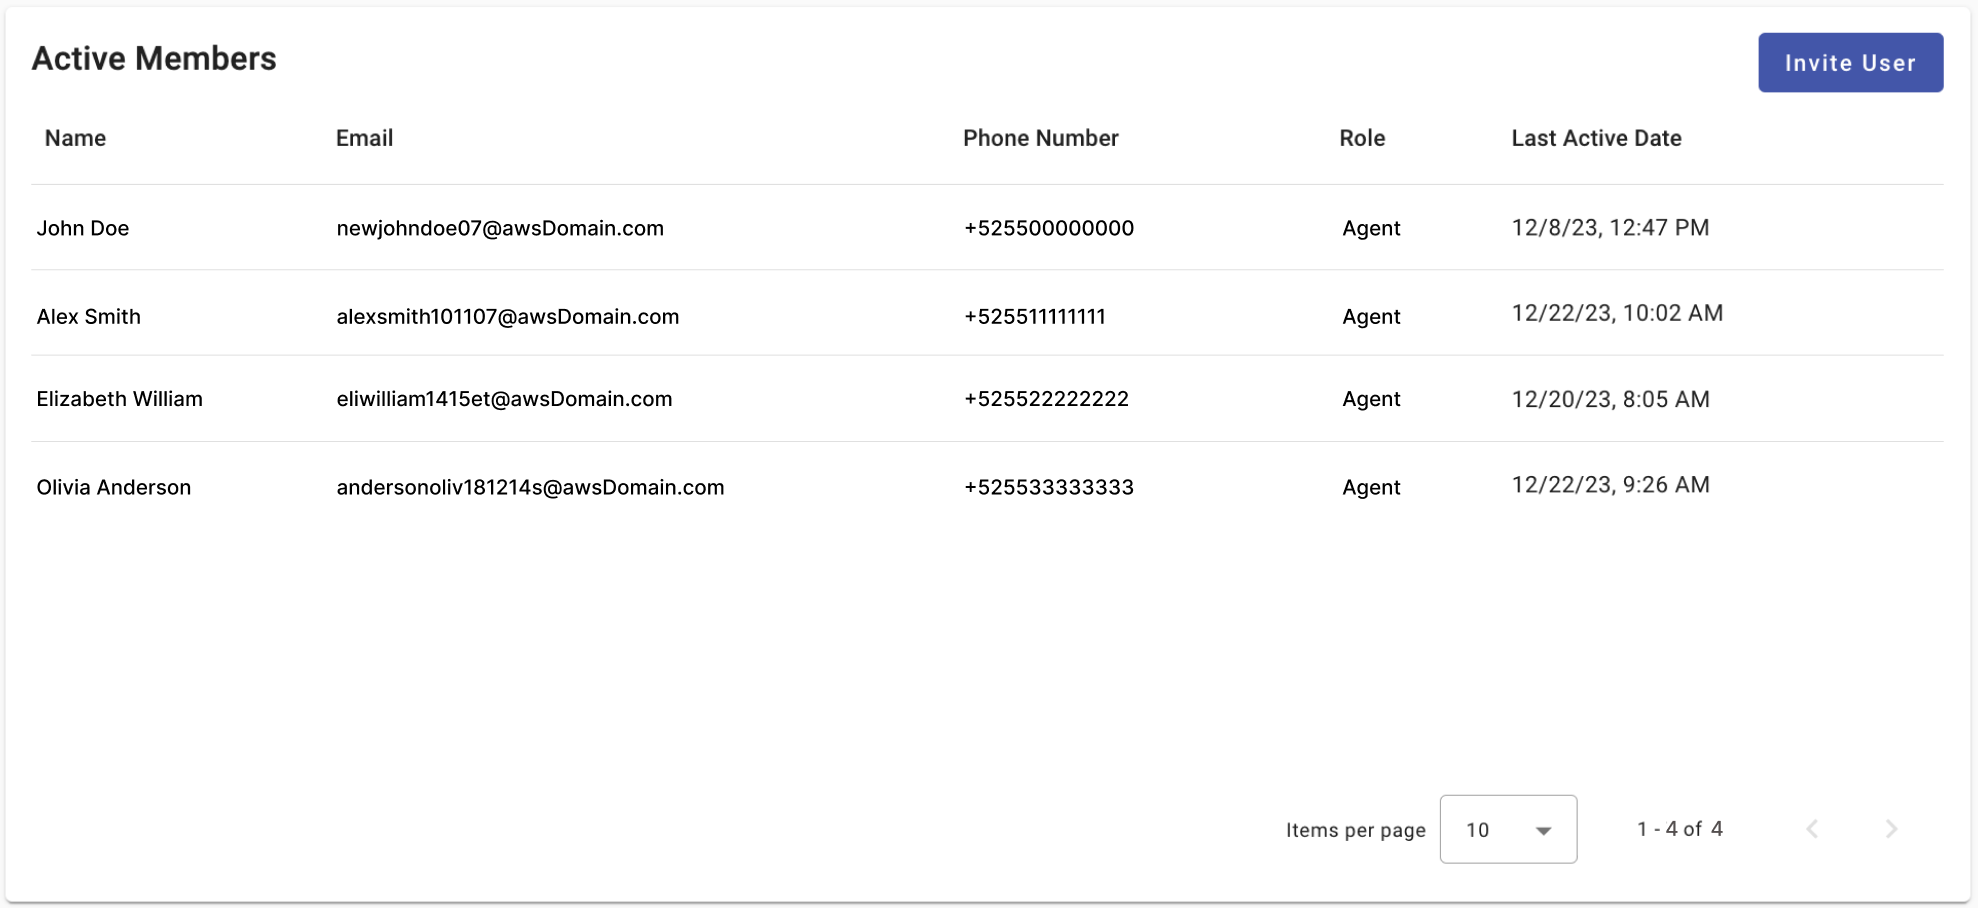
An agent appears in the Active Members table after accepting the invitation.
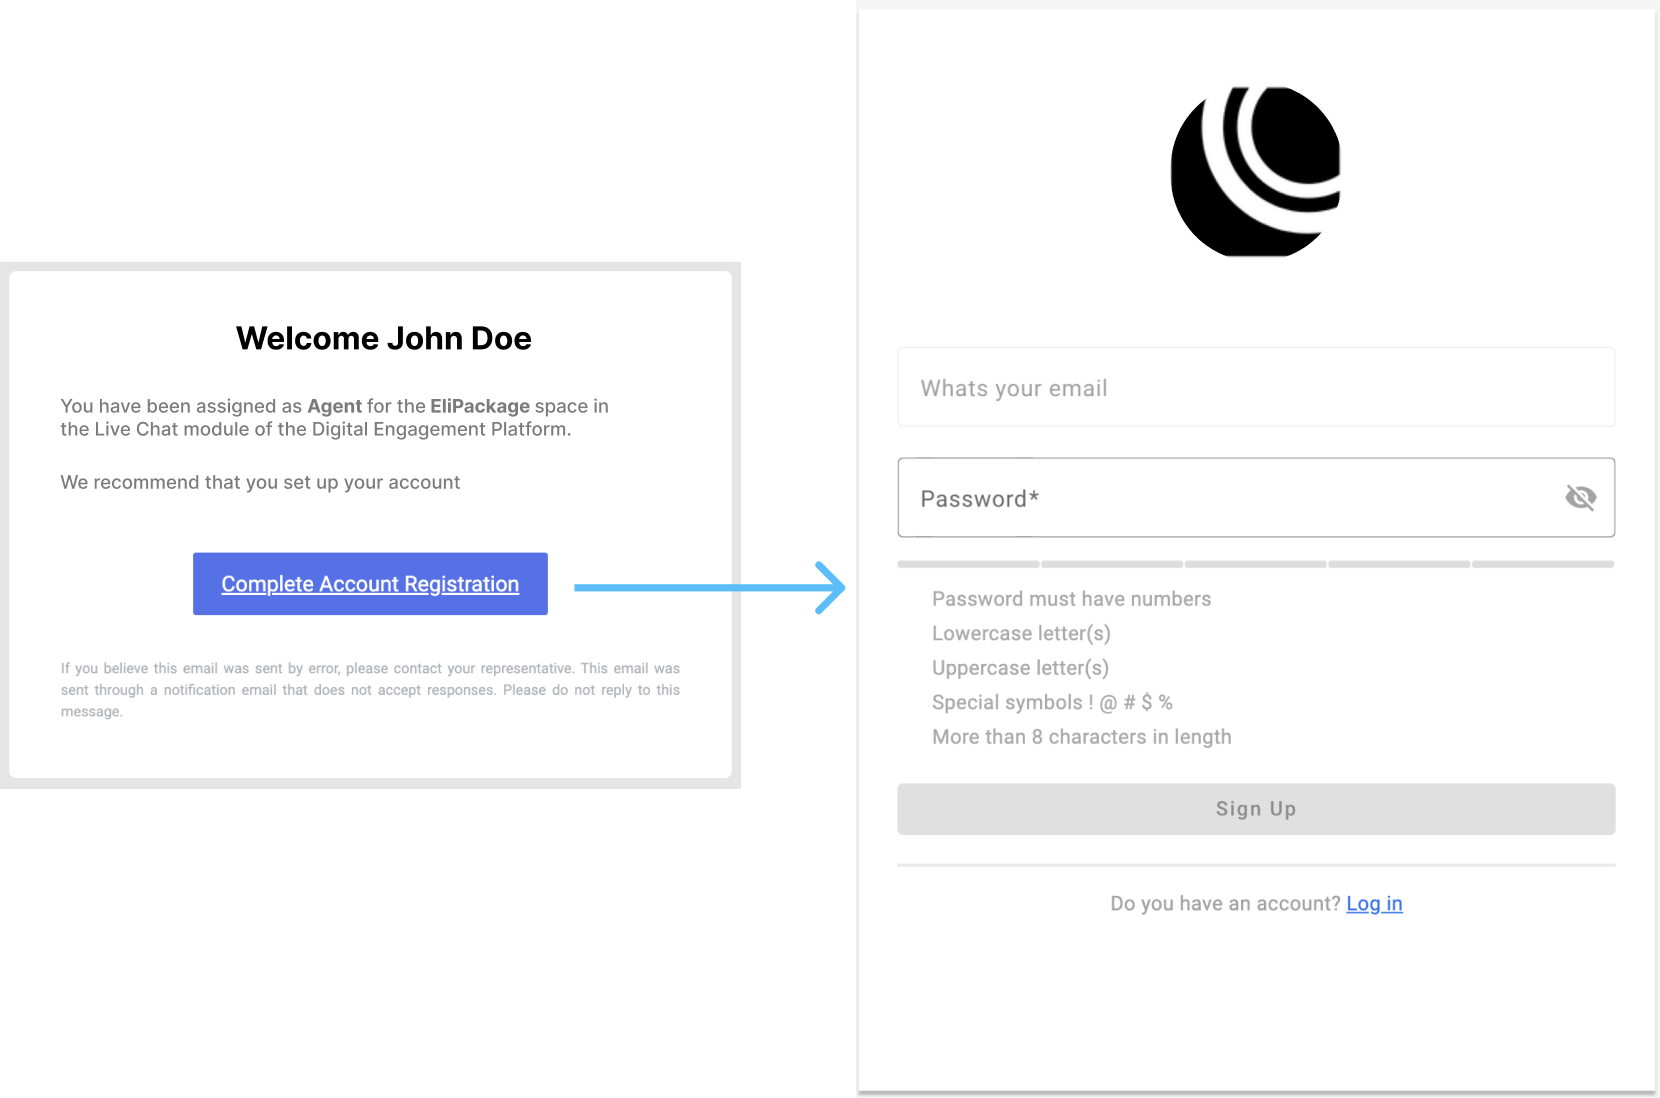
Agents receive an email invitation that assigns them to the Workspace. Each agent selects Complete Account Registration, enters the invited email address, sets a Live Chat password, and selects Sign up. Live Chat then redirects the agent to the platform.
Access Live Chat
The support team provides https://livechat.messangi.com/ for direct access after activating Live Chat. As a Workspace admin, open the URL and sign in with the email address and password you use for the Workspace.
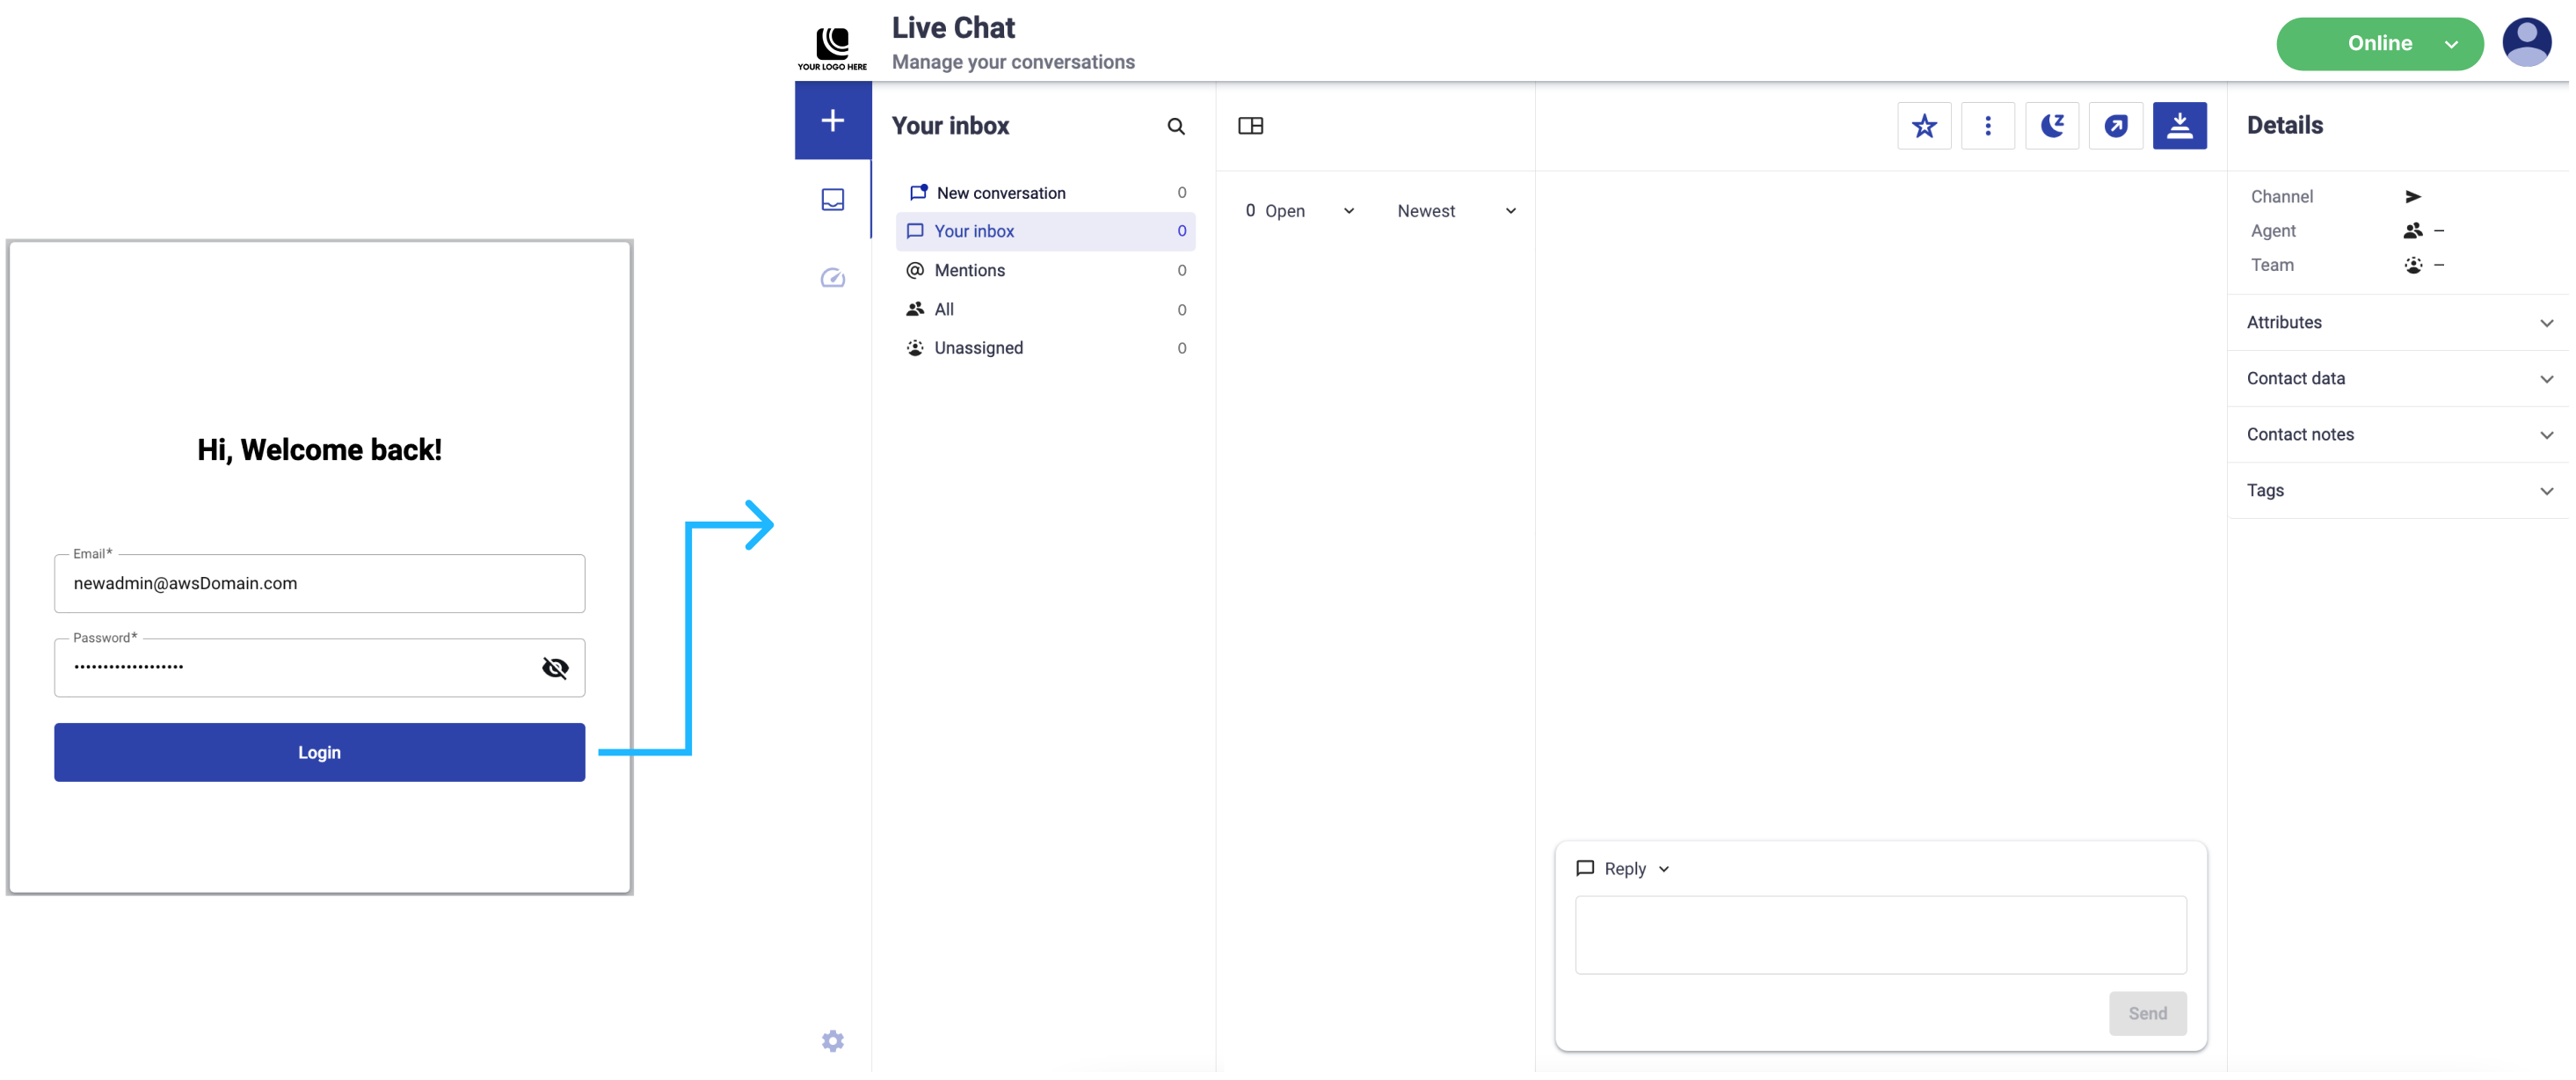
The Live Chat feature icon is also enabled in Communications Platform.
NOTE
- Workspace admins can access Live Chat and Communications Platform simultaneously.
- Agents can access only Live Chat; they cannot access Communications Platform.
- Admins sign in to Live Chat with the same credentials they use for the Workspace.
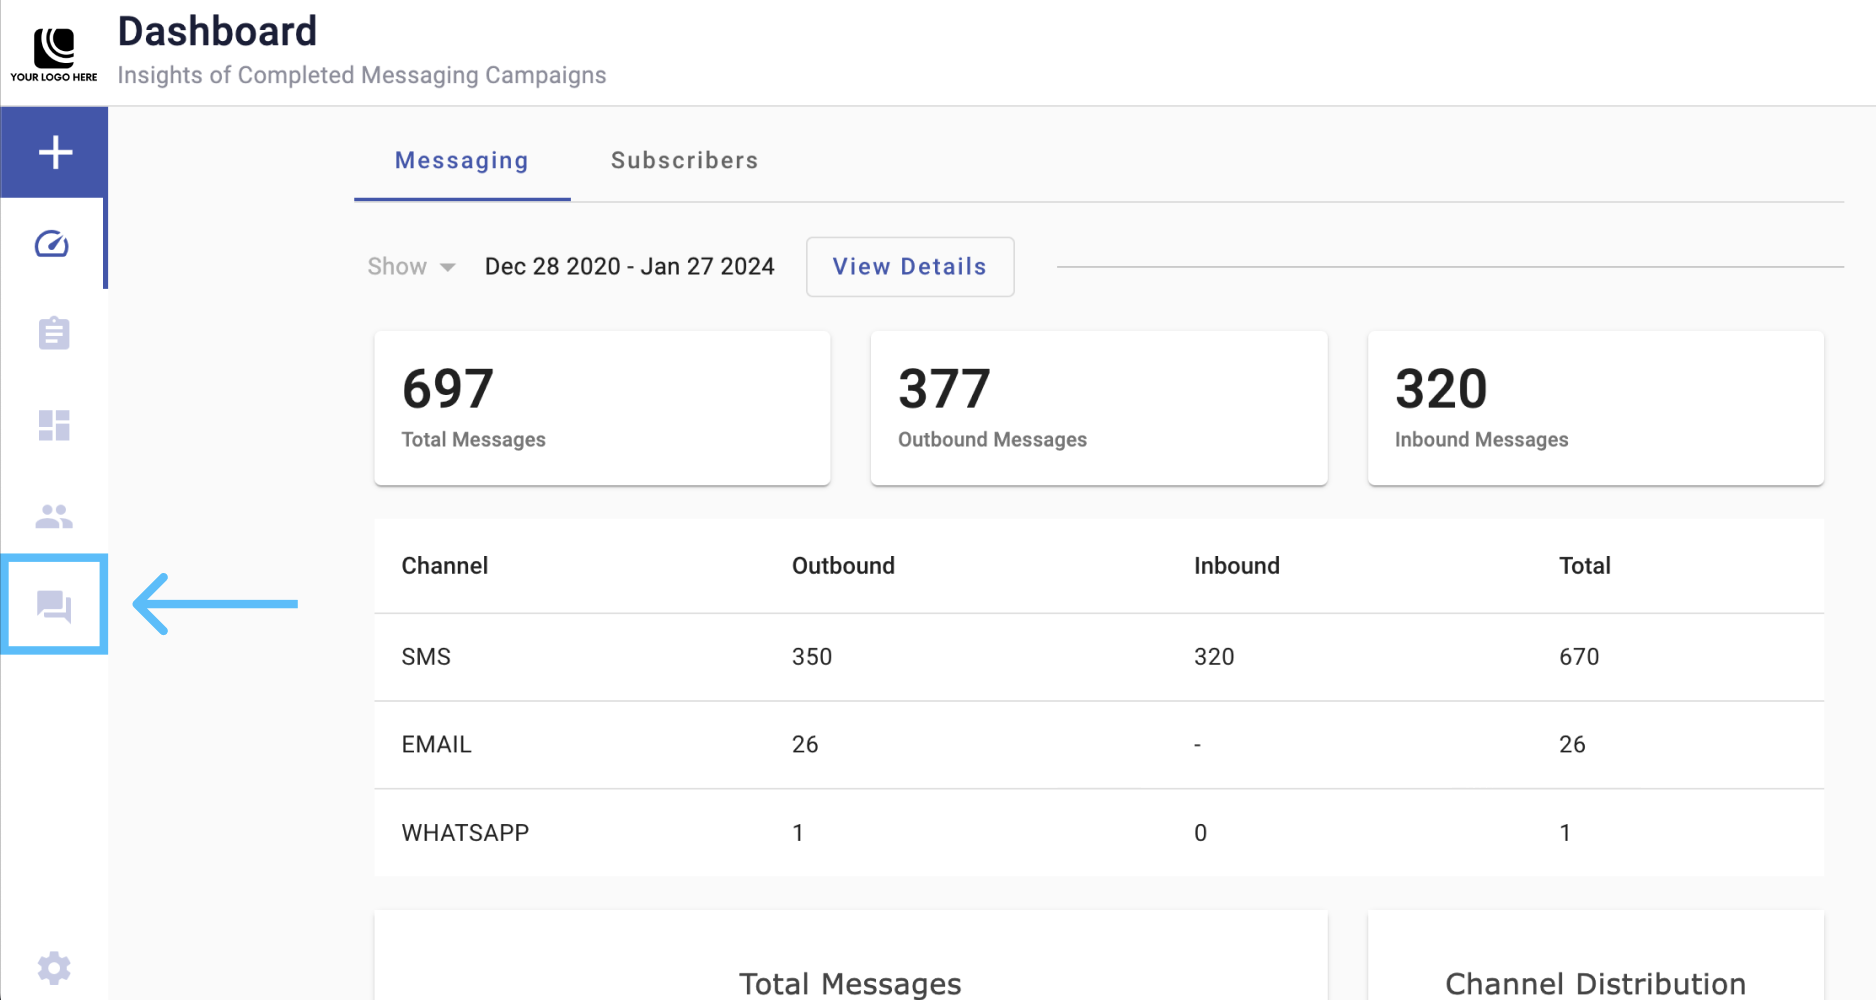
- Agents cannot access Dashboard or Preferences.
Live Chat connection and user engagement
Choose how end users reach a Live Chat agent after Live Chat is active.
Route users through a chatbot
Create a chatbot campaign that redirects end users to a Live Chat agent. The end user, chatbot, and agent communicate through the same channel and sender.
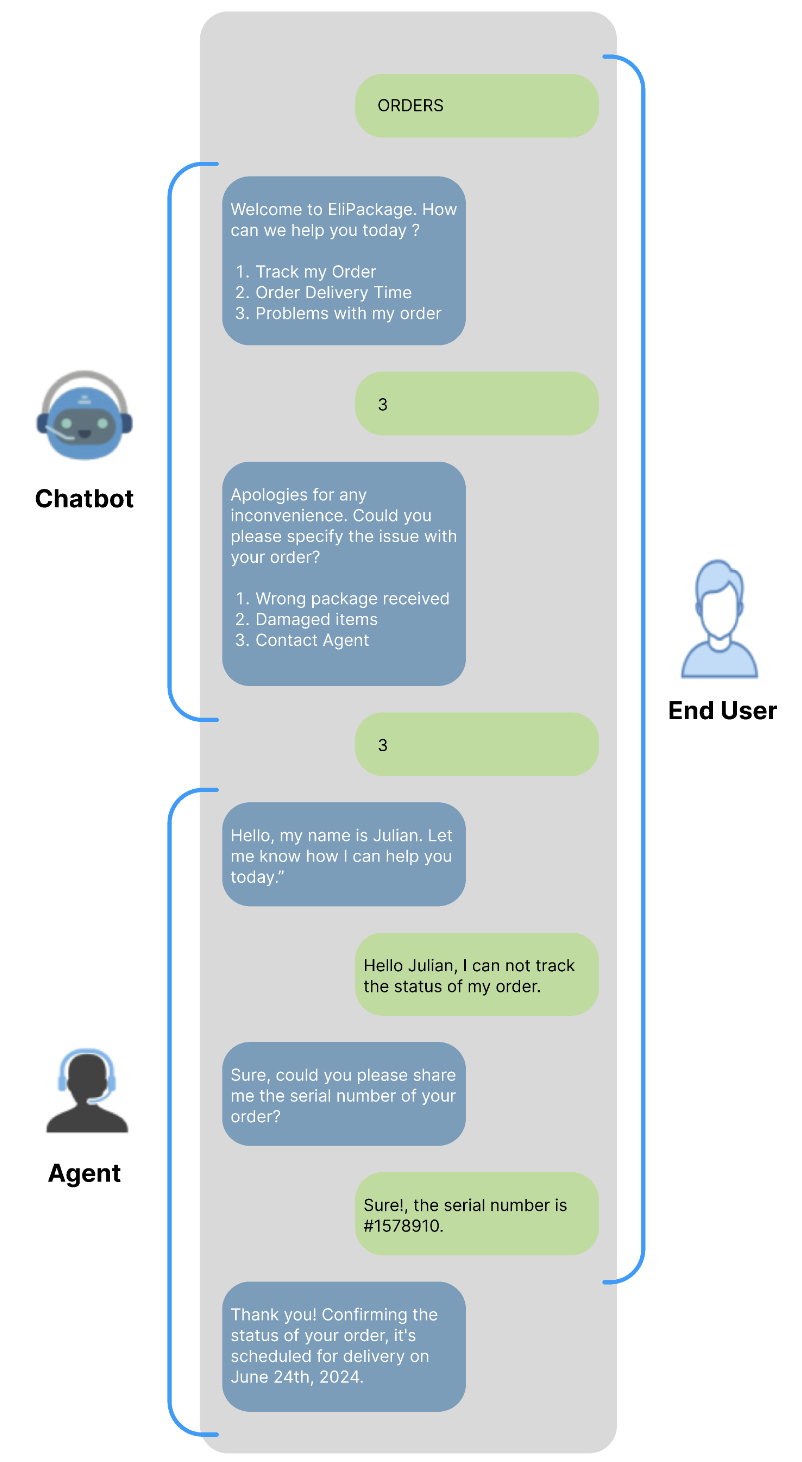
For setup instructions, see Integrate Chatbot with Live Chat.
Connect users directly to Live Chat
Enable a bidirectional SMS or WhatsApp sender for exclusive Live Chat use. End users can then message an agent directly, and Live Chat receives every incoming message for that sender.
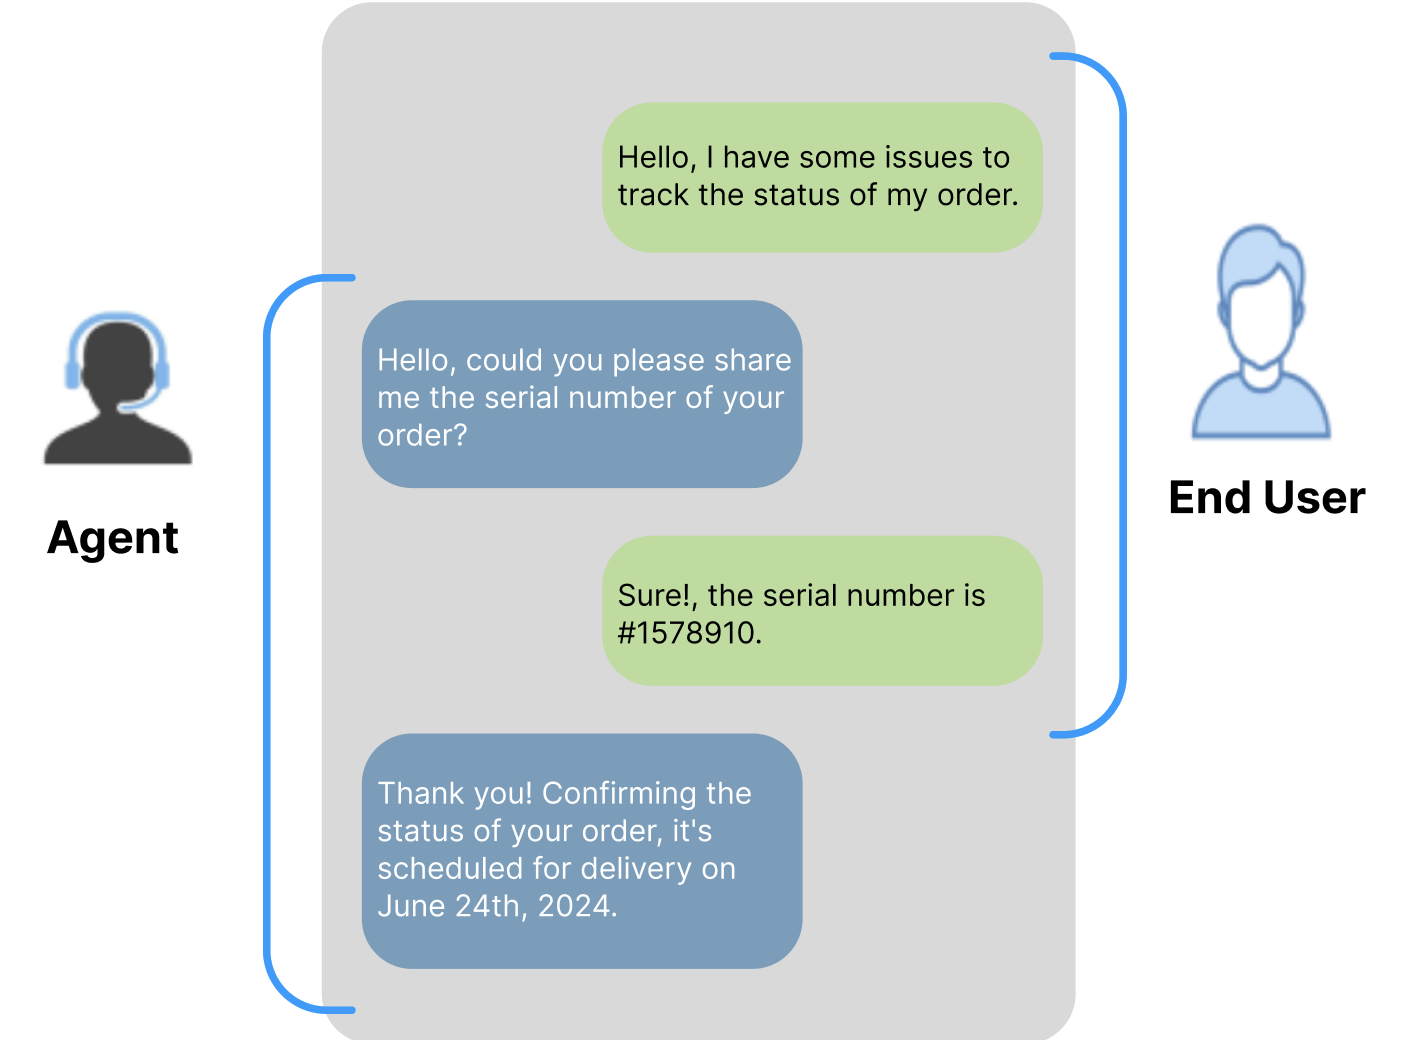
For instructions, see Live Chat Connection.
Channel requirements
Tell the support team which channel types to include when they configure your Workspace. Live Chat supports SMS and WhatsApp, and each channel must support bidirectional MT/MO communication.
Channels are configured at the platform level and remain available for interactive and messaging campaigns unless you configure a sender for exclusive Live Chat use. When you configure a chatbot campaign, select the SMS or WhatsApp channel and sender in Delivery Channels. The selected channel and sender carry messages between the end user, chatbot, and Live Chat agent.
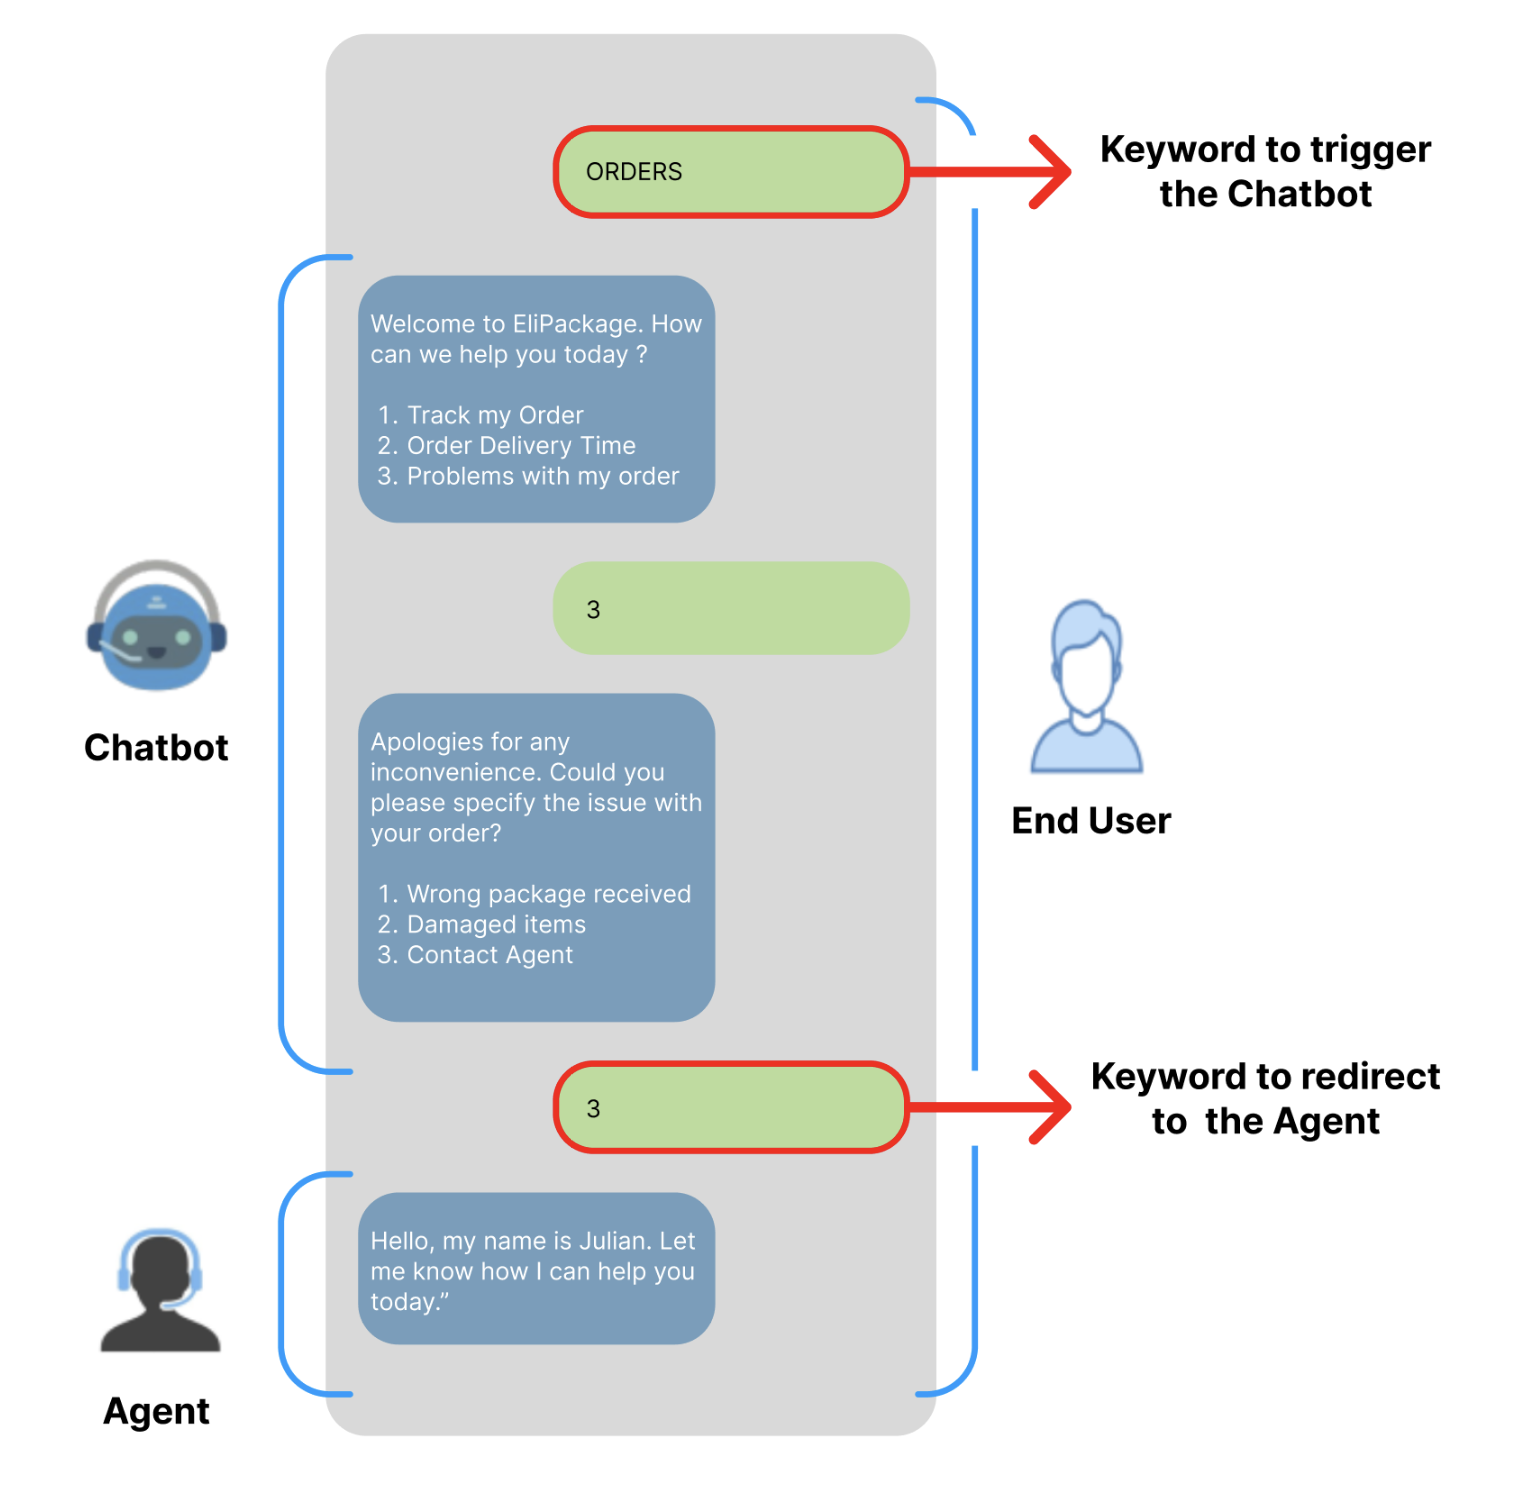
Use keywords with Live Chat
You cannot use a keyword to trigger Live Chat directly. To route users through a keyword:
- Create a chatbot campaign.
- Add the chatbot-triggering keywords in Delivery Channels.
- In the chatbot flow’s Interactions section, specify the keyword that redirects the user to a Live Chat agent.
Example setup for Live Chat
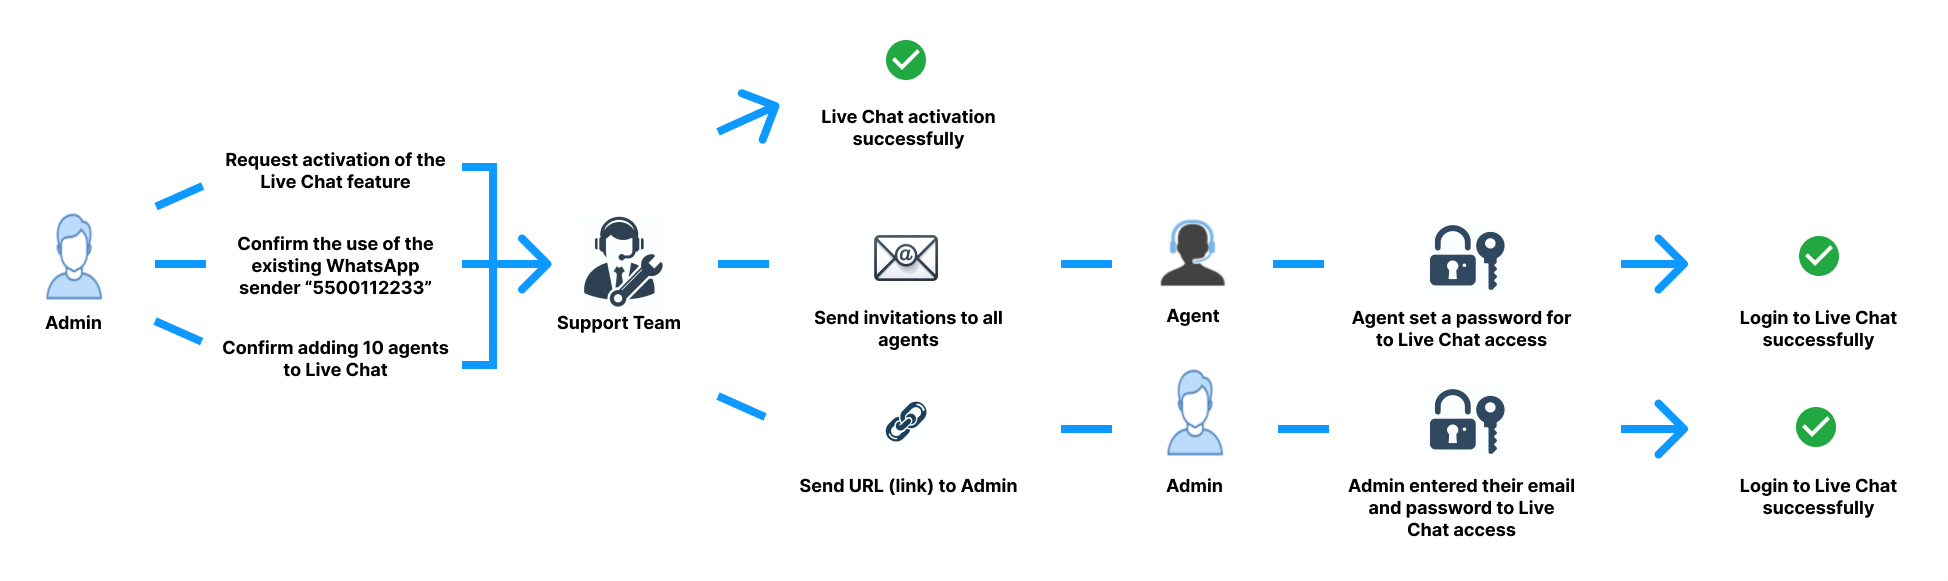
Configure Live Chat for the Orders Workspace by using its existing bidirectional WhatsApp sender, 5500112233, and adding 10 agents.
-
Request activation
Ask the support team to activate Live Chat for the
OrdersWorkspace. -
Confirm the sender
Tell the support team to use the existing bidirectional WhatsApp sender,
5500112233, which is already active in theOrdersWorkspace. -
Specify the agents
Request 10 Live Chat agents and provide each agent’s name, email address, and phone number. The support team adds the agents, sends invitations, and provides the admin with a Live Chat access link.
-
Onboard the agents
Each agent accepts the email invitation and uses its link to set up Live Chat credentials.
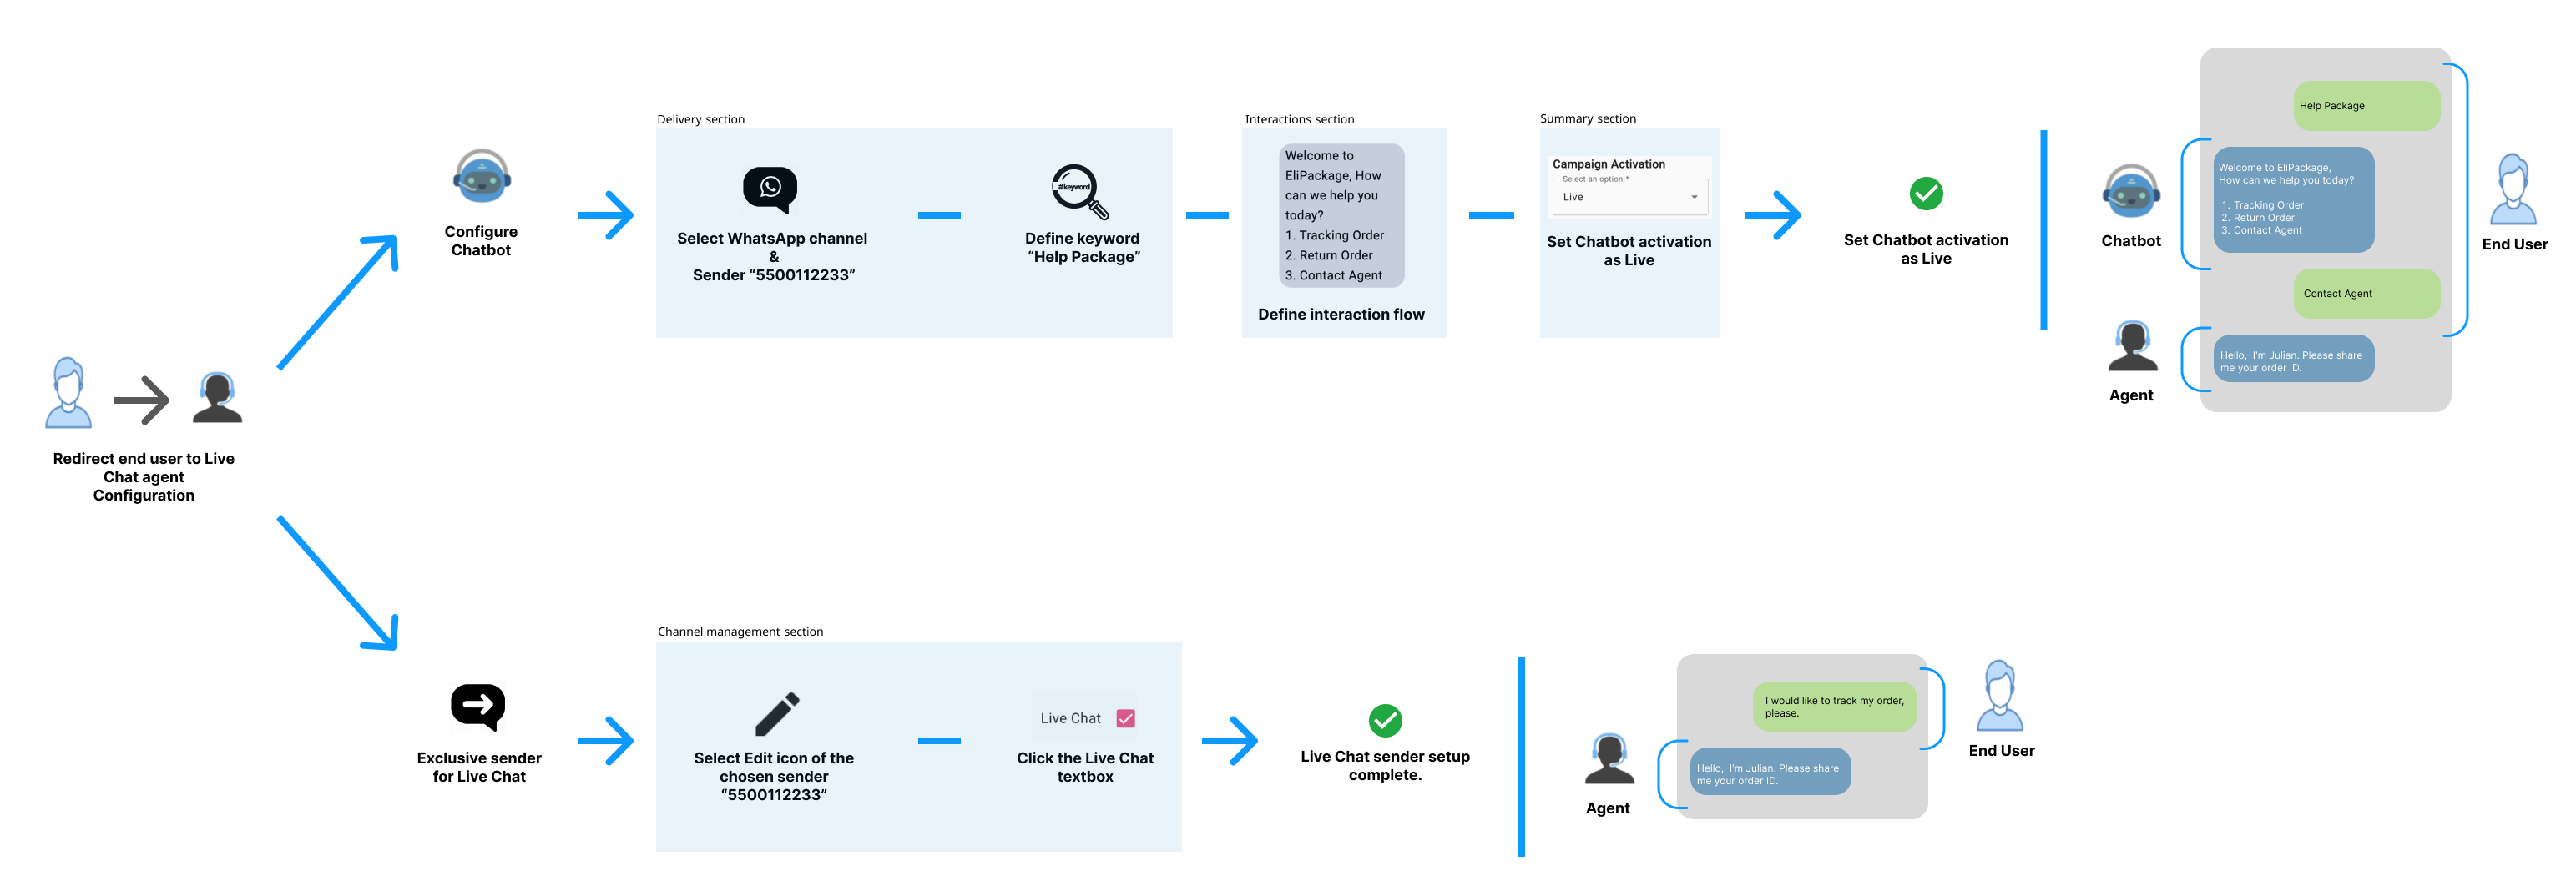
After setup, direct users to an agent in one of two ways:
- Chatbot transfer: Configure a chatbot that transfers users to a Live Chat agent. In this example, the end user, chatbot, and agent communicate through WhatsApp sender
5500112233. The keywordHelp Packagetriggers the chatbot. - Direct connection: Select WhatsApp sender
5500112233exclusively for Live Chat in Channel Management so end users can message an agent directly.
Updated 1 day ago