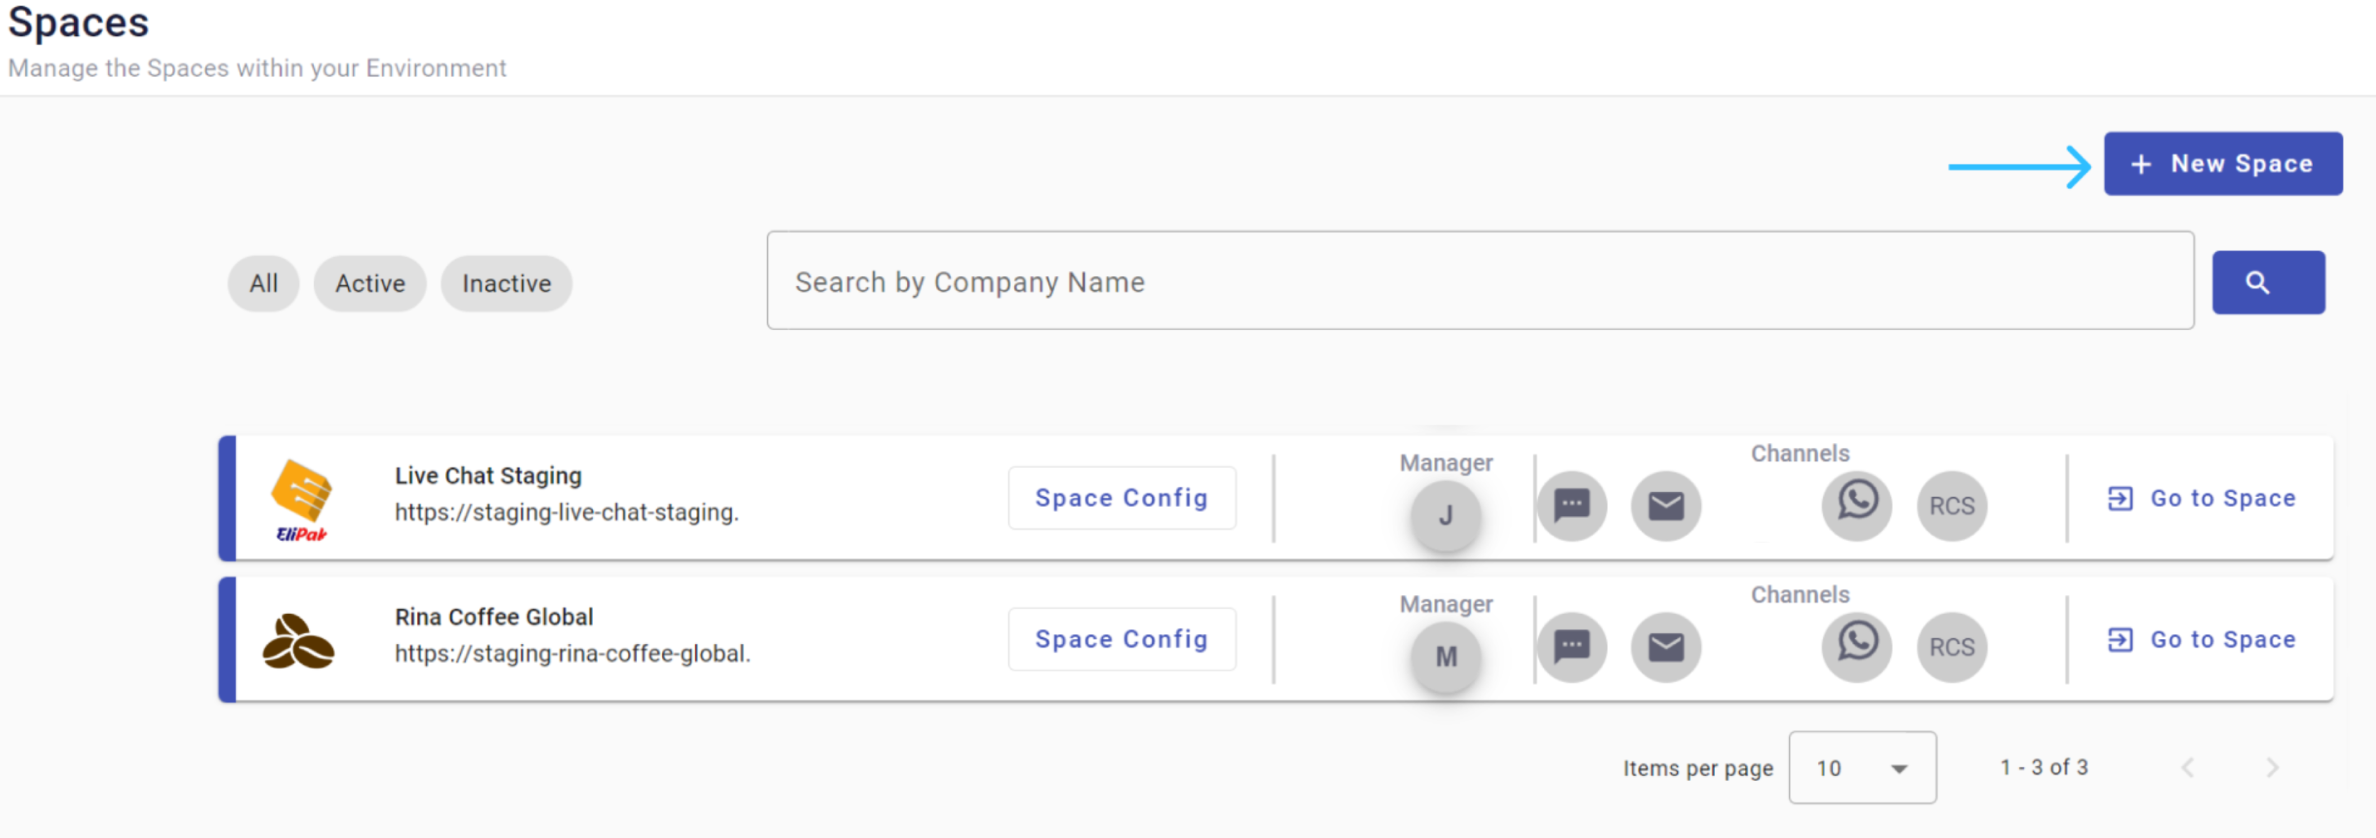
Create Workspace
You use Environments to organize and manage multiple Workspaces. Each Environment holds numerous Workspaces, each with its own configurations and functionalities. You create Workspaces within an Environment to tailor the platform to specific needs.
When you create a new Workspace, you set up a distinct area within your Environment that you customize and manage independently. You use this feature when your organization manages different projects or departments within a single Environment.

You create a new Workspace using the following steps:
-
Start the process: Select the + New Workspace button. A new window opens where you enter the basic information and configure the settings for your new Workspace.
-
Basic Information: You fill in the necessary Workspace details in the Basic Information tab.
-
Workspace Manager: You assign a Workspace manager who oversees and manages this Workspace. You ensure there is a dedicated person responsible for the Workspace's operations.
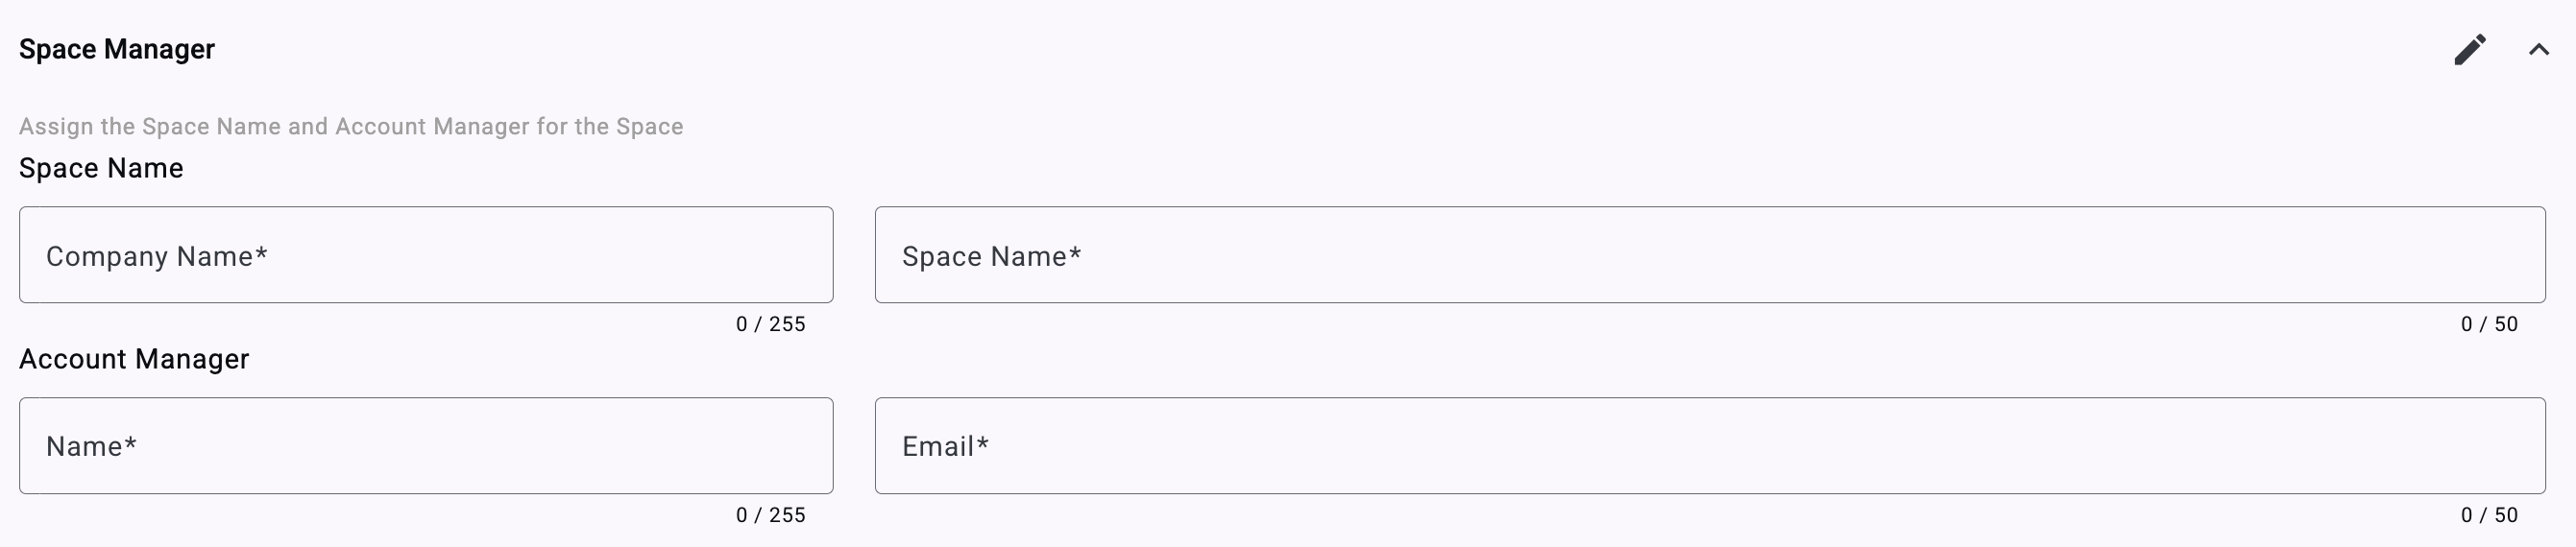
- Company Name: Enter the name of the company associated with this Workspace.
- Space Name: Enter a specific name for the Workspace. This is also a required field.
- Name: Enter the full name of the account manager.
- Email: Provide the email address of the account manager.
-
Platform Configuration: You set up the details that define how the platform operates for this Workspace. You configure an alias, language preferences, and email sender settings.

- Alias: Enter an alias for the Workspace. The alias activates the URL dropdown menu and identifies the Workspace within the platform.
- URL: Select the URL dropdown menu and choose the URL for the platform.
- Language: Select the preferred language for the Workspace from the dropdown menu.
- Email Sender: Choose the email sender address from the dropdown menu. This is the address from which notifications and communications are sent.
-
Welcome Screen: You customize the login interface that users see when they access your Workspace by uploading a logo.
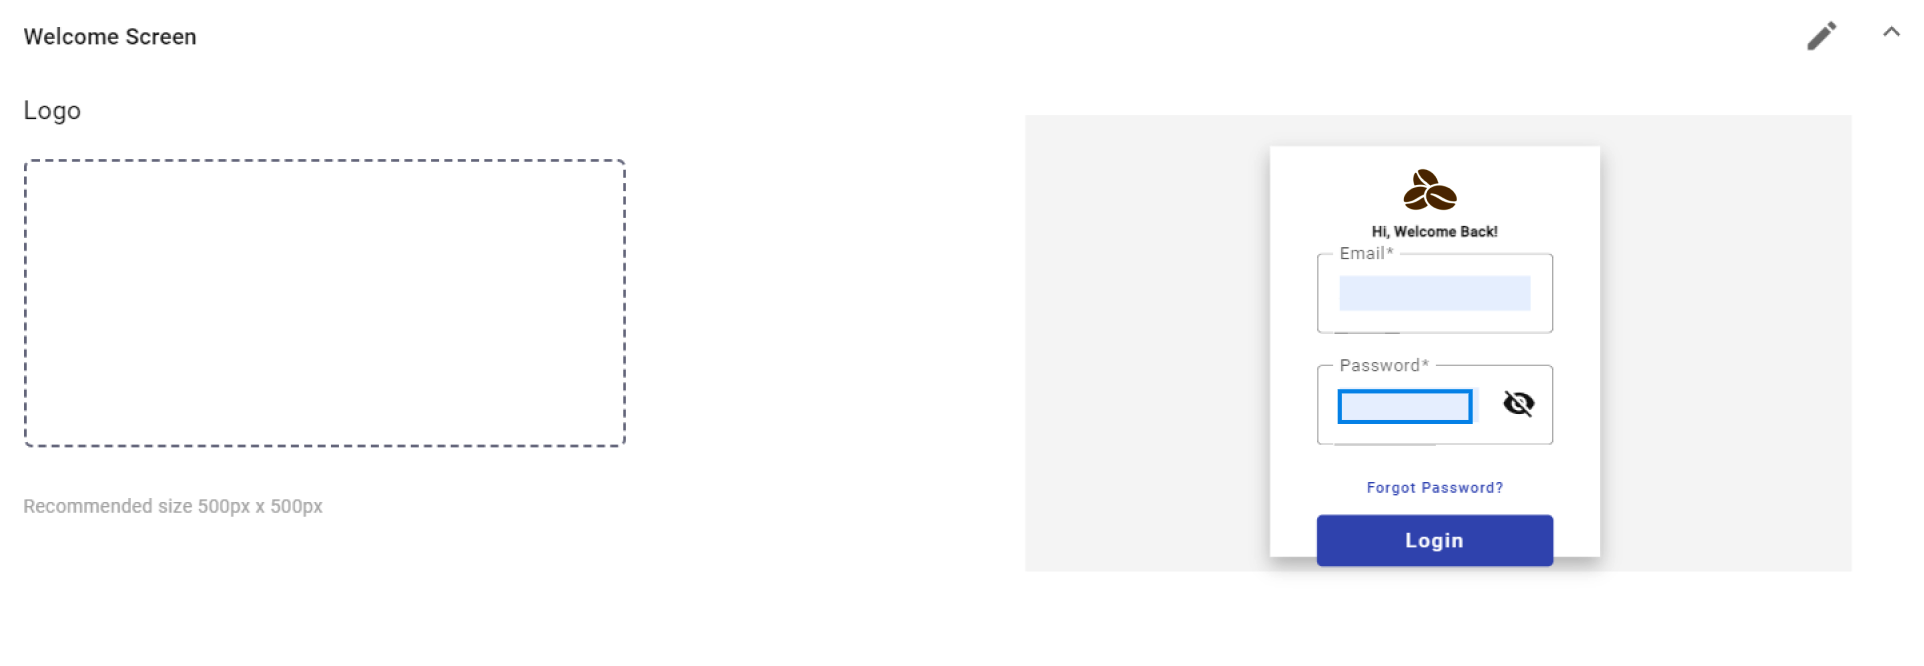
Select the area indicated to upload your company logo. The recommended size is 500px x 500px.
You see on the right a preview of how the login screen appears to users.
-
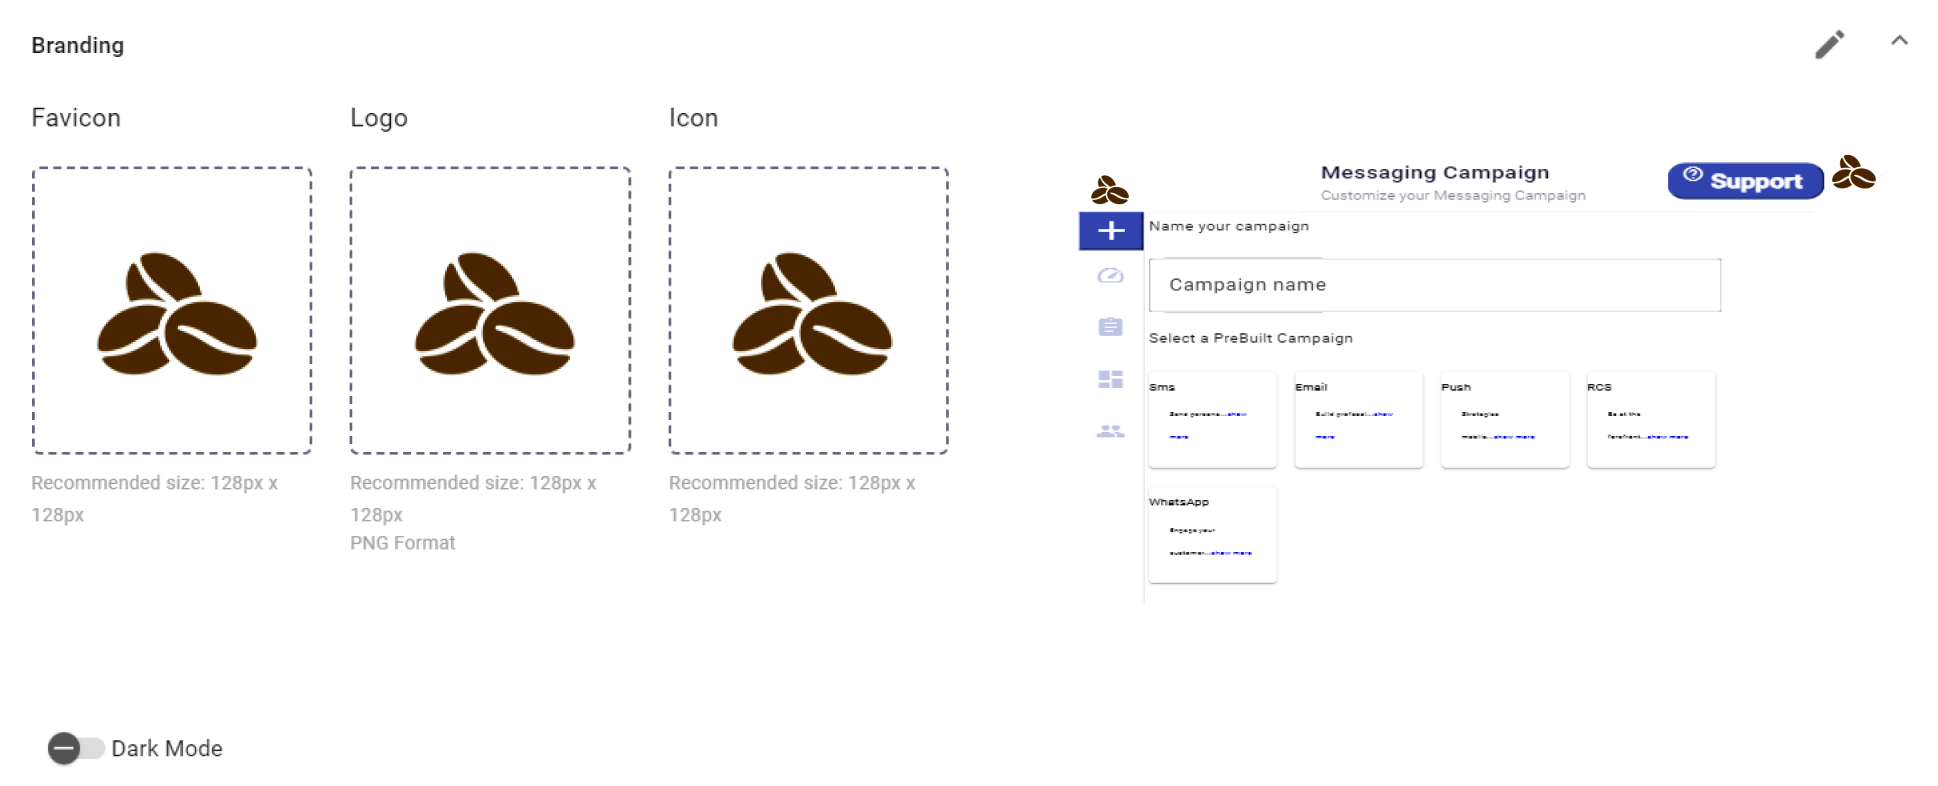
Branding: You customize the visual identity of your Workspace by uploading a favicon, logo, and icon. You ensure your Workspace reflects your organization's branding.
-
Favicon: Select the designated area to upload your favicon image. The recommended size is 128px x 128px. The favicon appears in the browser's address tab when users access the Workspace.
-
Logo: Select the area specified to upload your logo. The recommended size is 128px x 128px. This logo displays in the top right of the Workspace navigation bar.
-
Icon: Select the area specified to upload your icon. The recommended size is 128px x 128px. This icon appears as the logo in the list of Workspaces.
-
Dark Mode: You enable or disable Dark Mode using the toggle switch. Dark Mode changes the visual theme of the Workspace to a darker color scheme.
-
-
Platform Feature Activation: You select and activate the features available within this Workspace, such as broadcasts (SMS, WhatsApp, Email, RCS), automations, URL tracking, and Live Chat.
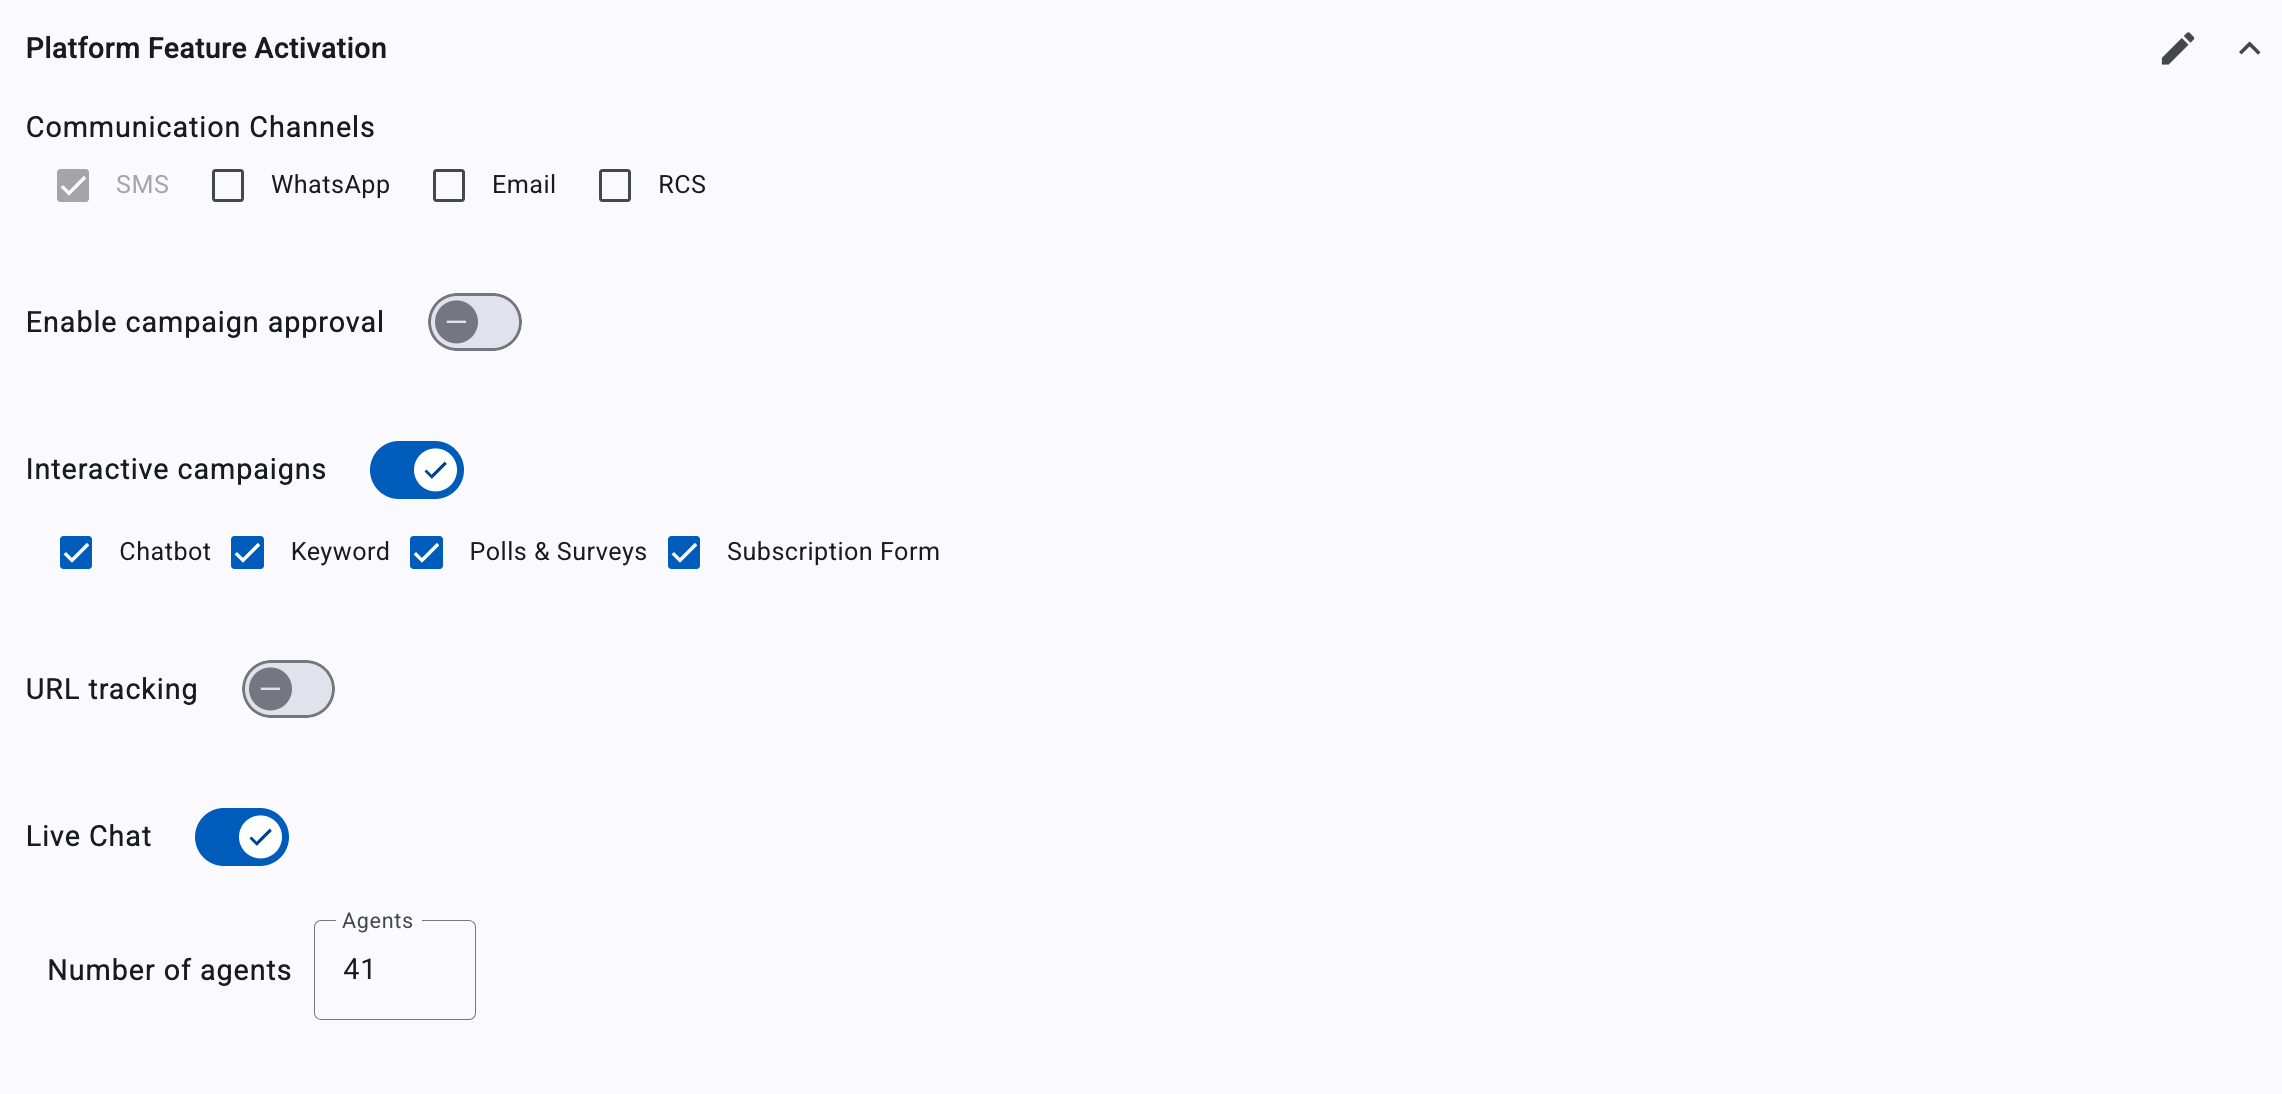
You activate or deactivate the Live Chat feature and set the total number of agents for the Live Chat.
For more information on activating the Live Chat, go to the Live Chat Configuration section.
NOTEBy default, the Campaign Approval feature is turned off, meaning broadcasts can be created and launched without requiring any prior validation.
When "Enable campaign approval" is activated, every broadcast must go through an approval process before it can be sent. This adds a control layer where designated Administrators review and approve the broadcast content and configuration before execution.
This functionality is designed specifically only for broadcast (SMS, WhatsApp, Email, RCS).
-
Platform Support: You provide support resources and configure integration with Zendesk so users have access to the help and documentation they need.
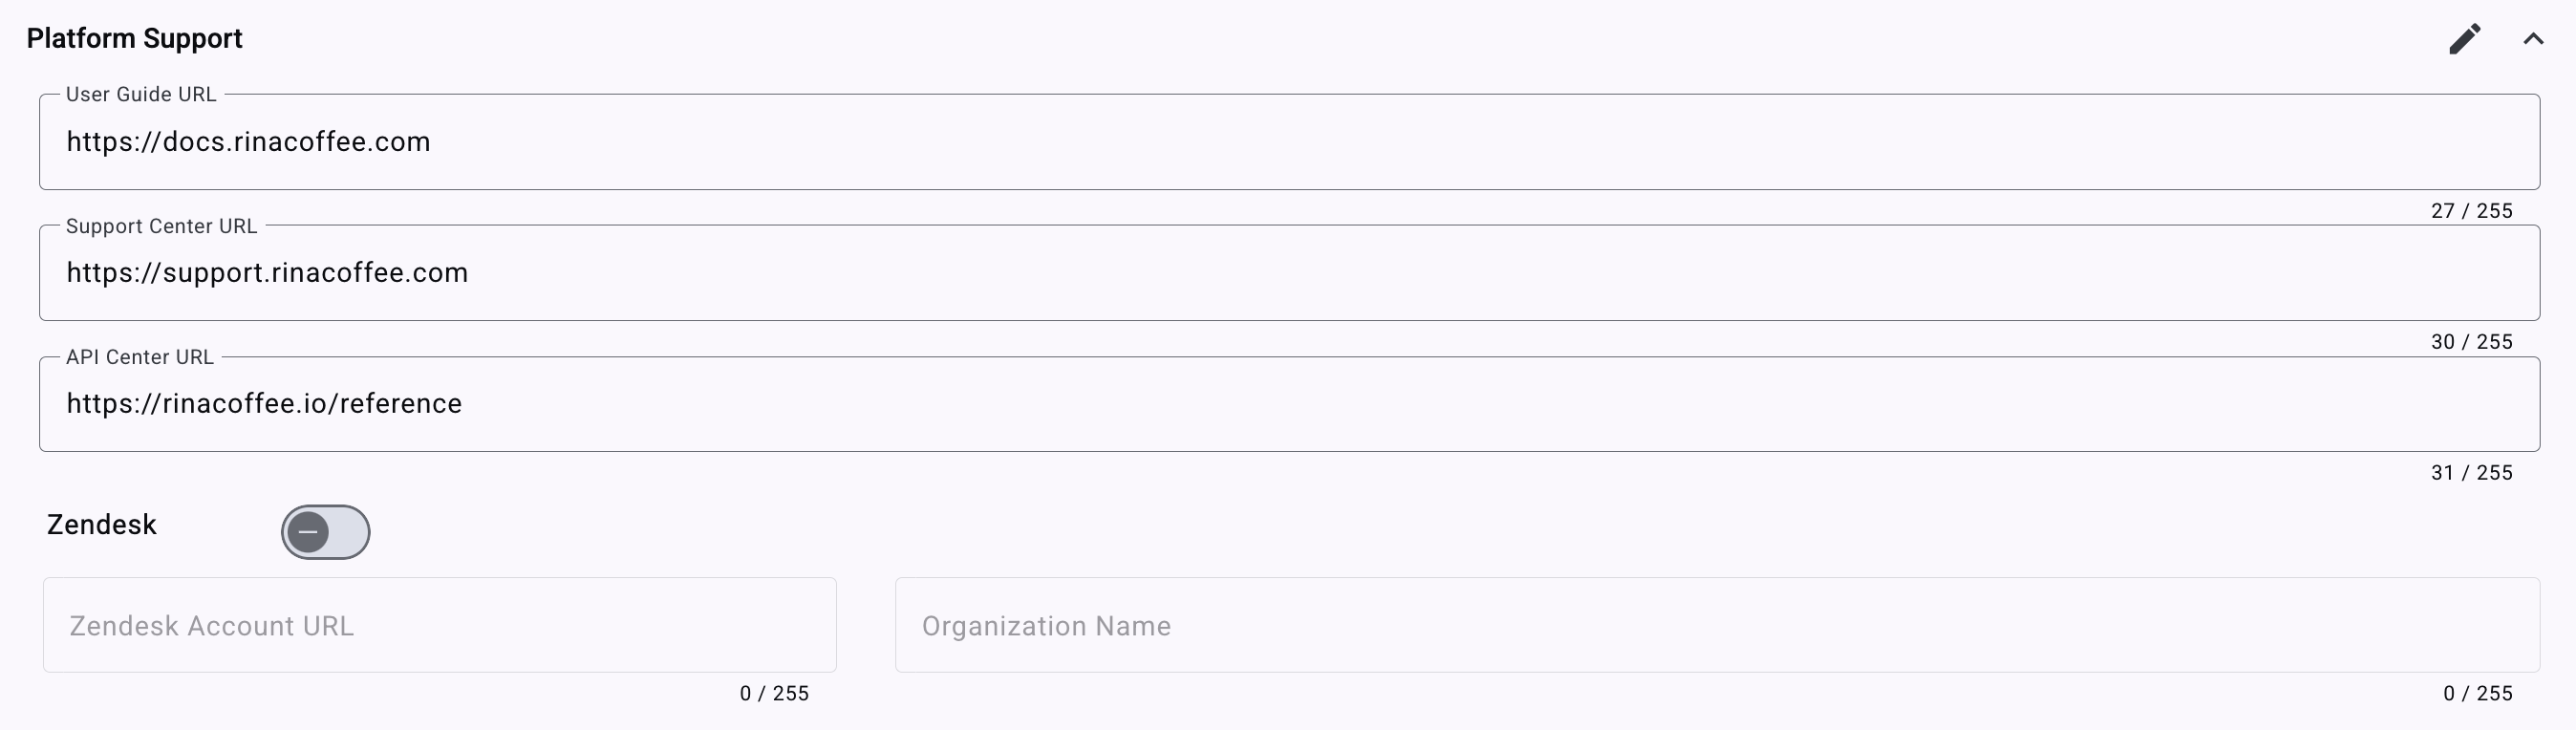
- User Guide URL: URL for the user guide. Users reference this to understand how to use the platform.
- Support Center URL: URL for the support center where users find FAQs, troubleshooting guides, or contact support.
- API Center URL: Enter the URL for the API documentation center. Developers use this for detailed information on integrating and using the API.
- Zendesk Integration: Enable or disable Zendesk integration using the toggle switch. When enabled, you provide a support experience directly through Zendesk. Enter the URL of your Zendesk account and enter your organization's name as it appears in Zendesk.
You cannot edit this section.
-
Google API: You integrate Google services such as Google Analytics and Google Maps into your platform from the Google API section. You use these services to track user interactions and provide location-based services.

- Google Analytics ID: A Google identifier to register events. The value does not change.
- Google Maps API Key: You use this key to find addresses when shipping requires a location.
You cannot edit this section.
-
Security – MFA: Multi-Factor Authentication (MFA) adds an extra layer of security by requiring users to verify their identity using two or more verification methods.
Available verification methods:
- App Authenticator - Users must use an authenticator app (such as Google Authenticator or Authy) to verify their identity when logging into the Workspace.
- Email - The platform sends a verification code to the user's email each time they log in.
You cannot edit this section.
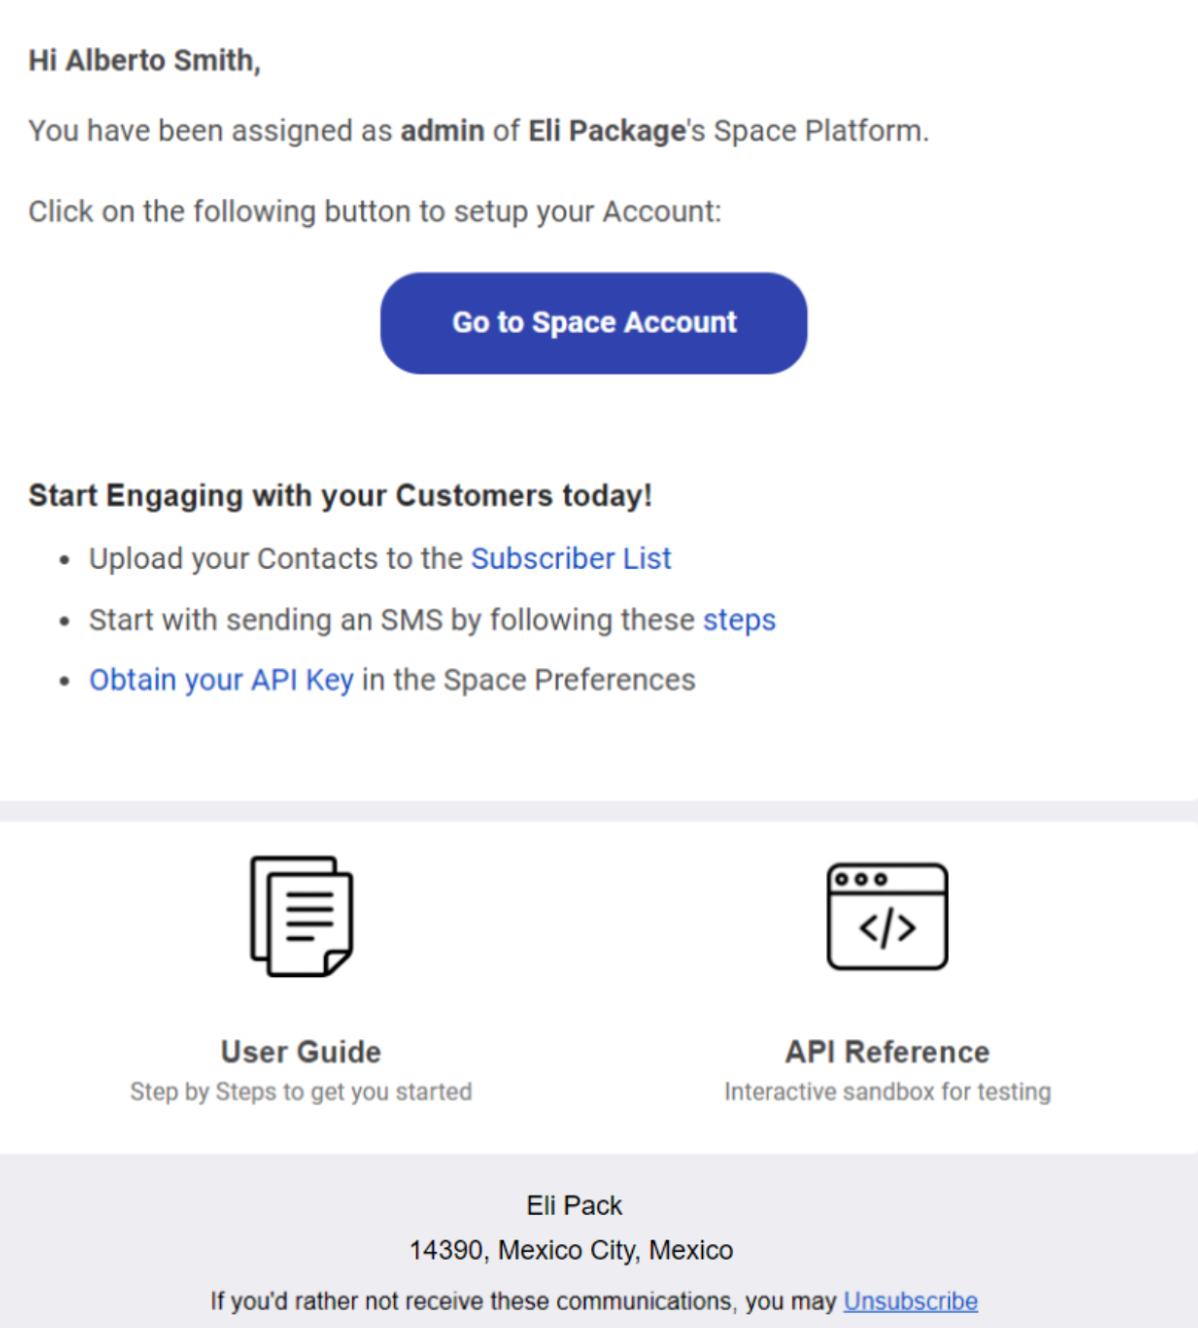
After you create a Workspace, the platform sends an email to the administrator with an invitation to enter the Workspace.
Updated 4 days ago