Contact Data
Configure contact data fields, edit permissions, and display names in Live Chat.
Configure Contact Data fields so agents can view, edit, and identify customer information in Live Chat.
Contact data helps agents personalize conversations, resolve issues, and follow up with customers. Handle contact data according to your organization’s privacy policies and applicable regulations.
Prerequisites
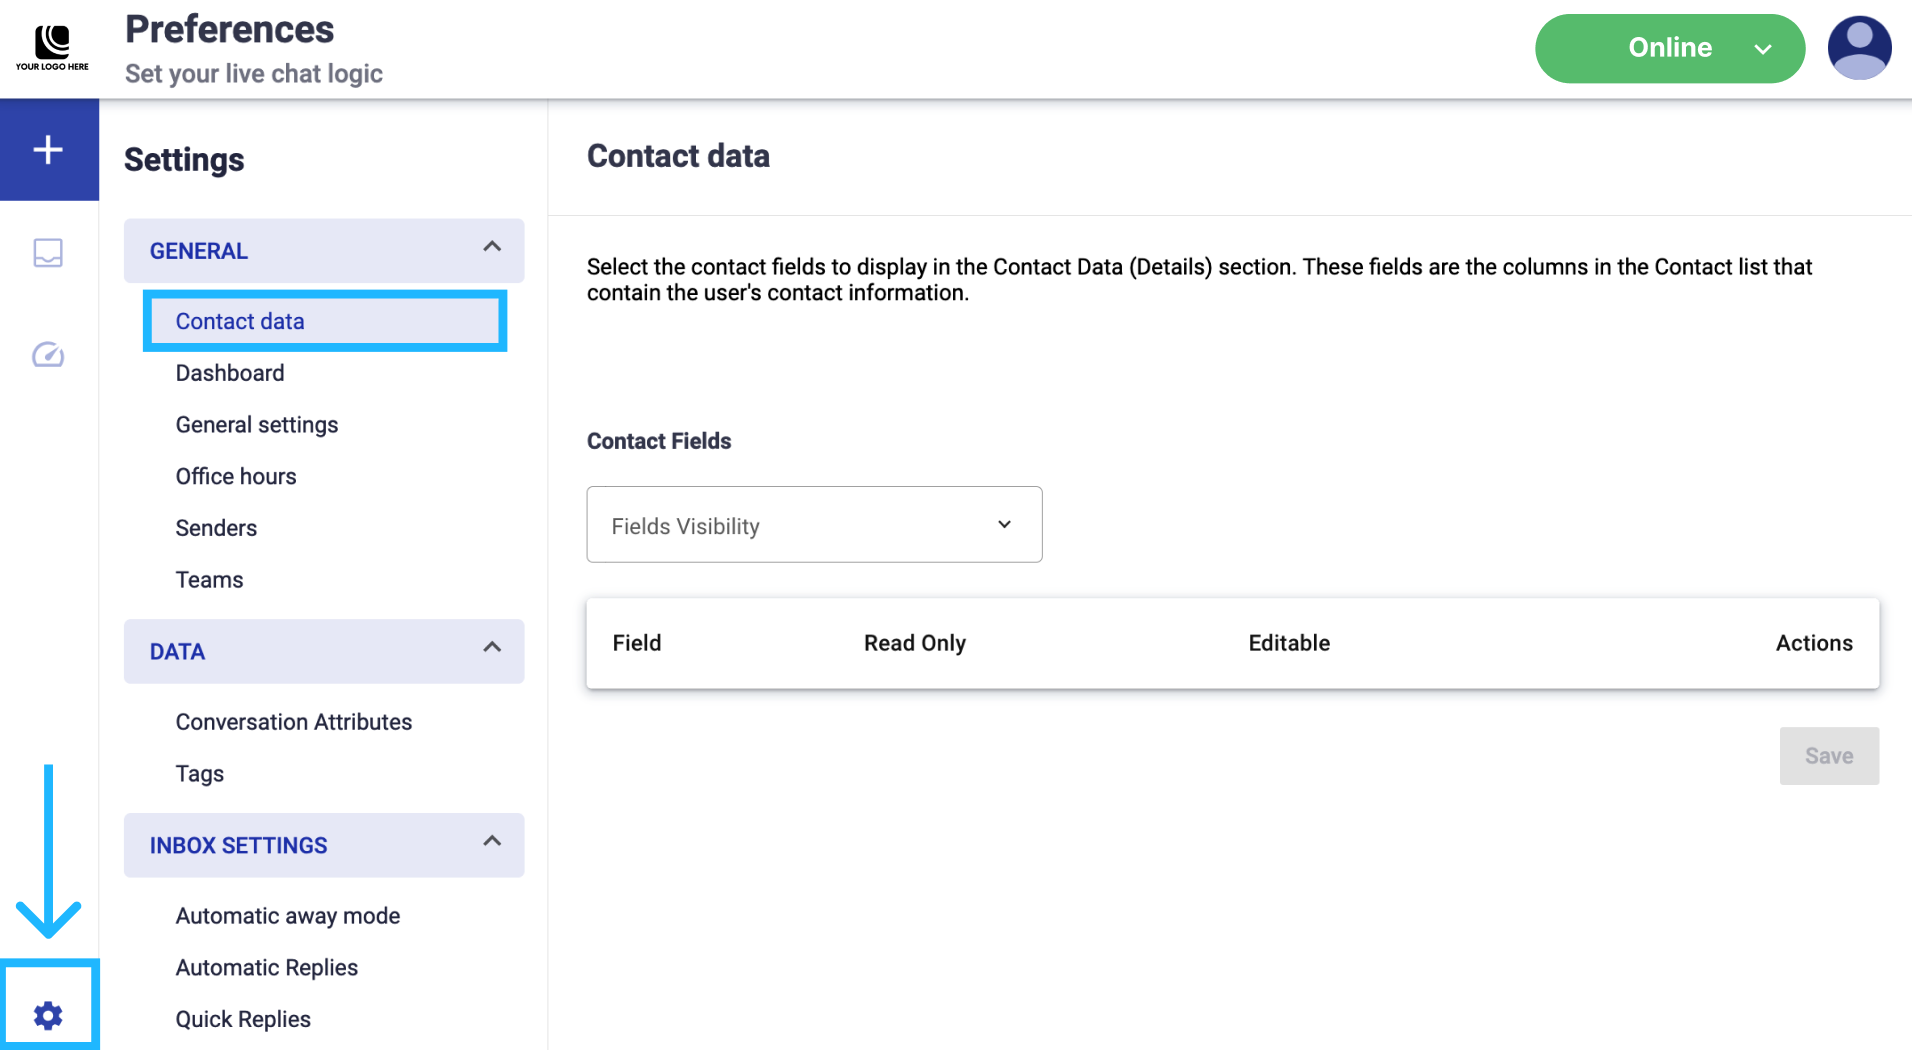
- Open the Live Chat platform.
- Go to Preferences.
- Open the GENERAL dropdown menu.
- Select Contact data.
Set up Contact Data fields
-
From the Fields Visibility dropdown menu, select the contact fields you want to display.
These fields are the columns in the Workspace Contact List that contain customer contact information.
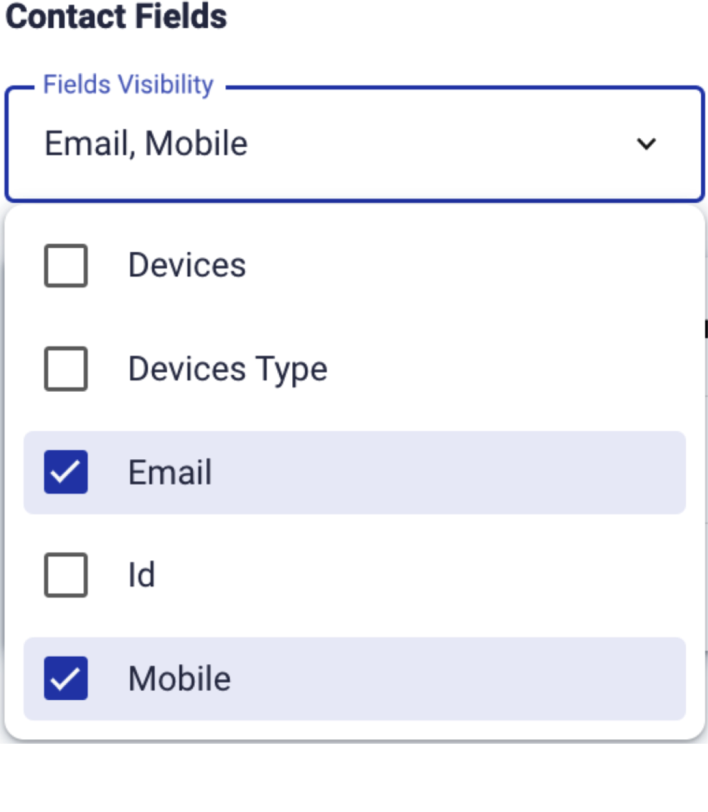
Contact data in Live Chat is linked to the Workspace Contact List. Fields available in the Contact Data section come from the associated Workspace Contact List, and any data saved or updated in Live Chat is reflected in that list.
-
Review the selected fields in the Contact Data table.
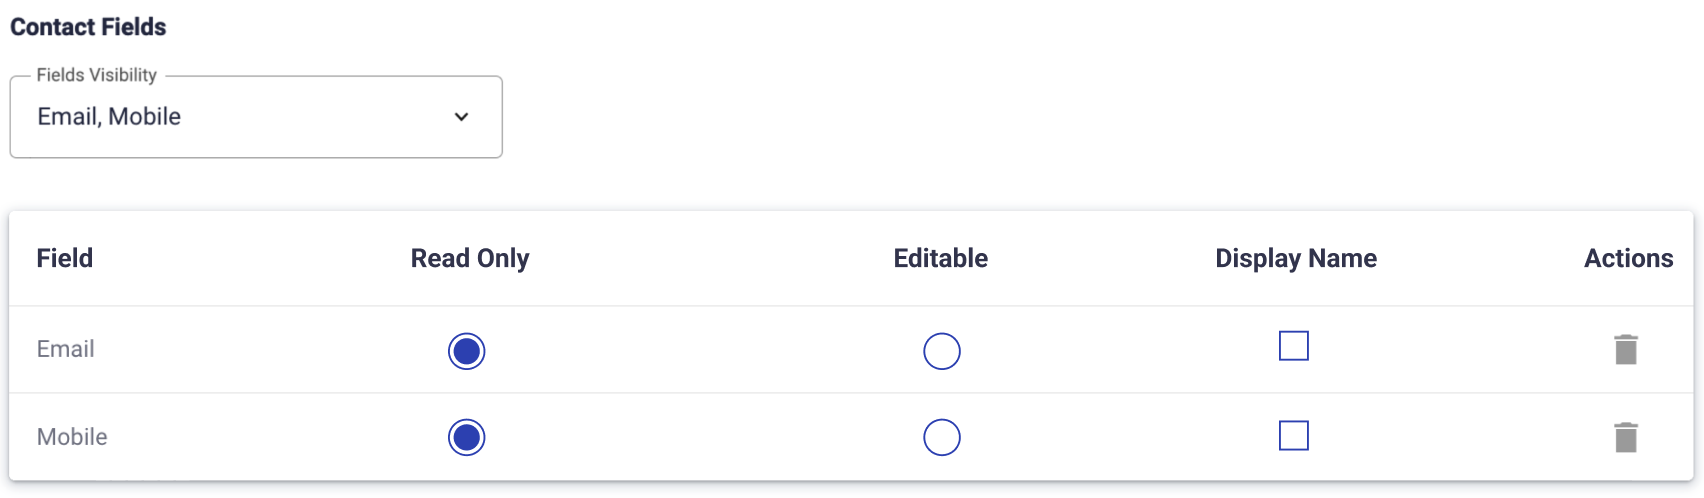
To remove a contact data field, clear the field in the Fields Visibility dropdown menu.
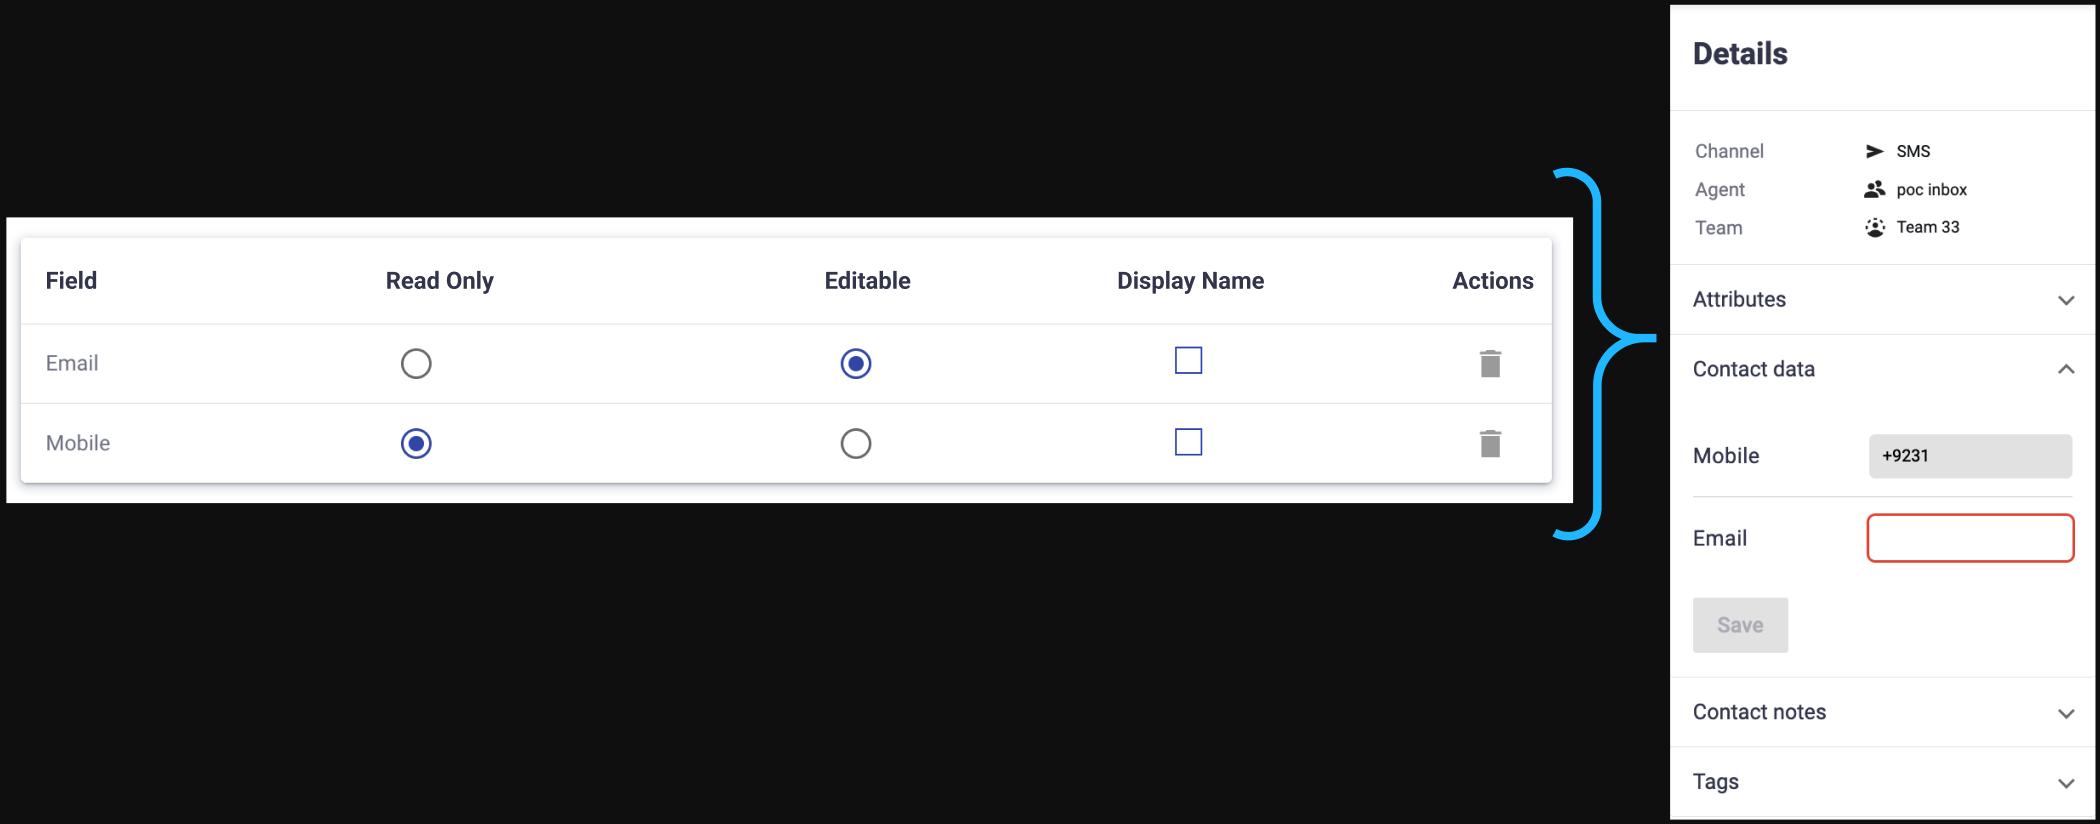
Selected contact data fields appear in the conversation Details panel.
-
Choose which fields agents can edit in the Details panel.
Select the fields that should be read-only. Leave fields editable when agents should be able to enter or update customer information manually.
-
Click Save.
In this example, the Email field is editable and the Mobile field is read-only. When the conversation starts, an agent can enter the customer's email from the Details panel.
-
In the Display Name column, choose the primary identifier agents see at the top of the conversation window.
Select a contact attribute, such as Membership or Email, then click Save. For example, if you select Membership as the Display Name, the customer's membership number, such as
141518-DF14, appears at the top of the conversation.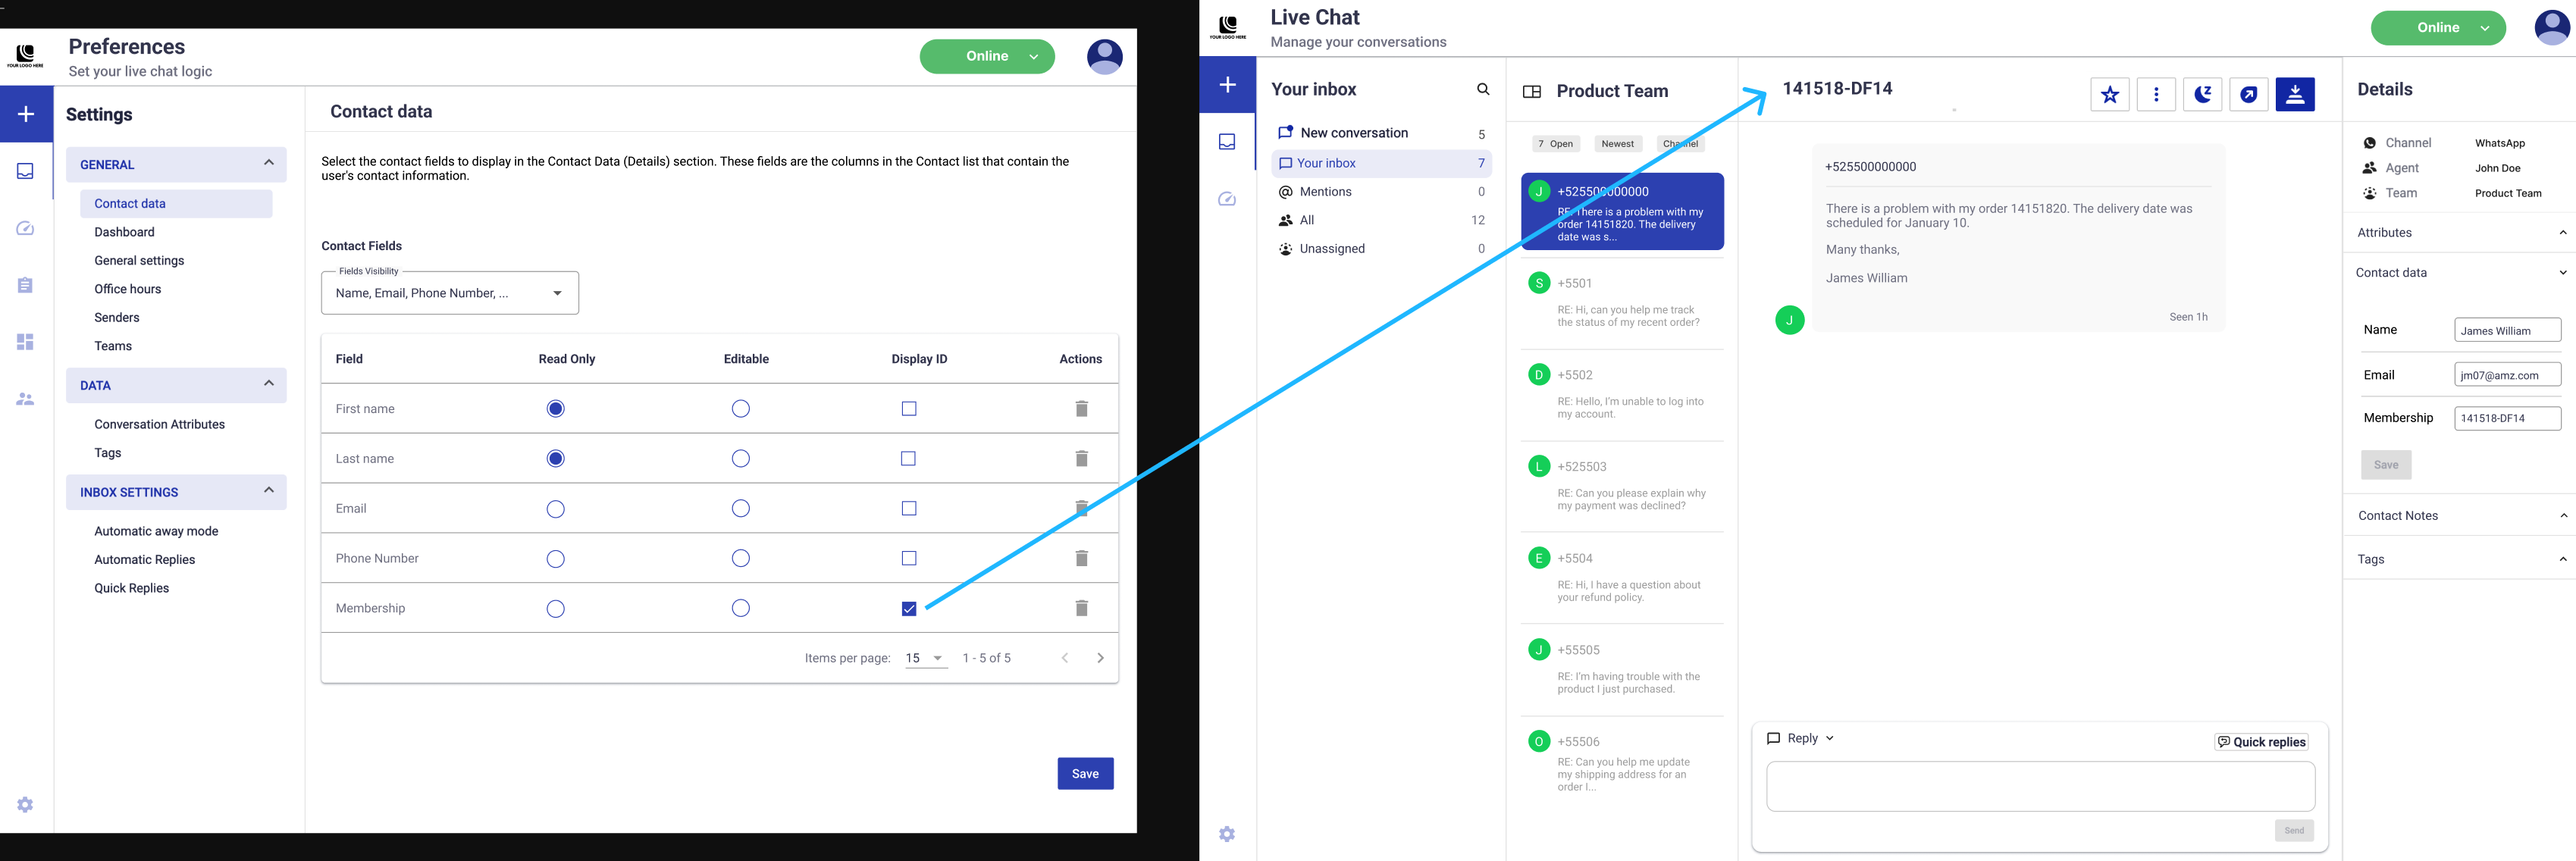
If no Display Name field is selected, Live Chat combines the First Name and Last Name fields by default. If the selected Display Name, First Name, and Last Name values are empty, Live Chat displays the Phone Number value instead.
Optional: Add new contact data fields
Add new fields in the Workspace Contact List before using them in Live Chat.
- Open the Contact List in the Workspace linked to Live Chat.
- Select the Fields Visibility dropdown menu next to the + Add Subscribers button.
- Click Manage Fields.
- Create the required field in the contact list.
- Return to Live Chat and log in.
- Go to Inbox Preferences.
- Under General, select Contact Data.
- Open the Contact Fields dropdown menu and select the new field.
The new field is available in Live Chat after it is created in the Workspace Contact List.
Updated 8 days ago