Conversation Attributes
Create, manage, archive, and unarchive conversation attributes for live chat conversations.
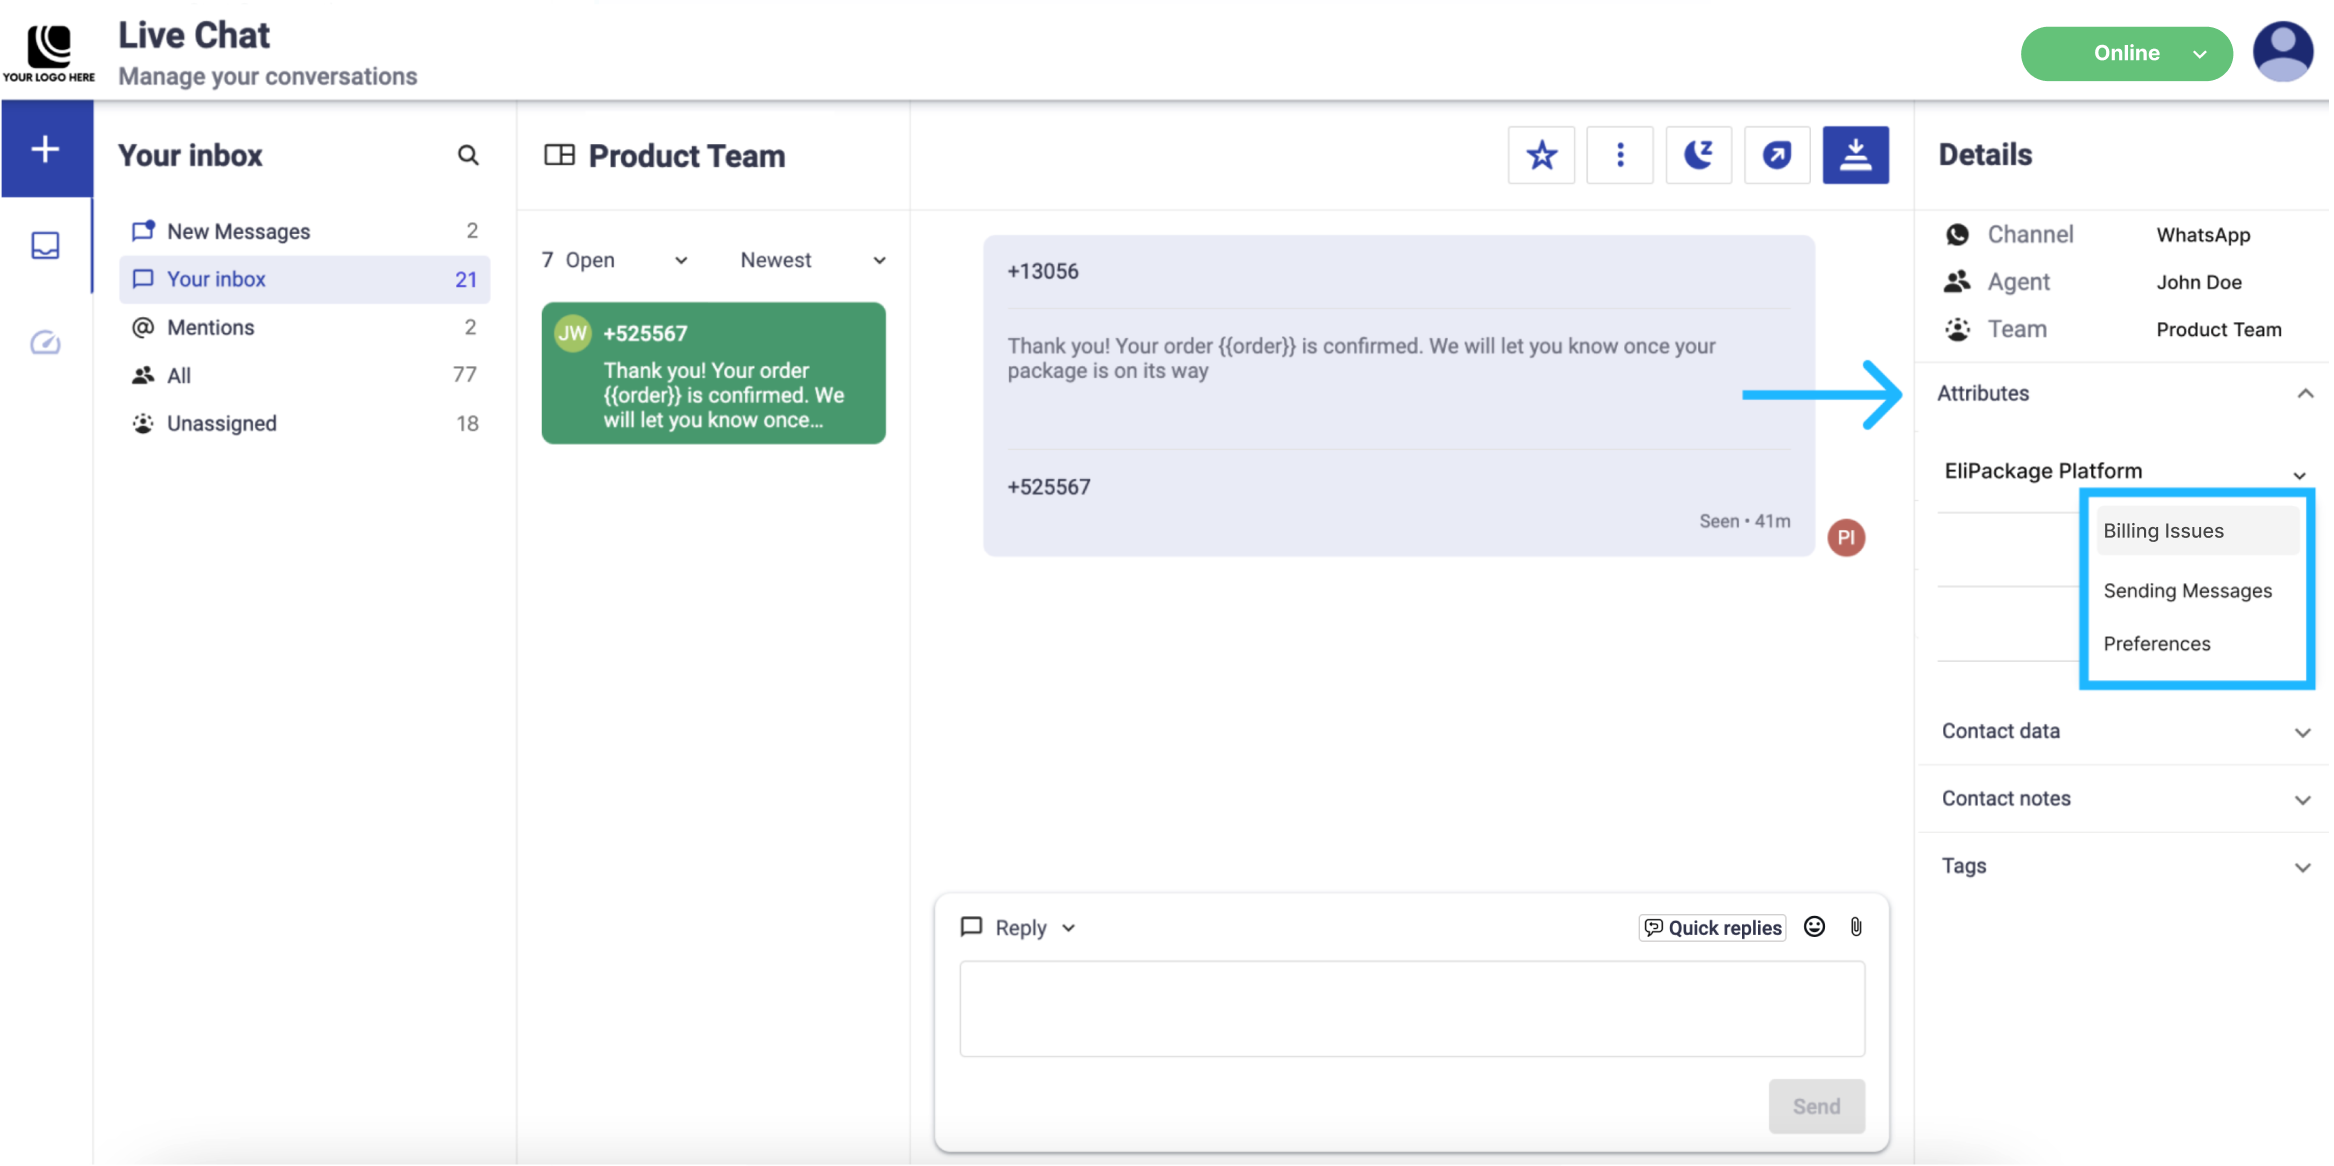
Use conversation attributes to classify, route, and report on live chat conversations from the Details panel.
Conversation attributes help your team manage different support processes for different conversation types. For example, you can create attributes for:
-
Type: Label conversations as
Bug,Feature request, orQuestionto identify real-time trends.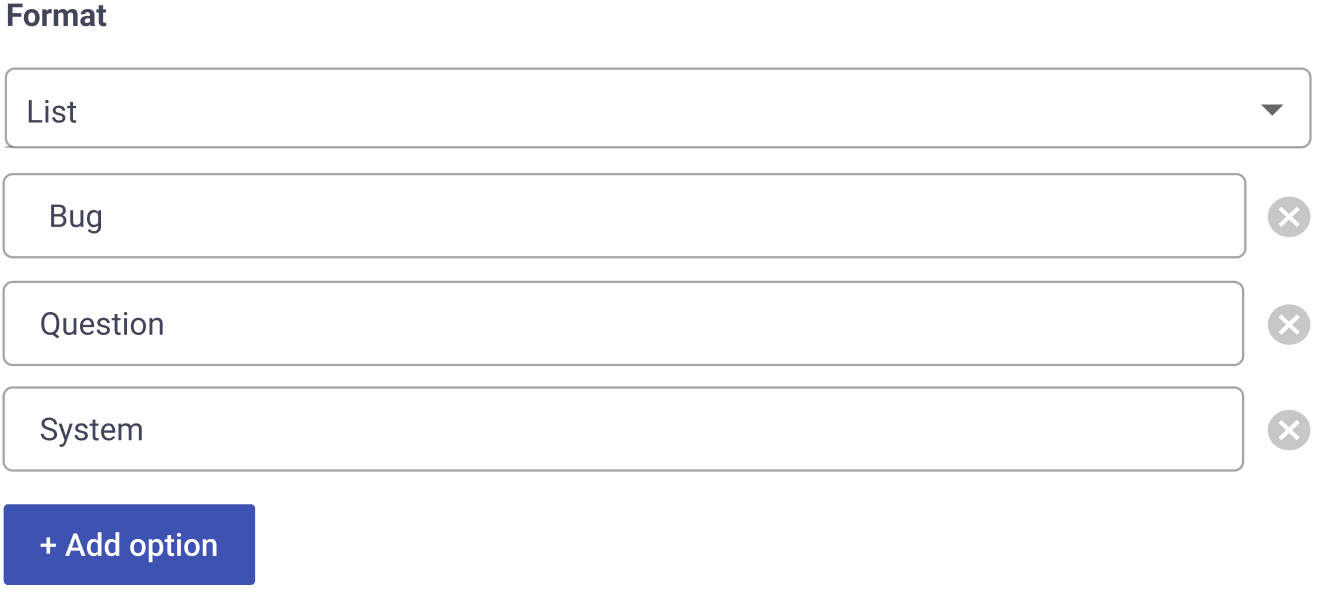
-
Product area: Group conversations by product area so teams can understand which features affect support volume.
-
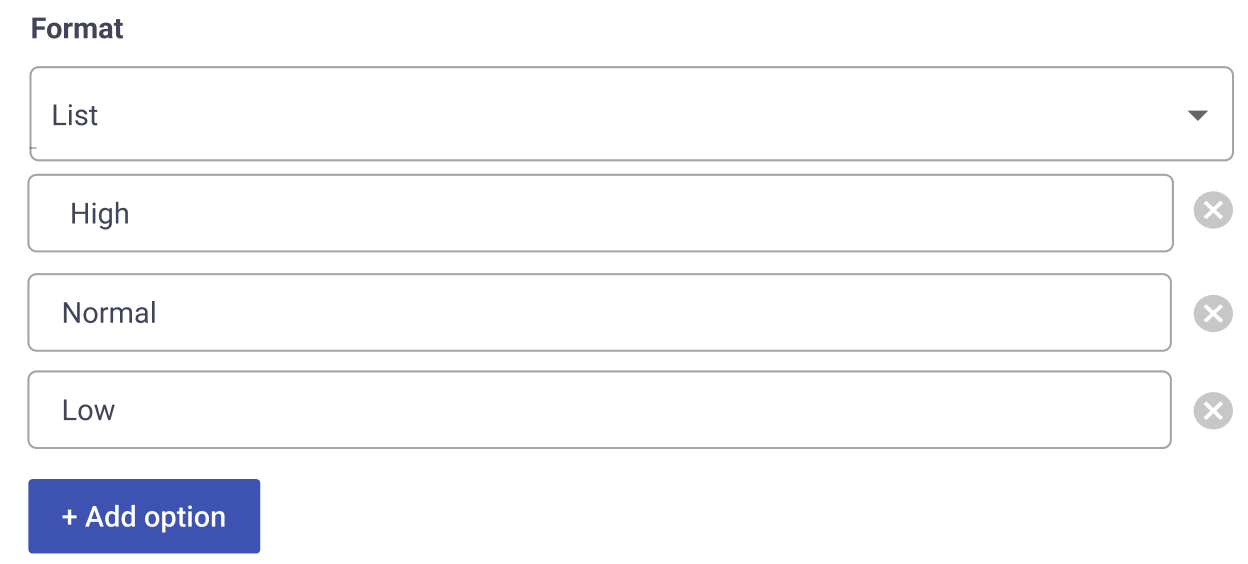
Top Priority: Assign an urgency level so customers who need immediate attention receive prioritized support.
After you configure conversation attributes, your team can set or update them during customer conversations and use them in reports.
Create a conversation attribute
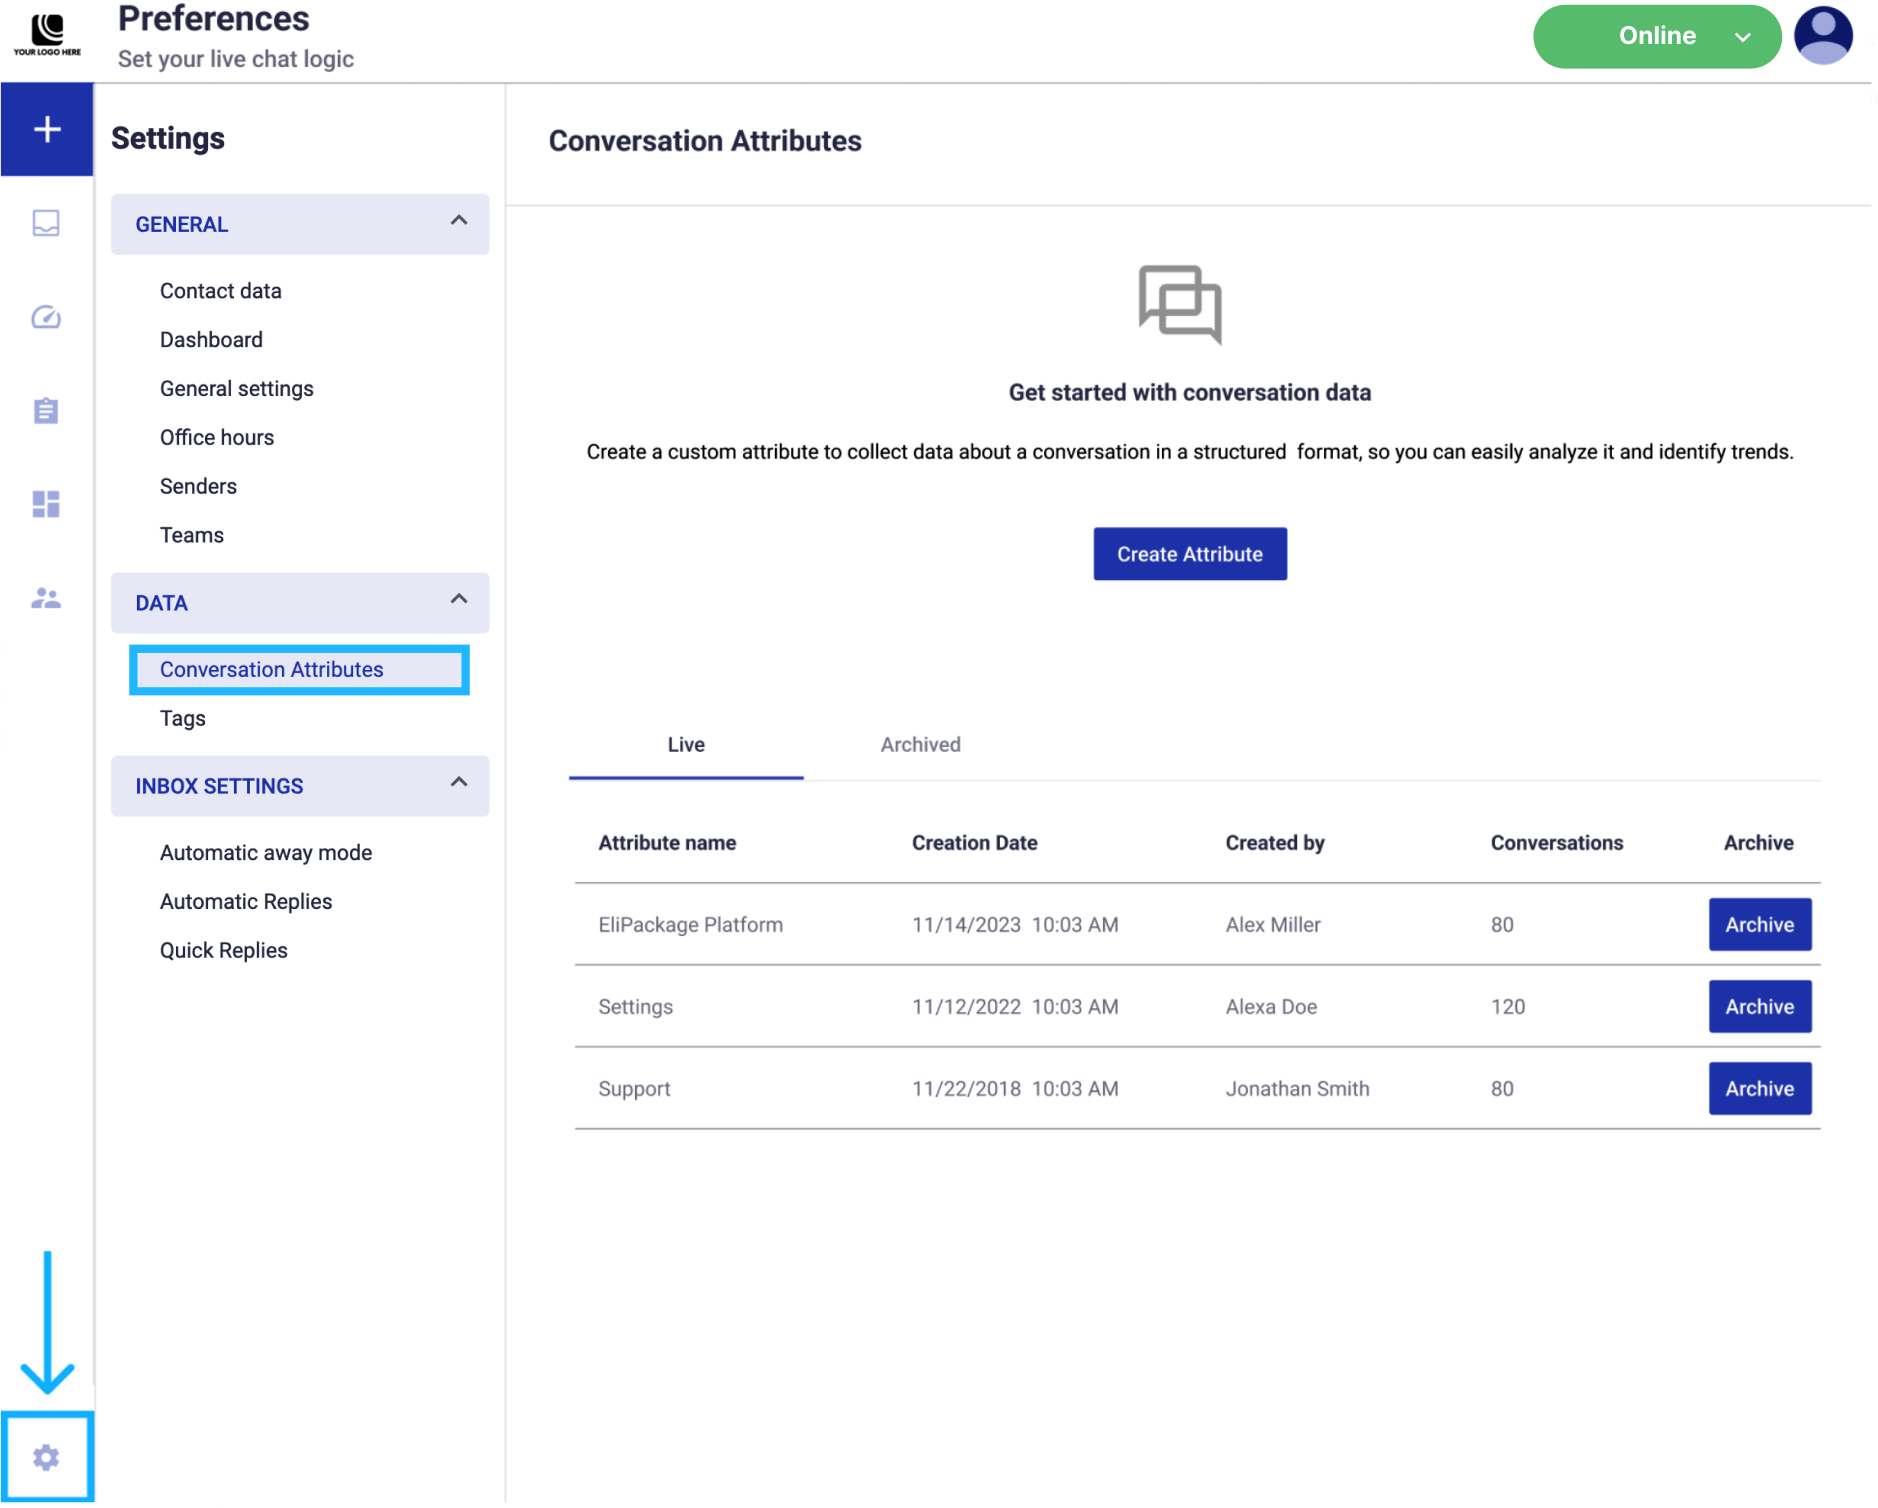
- Go to Preferences.
- Open the DATA dropdown menu.
- Select Conversation Attributes.
-
Click Create Attribute.
The setup dialog opens.
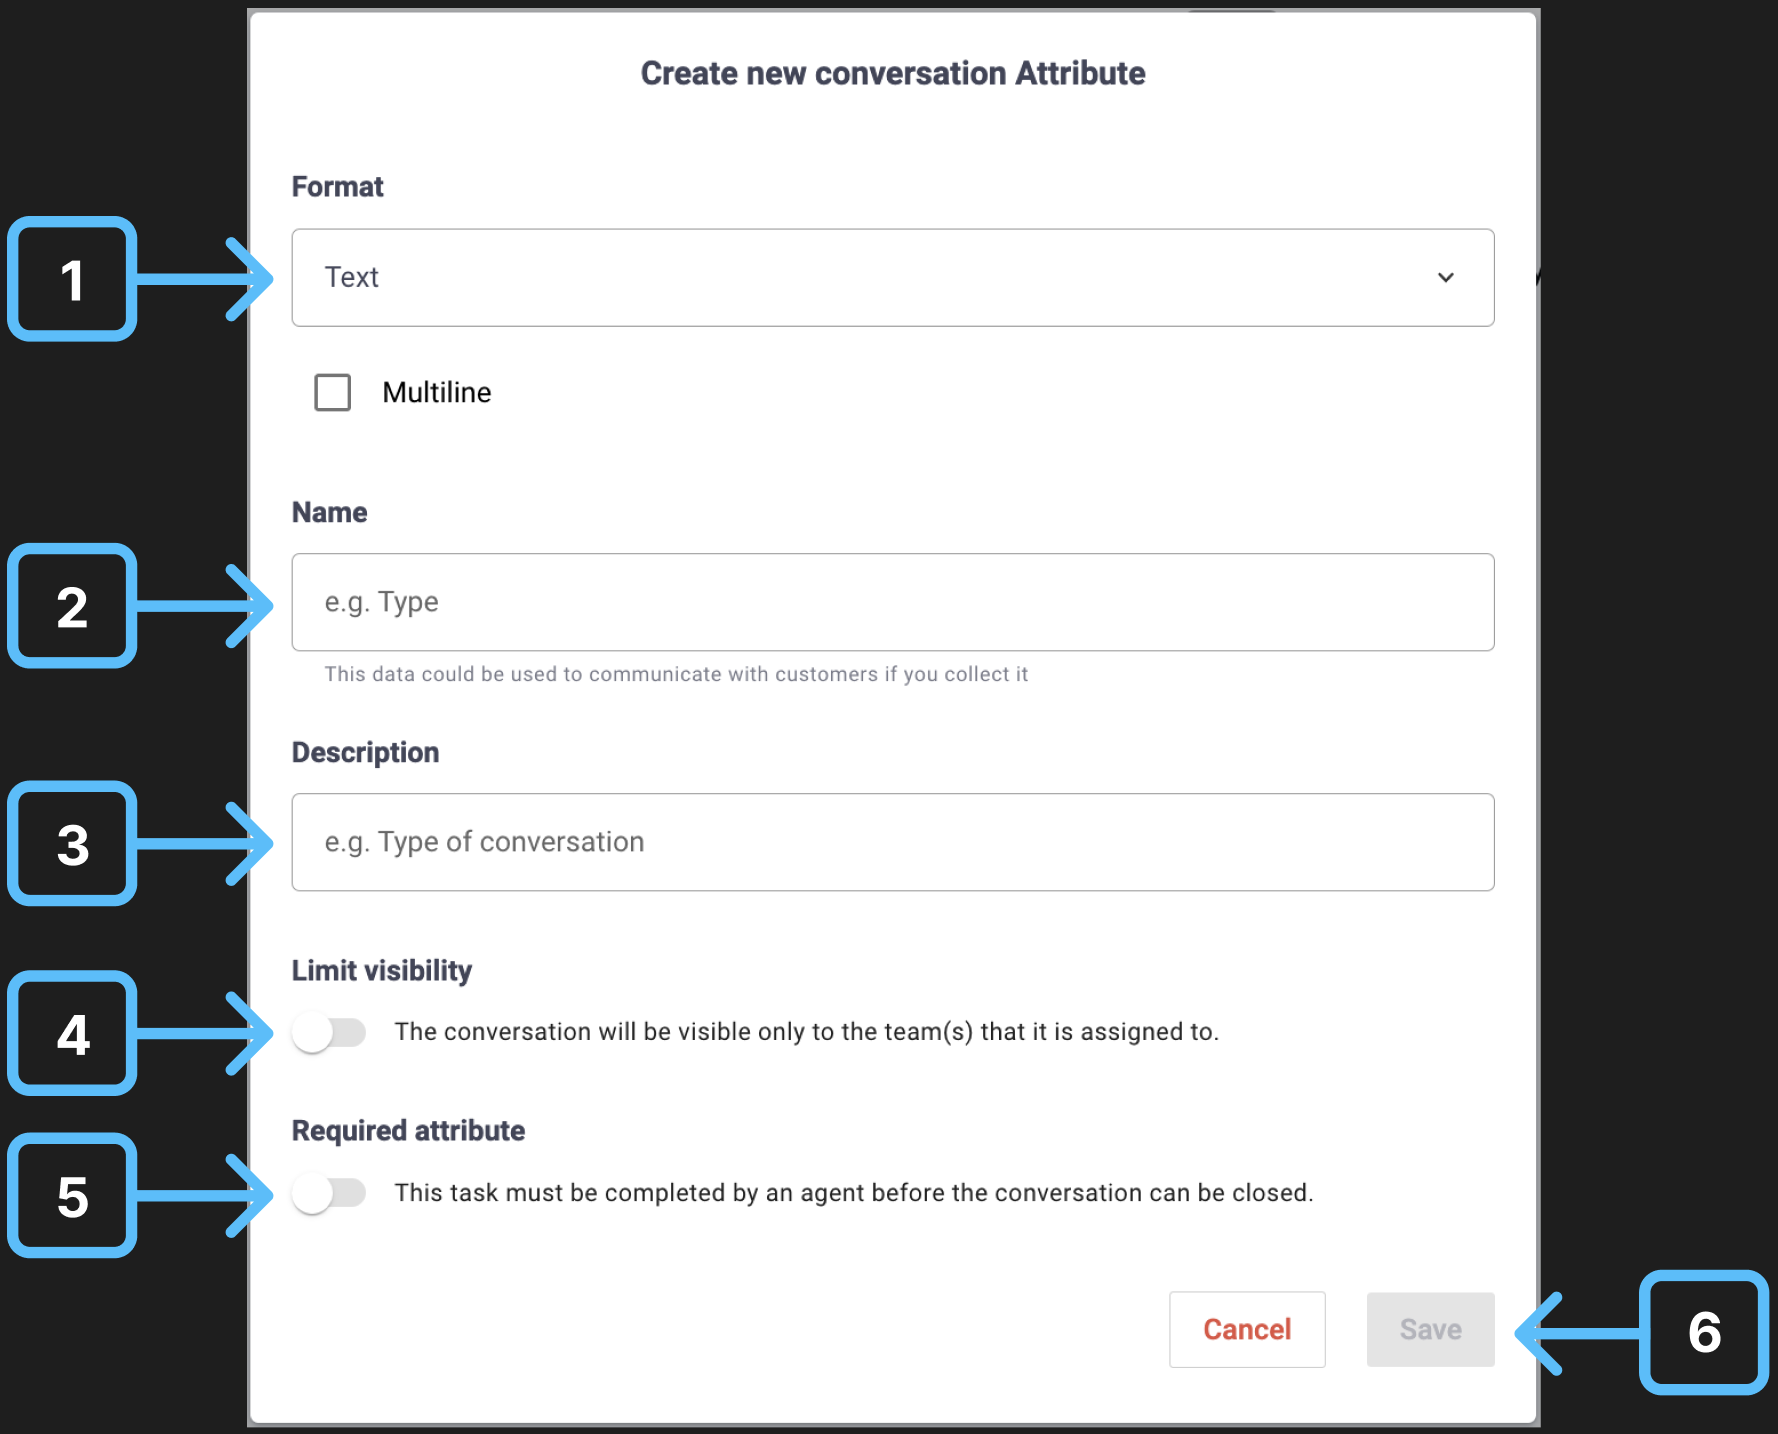
-
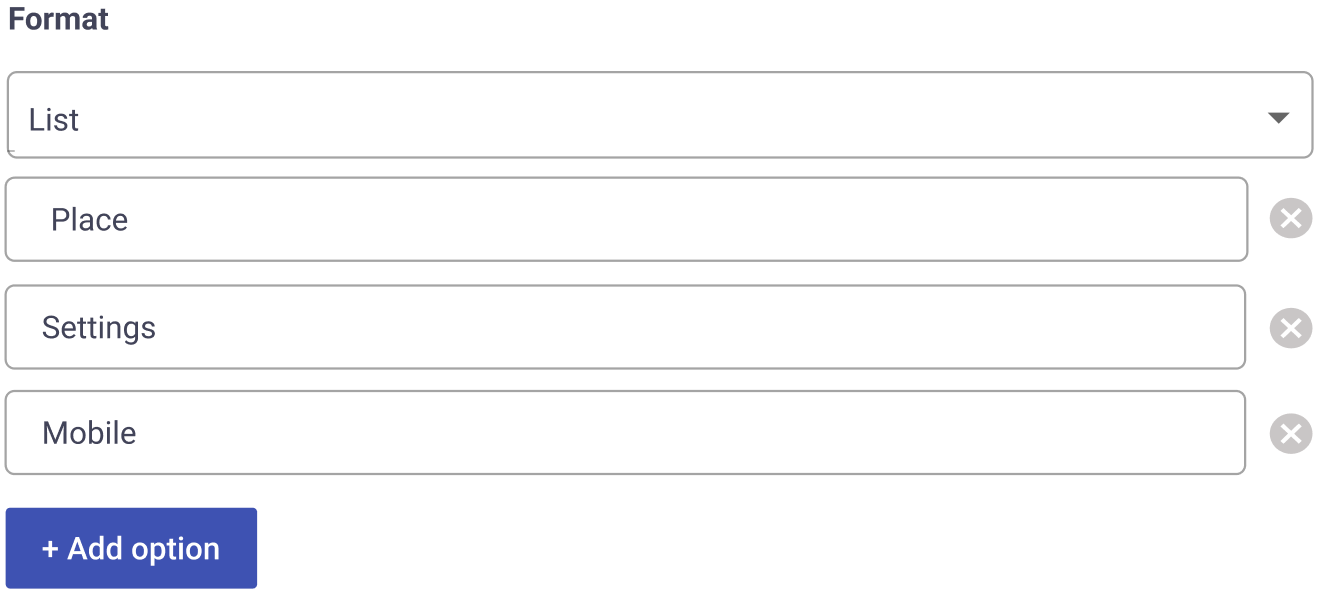
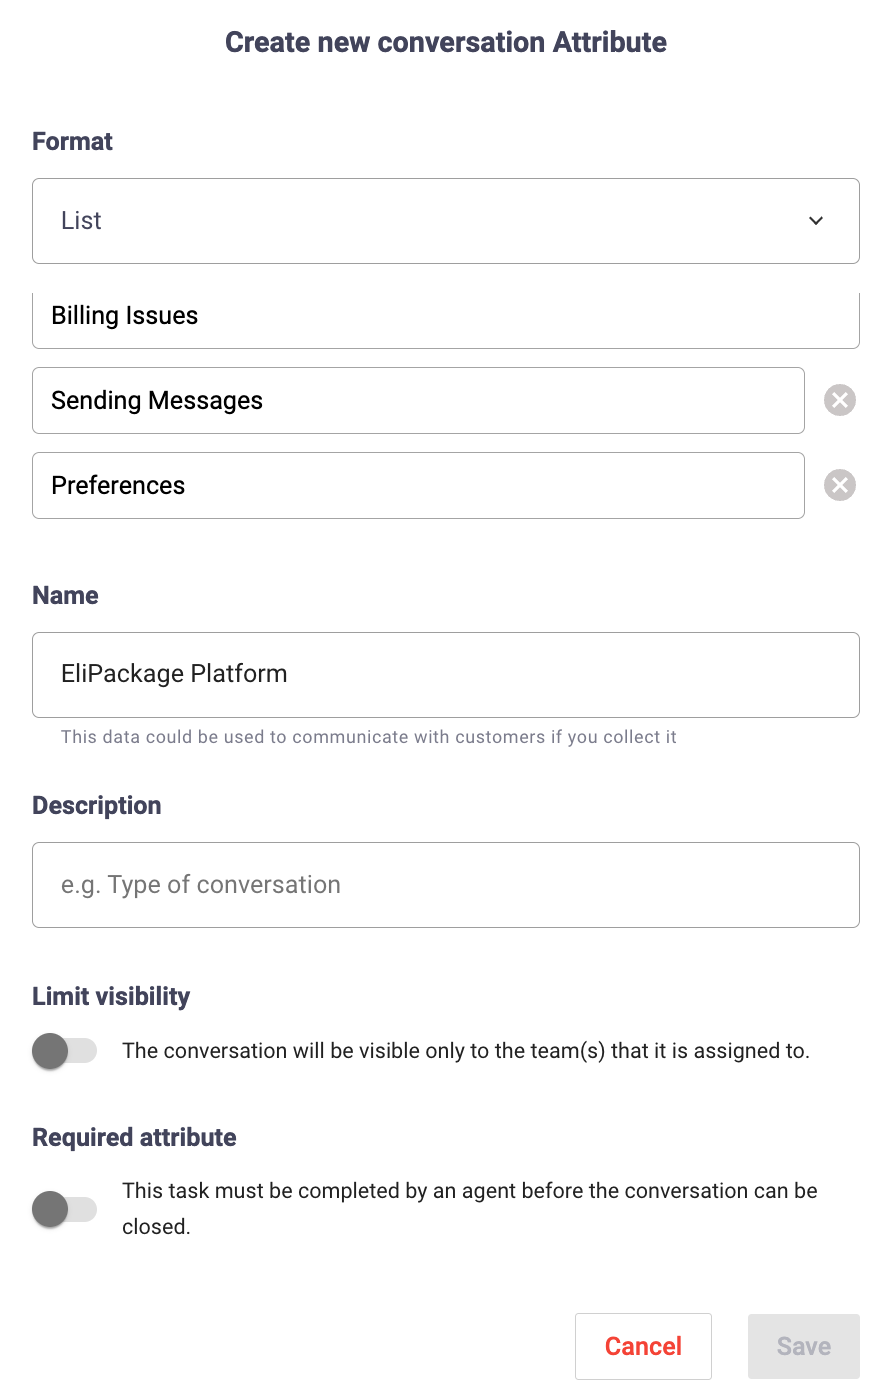
Choose the attribute format: Text or List.
For list attributes, click + Add option to add each option.
In this example, the “EliPackage Platform” conversation attribute uses three list options: Billing Issues, Sending Messages, and Preferences.
-
Enter the conversation attribute name.
-
Add a brief description.
-
Optional: restrict visibility to specific teams.
Turn on the team visibility toggle, then select the teams that should see the attribute.

-
Optional: make the attribute required.
Turn on the required toggle to require a value before a conversation is closed. Required attributes help keep reporting complete and accurate.
-
Click Save.
The new attribute appears under Attributes in the Details panel, where your team can set or update it during customer conversations.
Manage Live attributes
Use the Live tab to view and search conversation attributes that are currently active. You can set or edit live attributes from the Details panel during customer conversations.
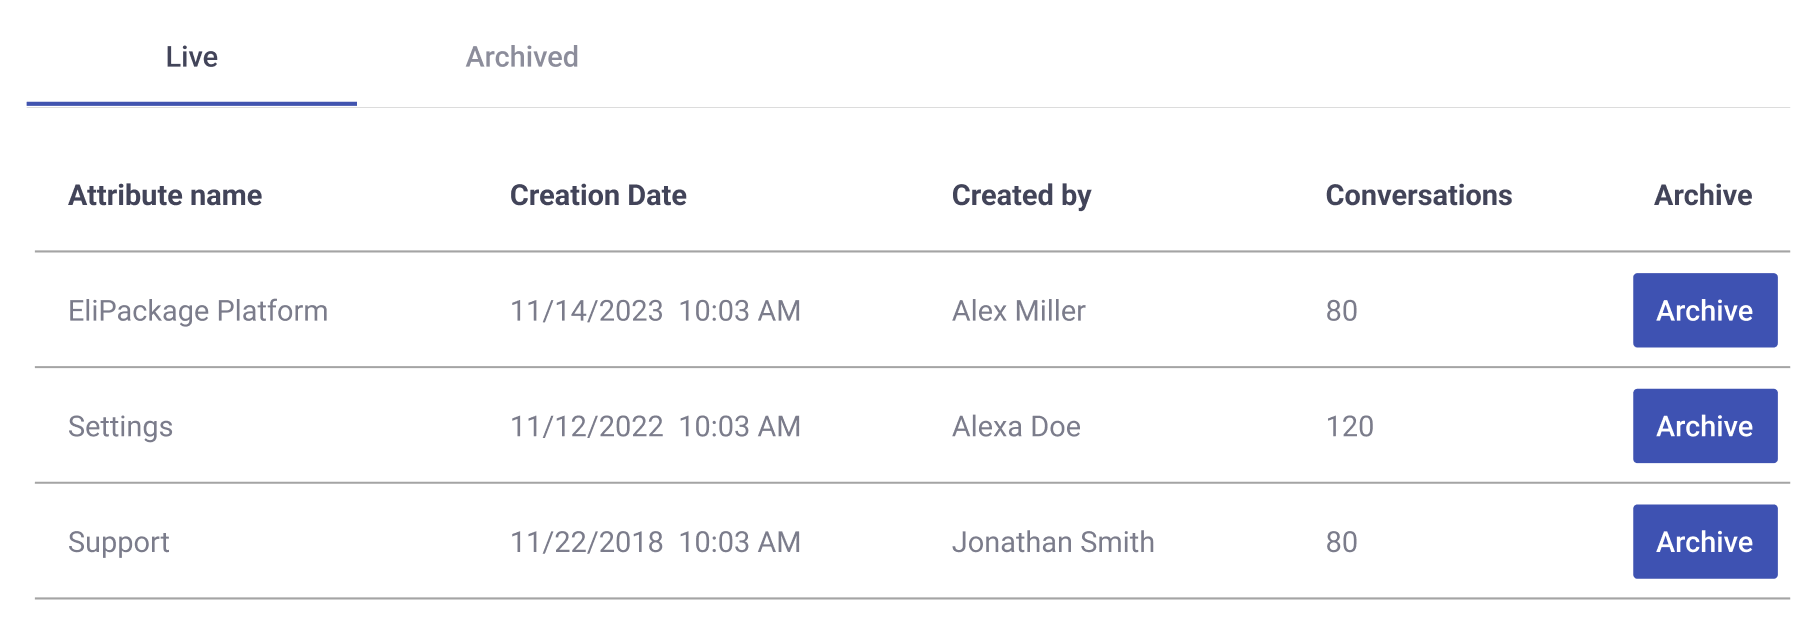
Each new attribute appears in the Live tab. The table includes these columns:
- Attribute name: Name of the attribute.
- Creation Date: Date and time the attribute was created.
- Created by: Admin who created the attribute.
- Conversations: Total number of conversations assigned to the attribute.
- Actions: Archive the attribute by selecting Archived. Archived attributes move to the Archived tab.
Manage Archived attributes
Use the Archived tab to view and search conversation attributes that are no longer active. When you archive an attribute, it is removed from the list of available attributes for new conversations. Existing data and reports for previously attributed conversations are retained.
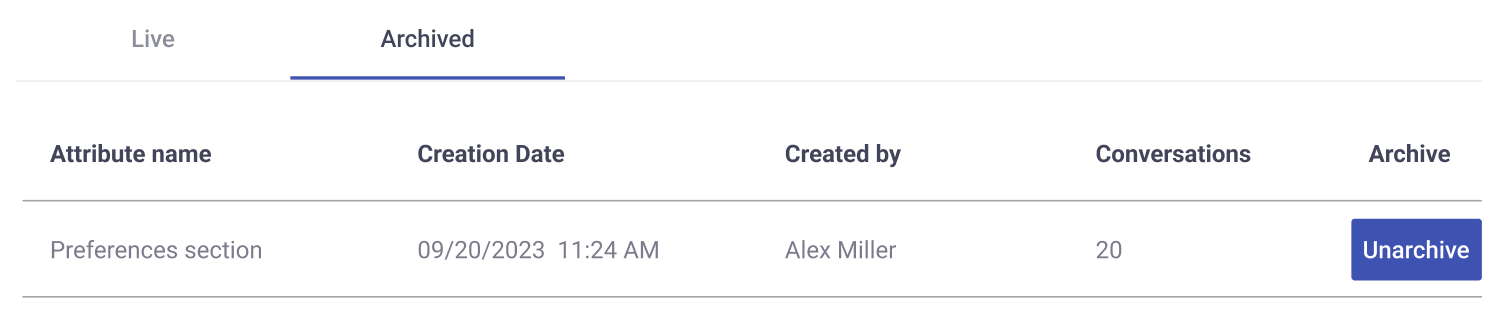
Each archived conversation attribute appears in the Archived tab. The table includes these columns:
- Attribute name: Name of the attribute.
- Creation Date: Date and time the attribute was created.
- Created by: Admin who created the attribute.
- Conversations: Total number of conversations assigned to the attribute.
- Actions: Unarchive the attribute by selecting Unarchive. Unarchived attributes move to the Live tab.
Updated 9 days ago