Slack Integration
The main goal of this integration is to post on a Slack channel the messages that are received by the end user (incoming messages) from the WhatsApp or SMS delivery channel. Therefore, this integration will allow and help you to manage incoming messages from end users in a single Slack channel.
In this example, we are going to integrate the Slack Channel with the WhatsApp channel.
You need to:
A. Create a Slack channel.
B. Create and install the Slack app
C. Integrate the Slack app with the Custom Webhook
D. Integrate Chatbot campaign with Custom Webhook (Example)
Create Slack channel
In this example, we are going to create a private Slack channel where the incoming messages will be posted.
NOTEYou can create a public or private Slack Channel.
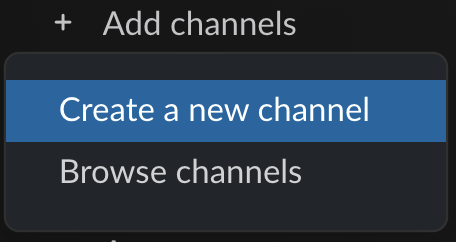
- From Slack, click the + Add Channels button in the sidebar and select Create a new channel.
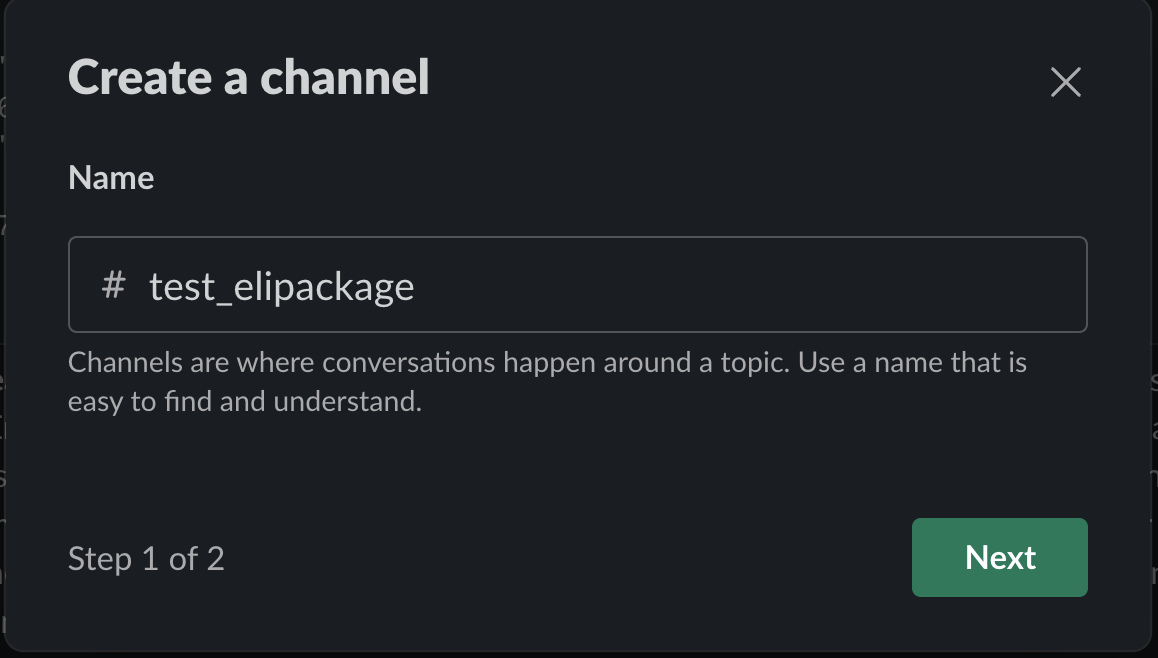
- Give the channel a name, then click Next.
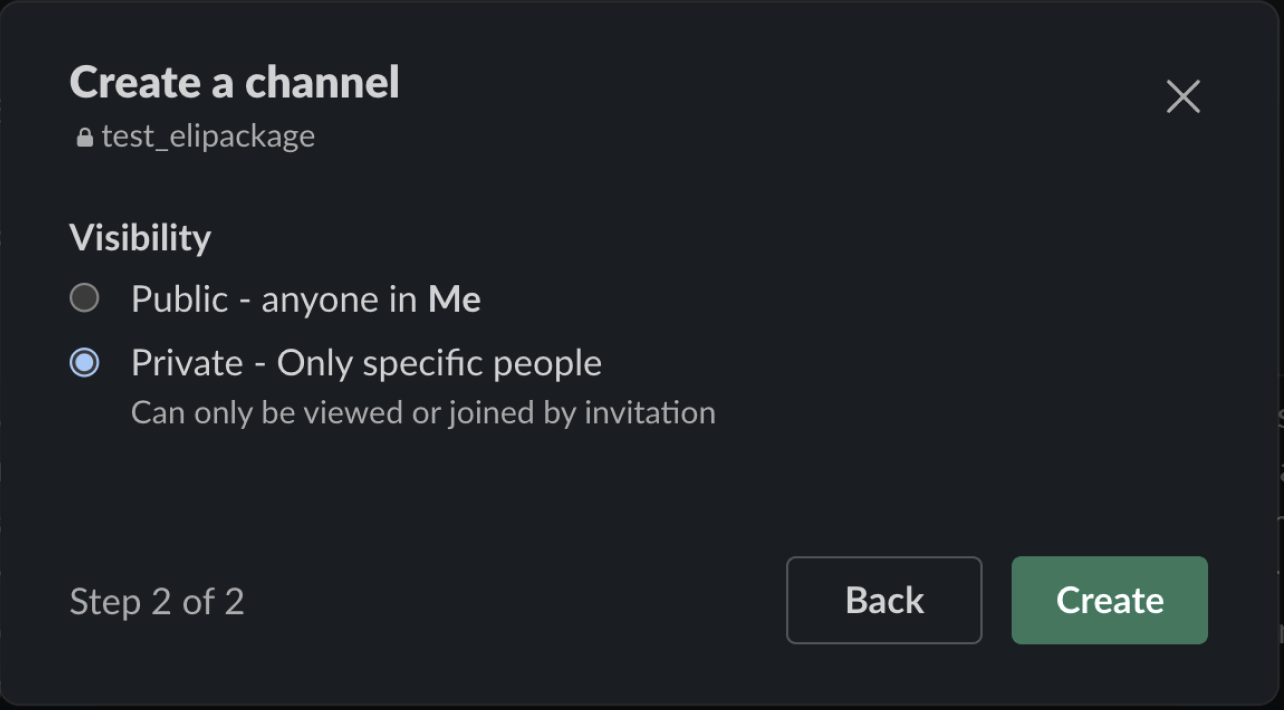
- Choose the channel type (Private), then click Create.
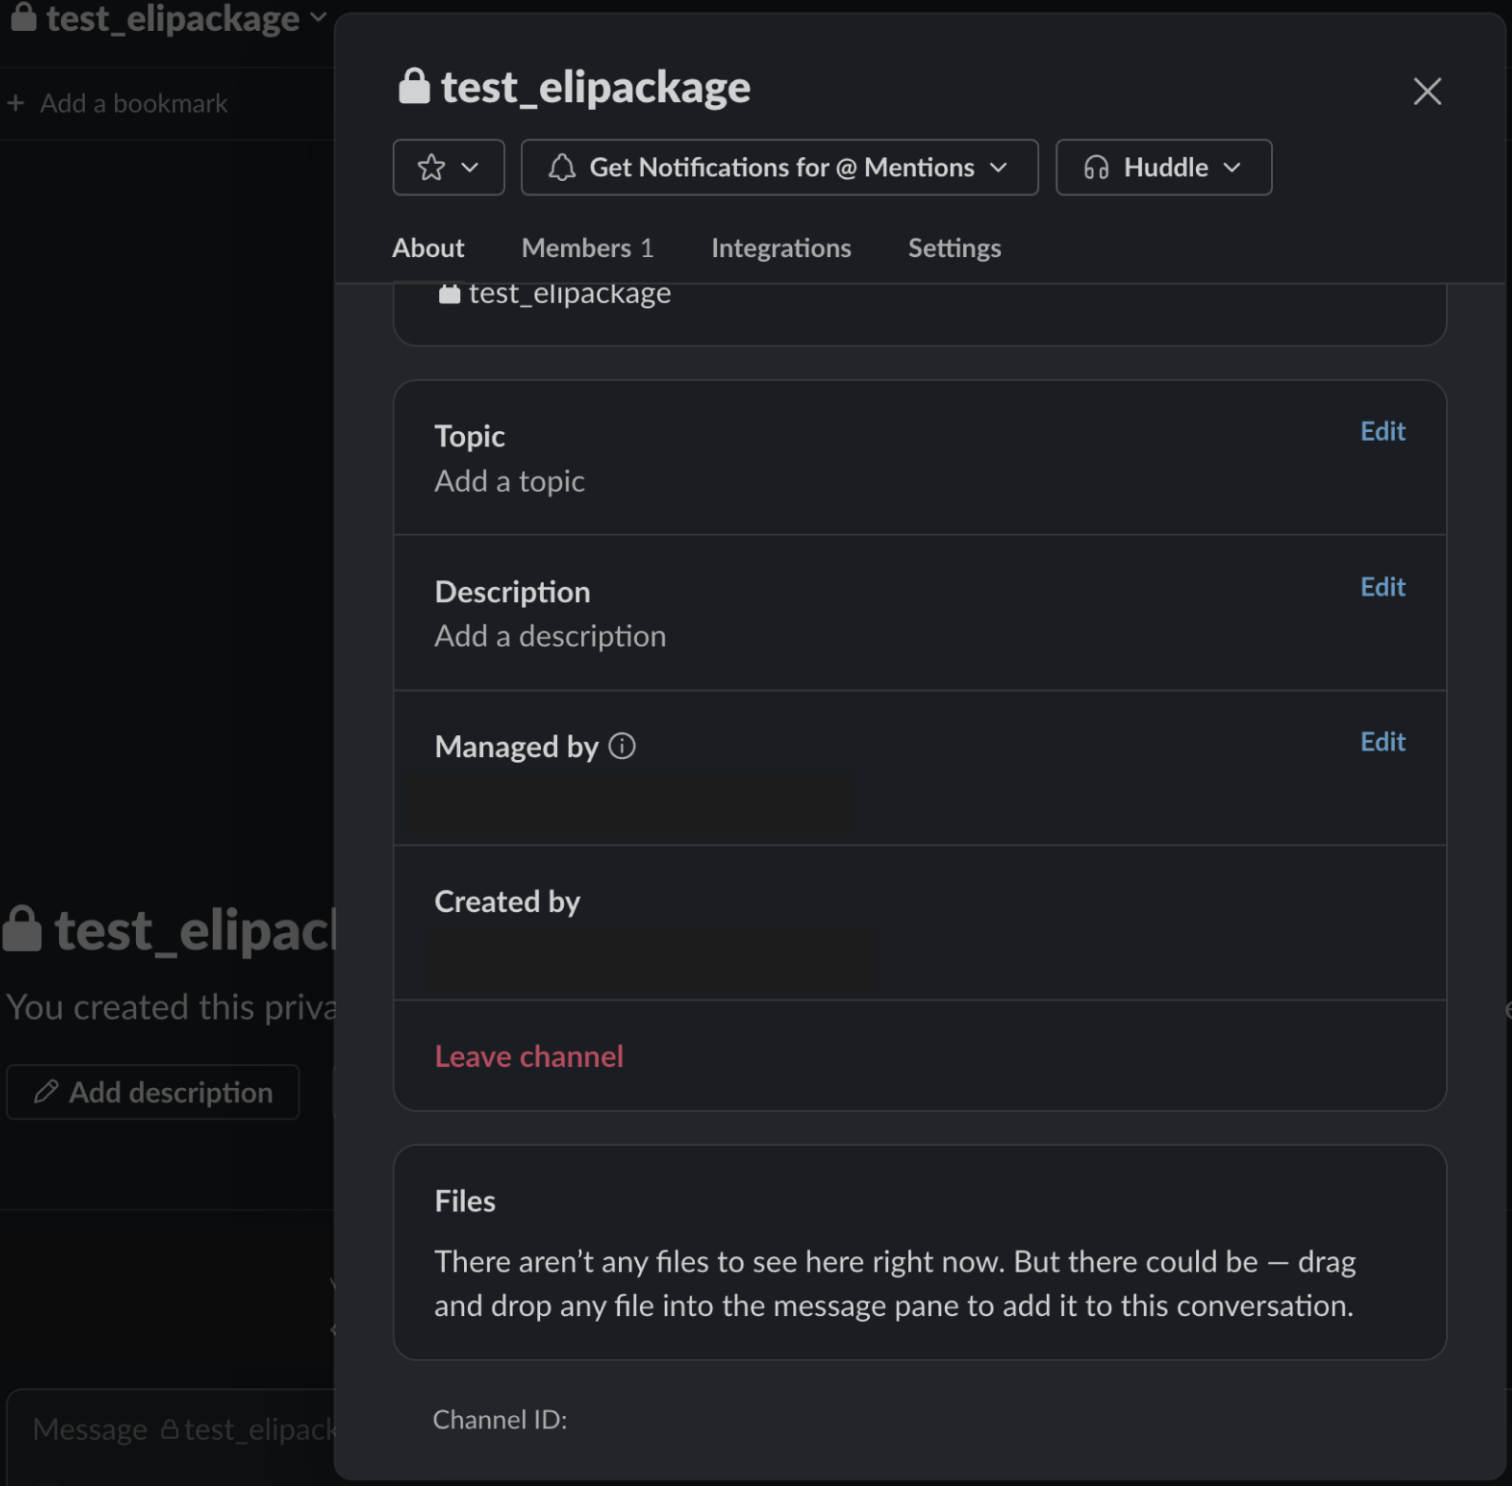
- Once the channel is created, click the View channel details button and copy the Channel ID.
Create & Install Slack app
In this step, we are going to create and install the Slack app in the Workspace where the private Slack channel was created.
- From Slack, click the + Add apps button in the sidebar. Then, click the App Directory button. You’ll be taken to the Slack App Directory.
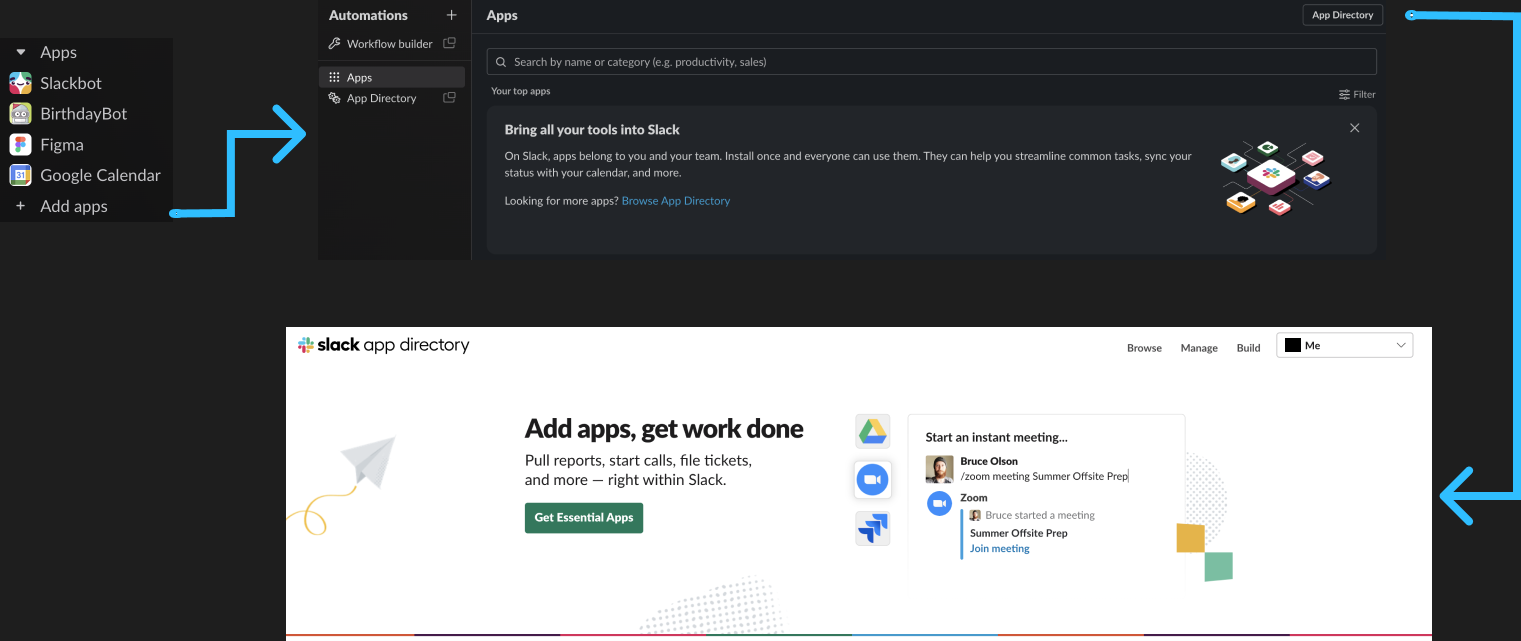
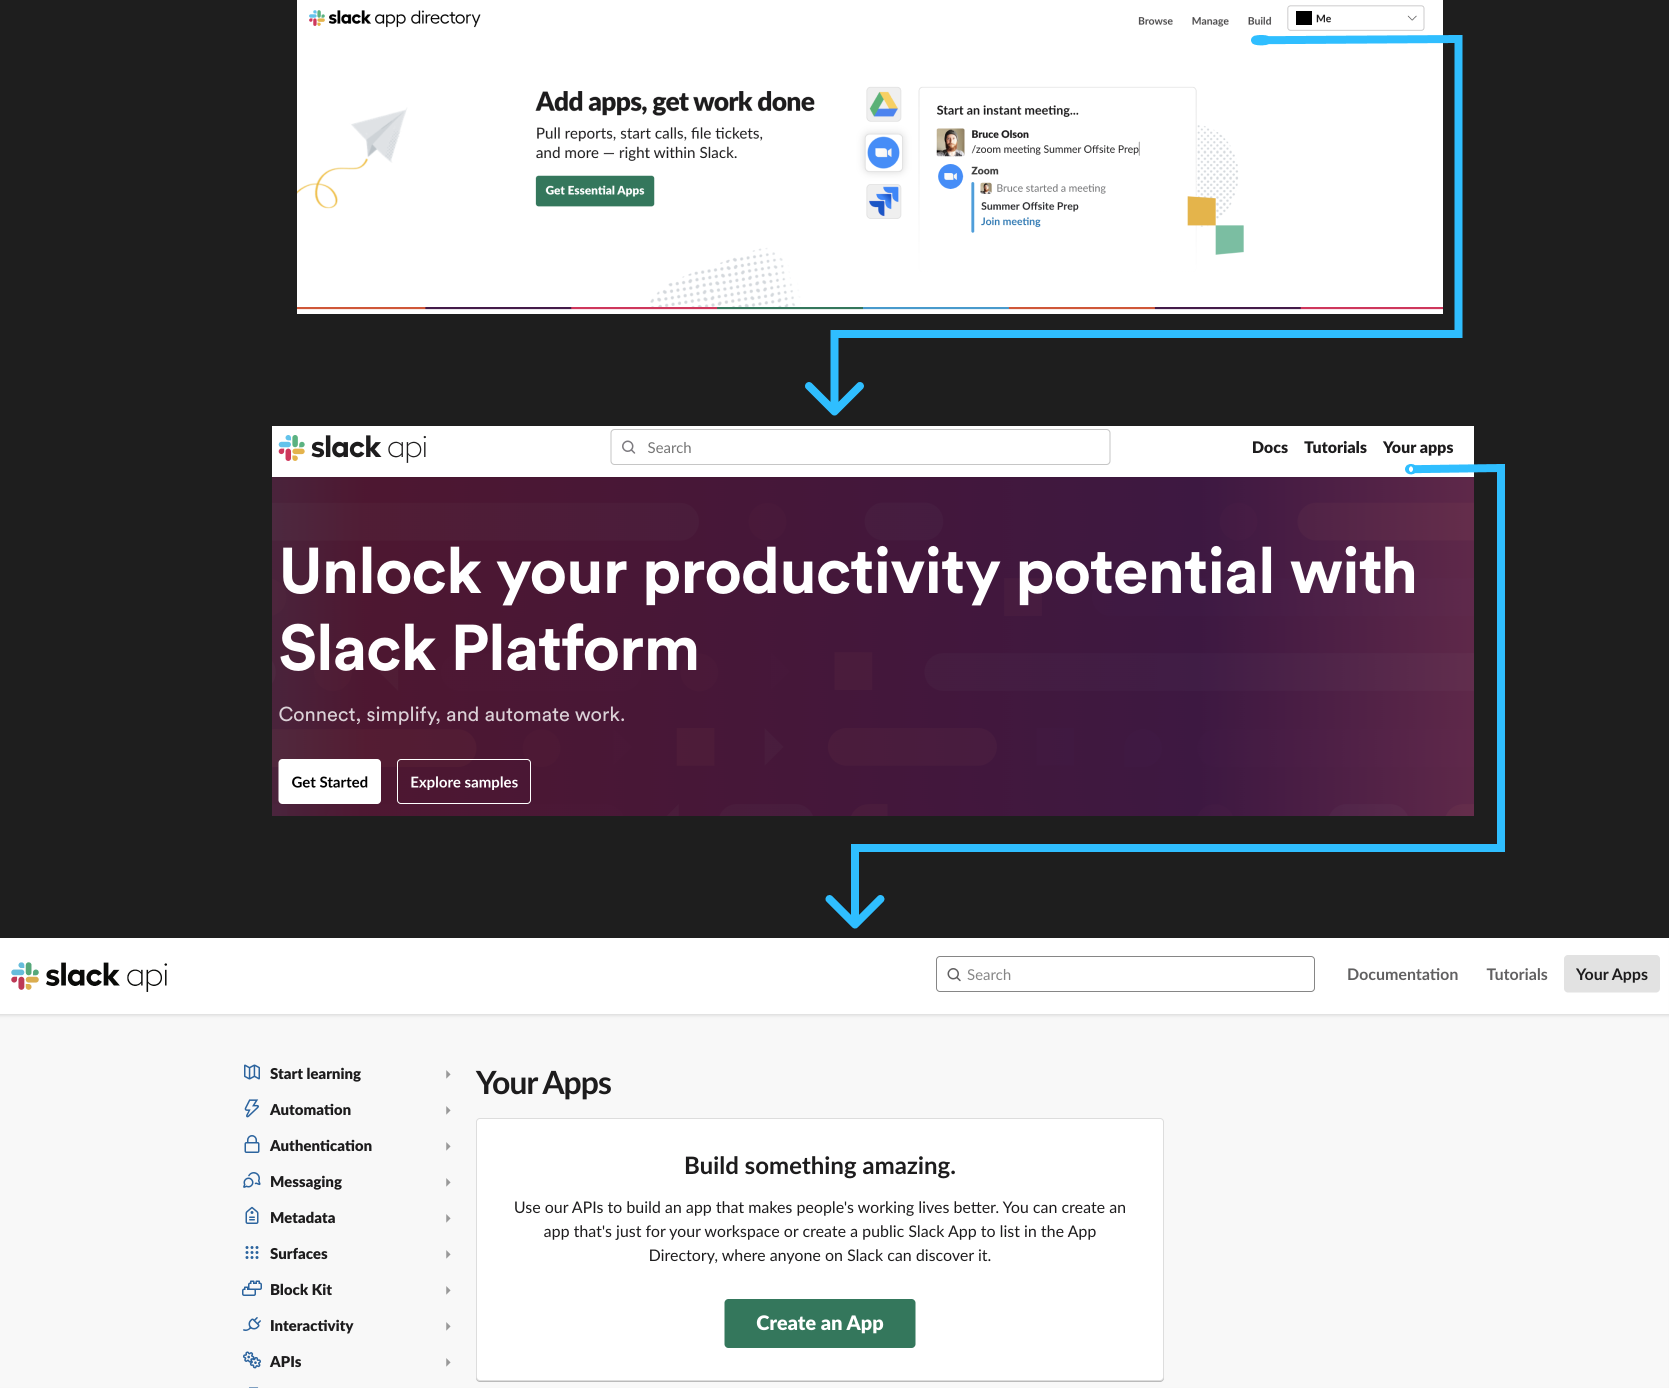
- From the Slack App Directory, select the Workspace located in the upper right corner, where the private Slack channel was created. Click the Build button and select the Your apps button.
-
Now, let's create a new application by selecting the Create an App button. Once selected, it will display the following dialog to configure your app’s scopes and settings.
Click the From scratch button. Then, enter the name of your app and click the Workspace where the private Slack channel was created. Click the Create App button.
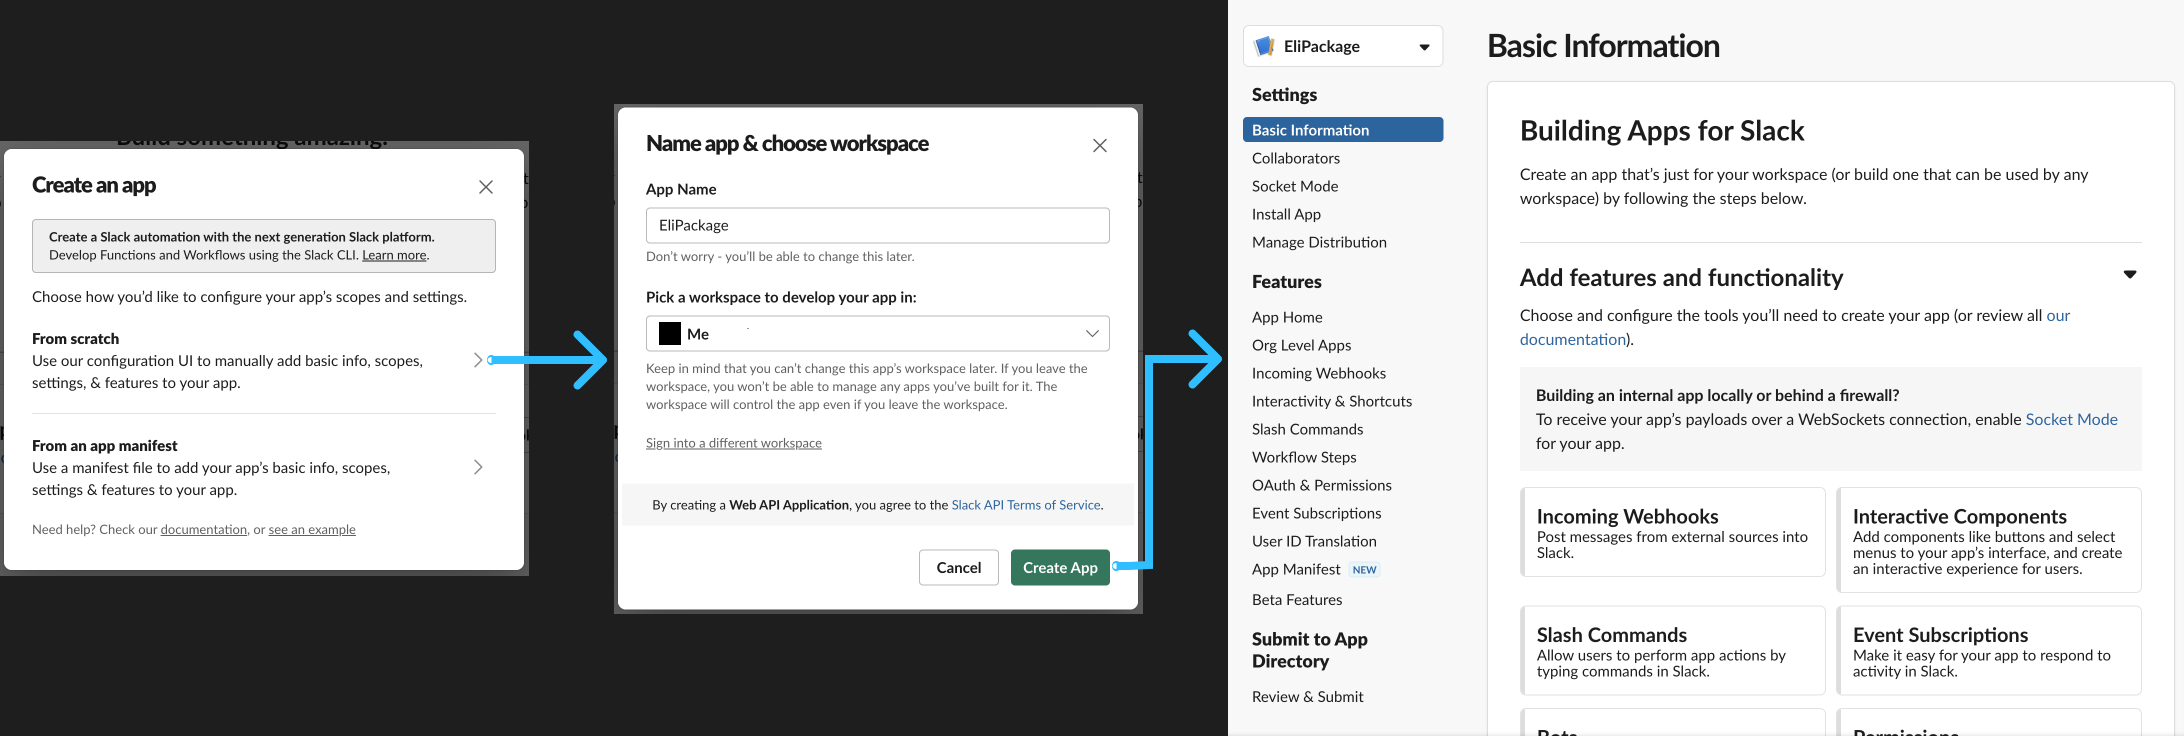
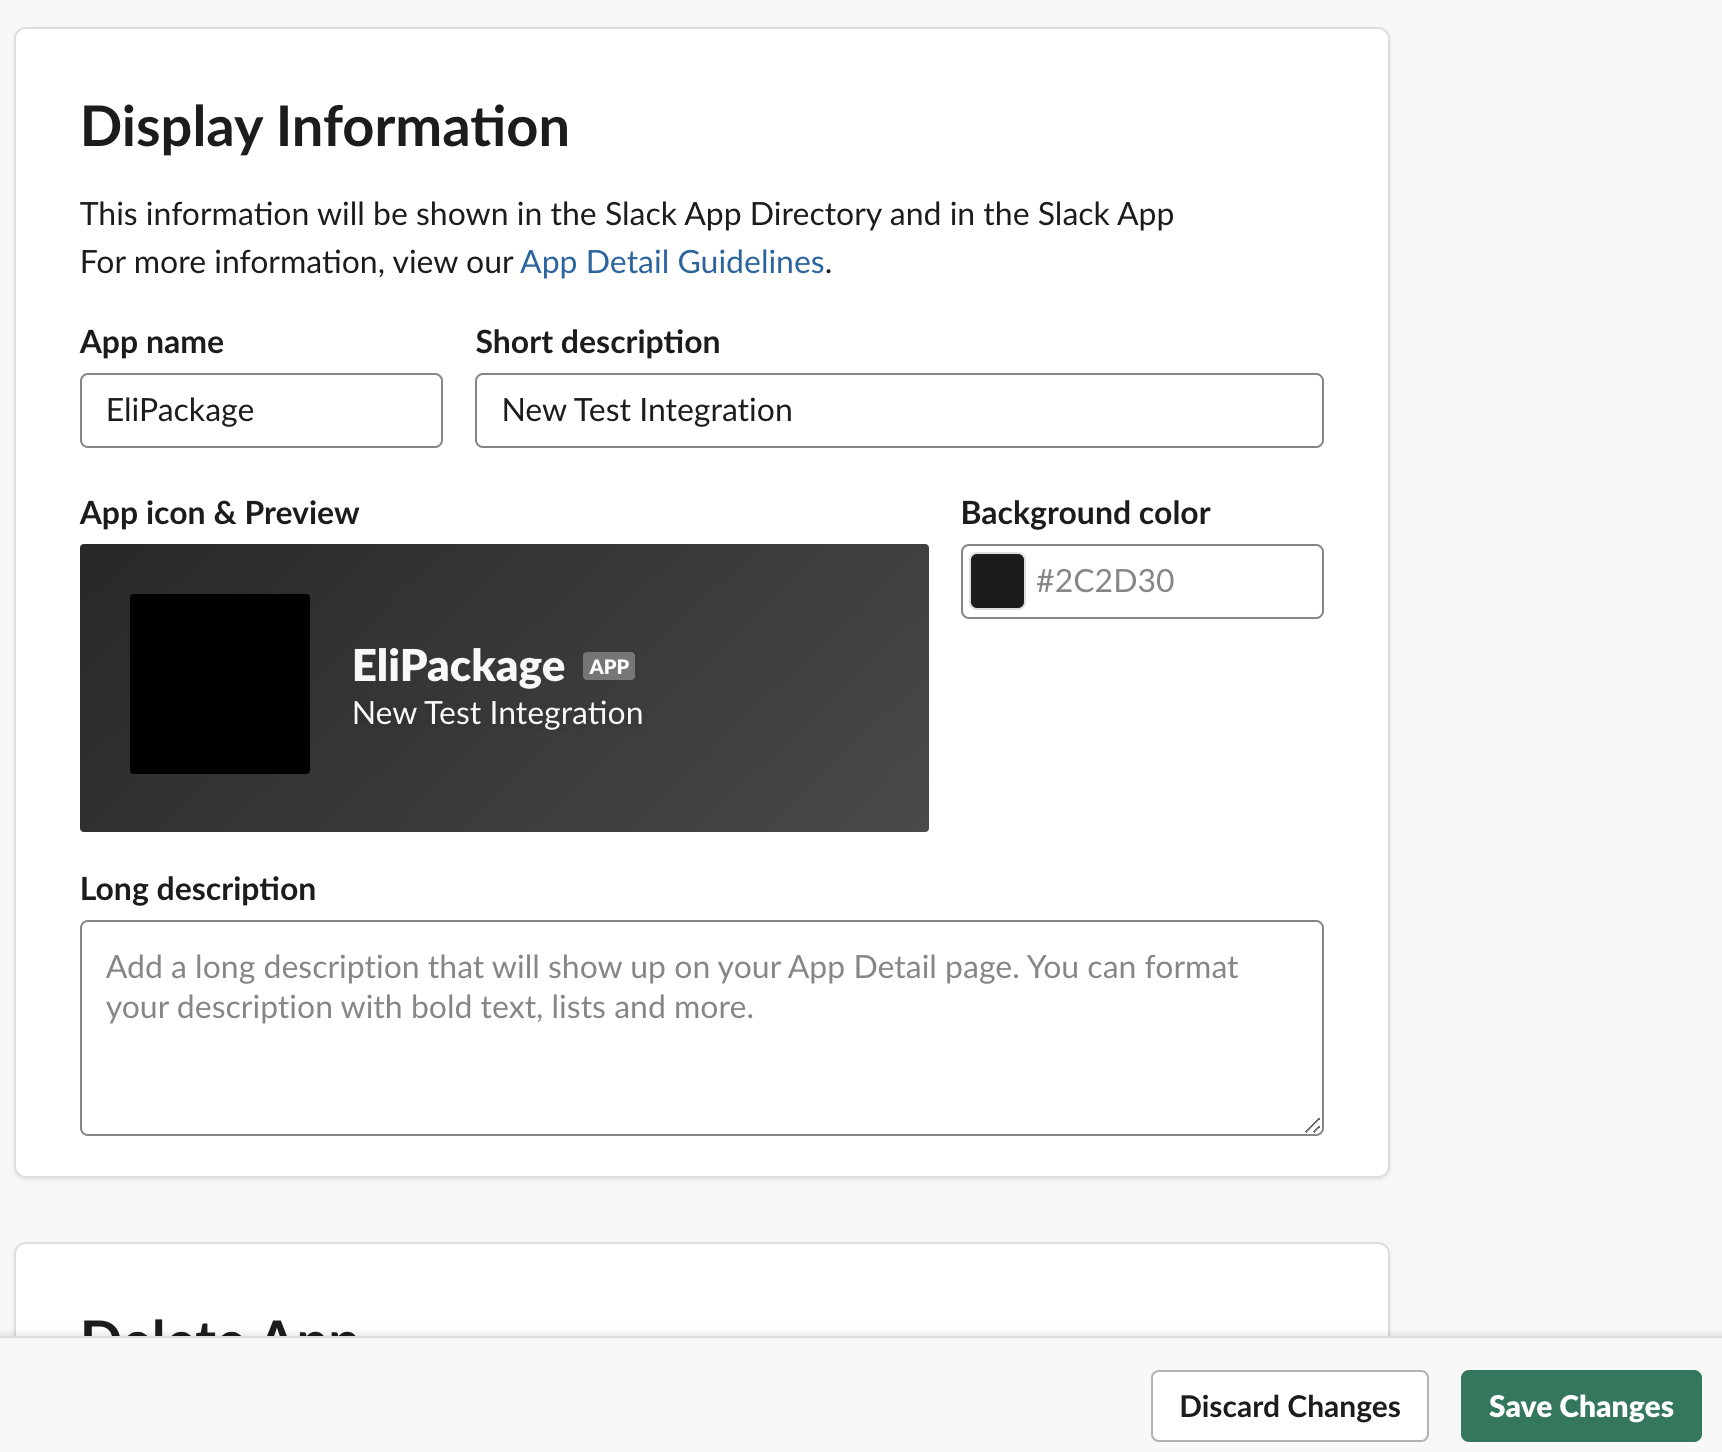
- Once the Slack app is created, select the Basic Information option located in the Settings sidebar.
From the Display Information section, enter a short and long description of your app, upload the App Icon image (size between 512 px by 512px and 2000px by 200px), and select the background color. Click the Save Changes button.
- After entering the data required for your Slack app configuration, select the OAuth & Permissions option located in the Features sidebar.
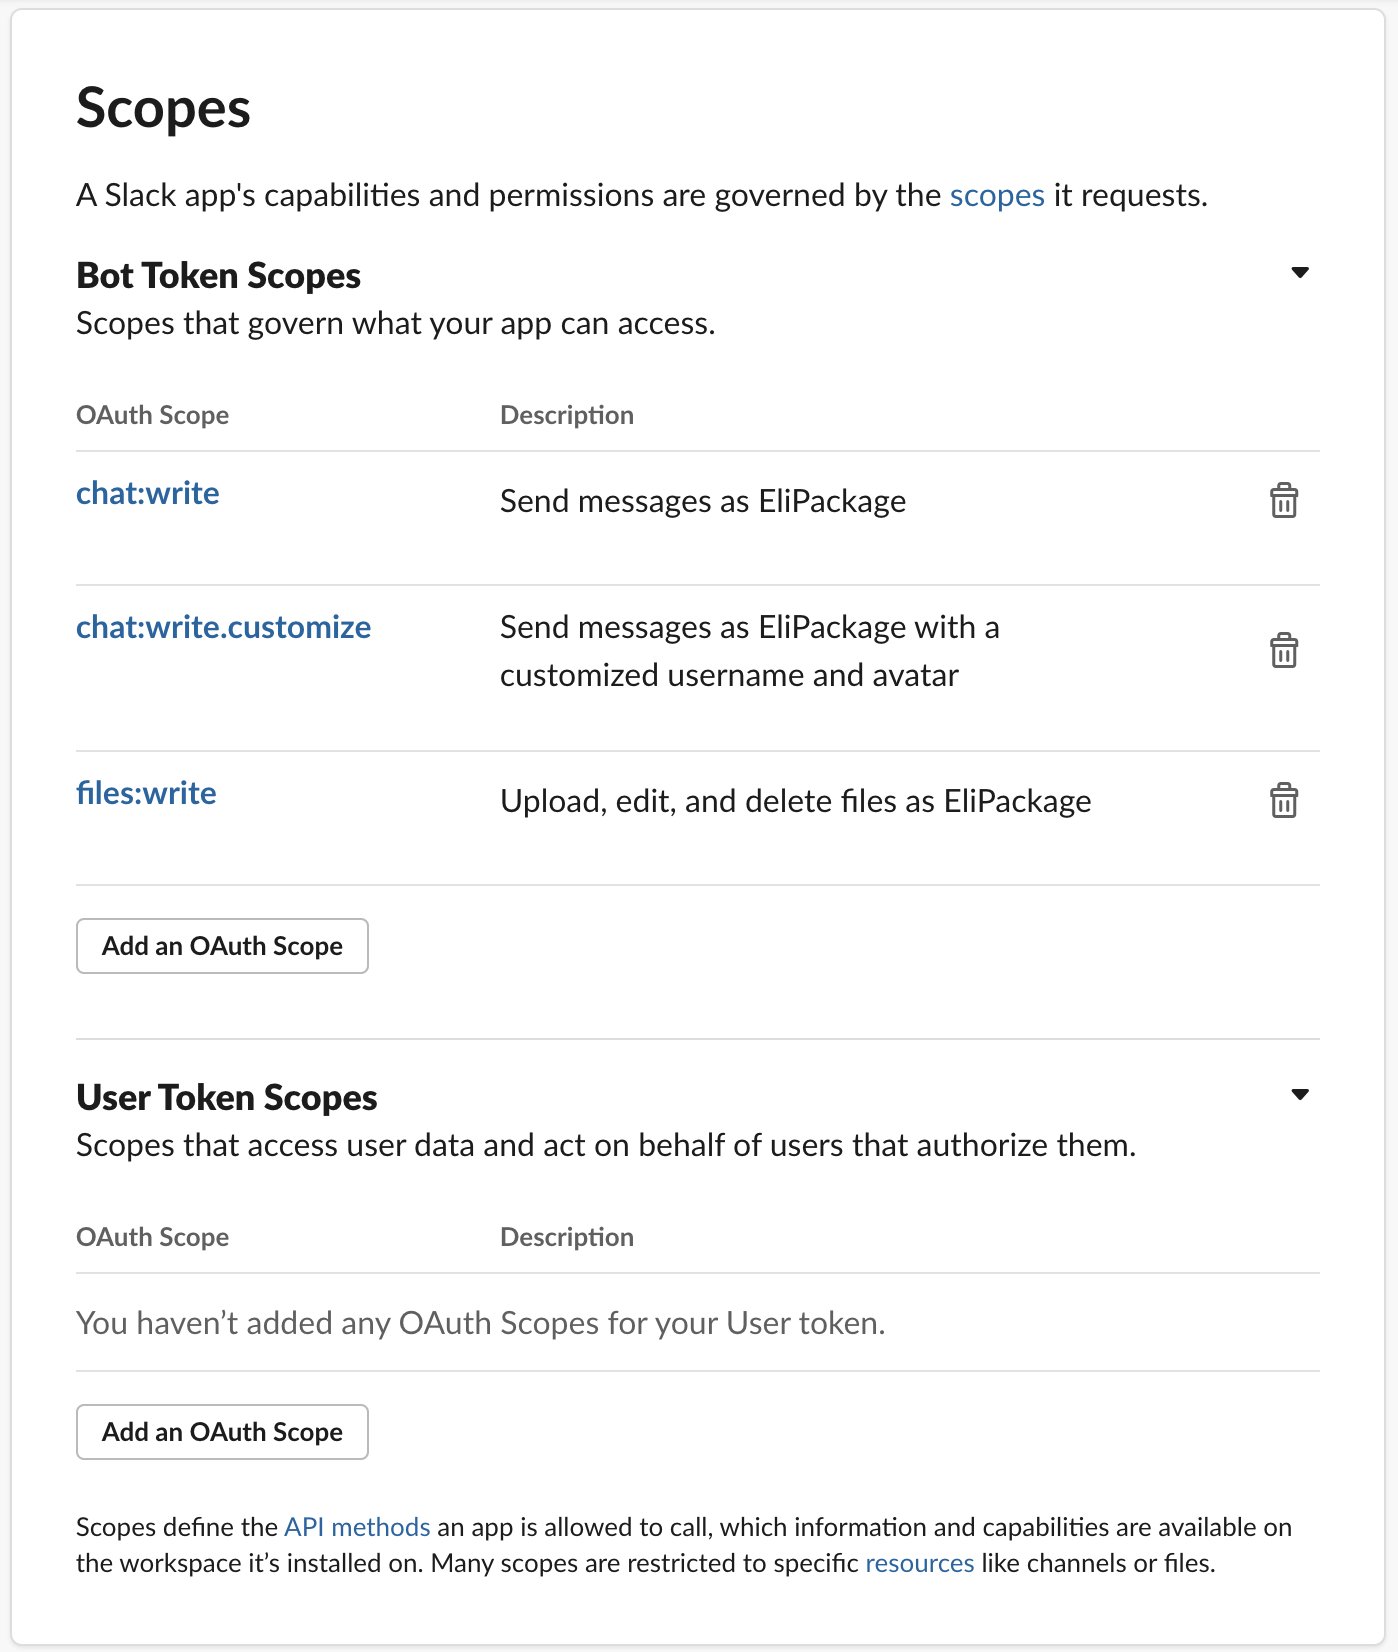
From the Scopes section, click the Add an OAuth Scope button and add the following scopes (permissions) from the dropdown menu:
-
chat:write - Send messages as App_Name.
-
chat:write.customize - Send messages as App_Name with a customized username username and avatar. That is, this scope (permission) allows you to change the name of the app.
-
files: write - Upload, edit, and delete files as App_Name. That is, this scope (permission) allows you to upload images from the WhatsApp app.
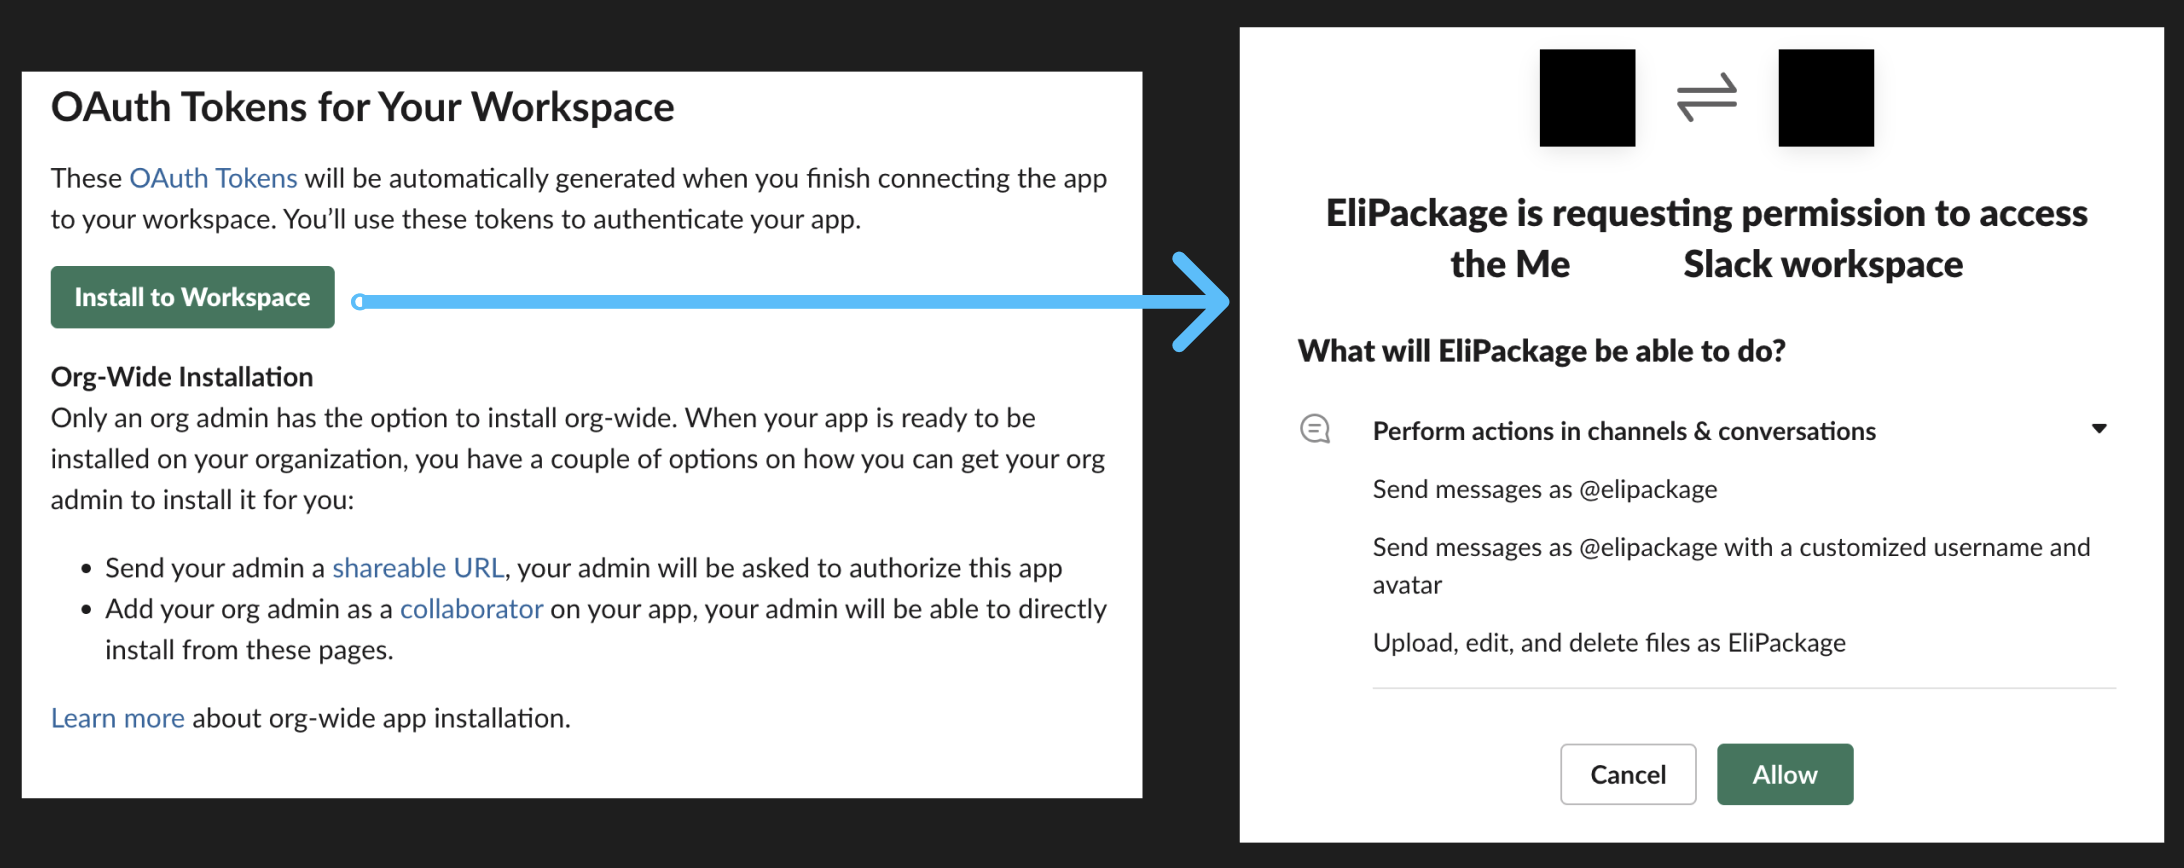
Once we have created the Slack app with the required scopes (permissions). The next step is to install the Slack app in your Workspace to generate the tokens.
The purpose of the tokens is to authenticate and connect the Workspace to your app.
- From the OAuth Tokens for your Workspace section, click the Install to Workspace button. it will redirect to the App settings page. Select the scope options you have configured earlier from the dropdown menu. Click the Allow button.
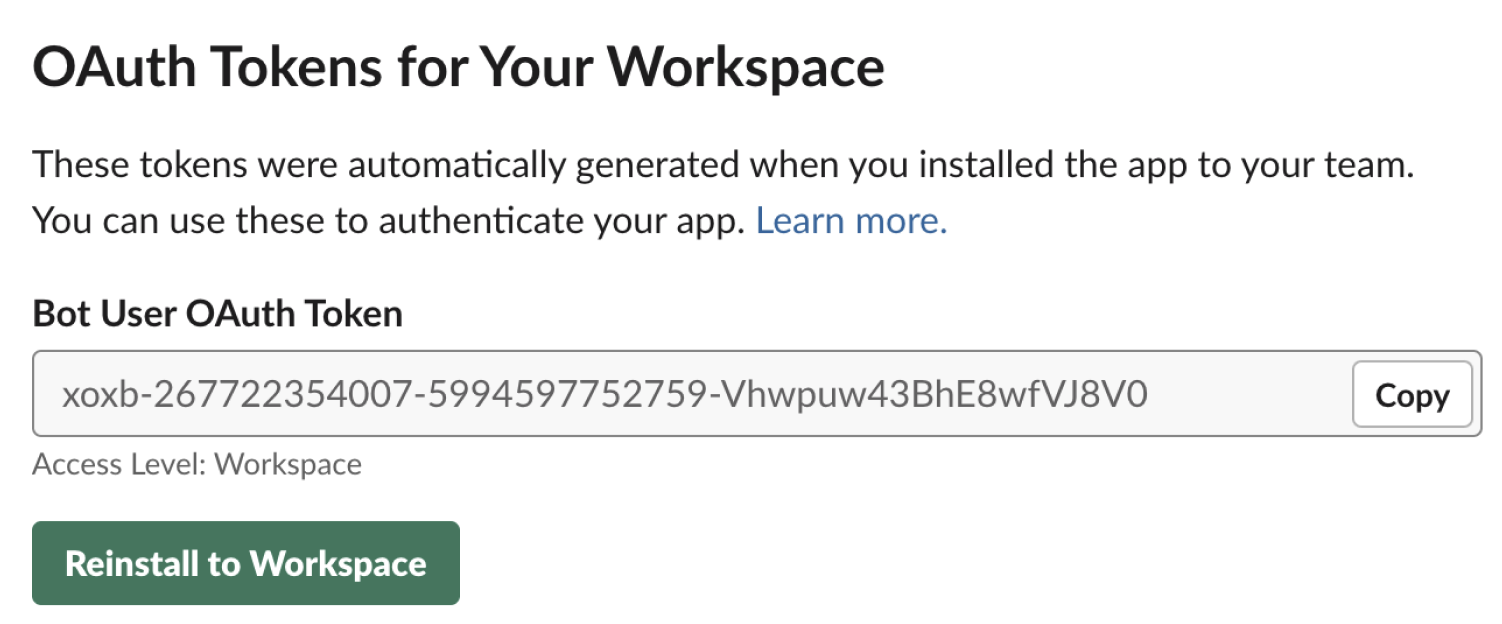
It will generate the User OAuth token for your Workspace.
Integrate the Slack app with the Custom Webhook
Both credentials (ID Slack Channel and OAuth token) help you to execute the API calls on behalf of the application to publish in the Slack channel the incoming messages. Therefore, the next step is to integrate the Slack app through the Custom Webhook integration.
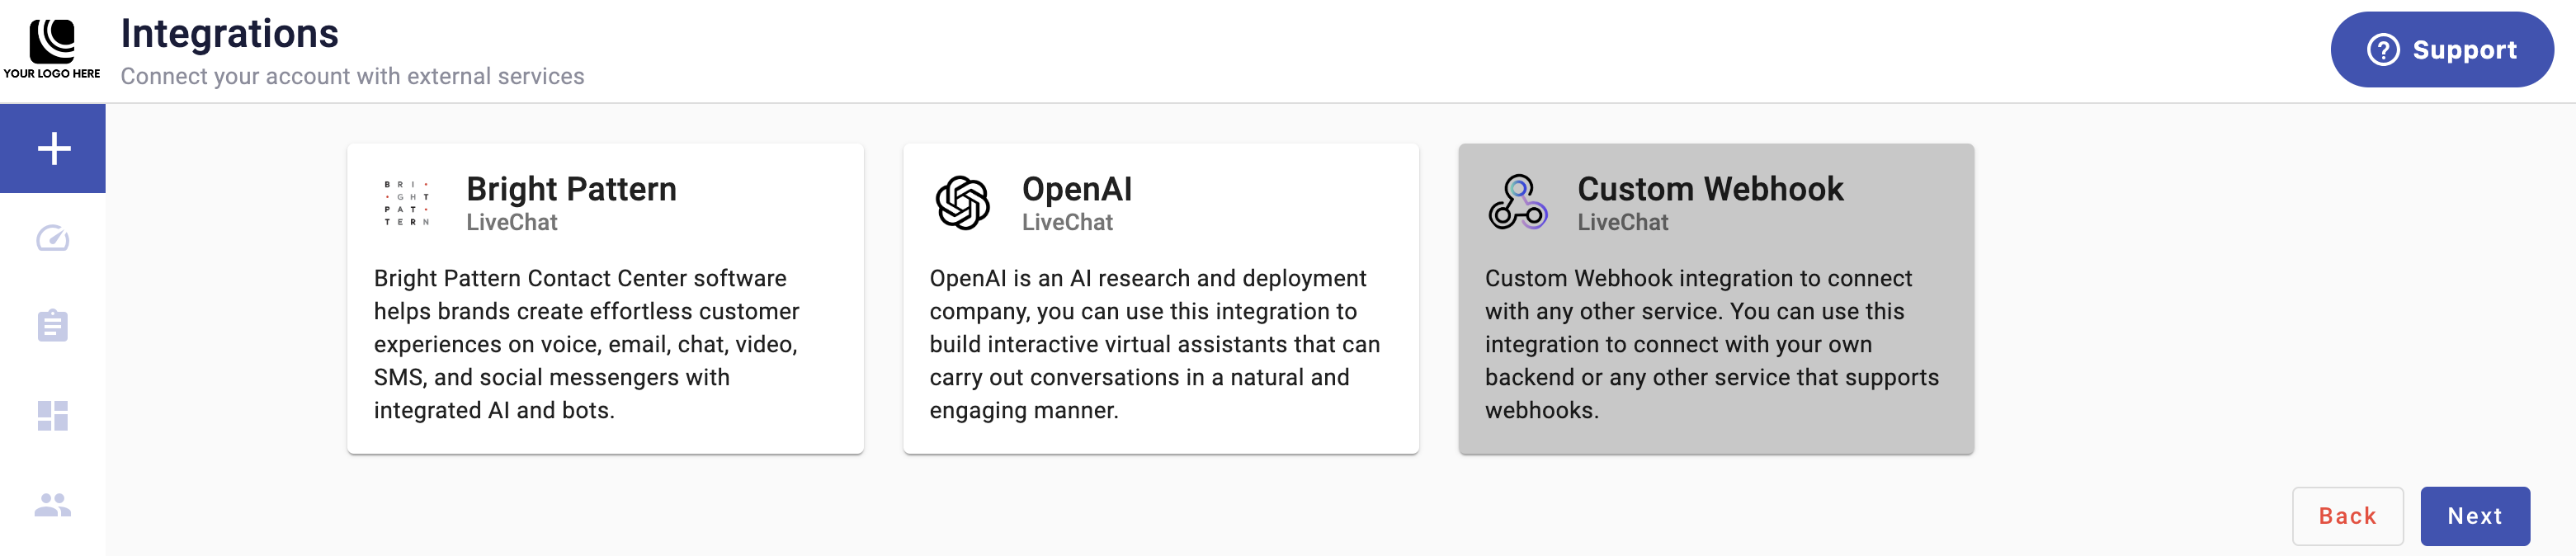
- From the main pane of the Integrations section, select the Custom Webhook card.
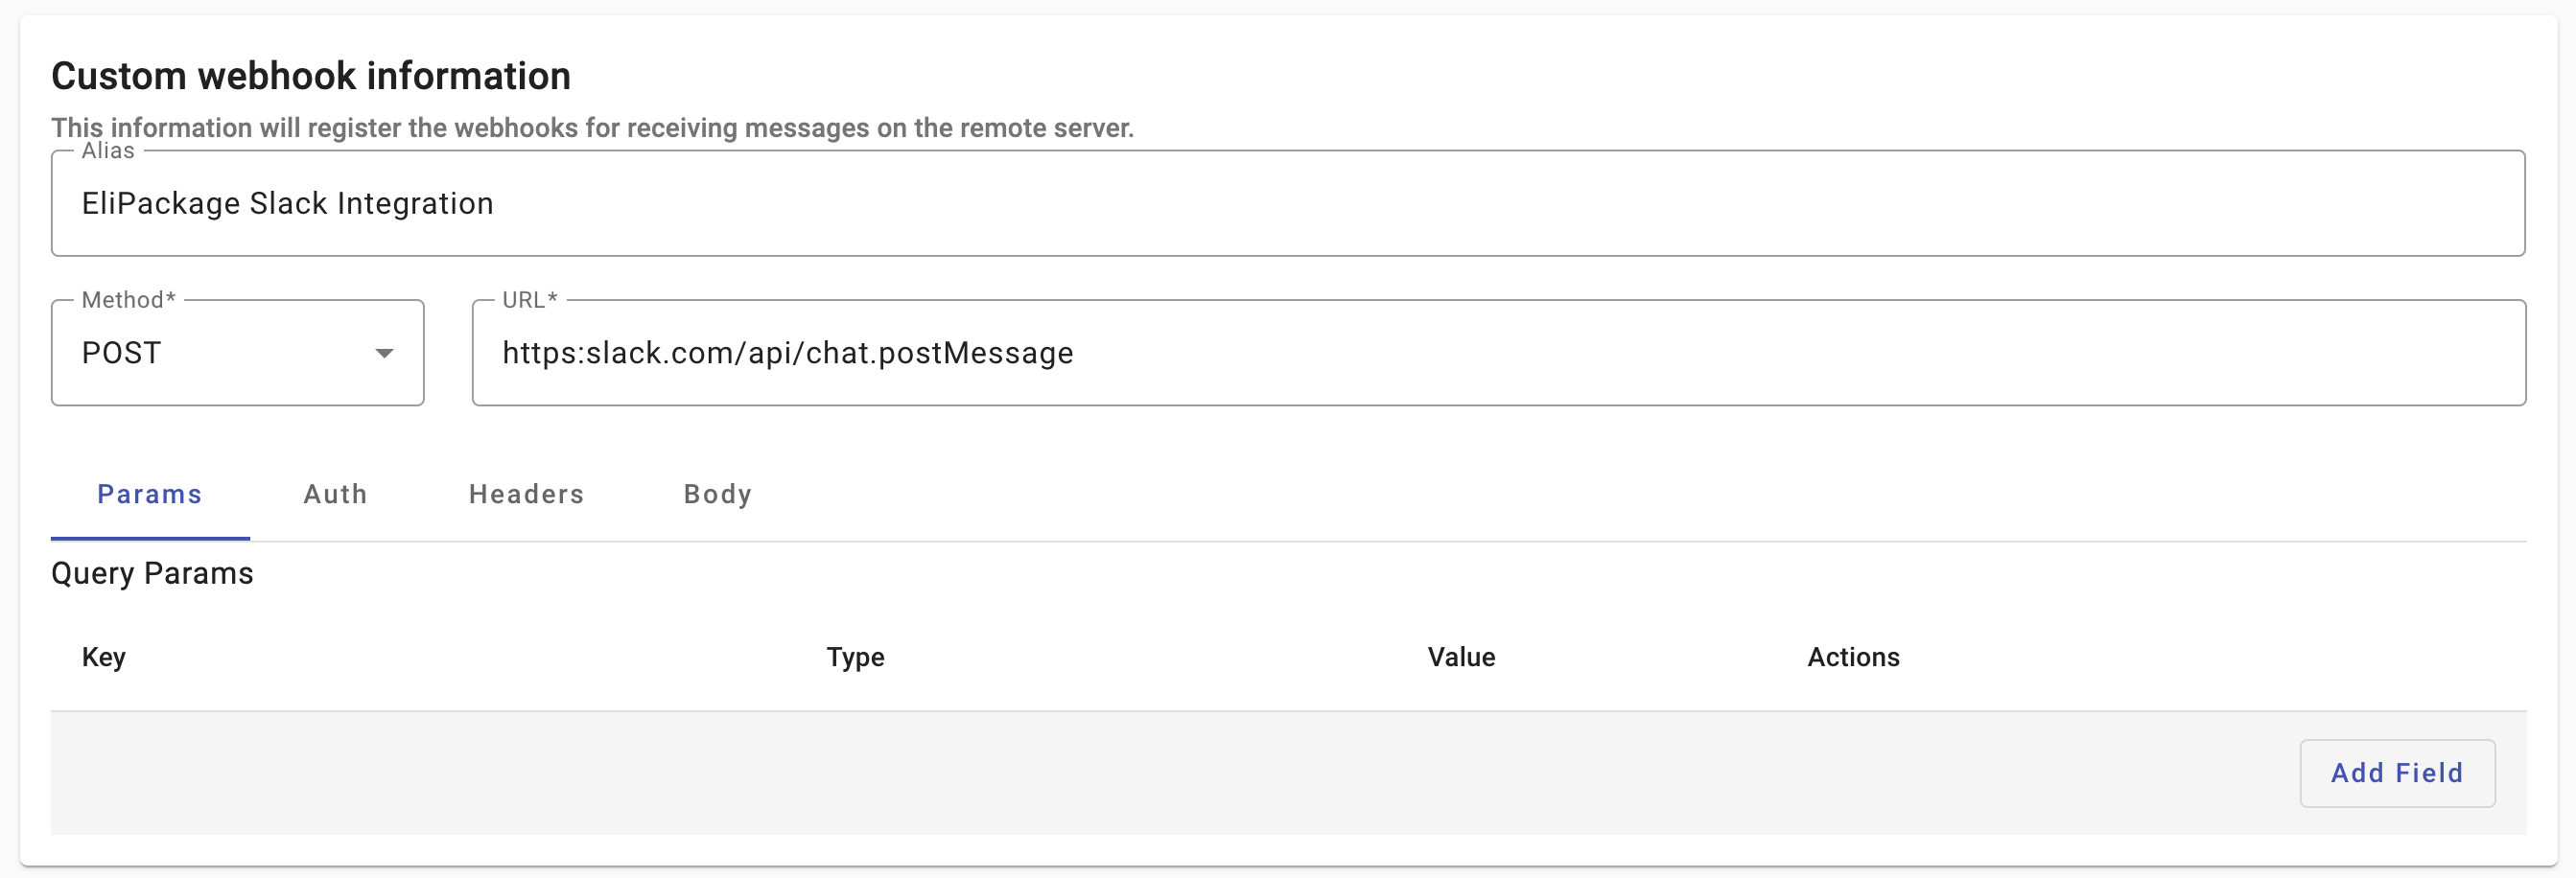
- From the Custom Webhook Information section, type the following information:
- Alias: Type a custom name to identify the Custom Webhook.
- Select the POST method option and enter the next “https:slack.com/api/chat.postMessage” URL.
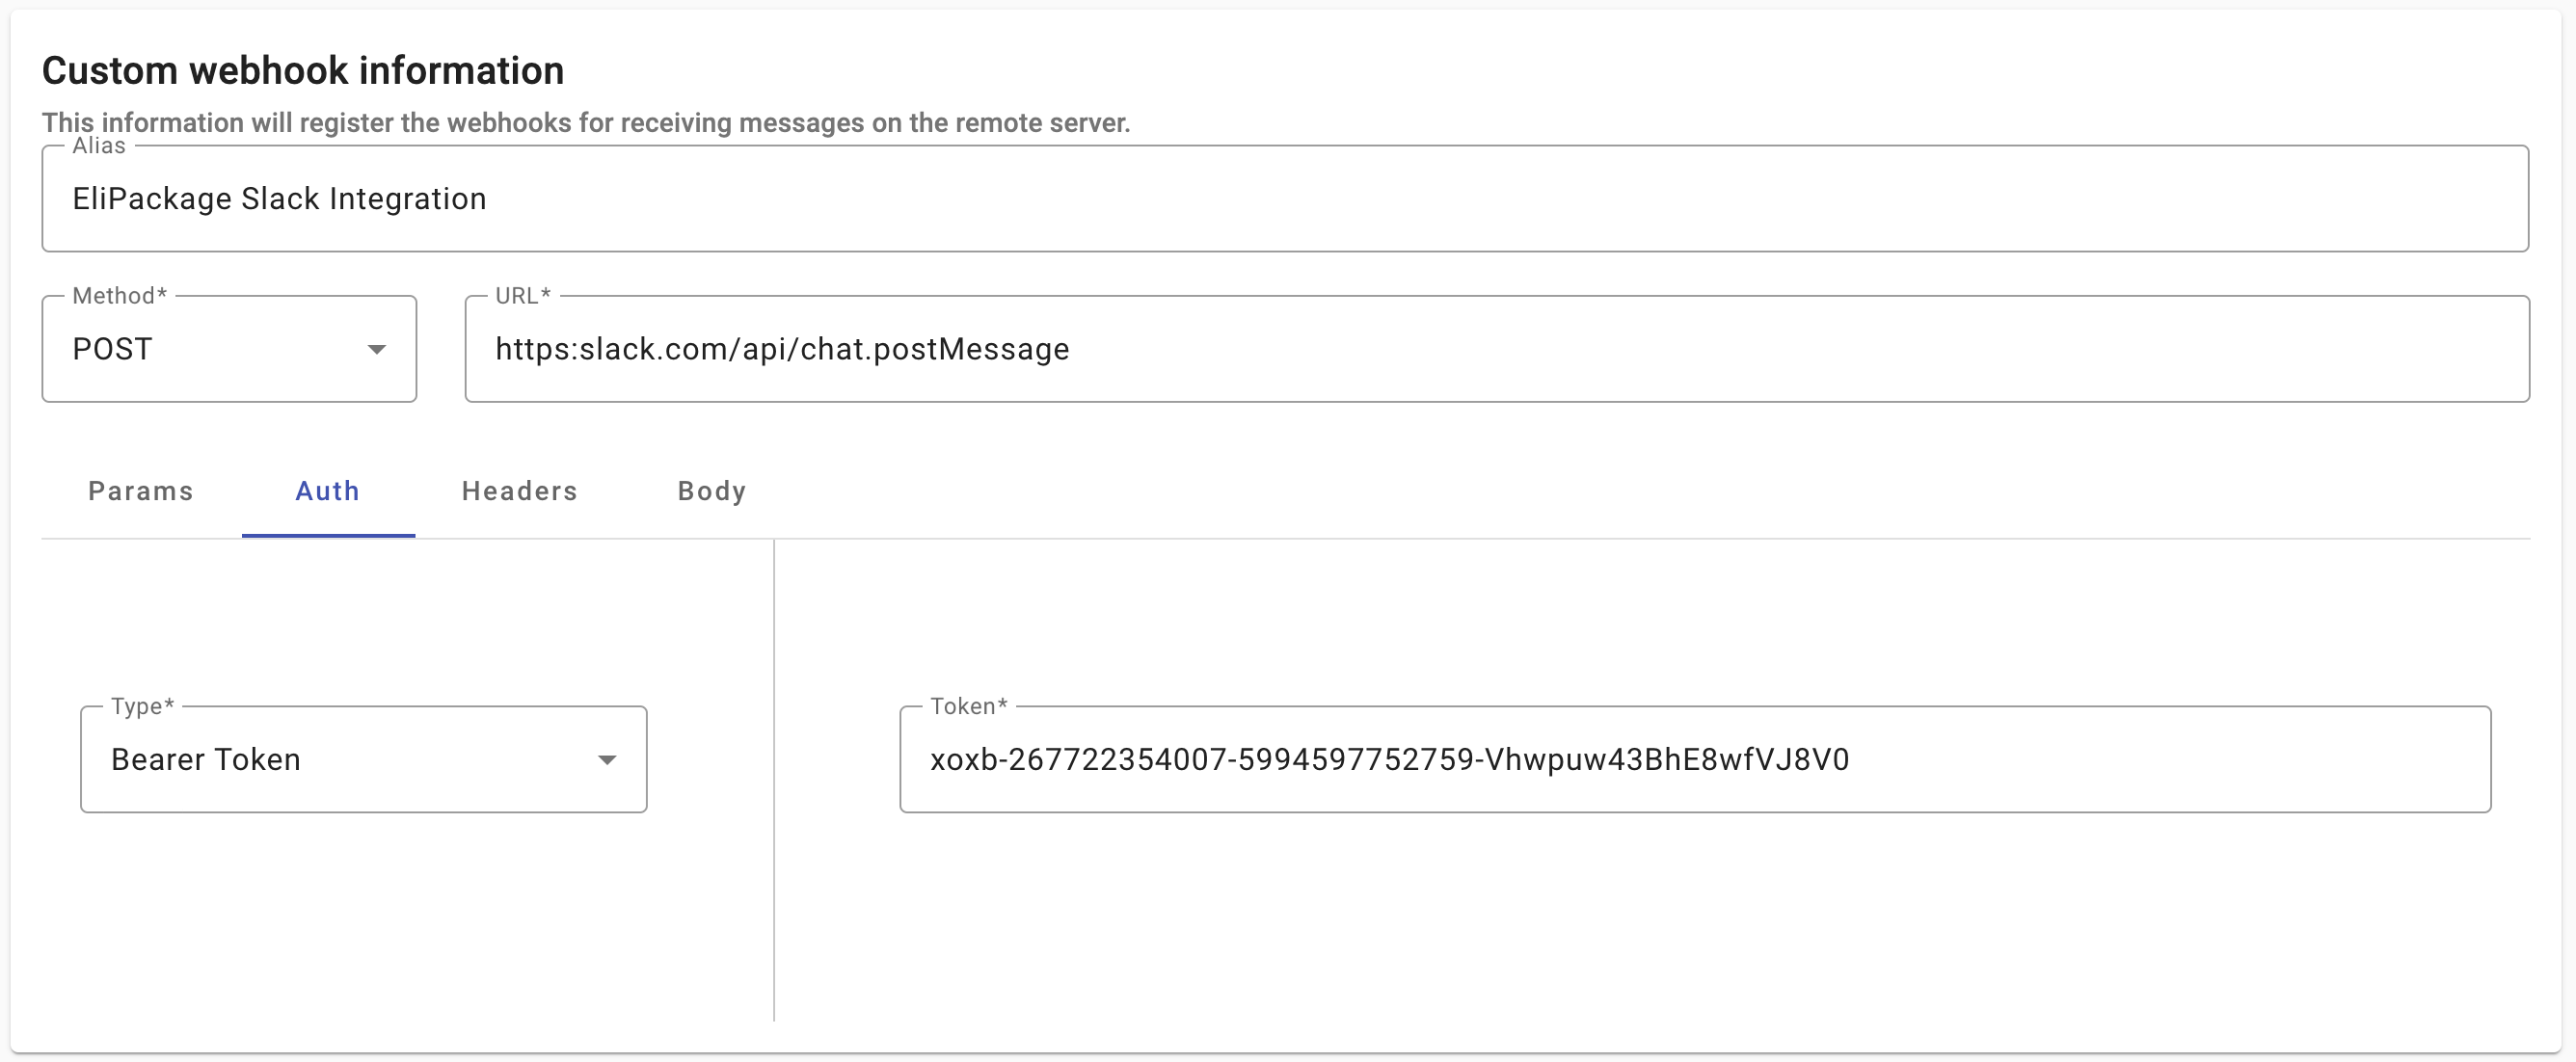
- From the Auth tab, select the Bearer Token option from the Type dropdown menu and enter the OAuth token of the Slack app we have created earlier.
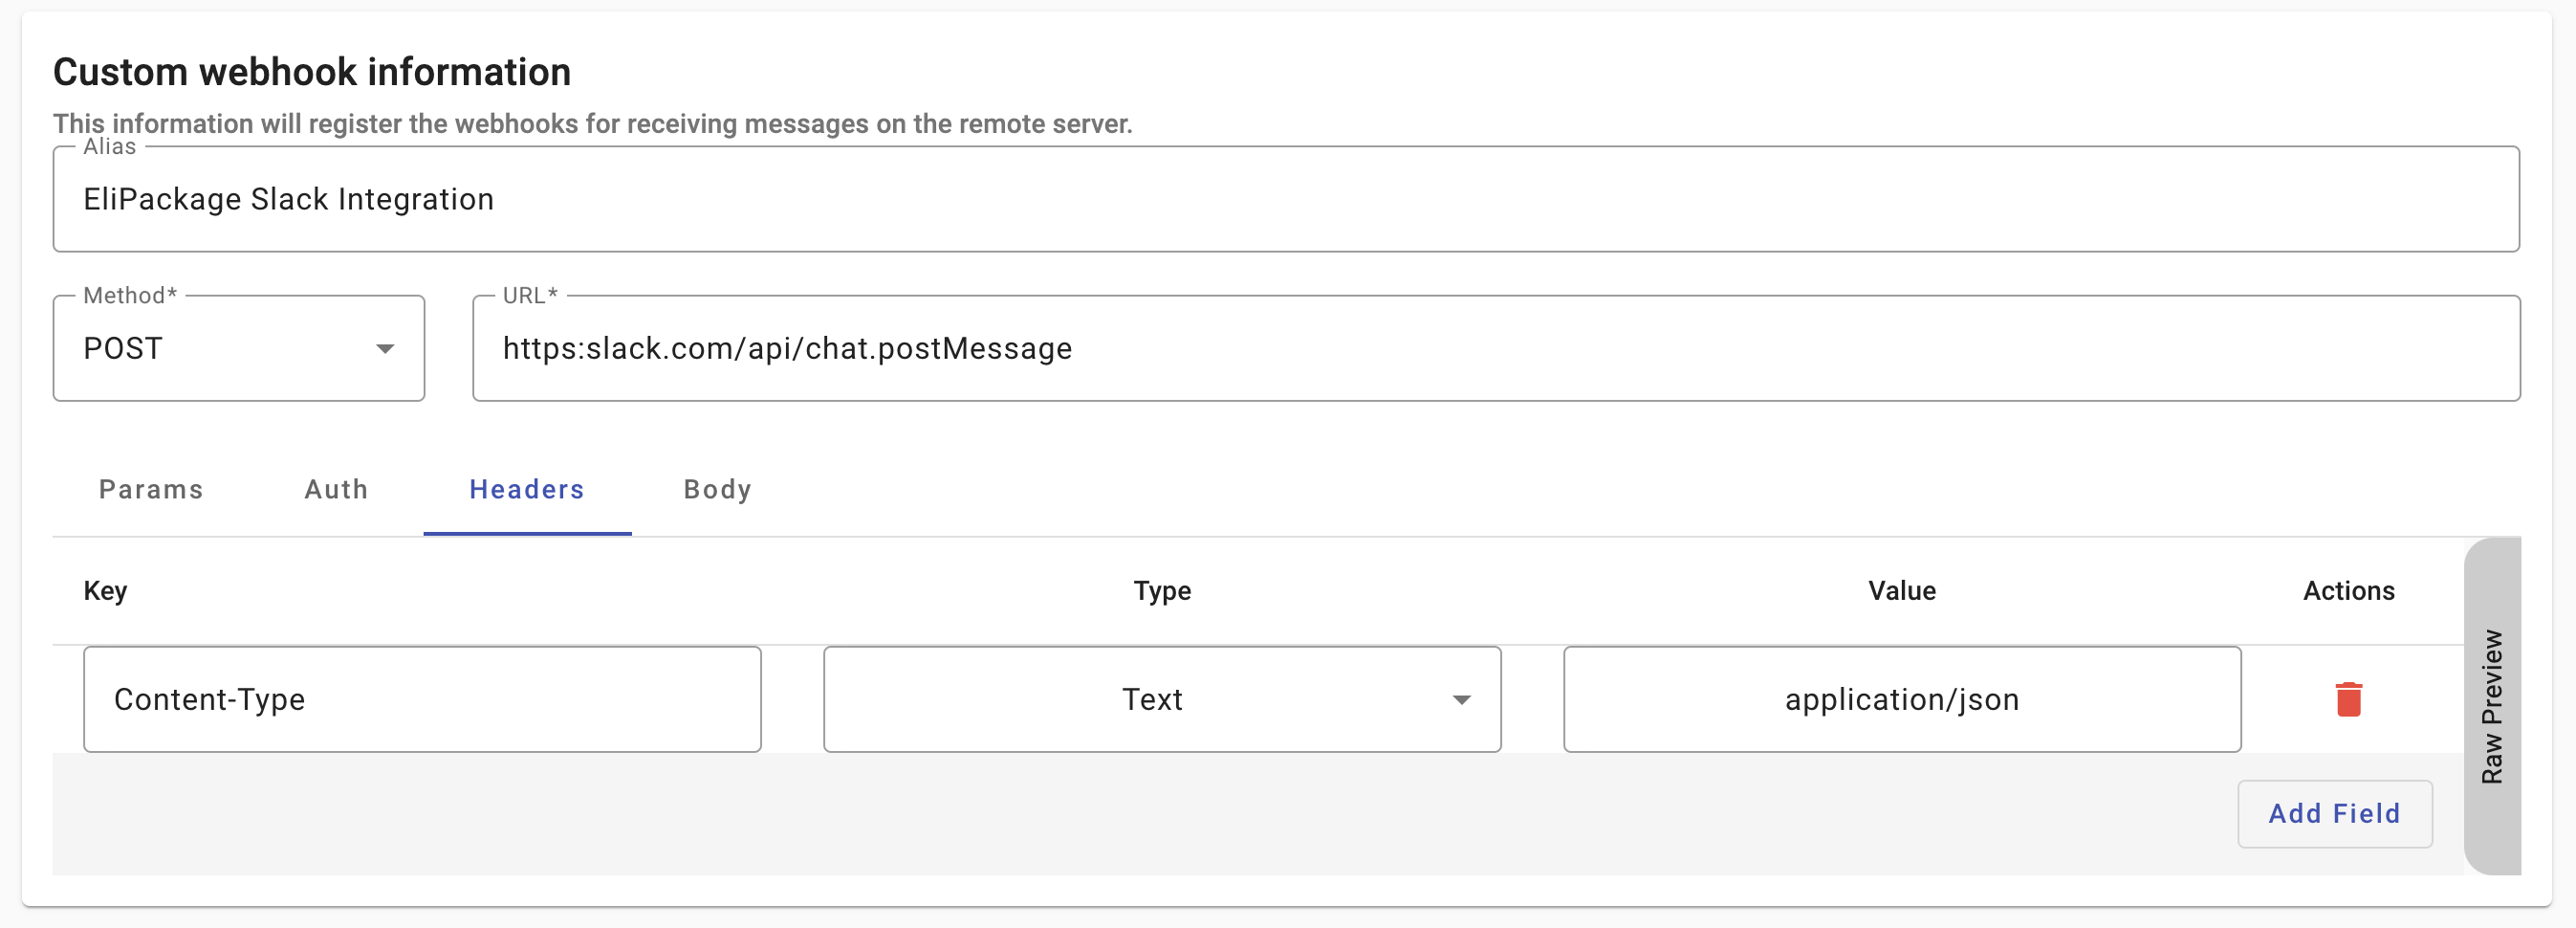
- From the Headers tab, we set the predefined values.
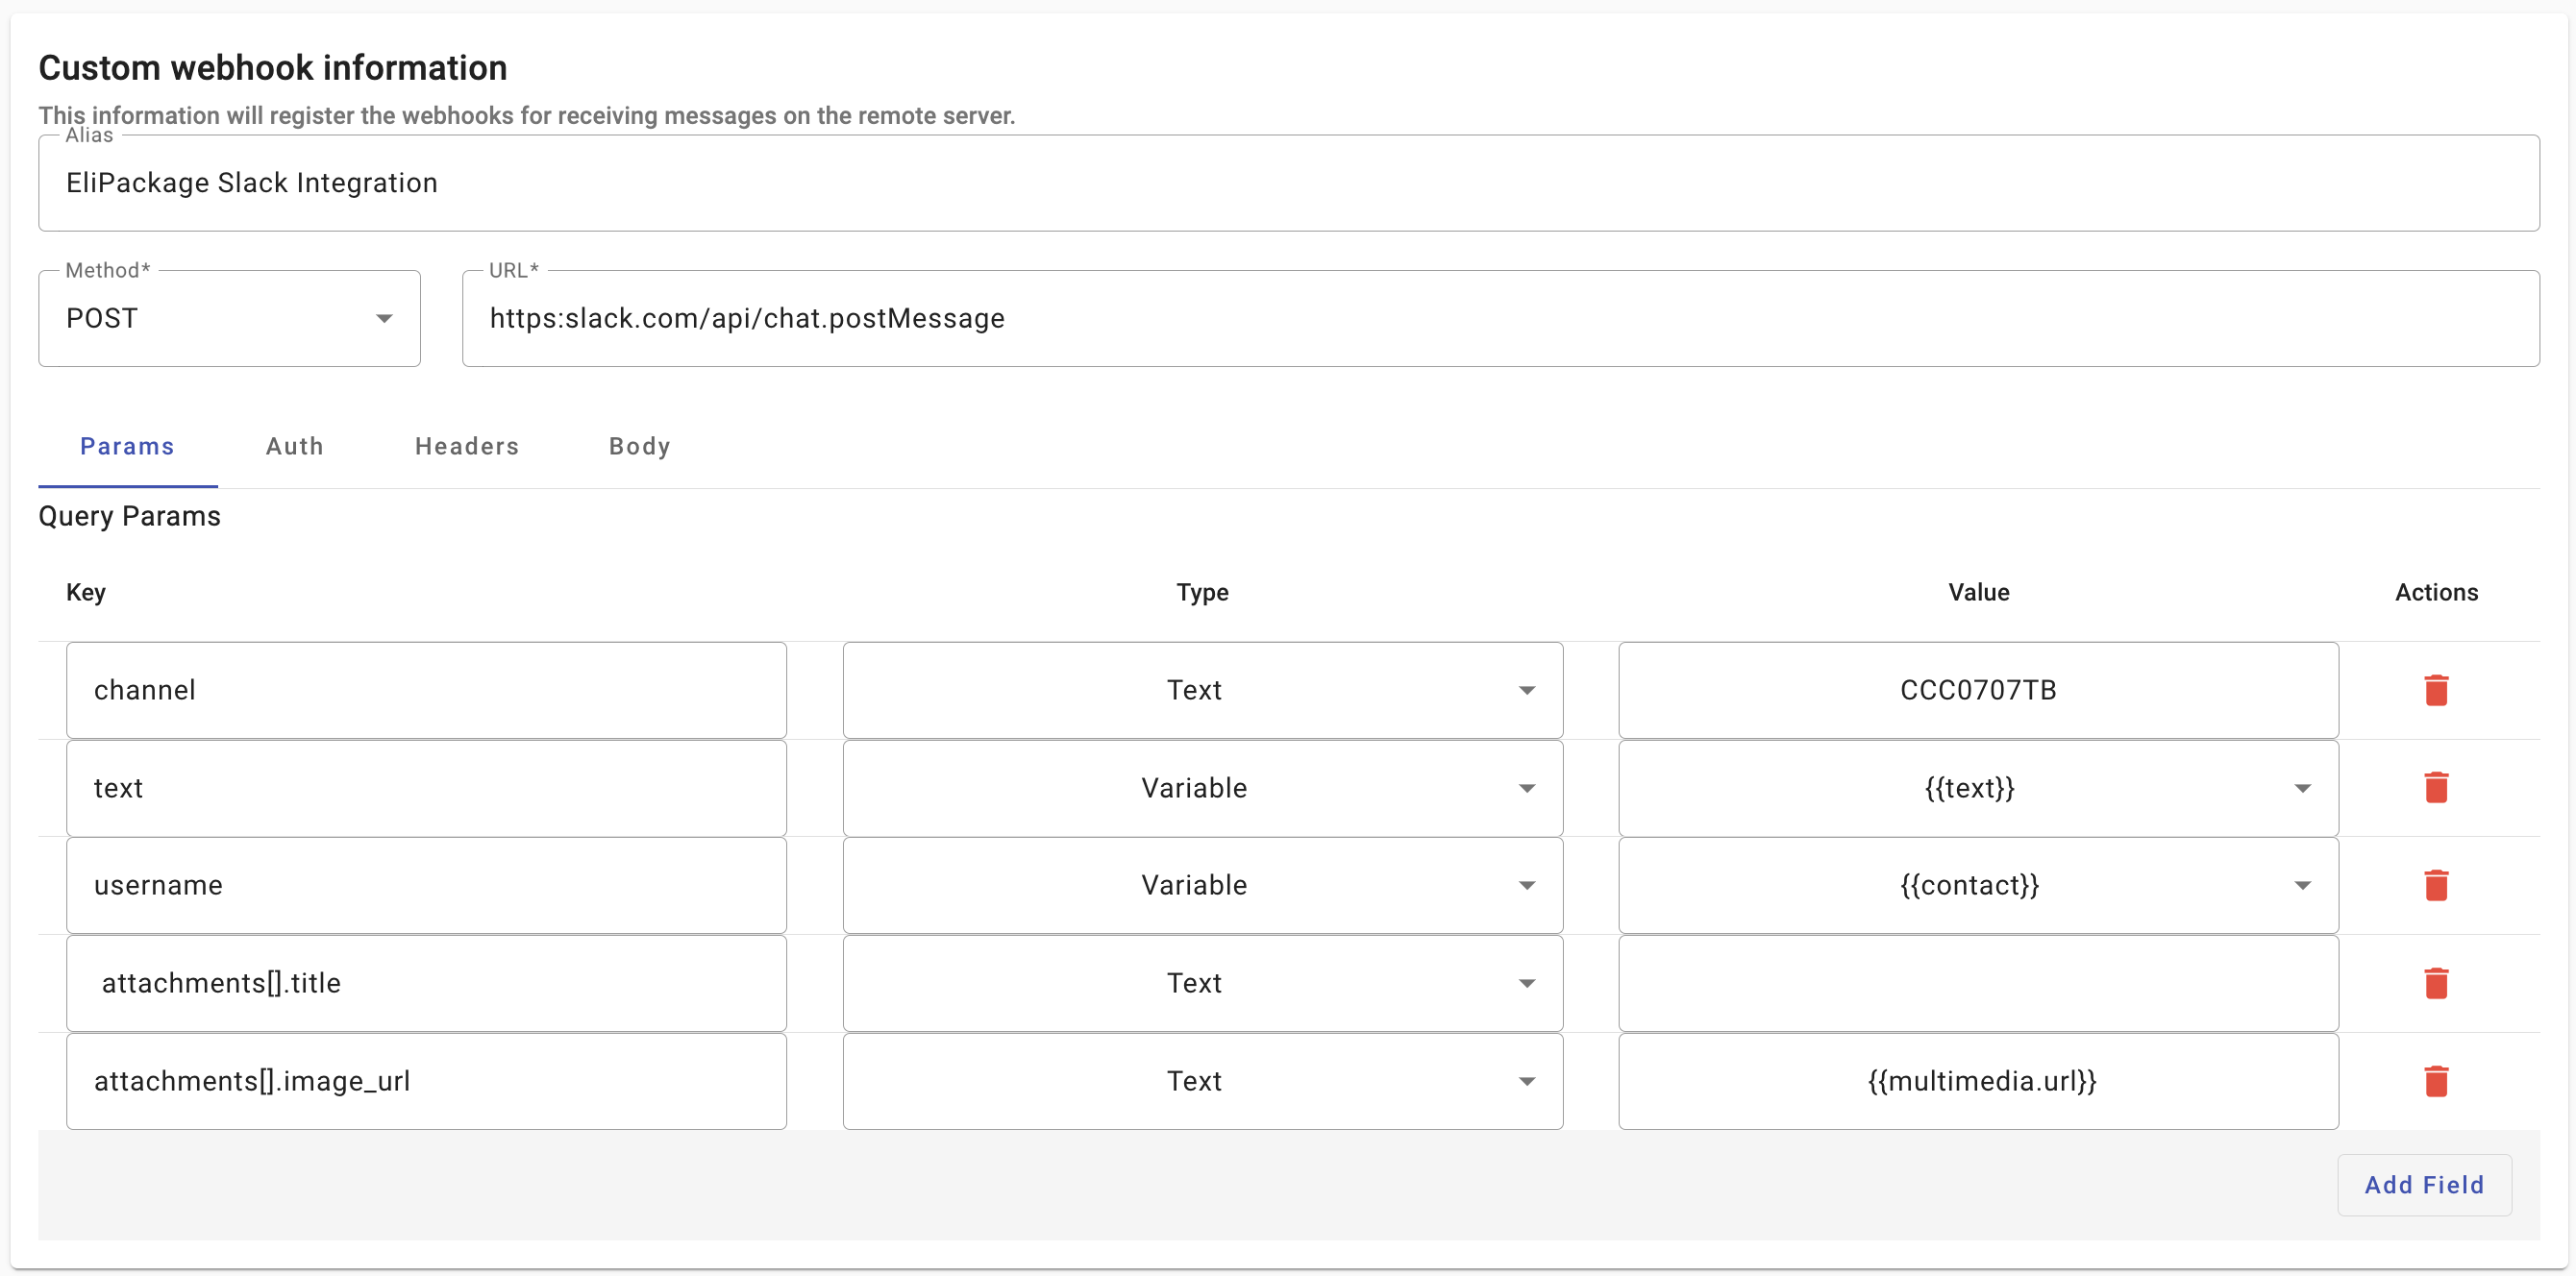
- From the Body tab, the body of a webhook HTTP request contains the data sent via POST. The URL typed is the external callback where the events of the incoming message will be registered and published in the Slack channel. That is, the following required parameters sent to your callback URL will be the events to be recorded in the callback once the end users begin to send you messages:
| Key | Tab | Value | Description |
|---|---|---|---|
| channel | Text |
| |
| text | Variable | {{text}} | Text of the incoming message. |
| username | Variable | {{contact}} | The final user who sent the message |
| attachments[].title | Text | Title of the image.
| |
| attachments[].image_url | Variable | {{multimedia.url}} | Public URL to access the image |
- From the Connections section, select a WhatsApp or SMS sender to receive the incoming message through one of these channels and be posted to the Slack channel. That is, the connection is only configured in case all received messages (incoming messages) on the sender are redirected to the Slack channel.
NOTEIf you want to configure the Chatbot automation to integrate the custom webhook, do not select any connection. The delivery channel and sender will be defined when setting the Chatbot.
In this example, we are not going to select any connection.
- The next step is to activate the Integration by selecting the Start ▶ button.

Integrate Chatbot automation with Custom Webhook
Once you have activated the Integration, we proceed to create a Chatbot. In this example, we are going to create an option menu to contact our support team to resolve their doubts about the system via WhatsApp.
- The next step is to integrate the Chatbot automation with the Custom Webhook integration, which contains the parameters required to post the incoming messages to the Slack channel.
-
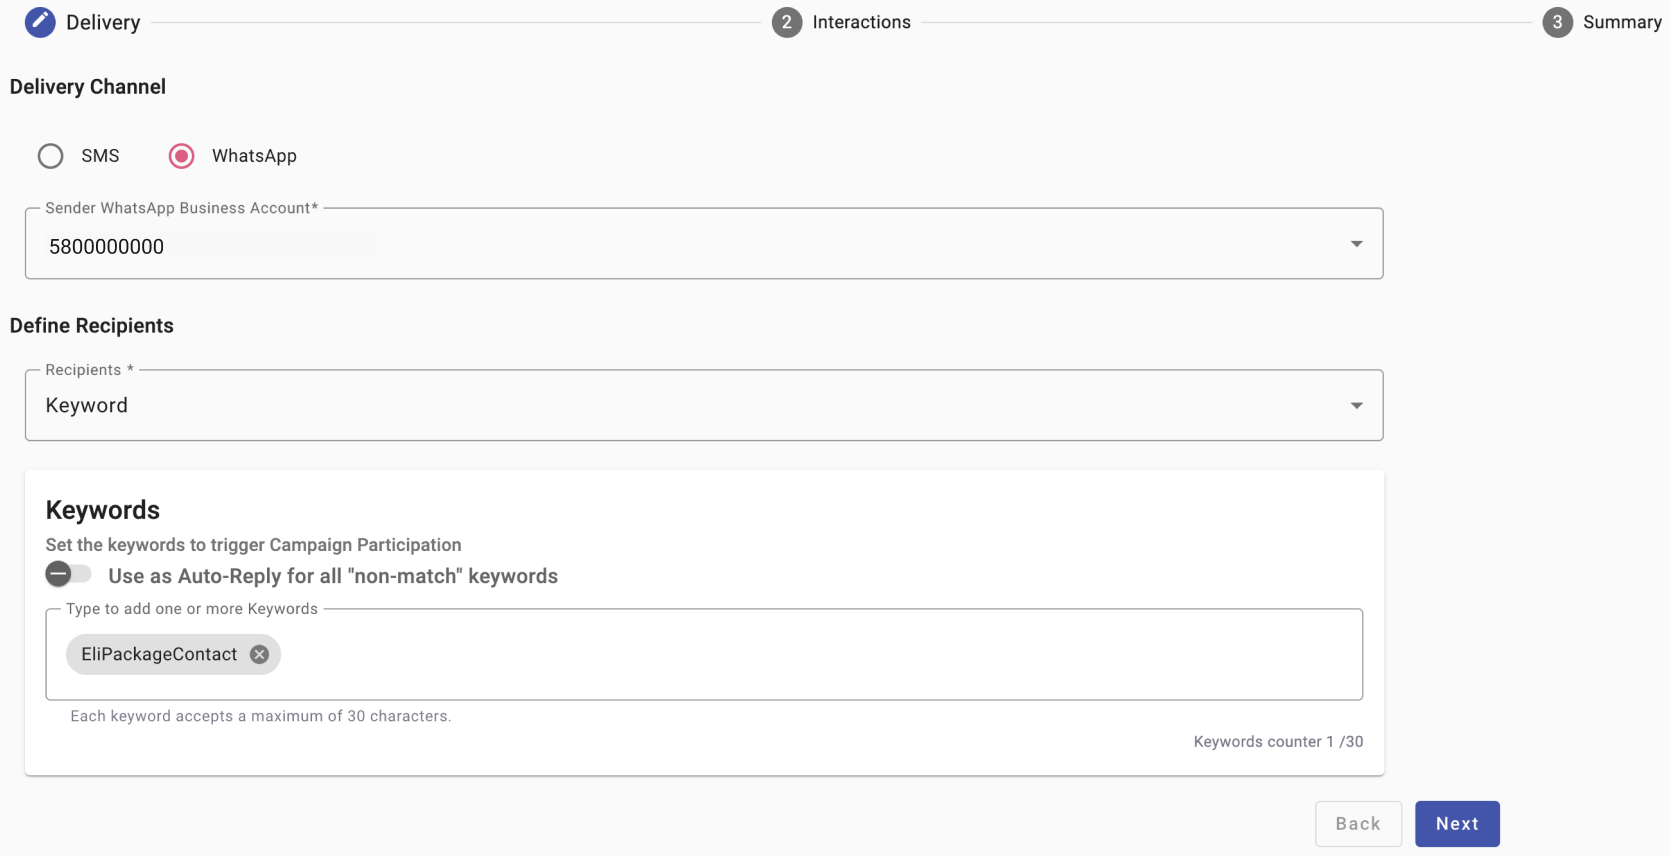
Delivery section: In this example, we select WhatsApp as the delivery channel. Then click the Sender WhatsApp Business Account.
To invoke the chatbot, we enter the next keyword: EliPackageContact
- Interactions section: Welcome Message, which is where you insert the greeting that the user will receive once the service is invoked. It also represents the starting point of the hierarchical decision tree. Therefore, in this element, we are going to set the next message “Welcome to Eli Package, how can we help you?” which contains a menu with two options:
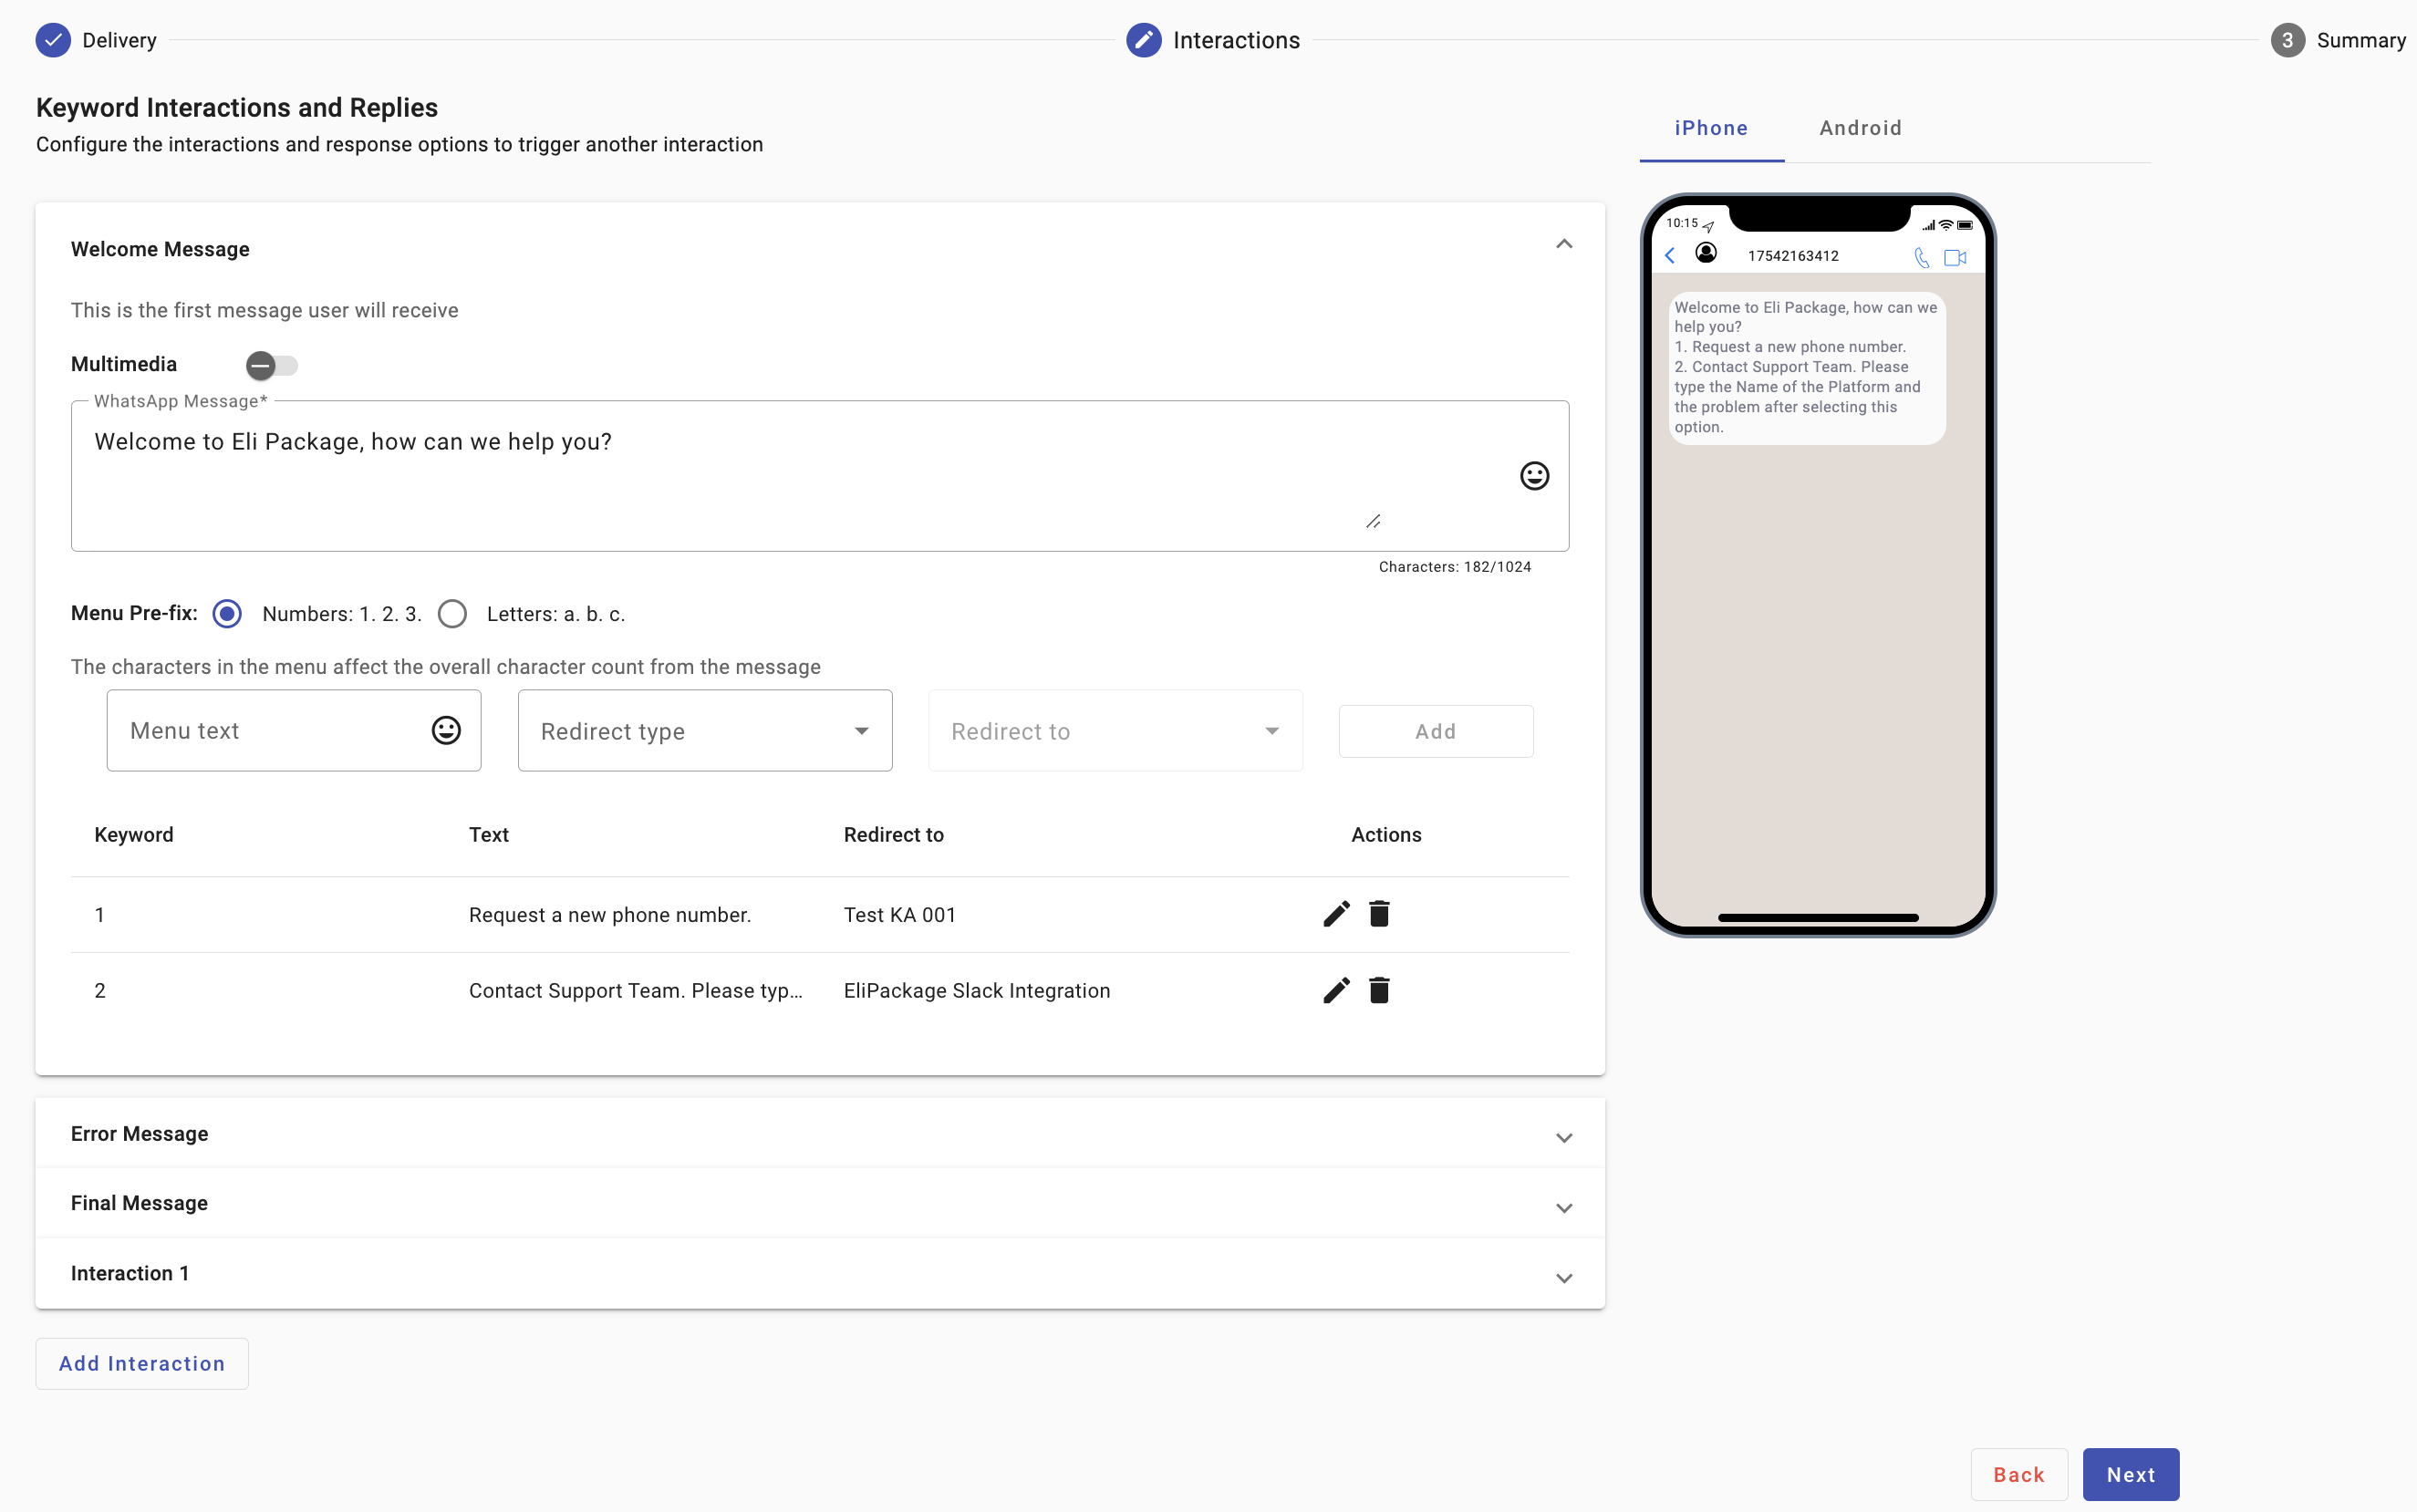
Request a new phone number. If the user clicks this option, he/she will redirect to the automation selected.
Contact Support Team. Please type the Name of the Platform and the problem after selecting this option. In case the user selects this option, he/she will be redirected to the integration that was previously created.
For example, the end user has a question about how to add new users to the platform. Therefore, he/she must contact the support team when entering this option. Once entered, the user must write the problem or question about the problem. The Option selected, the Name of the platform, and the problem or question the user types will immediately be posted in the private Slack channel.
For this, you need to click the add the Slack integration we created earlier by selecting the “Integration Name - Custom Webhook” from the Redirect To.
- Summary section: Take the final actions to set up your Chatbot Service, and have a chance to review some of its configuration aspects. It's divided into three sections. Click the Live button and select Save.
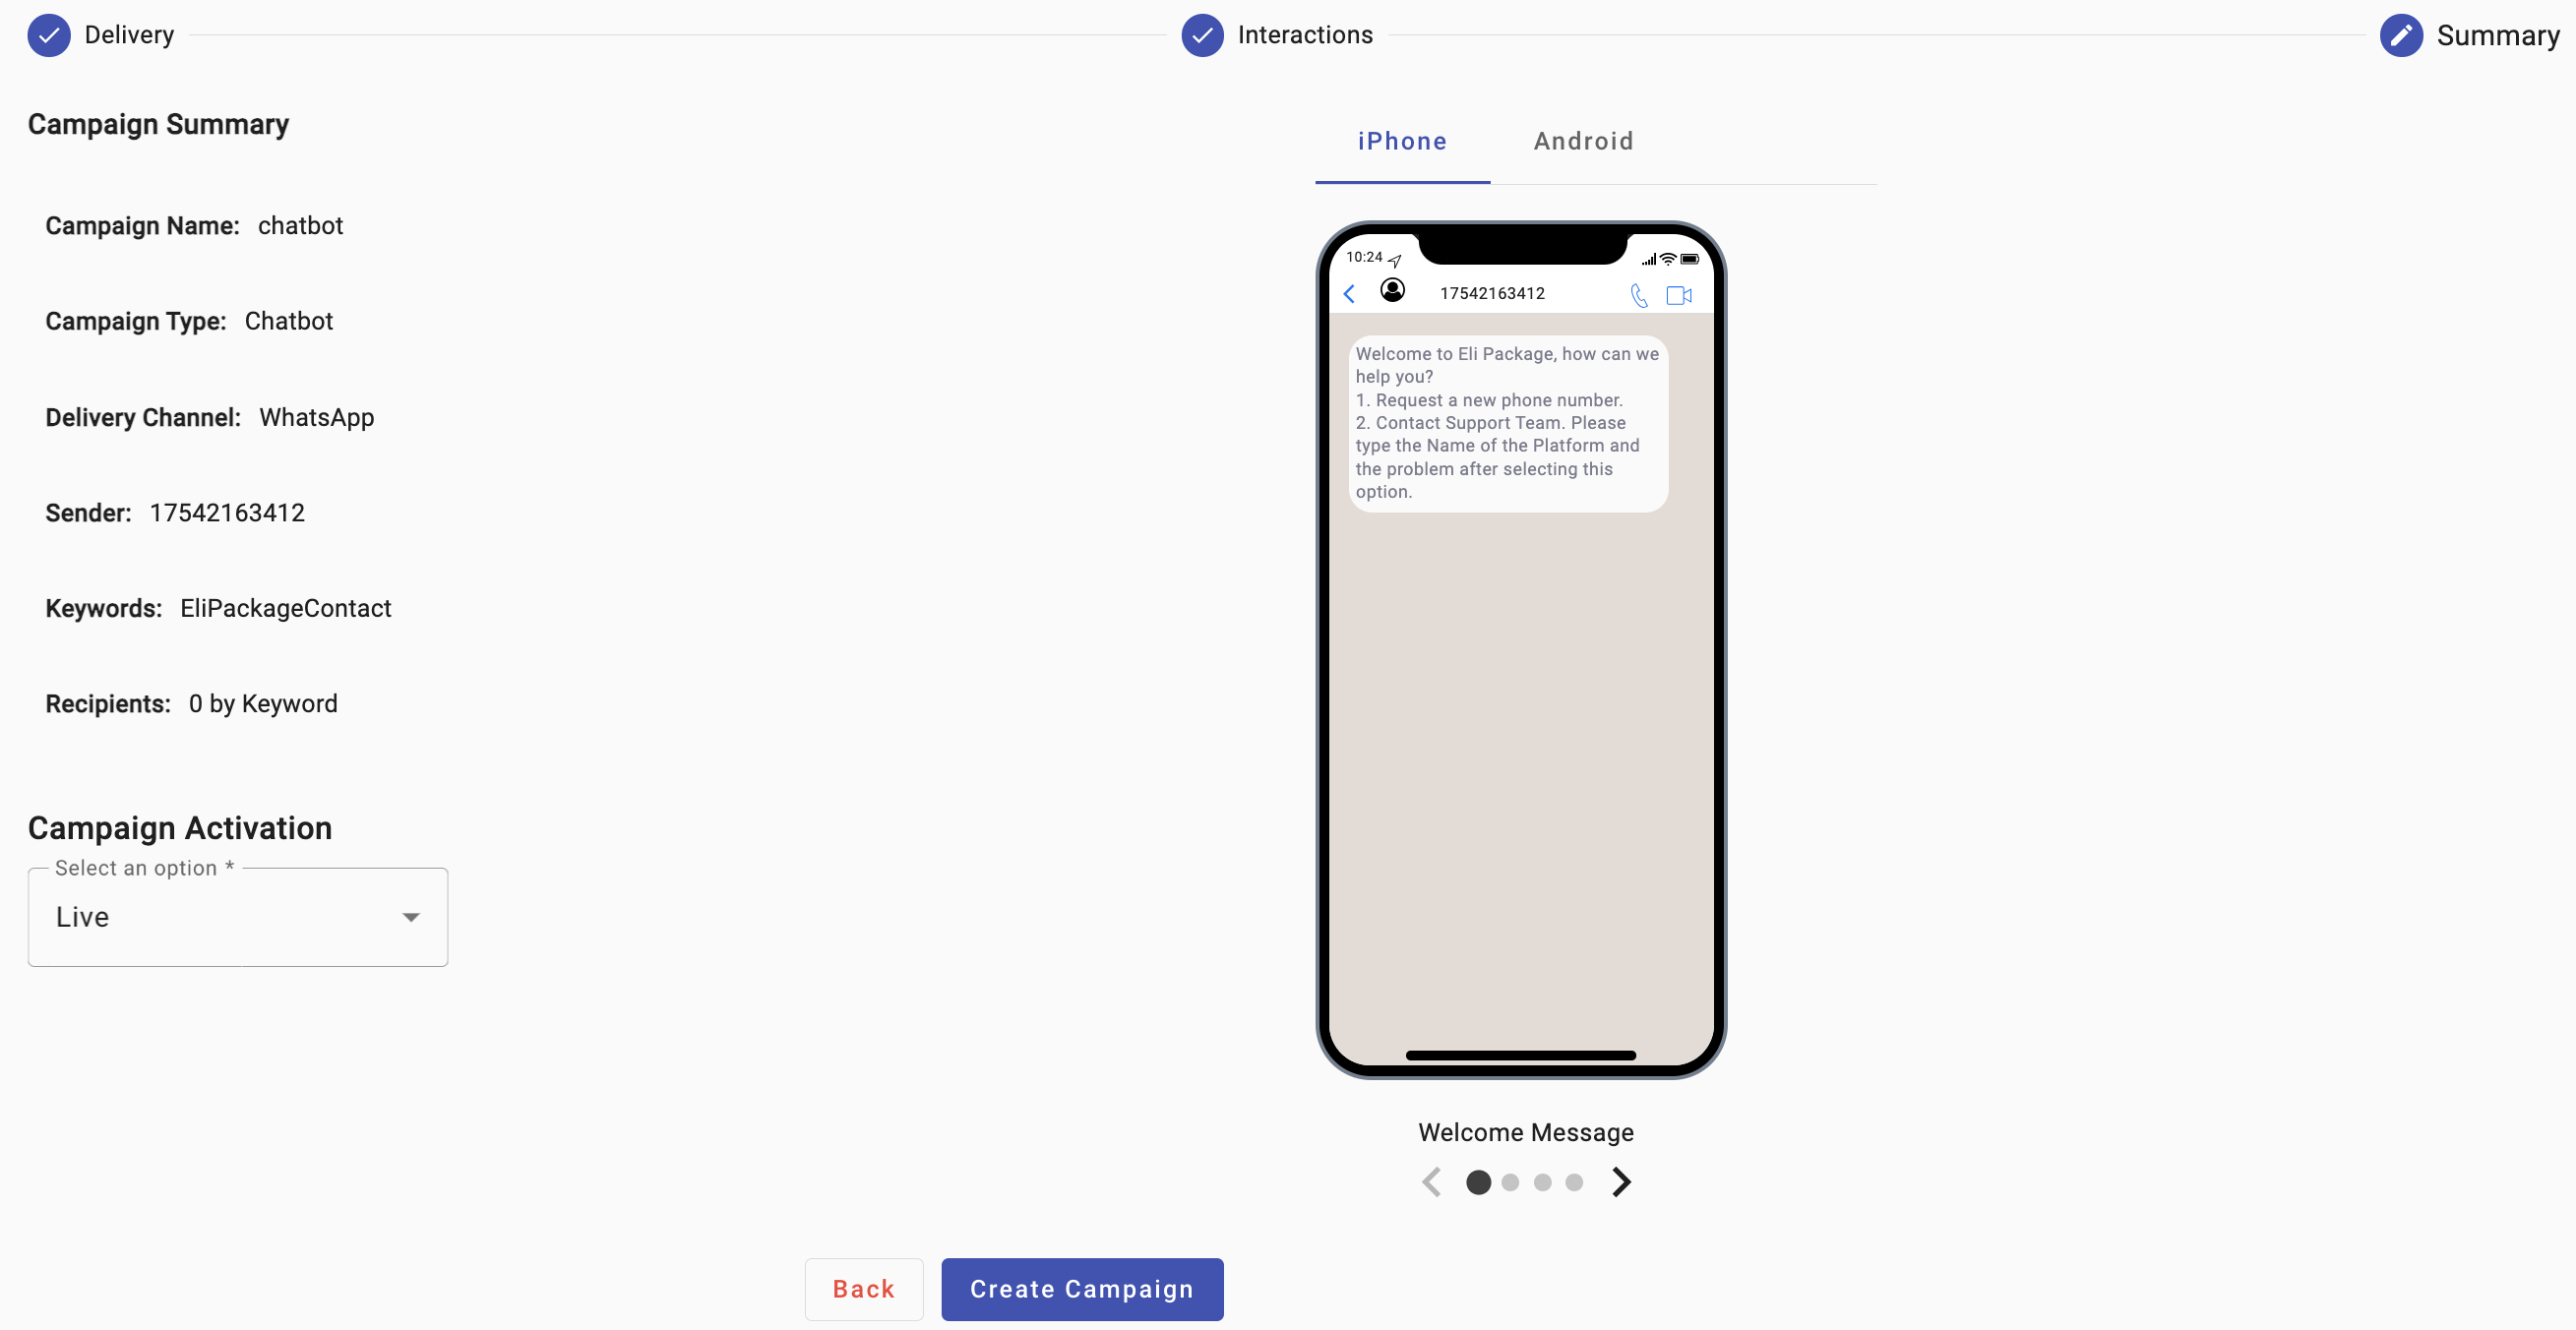
Congratulations! You have successfully integrated Slack with WhatsApp! Now you will be able to receive the incoming messages from your end users via WhatsApp and posted to the Slack channel.
Updated 4 months ago