Attributes
Configure chatbot attributes to collect user details and reuse them in later chatbot messages.
Attributes act as placeholders, also known as personalized fields, that enable the chatbot to request and capture specific information from the end user. These attributes can be customized to store details such as the user’s name, email, address, or any other relevant information, enhancing the chatbot’s ability to provide a personalized experience.
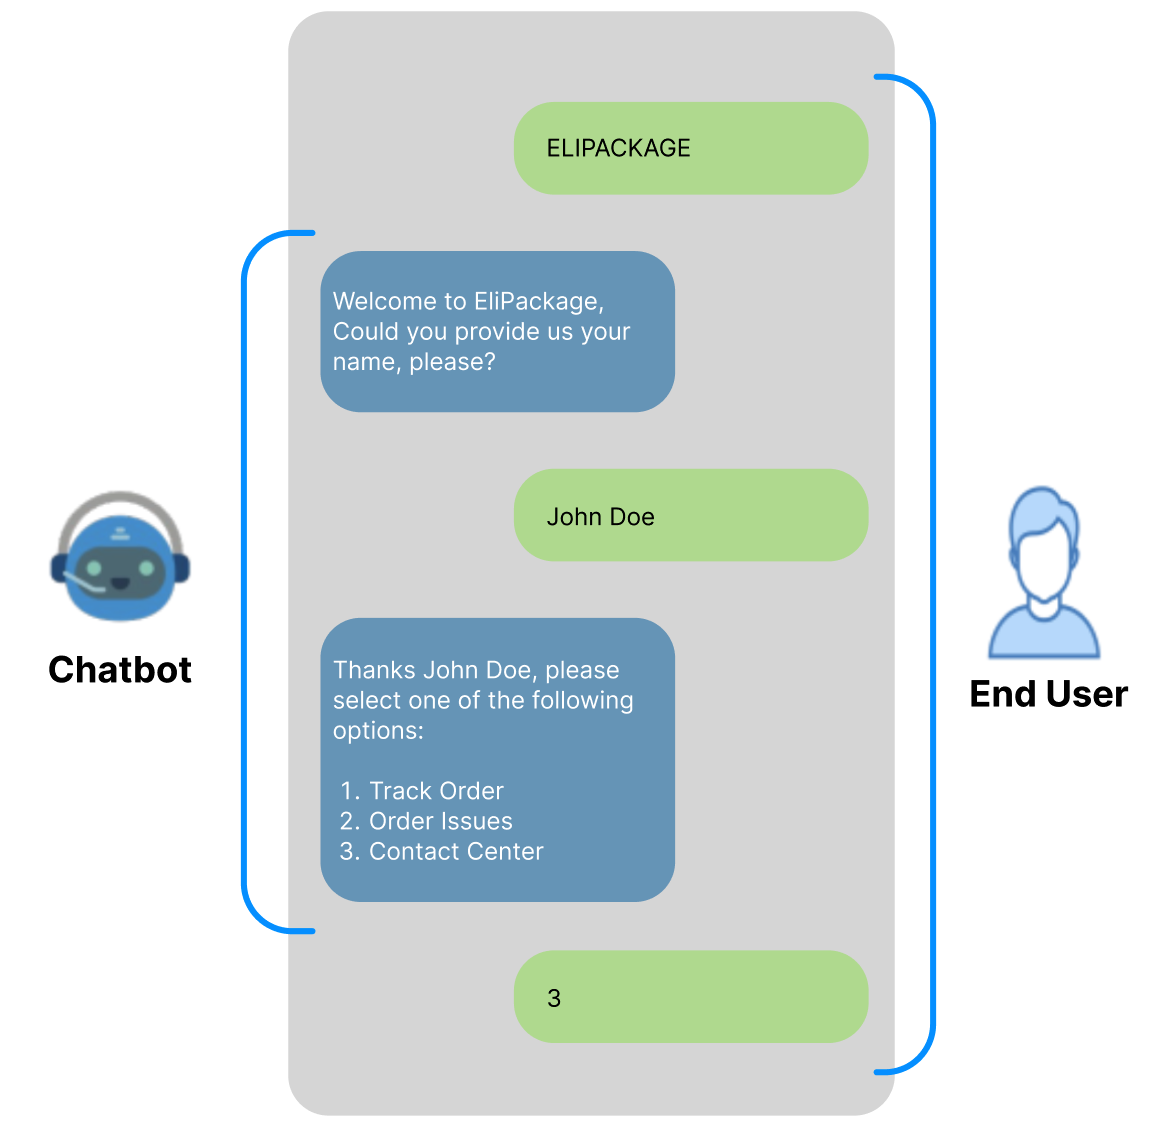
Attributes can be used to prompt users for details, which are then saved for later interactions or responses. In the example shown in the image, a chatbot is configured to greet users and request their names.
As shown in the example above, we will guide you through each step to set up and configure attributes for the chatbot.
The steps to set existing attributes to the chatbot are the following:
-
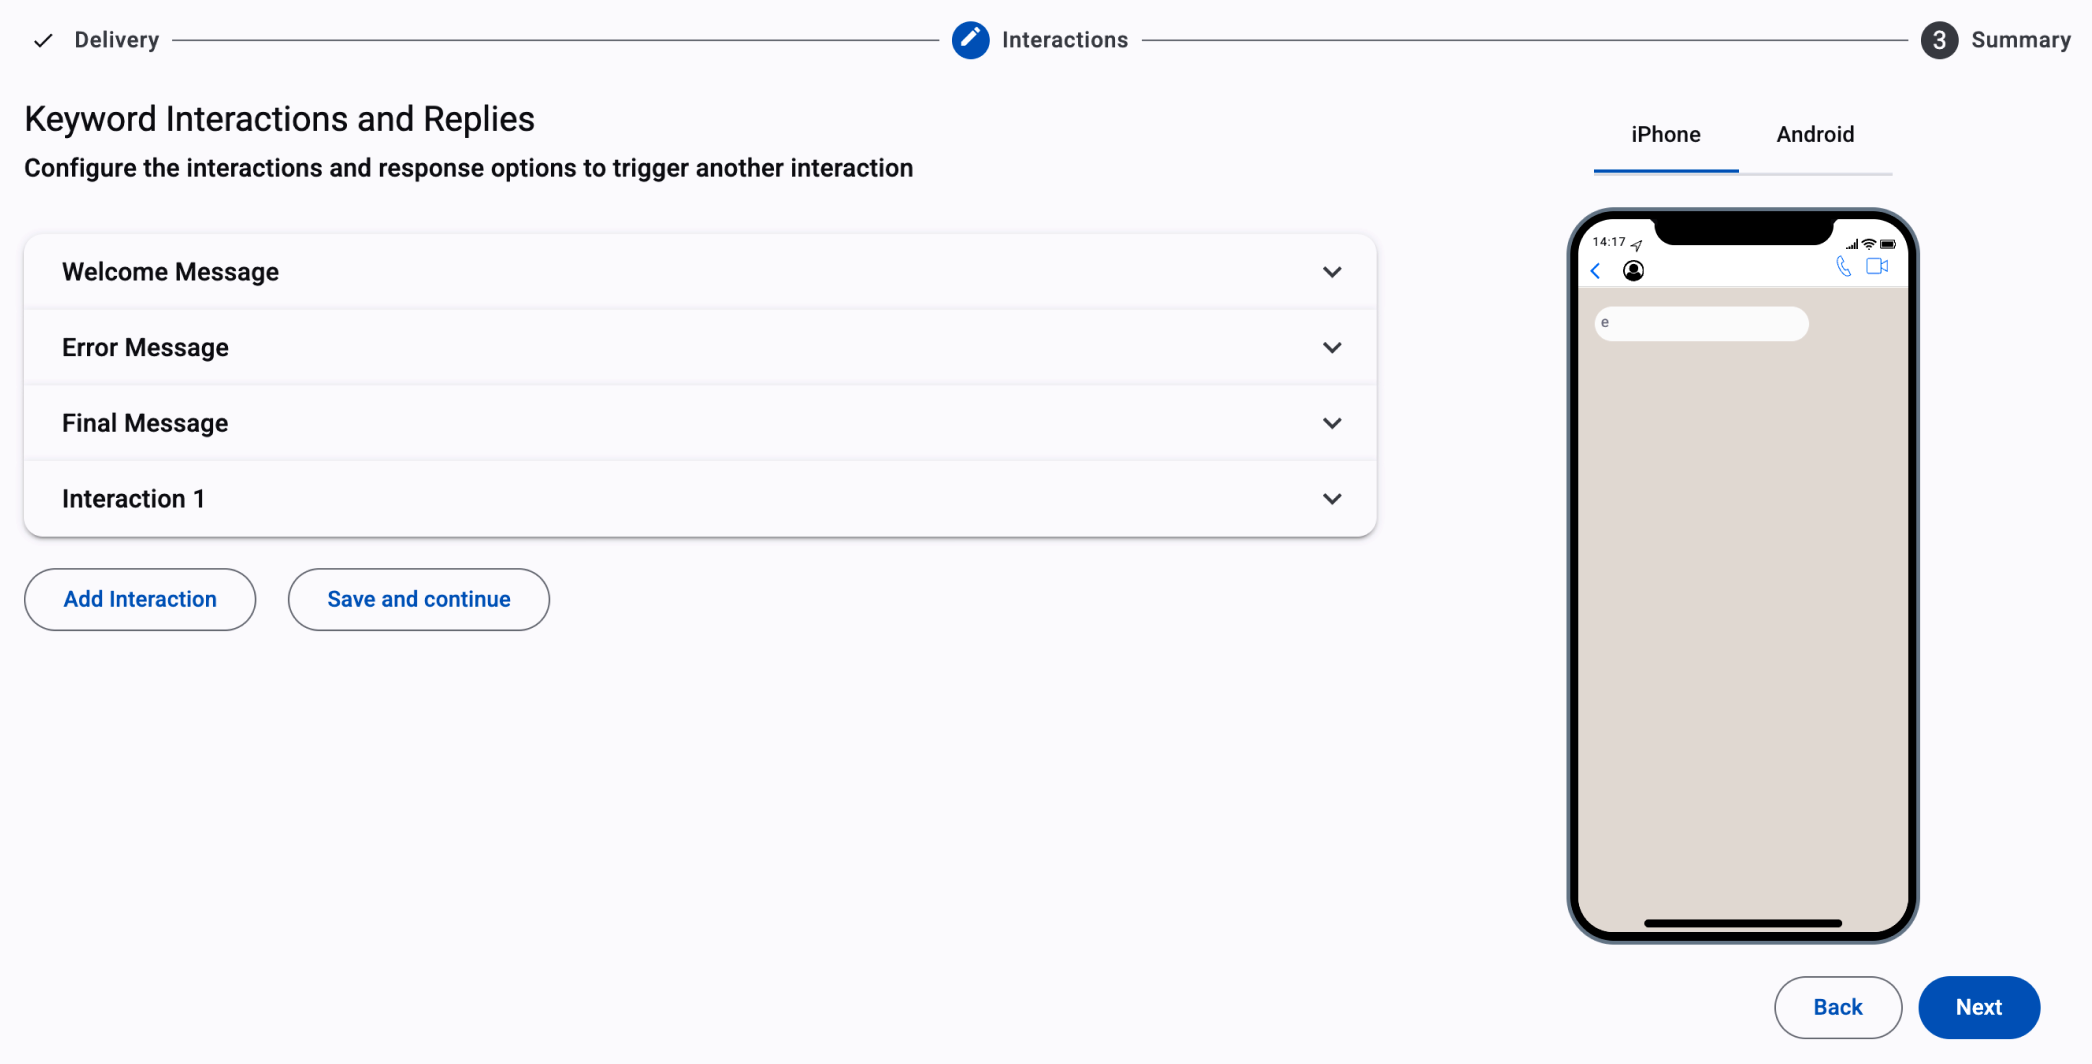
As mentioned above in the Welcome message & interactions section, both chatbot configurations Welcome Message and Interaction are where you define and manage how the chatbot communicates with users. It encompasses various elements designed to simulate a conversation, guide users through processes, or provide information.
-
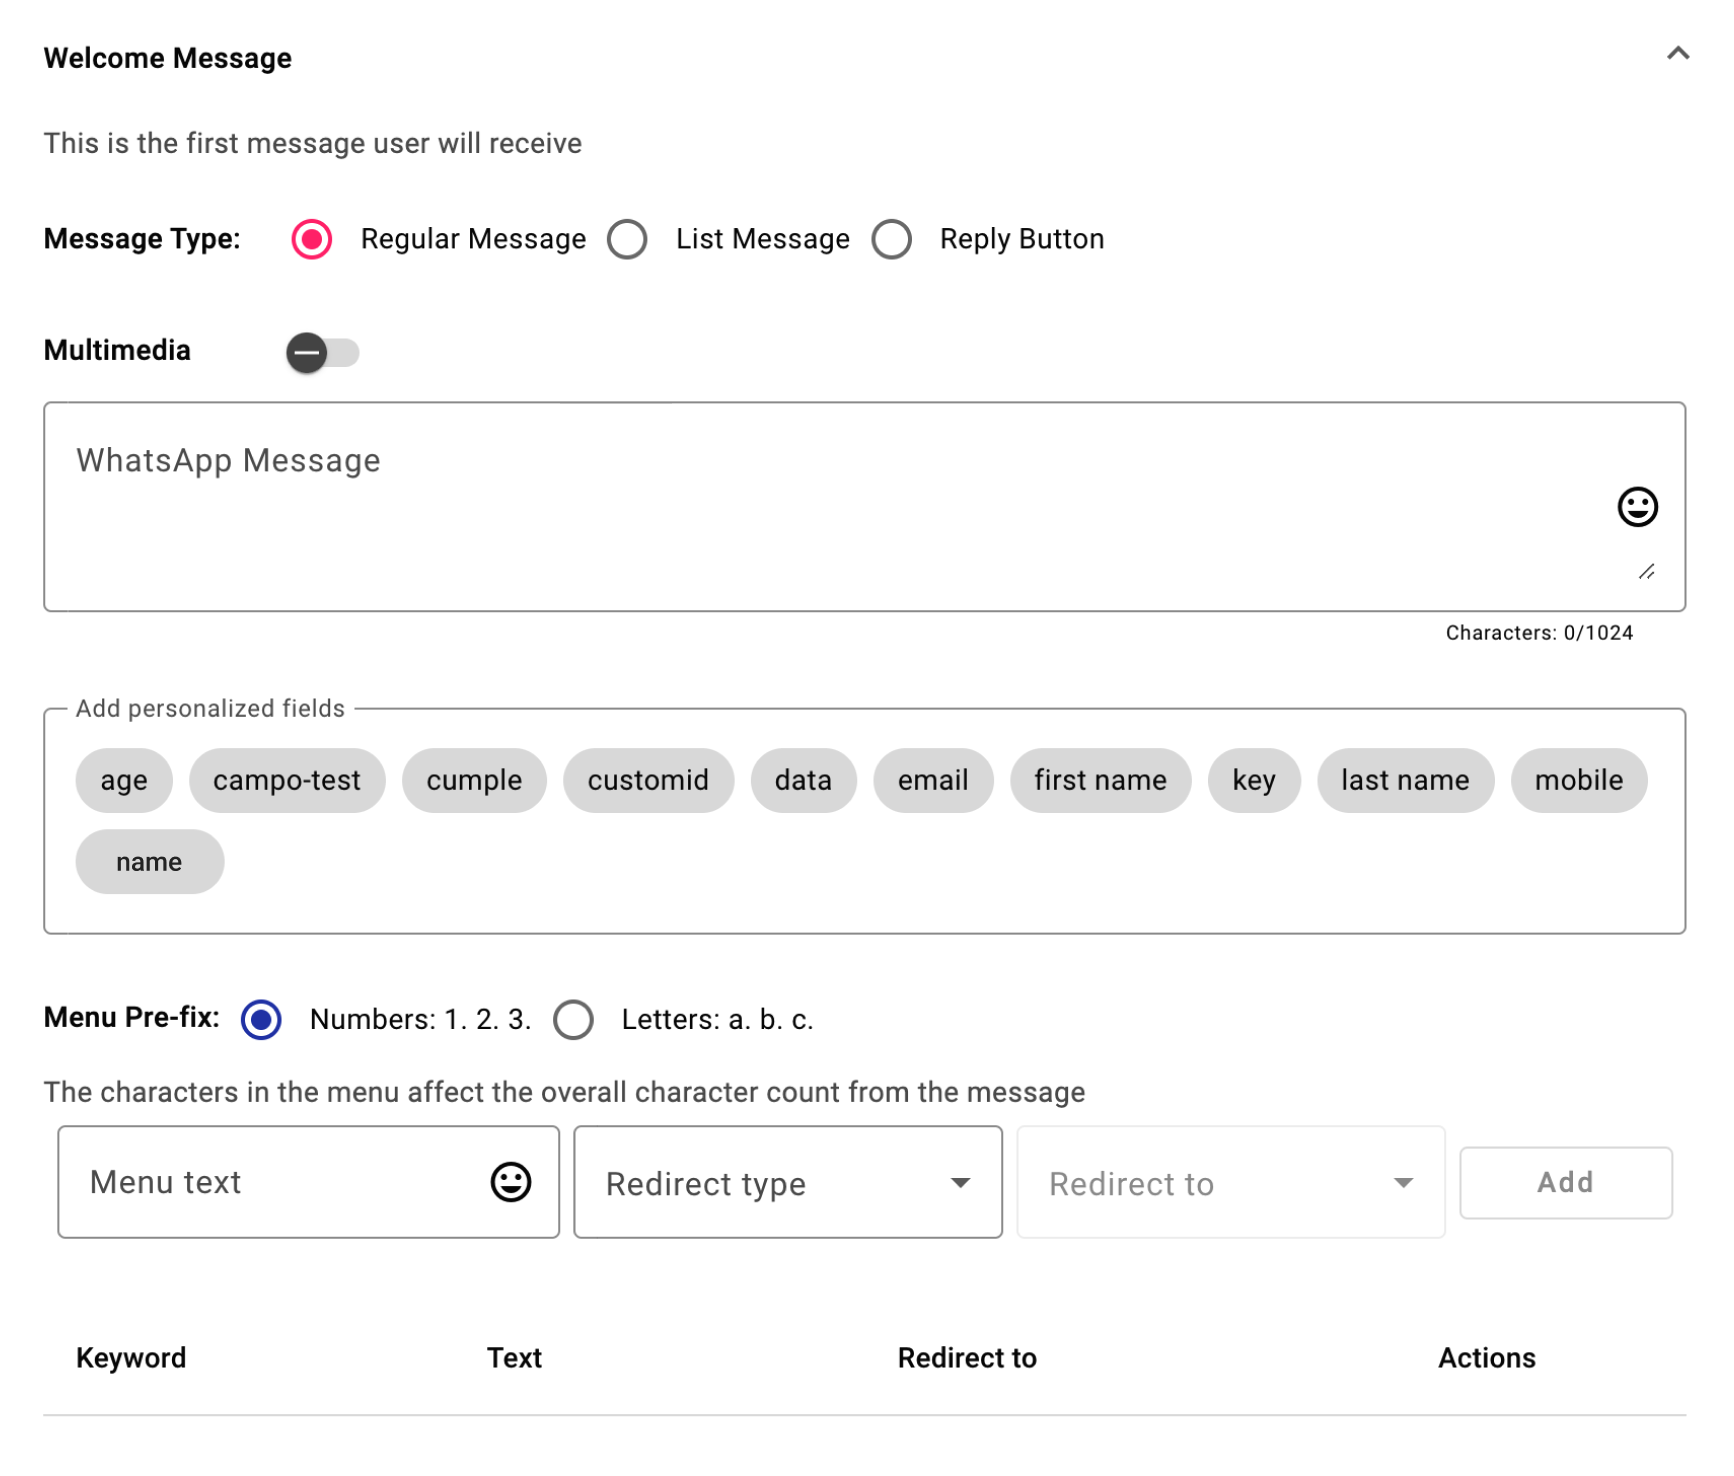
When setting up the welcome message and interaction, you have the option to configure different types of interactive messages (regular message, List Message, Reply Button). In this example, we are going to configure the chatbot through regular messages (standard text messages sent to the user that include a user-friendly menu with numbered options for resolving common issues).
Here are the steps to set up an attribute to a regular message for the Welcome Message:
-
Select the Regular Message interactive message option.
-
Define the welcome message to initiate the conversation with the chatbot.
We are going to Enter the greeting message aligned to the chosen channel type, each with its own characteristics; SMS using the standard 160-character cap, WhatsApp with 1024 including emoji capability that you select from the smiley face on the right end of the message box, and RCS with 1024 characters.According to the example, we enter the next message:
"Welcome to EliPackage, Could you provide us your name, please?”This message is the initial interaction aimed at gathering the user’s name.
-
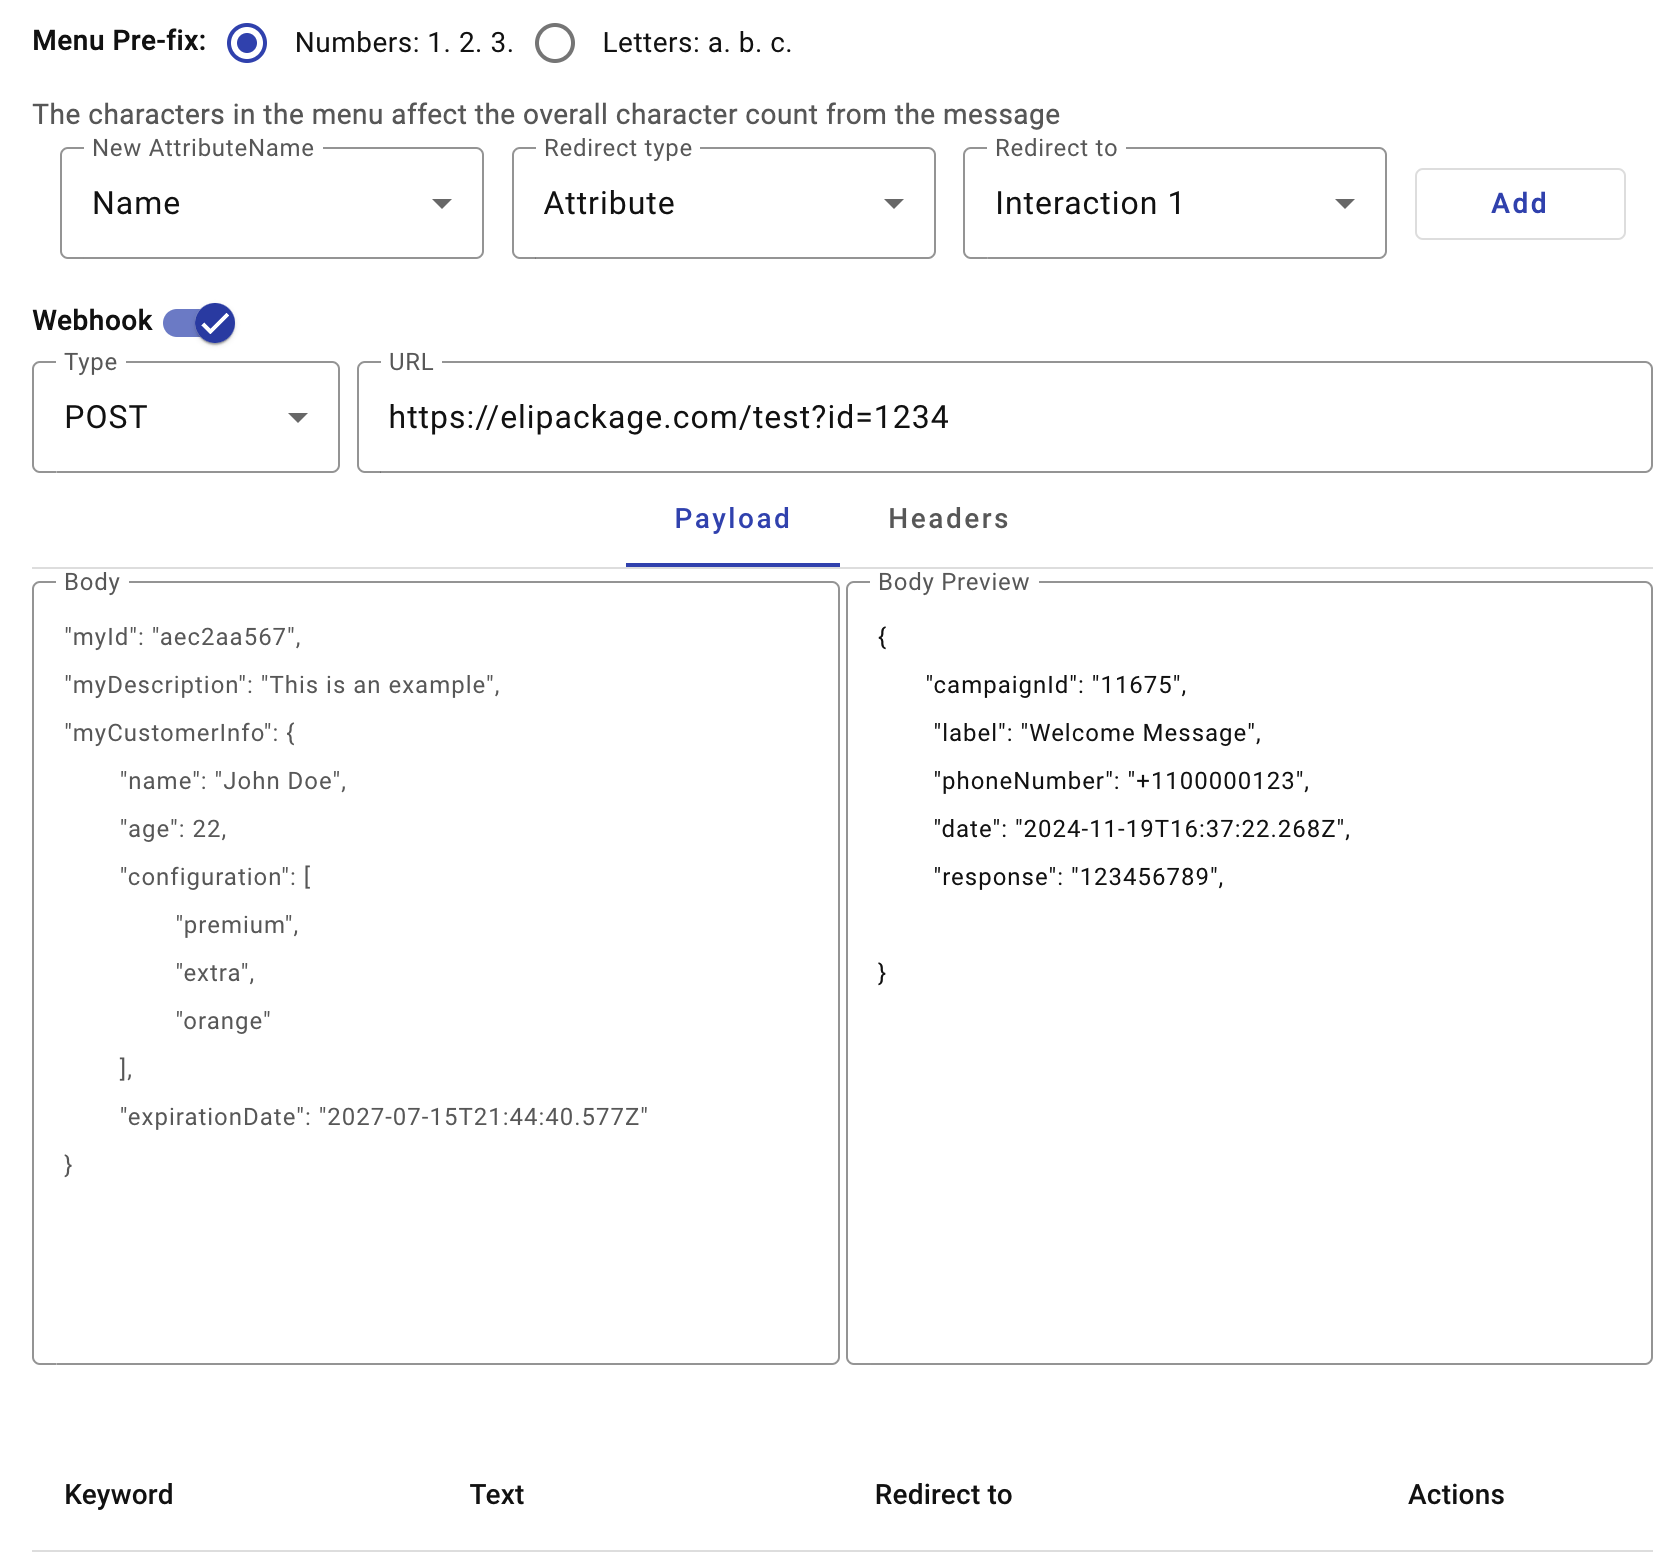
From the "Menu Pre-fix" option, we are going to set the available options that users can pick from.
Each number or letter represents a response to the particular interaction that the user finds herself/himself in. These single-character keyword prefixes will be what the end user texts back as a response to each step in the chatbot flow. Each number or letter represents a response to the particular interaction that the user finds herself/himself in.
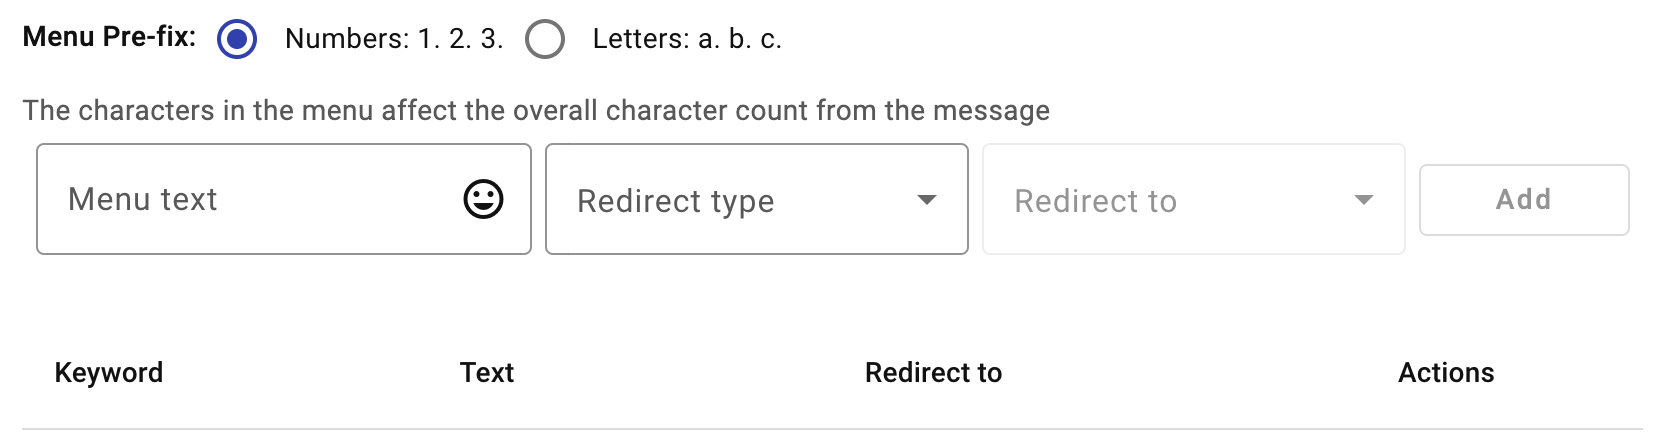
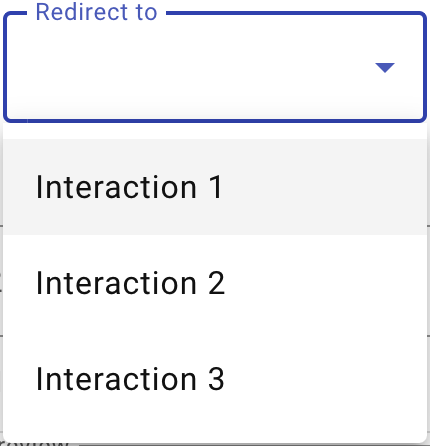
The next step is to specify where the user will be redirected once they select the desired option from the menu. Additionally, the user responses in the form of a single character or by adding attribute(s) allow the chatbot to redirect the user to the next action. Here we are going to set the attribute(s).
-
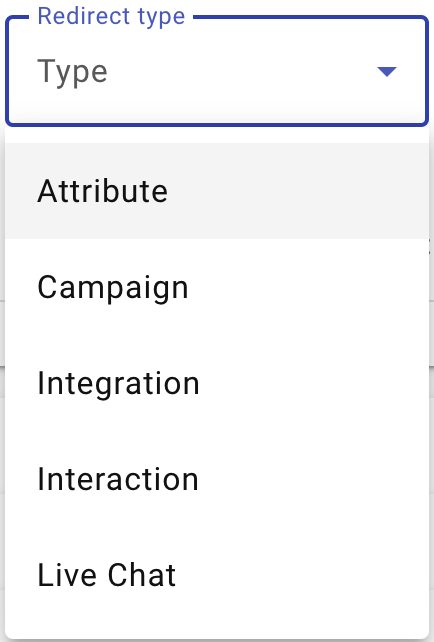
From the Redirect Type , specifies the next step in the chatbot's sequence. The platform provides five options to choose from. For this example, select the "Attribute" option.
-
The "Attribute" drop-down menu will appear instantly next to the "Redirect type" dropdown menu, and the webhook option will be visible.
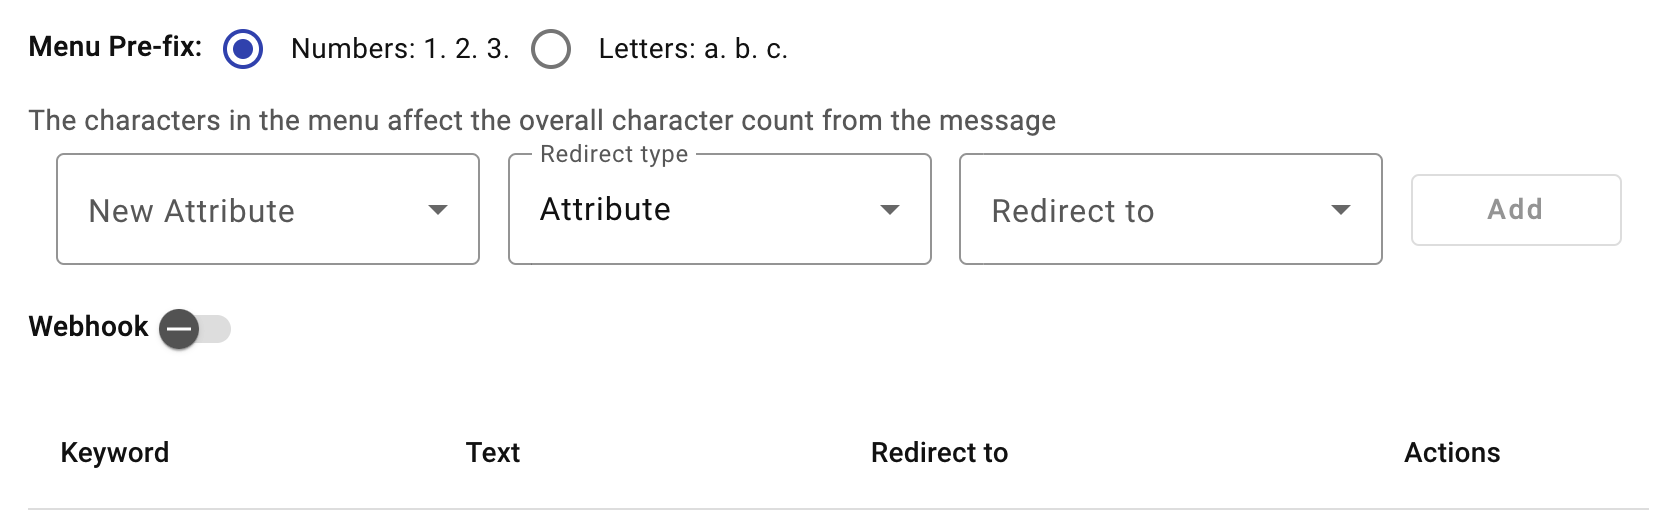
From the Attribute drop-down menu, choose the attribute you want to request to the end user. For this example, we choose the "Name" attribute.
 NOTE
NOTEThe attributes shown in the “Attributes” dropdown menu correspond to the columns defined during the creation and setup of the contact list.
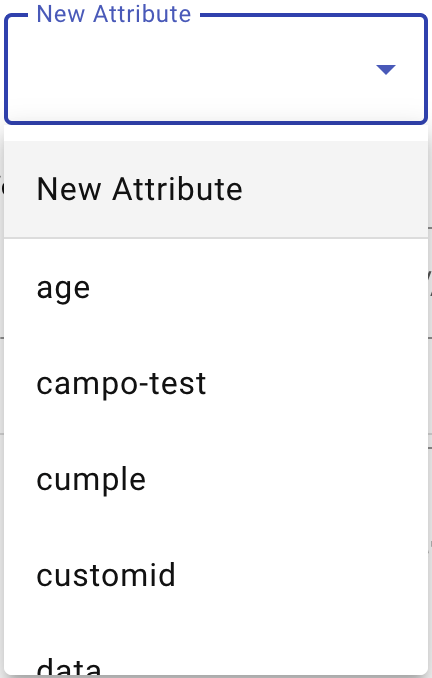
When a user selects "New Attribute" in the “Attributes” dropdown menu, they are given the option to create a completely new data field to collect specific information from the end user. This process involves defining the attribute’s Name and Type:

Name Field: The user enters a unique name for the attribute in the provided field. This name will help identify the data being collected in interactions, such as “address”, “Id number,” or any custom label relevant to the conversation flow.
Type Selection: After entering the attribute name, the user needs to specify the attribute type. The type defines the kind of data expected for that attribute. Options include (Phone, Email, Number, Text, GeoLocation).
-
After selecting the “Name” attribute, the user configures the chatbot to direct the conversation flow based on the input received. Using the Redirect to dropdown menu, it will list all interactions available. Therefore, the chatbot can choose to lead into a specific interaction (e.g., “Interaction 1”) once the user provides their name. This enables a smooth and responsive flow, moving the conversation forward in a logical sequence.
-
Once the Attribute, Redirect Type, and Redirect To are configured, you can optionally proceed to add a webhook. By default, the webhook functionality is deactivated. If you want to enable the webhook, switch on the Webhook toggle. A webhook enables an application to instantly send data to other applications when a specific event occurs. This feature is particularly useful for integrating collected data with external systems in real time. For more information on incorporating a webhook into your chatbot, please refer to the Setting Webhook section. Once added, we select the "Add" button to add the attribute.
-
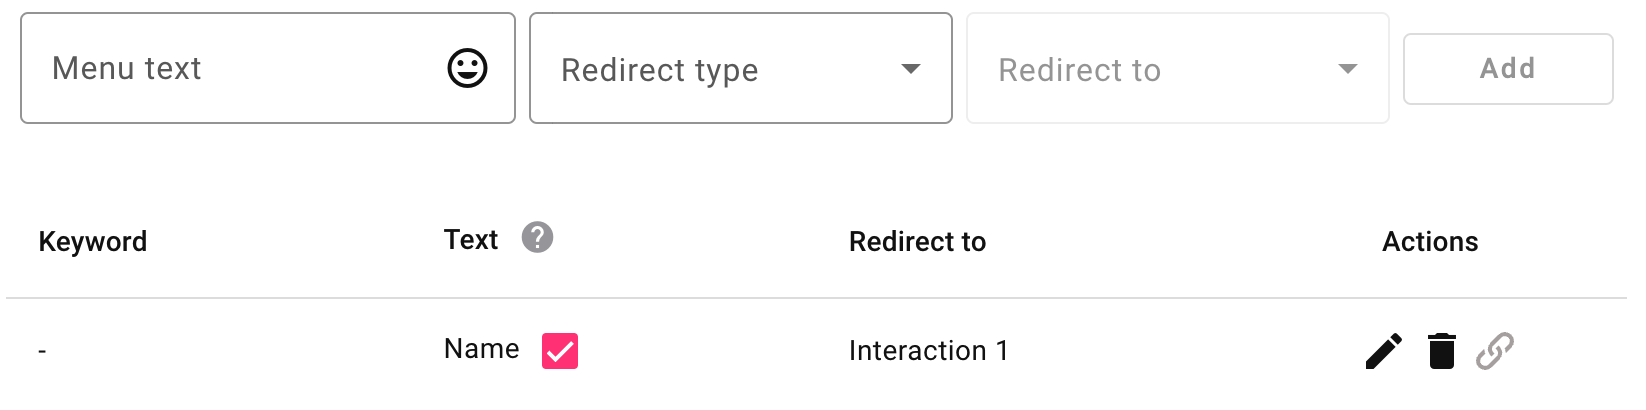
Therefore, once the Attribute, Redirect Type, and Redirect To configuration is complete, each item will be included in a menu item table displayed under the configuration section. Menu items will be placed in ascending order as they are entered, automatically advancing the keyword identifier at each menu entry. In this example, we only set one attribute.
 WARNING
- Selecting the checkbox automatically saves the end user's data entered during that interaction to the corresponding column in the contact list. That is, as long as at least one end-user enters the requested attribute information, this information will be saved in the contact list.
In case the the attribute has been created, as long as at least one end-user enters the requested attribute information, the column (attribute name) will be created and the requested information will be saved in the contact list.
- If the attribute is not selected, the requested information will not be saved in the contact list, even if the attribute was created.
- Whether the attribute is selected or not, the end-user’s requested information is temporarily stored during their interaction with the chatbot.
- Only (1) one attribute can be set for each interaction. If an attribute is set in the interaction, selecting a different option from the "Redirect Type" dropdown is not allowed.
- Only the Attributes are avariable for Regular Message.
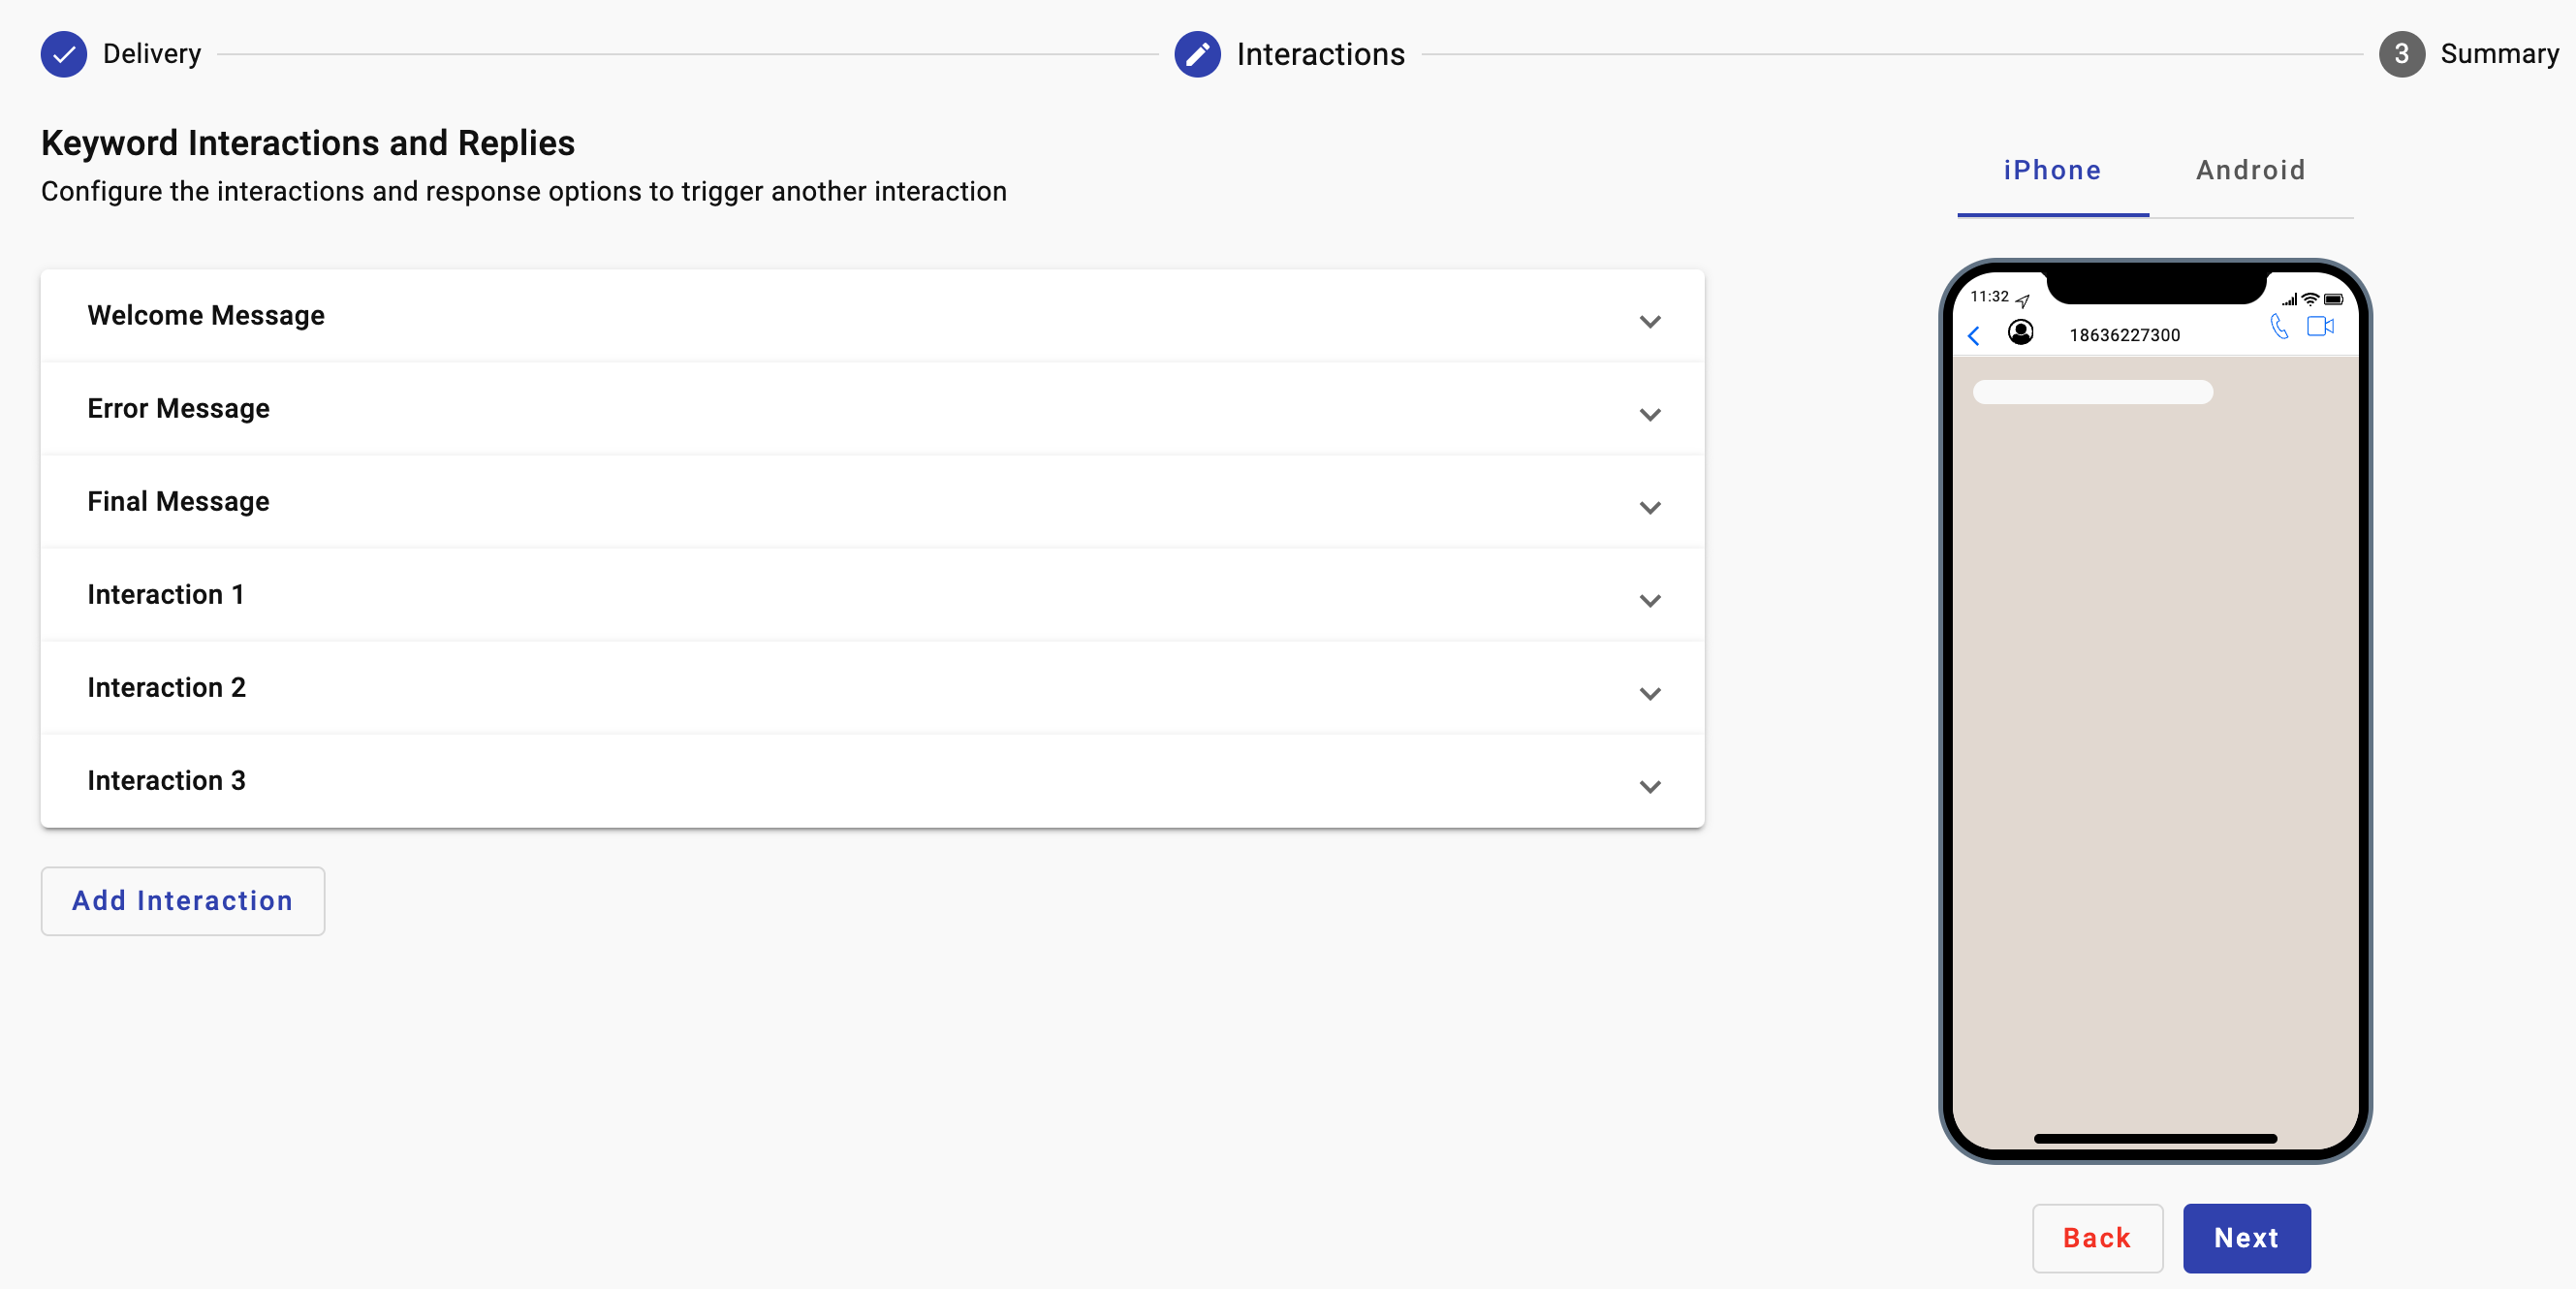
After configuring the Welcome Message, the next step is to define the Interaction flow.
- Selecting the checkbox automatically saves the end user's data entered during that interaction to the corresponding column in the contact list. That is, as long as at least one end-user enters the requested attribute information, this information will be saved in the contact list.
-
-
-
Here you are going to define how the chatbot will engage with users. It involves creating and organizing a series of automated responses, questions, or actions that the chatbot will execute based on user inputs or triggers. This step shapes the conversational flow, determining how the chatbot will understand and respond to various user inquiries, guide users through processes, or provide information. Essentially, it's about mapping out the dialogue structure the chatbot will use to interact with users when setting the Welcome Message, making the chatbot's interactions more dynamic, personalized, and effective in achieving its intended purpose.
When configuring an Interaction, the steps are identical to those for setting up the Welcome Message. But, in this case, you have the additional choice to redirect it to a different interaction.
Continuing with the example we introduced at the beginning, we defined the following interaction:
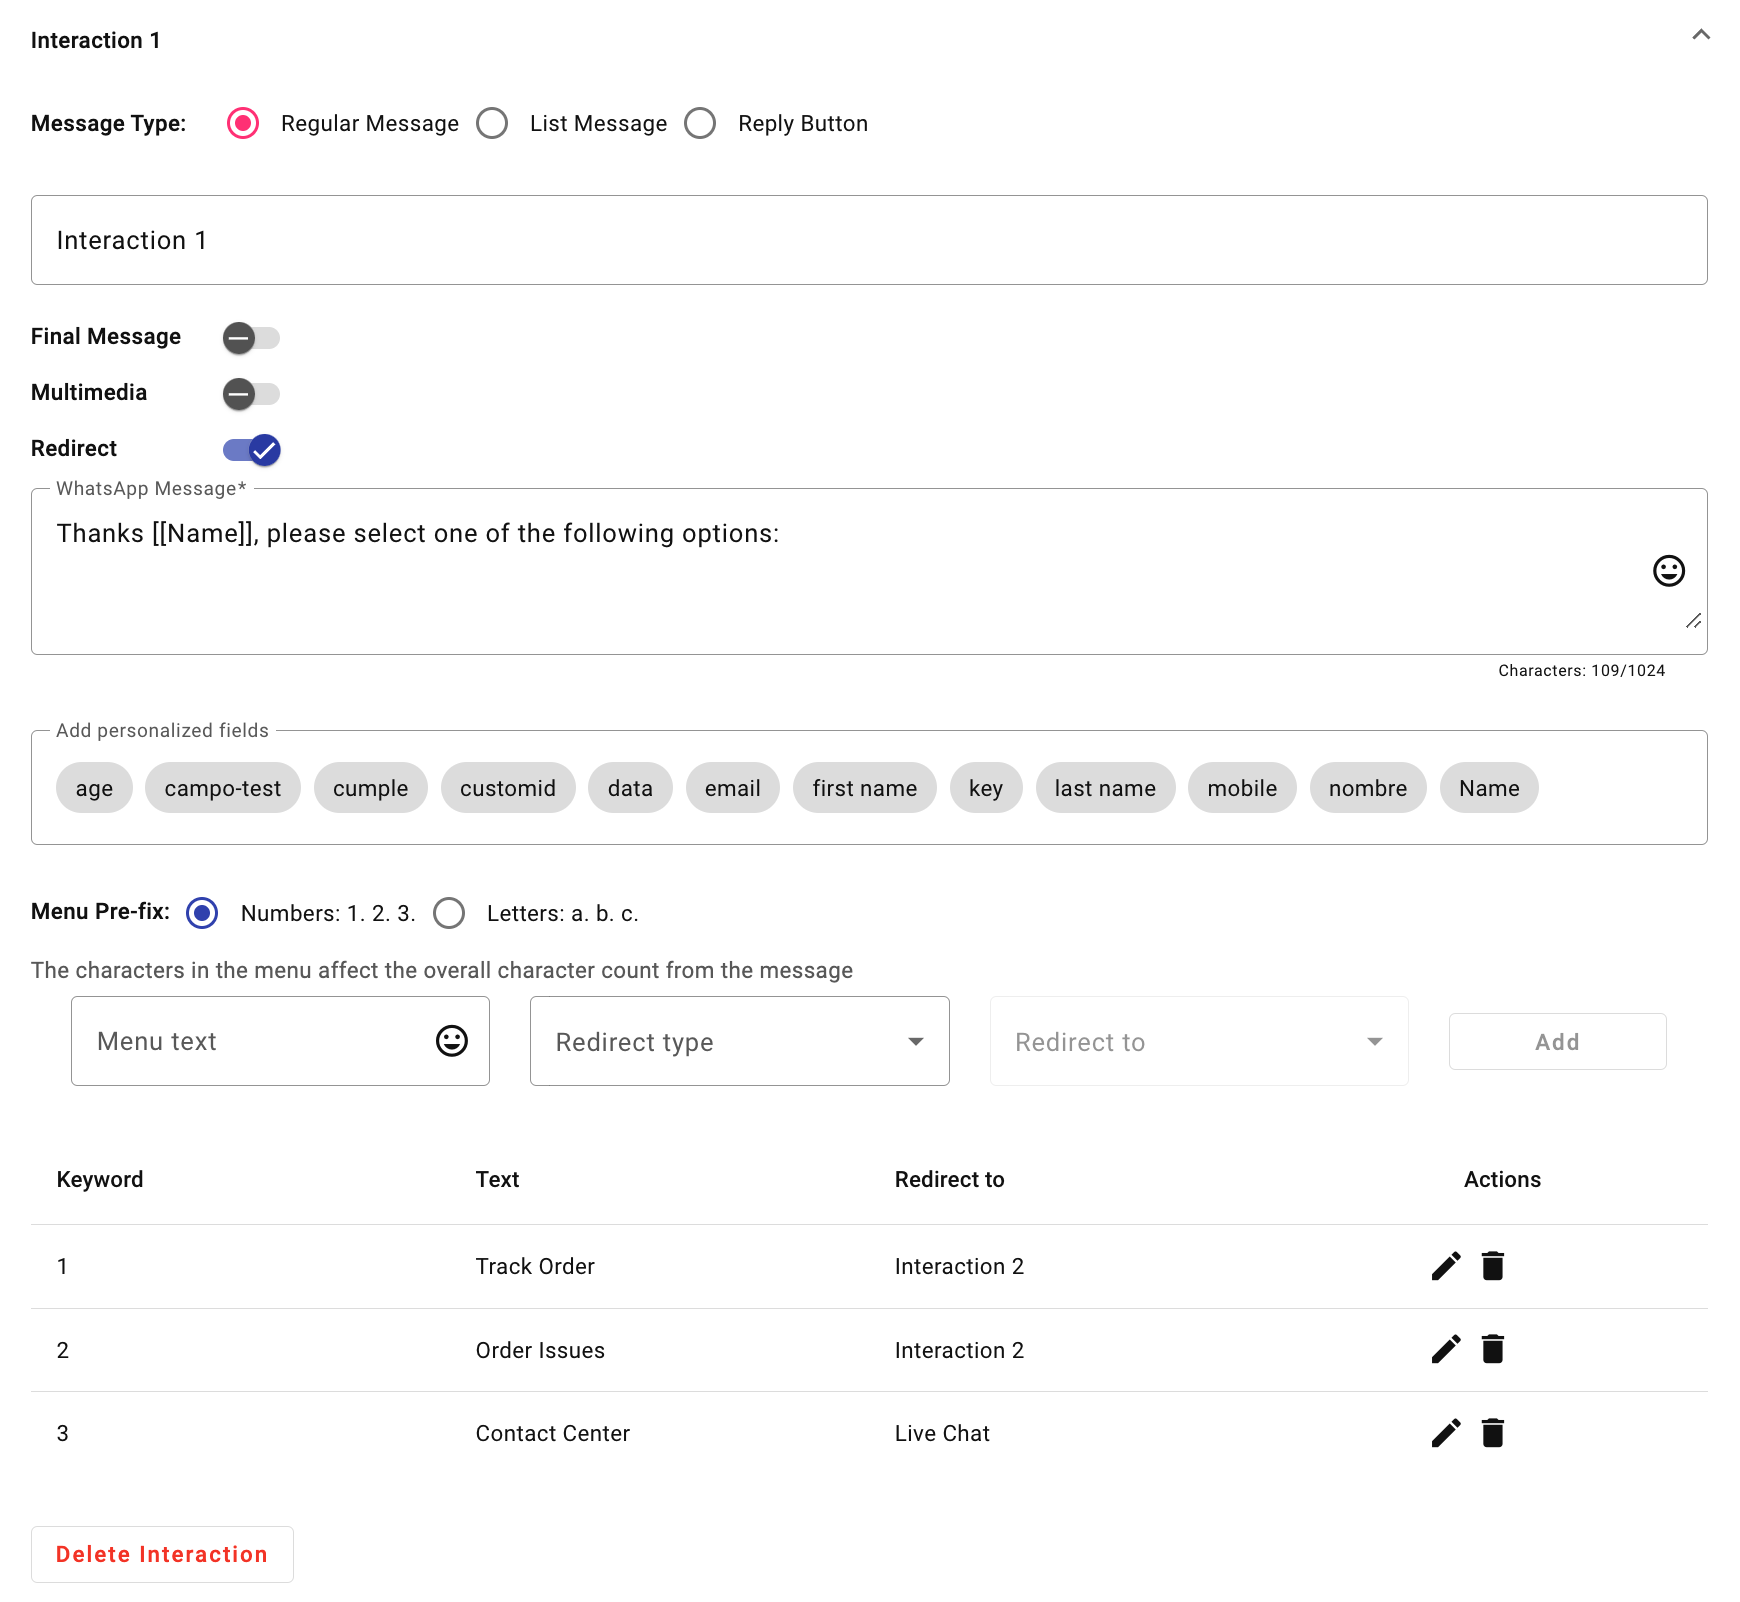
In the image above, "Interaction 1" is configured as a Regular Message to guide the end user in selecting an appropriate option for their next action. The message reads:
“Thanks [[Name]], please select one of the following options:”.- Personalized fields: This message includes placeholders for the user’s Name to create a more personalized experience, acknowledging the user by their specific details gathered earlier in the conversation.
- Menu Options: The user is presented with a choice of three predefined options:
- Track Order: Redirects to Interaction 2.
- Order Issues: Redirects to Interaction 2.
- Contact Center: Redirect to a Live Chat Agent.
-
Once defined, the Welcome Message, Interactions, Final Message, and Error Message, click on the "Next" button to proceed to the final review step before the chatbot goes Live.
By using attributes, chatbots can collect and utilize information effectively, providing a more personalized and seamless experience for users. Therefore, this guide introduces the concept and function of attributes clearly, emphasizing their role in personalizing chatbot interactions and guiding users through setup steps in a user-friendly manner.
Updated 17 days ago