List Message
List Messages on WhatsApp enables brands to create a menu of up to 10 options in one message. This type of message offers a simpler and more consistent way for users to make a selection when interacting with your Chatbot.
These messages can be used for various purposes, such as presenting multiple menu items and product choices.
There are several ways in which brands can use WhatsApp List Messages in their WhatsApp marketing strategy. Here’s how we recommend using this type of interactive message option:
- FAQ menu: A list of common questions and answers to help users find information quickly.
- Customer Support menu: A menu to guide users to the right support service.
- Product categories: A categorized list to help users navigate through different product types.
- Product Management: A menu to help users manage their orders.
The specifications for the List message are the following:
- Users cannot select more than one option at the same time from a list or button message, but they can go back and reopen a previous message.
- You have the option to use a header and a footer.
- No message template approval is needed.
- You can't include multimedia files in your message.
Here are the steps to set up a list message for the Welcome Message:
- Select the List Message interactive message option.
- Set the header and footer. (Optional)
- Define the welcome message to initiate the conversation with the chatbot.
- Setting the available options that users can pick from.
- Configure the selection menu through the List Configuration section.
- Specify where the user will be redirected once they select the desired option from the menu.
Define Welcome Message
The Header, Message Body, and Footer support Markdown syntax, allowing you to format the text for a more engaging and clear presentation. You can use basic Markdown options such as bold, italics, strikethrough, and monospace to enhance the readability and impact of the message.
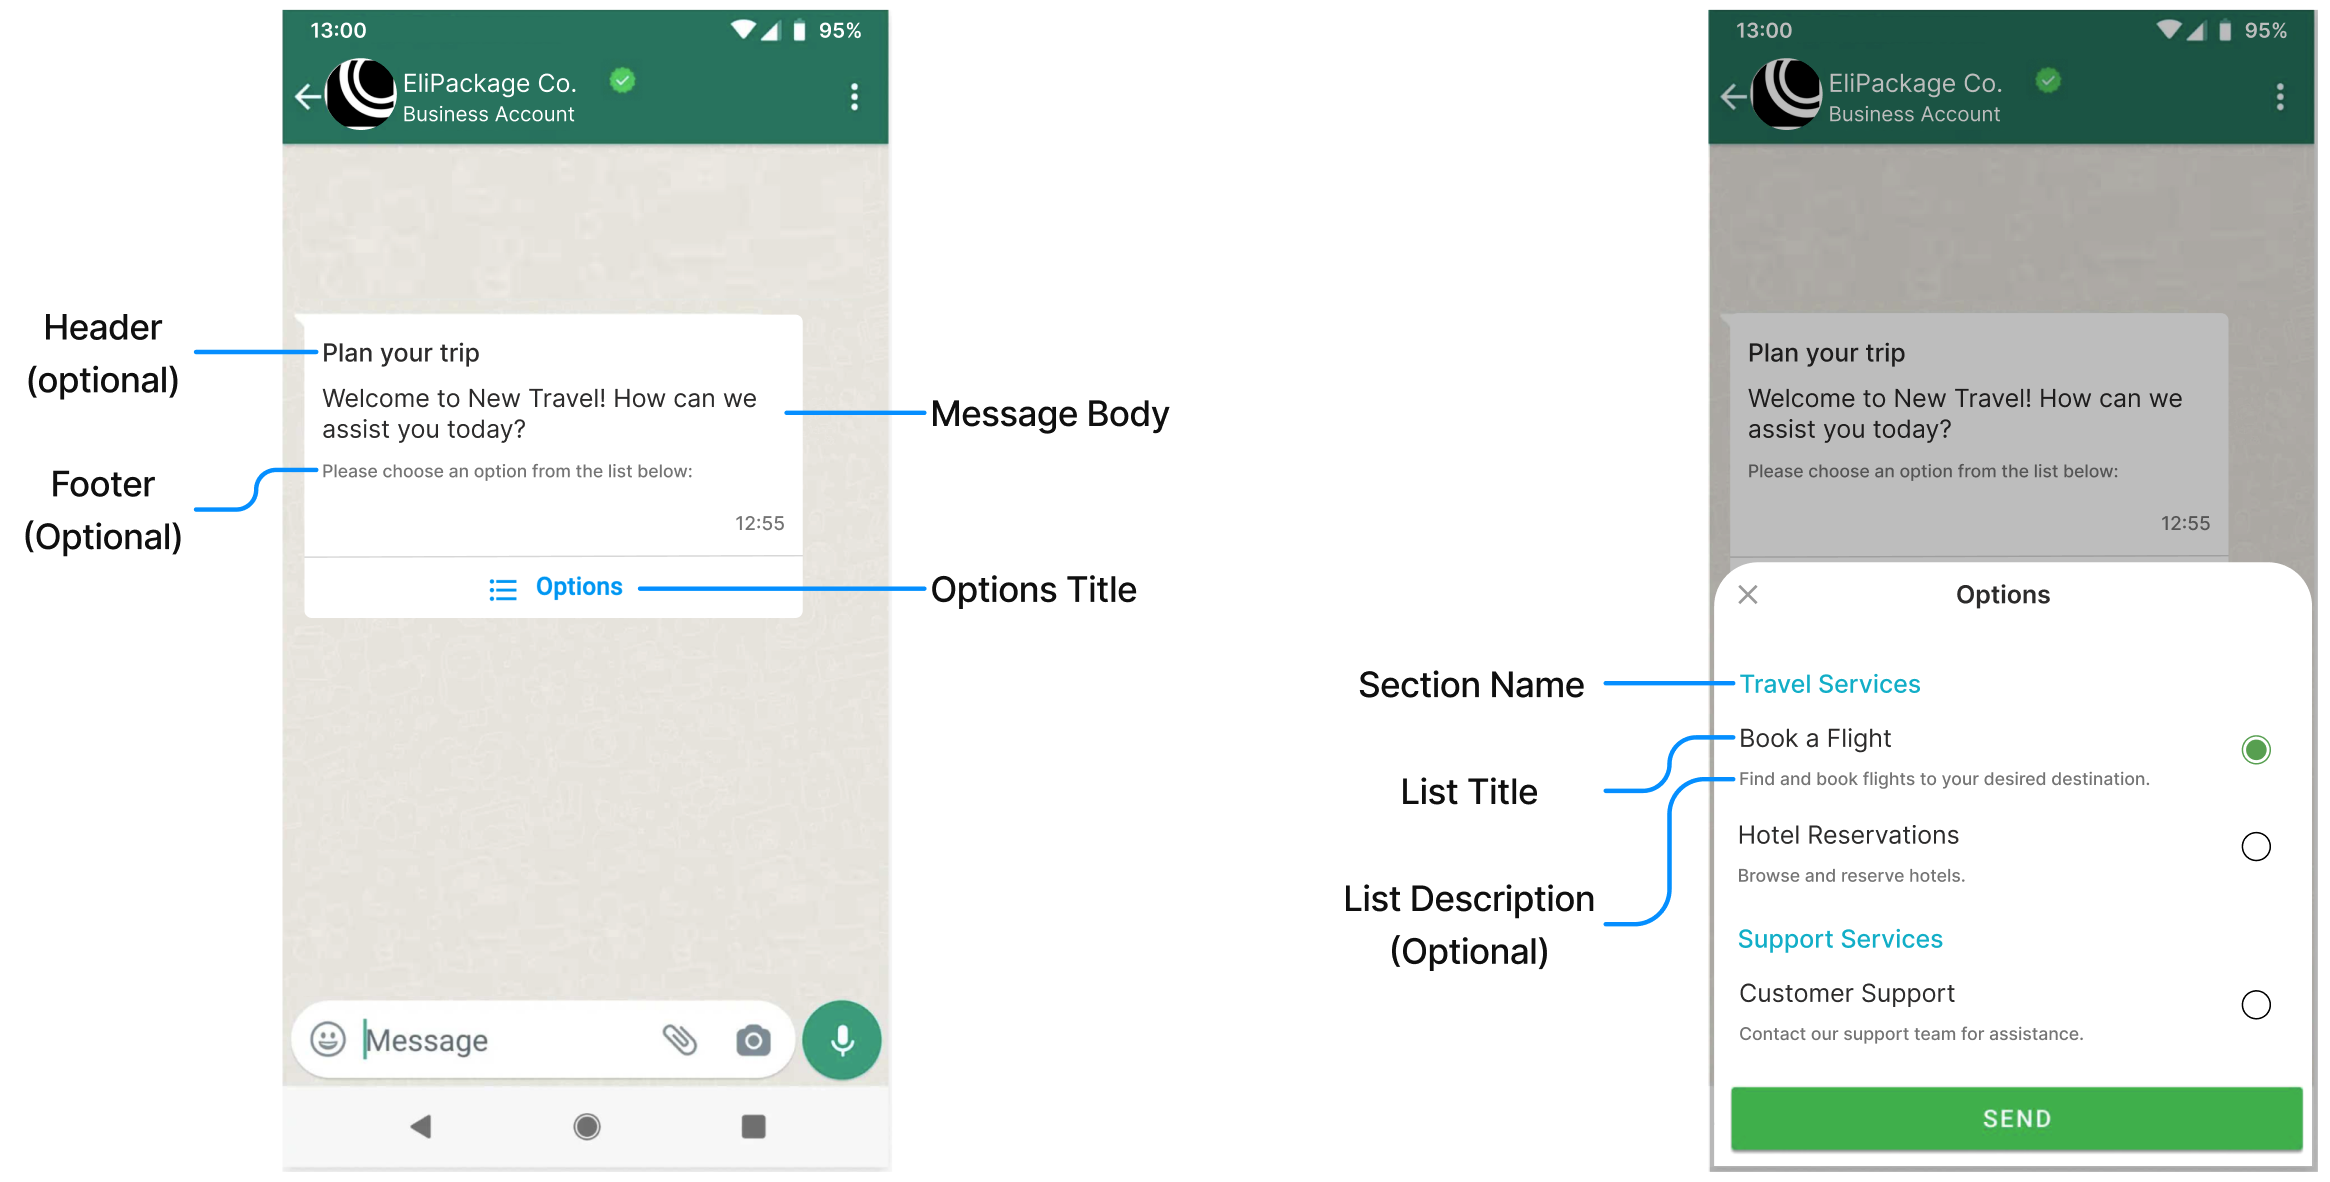
Header
Enter the header displayed at the top of the message body. The “header” is an optional field that appears at the top of the message and provides a brief, attention-grabbing introduction to the content of the list.
This header can contain up to 60 characters. This limitation ensures the header remains concise and to the point, effectively drawing the user’s attention without overwhelming them with excessive information.

Message body
The Message Body refers to the main content section where the primary information is displayed. This includes the instructions or context for the list, followed by the actual list of options that users can choose from. The message body provides the detailed information that the user needs to understand the purpose of the message and make a selection from the available options. It is the core part of the message that guides user interaction and engagement.
This greeting message can contain up to 1024 characters including the emoji capability that you select from the smiley face on the right end of the message box.

Footer
The Footer is an optional text section located at the bottom of the message. It typically contains additional information that supports the main content of the message. It can provide extra context, disclaimers, or instructions that are relevant to the user’s interaction with the list message. This footer can contain up to 60 characters.

Options Title
The Options Title is a mandatory title or heading that appears above the list of options. It serves as a brief introduction or summary of the content of the list, providing context and helping users understand what the list is about. It is designed to be concise and informative, ensuring that users immediately grasp the purpose of the message and the options available to them. This title can contain up to 20 characters.

Section Configuration
From the Section Configuration, the Section Name are headings used to categorize and organize the list of options into distinct sections. These section names help to group related options, making it easier for users to navigate and find the specific information or choice they need. By dividing the list into sections with clear titles, the list of options becomes more structured and user-friendly, enhancing the overall interaction experience. This section name can contain up to 24 characters.

NOTEThe Section Name will be shown when setting up more than one (1) section.
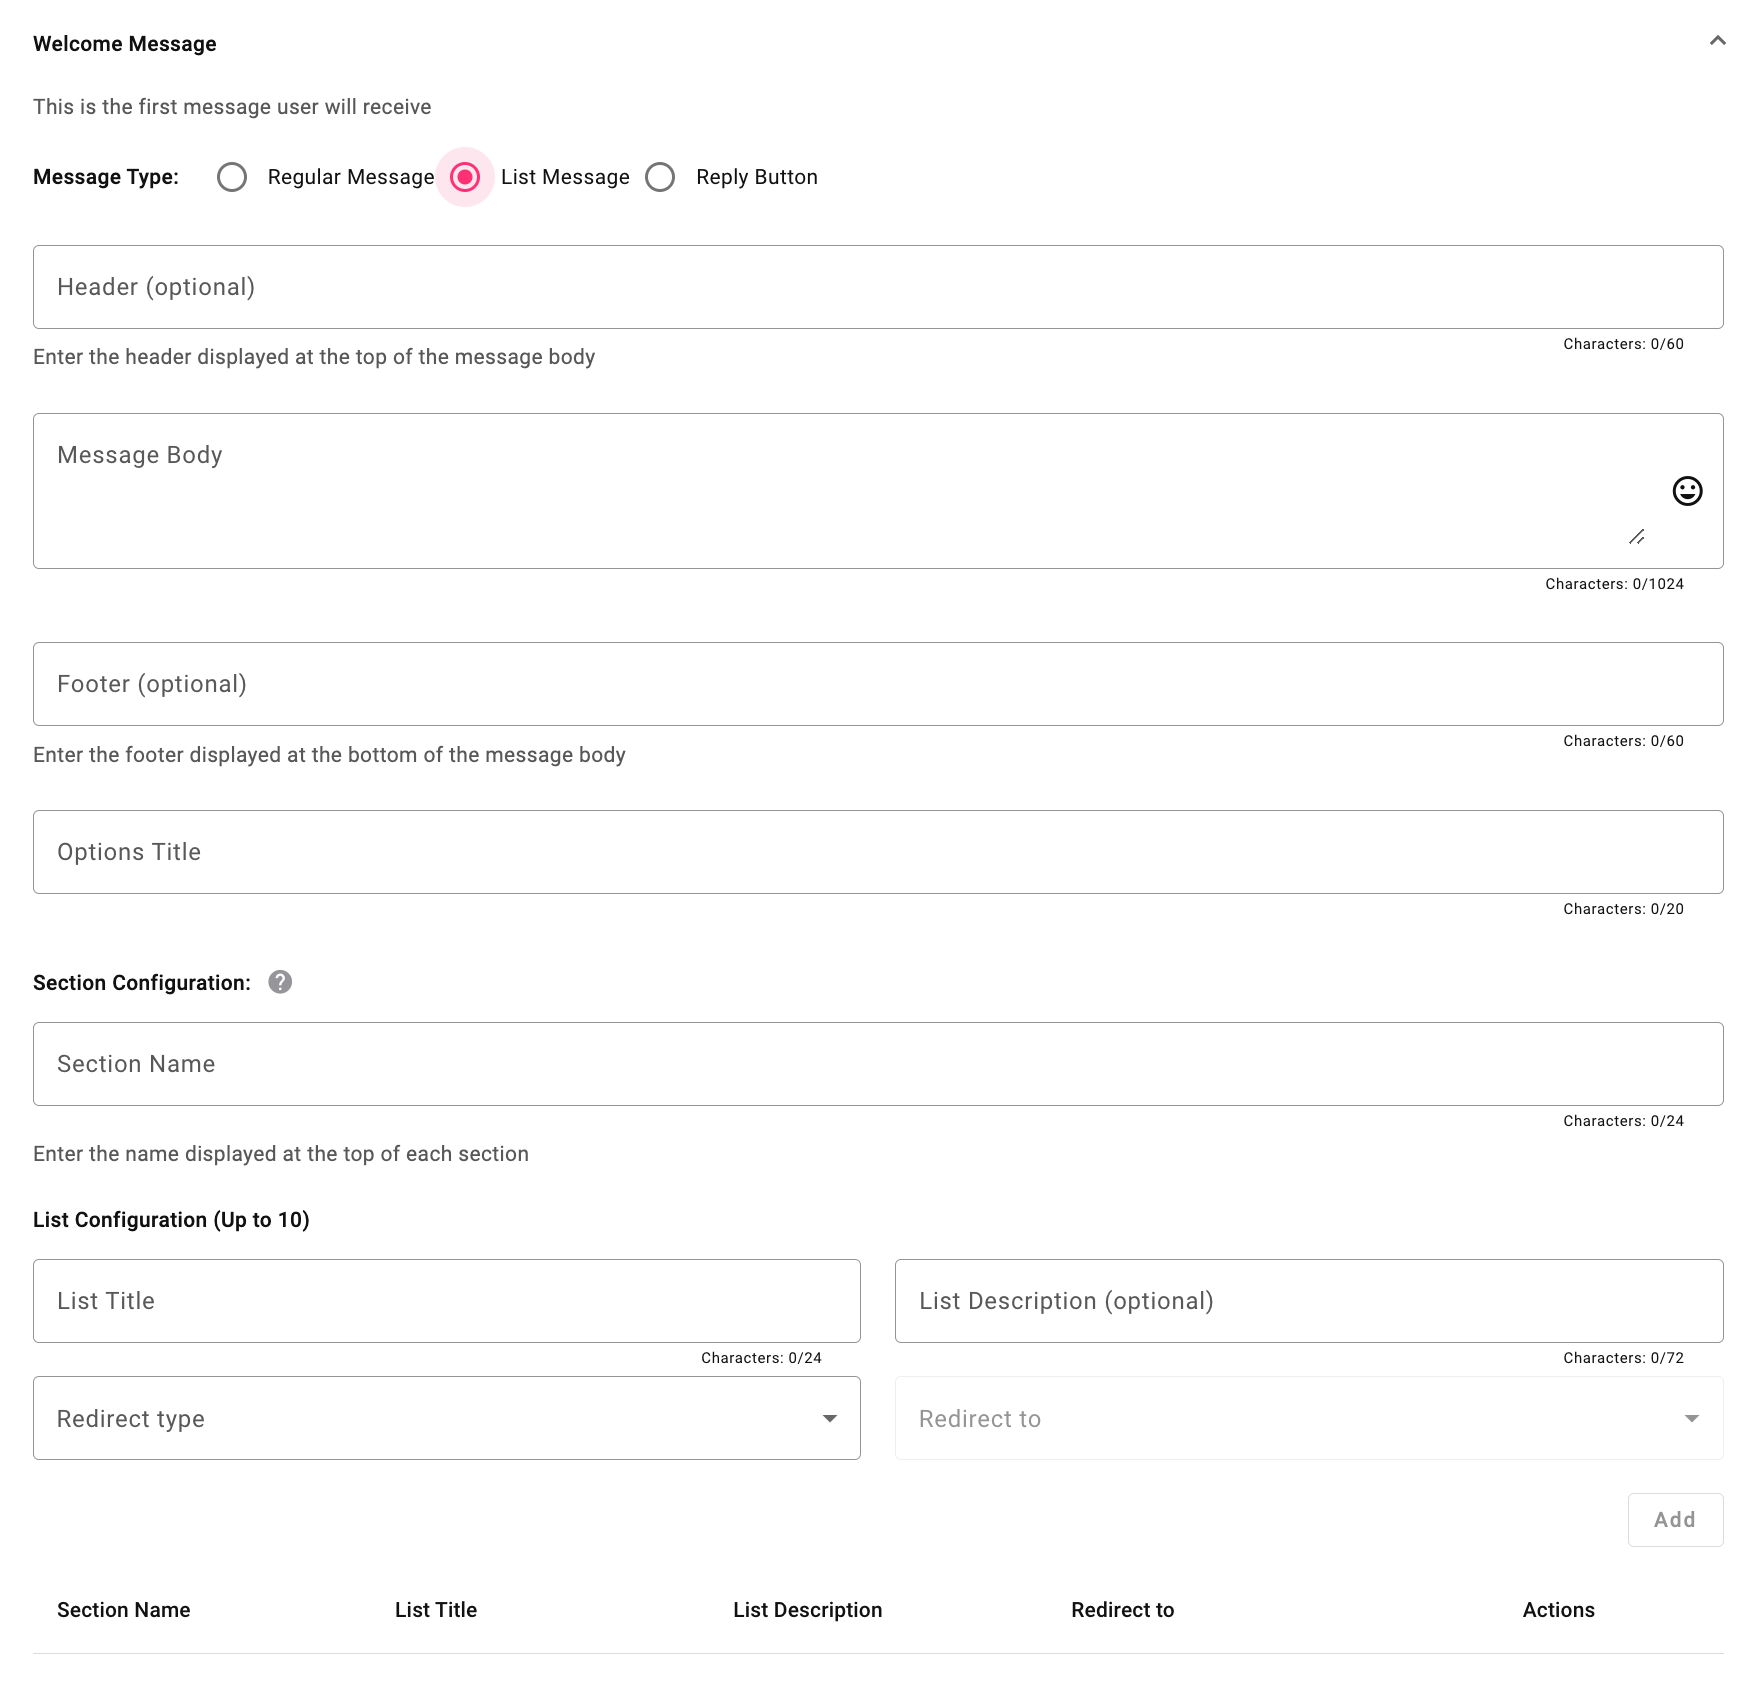
List Configuration
Here we are going to predefine the actions or destinations that are triggered when a user selects an option from the menu.
The steps to configure the selection menu through the List Configuration are the following:
- List Title
- List Description (optional)
- List Redirect Options
- Redirect type
- Redirect to
List Title
The List Title is the main heading for each option within the list. It serves as the primary label or identifier for that option, giving users a clear understanding of what selecting that particular row will entail. The Row Title is typically concise and descriptive, ensuring users can easily comprehend and choose the appropriate option from the list. This list title can contain up to 24 characters.

List Description
The List Description is an optional subheading that provides additional information or context for each option within the list. It appears below the List Title and offers a brief explanation or details that help users better understand what selecting that particular row will involve. It is useful for providing clarity and ensuring that users make informed decisions when choosing from the list of options. This list description can contain up to 72 characters.

List Redirect Options
The List Redirect Options are the predefined actions or destinations that users are directed to after selecting an option from the list. These options determine what happens when a user tabs the radio button on a specific list item and then tabs on the Send button. These redirect options are configured to guide users through the desired interaction flow, ensuring they receive the appropriate response or action based on their selection.

The next step is to specify where the user will be redirected once they select the desired option from the menu. Additionally, the user responds by tab the radio button next to the List Title and tab the Send button, which indicates that the option is selectable to redirect the user to the next action.
For the List message, you can include from 1 to 10 options in a menu.
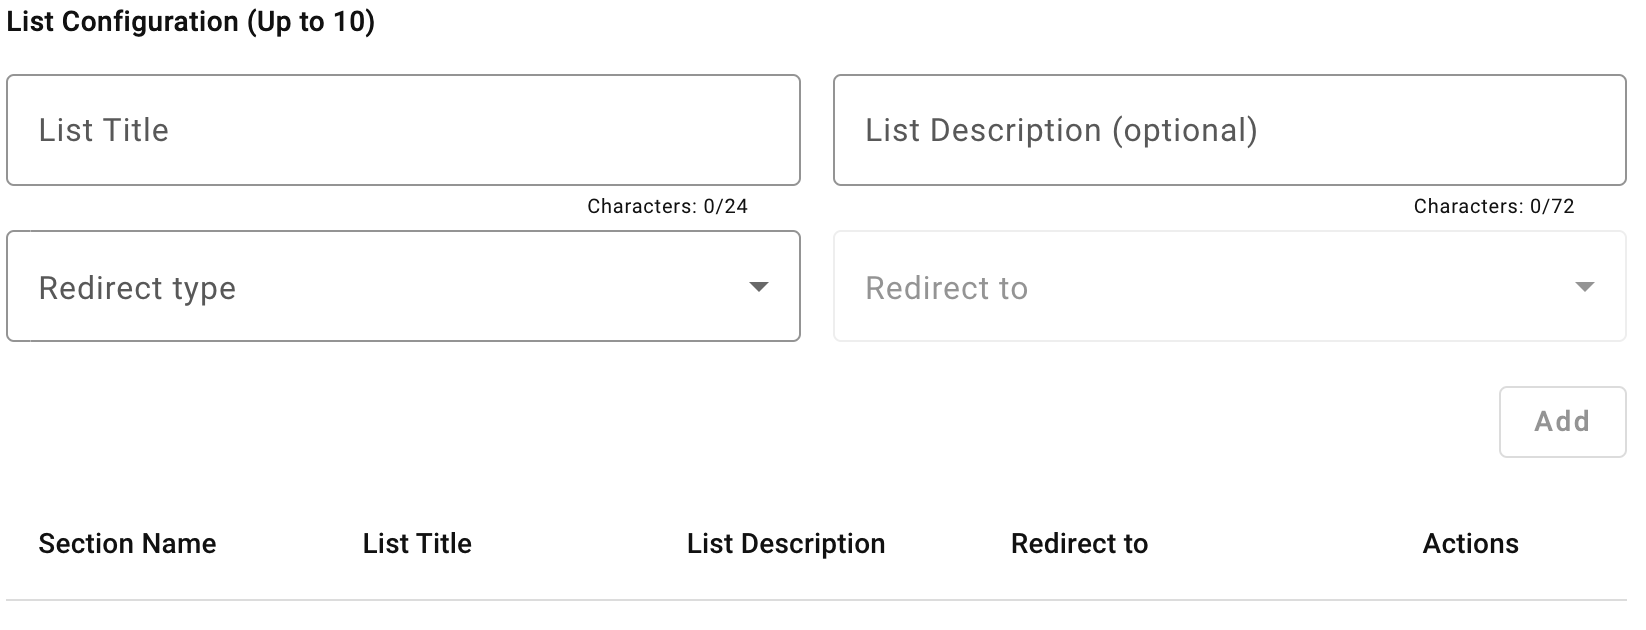
Redirect Type
The Redirect type specifies the next step in the chatbot's sequence. The platform provides five options to choose from.
-
Campaign: defines if the next item in the flow corresponds to a Live platform automation with content associated with the chatbot’s intended purpose, or an out-of-flow action.
-
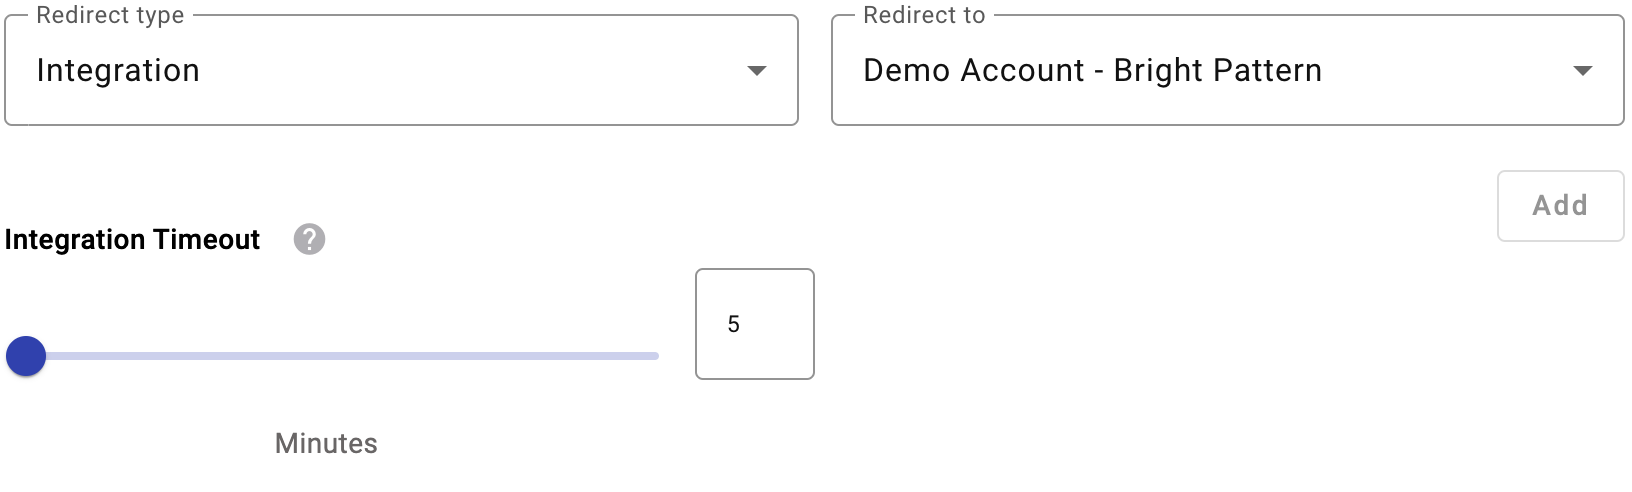
Integration: defines if the next item in the flow corresponds to a third-party solution that can be added to the interaction flow with your customers using the chatbot as the communication vehicle.
There are three types of integrations: Bright Pattern, OpenAI, and Custom Webhook.
By selecting the Integration as Redirect Type, an interaction timeout will be displayed.
This interaction timeout will help you to close the interaction (communication) between the end user and the chatbot. That is, it sets the total number of minutes that must elapse due to inactivity. For example, if a session has started but the end-user hasn't responded to or interacted with the automation, the session will end after a certain amount of time has elapsed.
 NOTE
NOTEThe max time the session can wait before closing is 120 minutes.
-
Interaction: defines if the next item in the flow corresponds to another interaction step within the chatbot flow, an in-flow interaction.
-
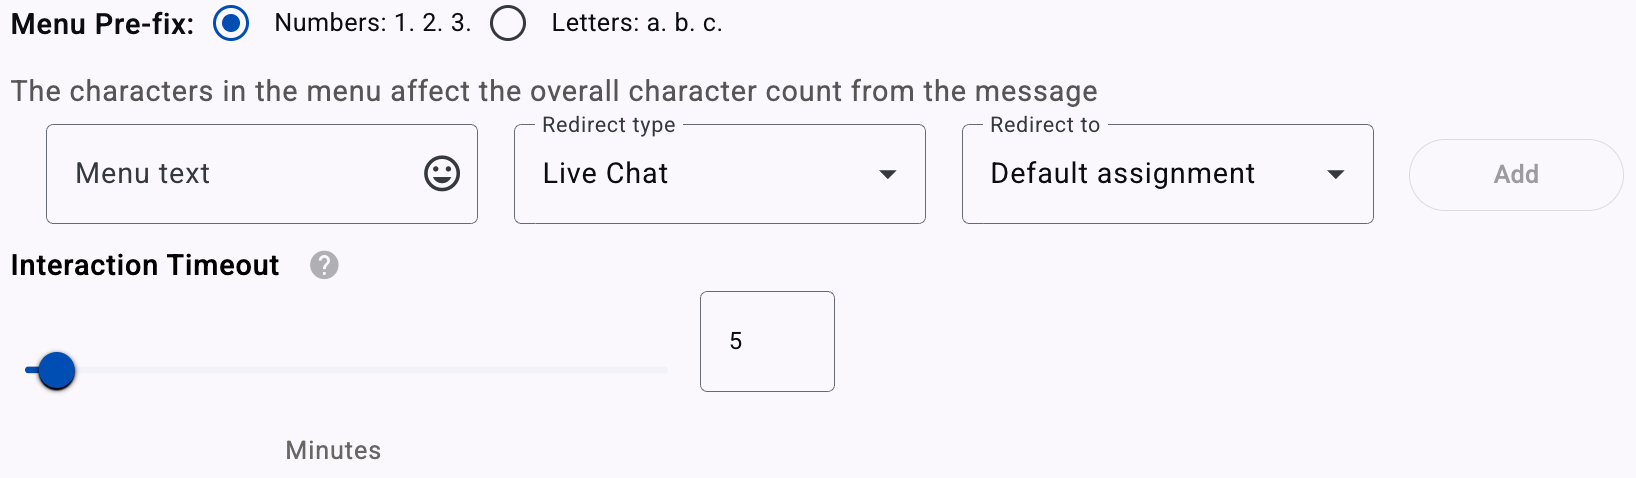
Live Chat: Specifies whether the subsequent element in the workflow links to an agent from the Live Chat feature.
To redirect the end user to the agent, click on the Live Chat option located in the Redirect Type dropdown. Then, set the total minutes that must elapse due to inactivity. For example, if the end user selects the links to the agent but the end user doesn't respond to the agent within 5 minutes, the connection will be finished.
To create, build, and deploy a chatbot that connects to the Live Chat feature, go to the Integrate Chatbot with Live Chat section.
Redirect To
The Redirect To represents the identity of the destination to which the platform will go for its next action. It is the identity of an interaction, a platform-defined automation, or an integration, according to the redirect type chosen.
When Campaign is chosen as the Redirect Type, the Redirect To dropdown will list all Live status automations available with the next format: Automation Name - Automation Type.
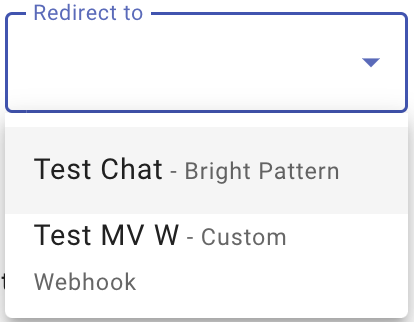
When Integration is chosen as the Redirect Type, the Redirect To dropdown will list all integrations created and available with the next format: Alias - Integration Type.
Actually, we support the Bright Pattern, OpenAI, and Custom Webhook Integrations.
For more information, to create and enable each integration, go to the Integrations section.
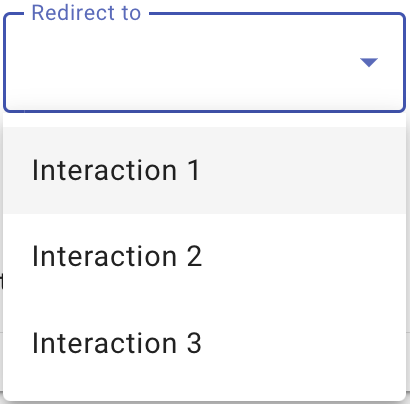
When Interaction is chosen as the Redirect Type, the Redirect To dropdown will list all interactions created when setting the chatbot.
When Live Chat is chosen as the Redirect Type, the Redirect To dropdown will list all the teams available in the Live Chat platform.
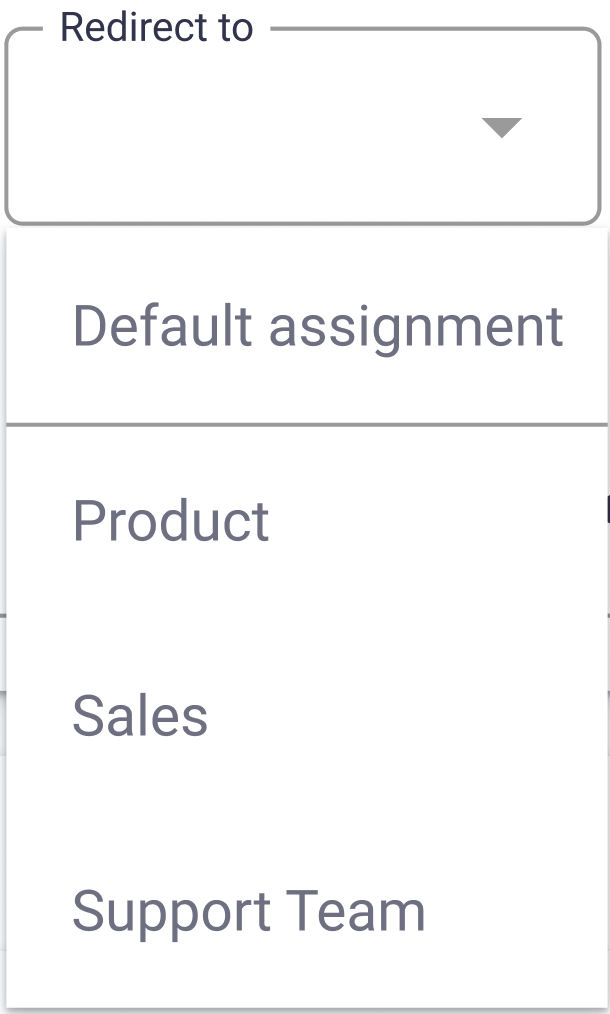
Therefore, when Live Chat is selected as the Redirect Type, the Redirect To dropdown lets you choose which team will receive the conversation. The options shown are based on the teams configured in your Live Chat platform.
- Specific Team (e.g., Product, Sales, Support Team): Routes all incoming conversations from the chatbot to the selected team.
- Default assignment: Uses the default team routing defined in your Live Chat platform’s settings.
This setting ensures conversations are directed to the right team based on the chatbot’s purpose.
Once the Redirect type and the Redirect To are configured by selecting the Add button, you have the option to add a webhook.
For more information on incorporating a webhook into your chatbot, please refer to the Setting Webhook section.
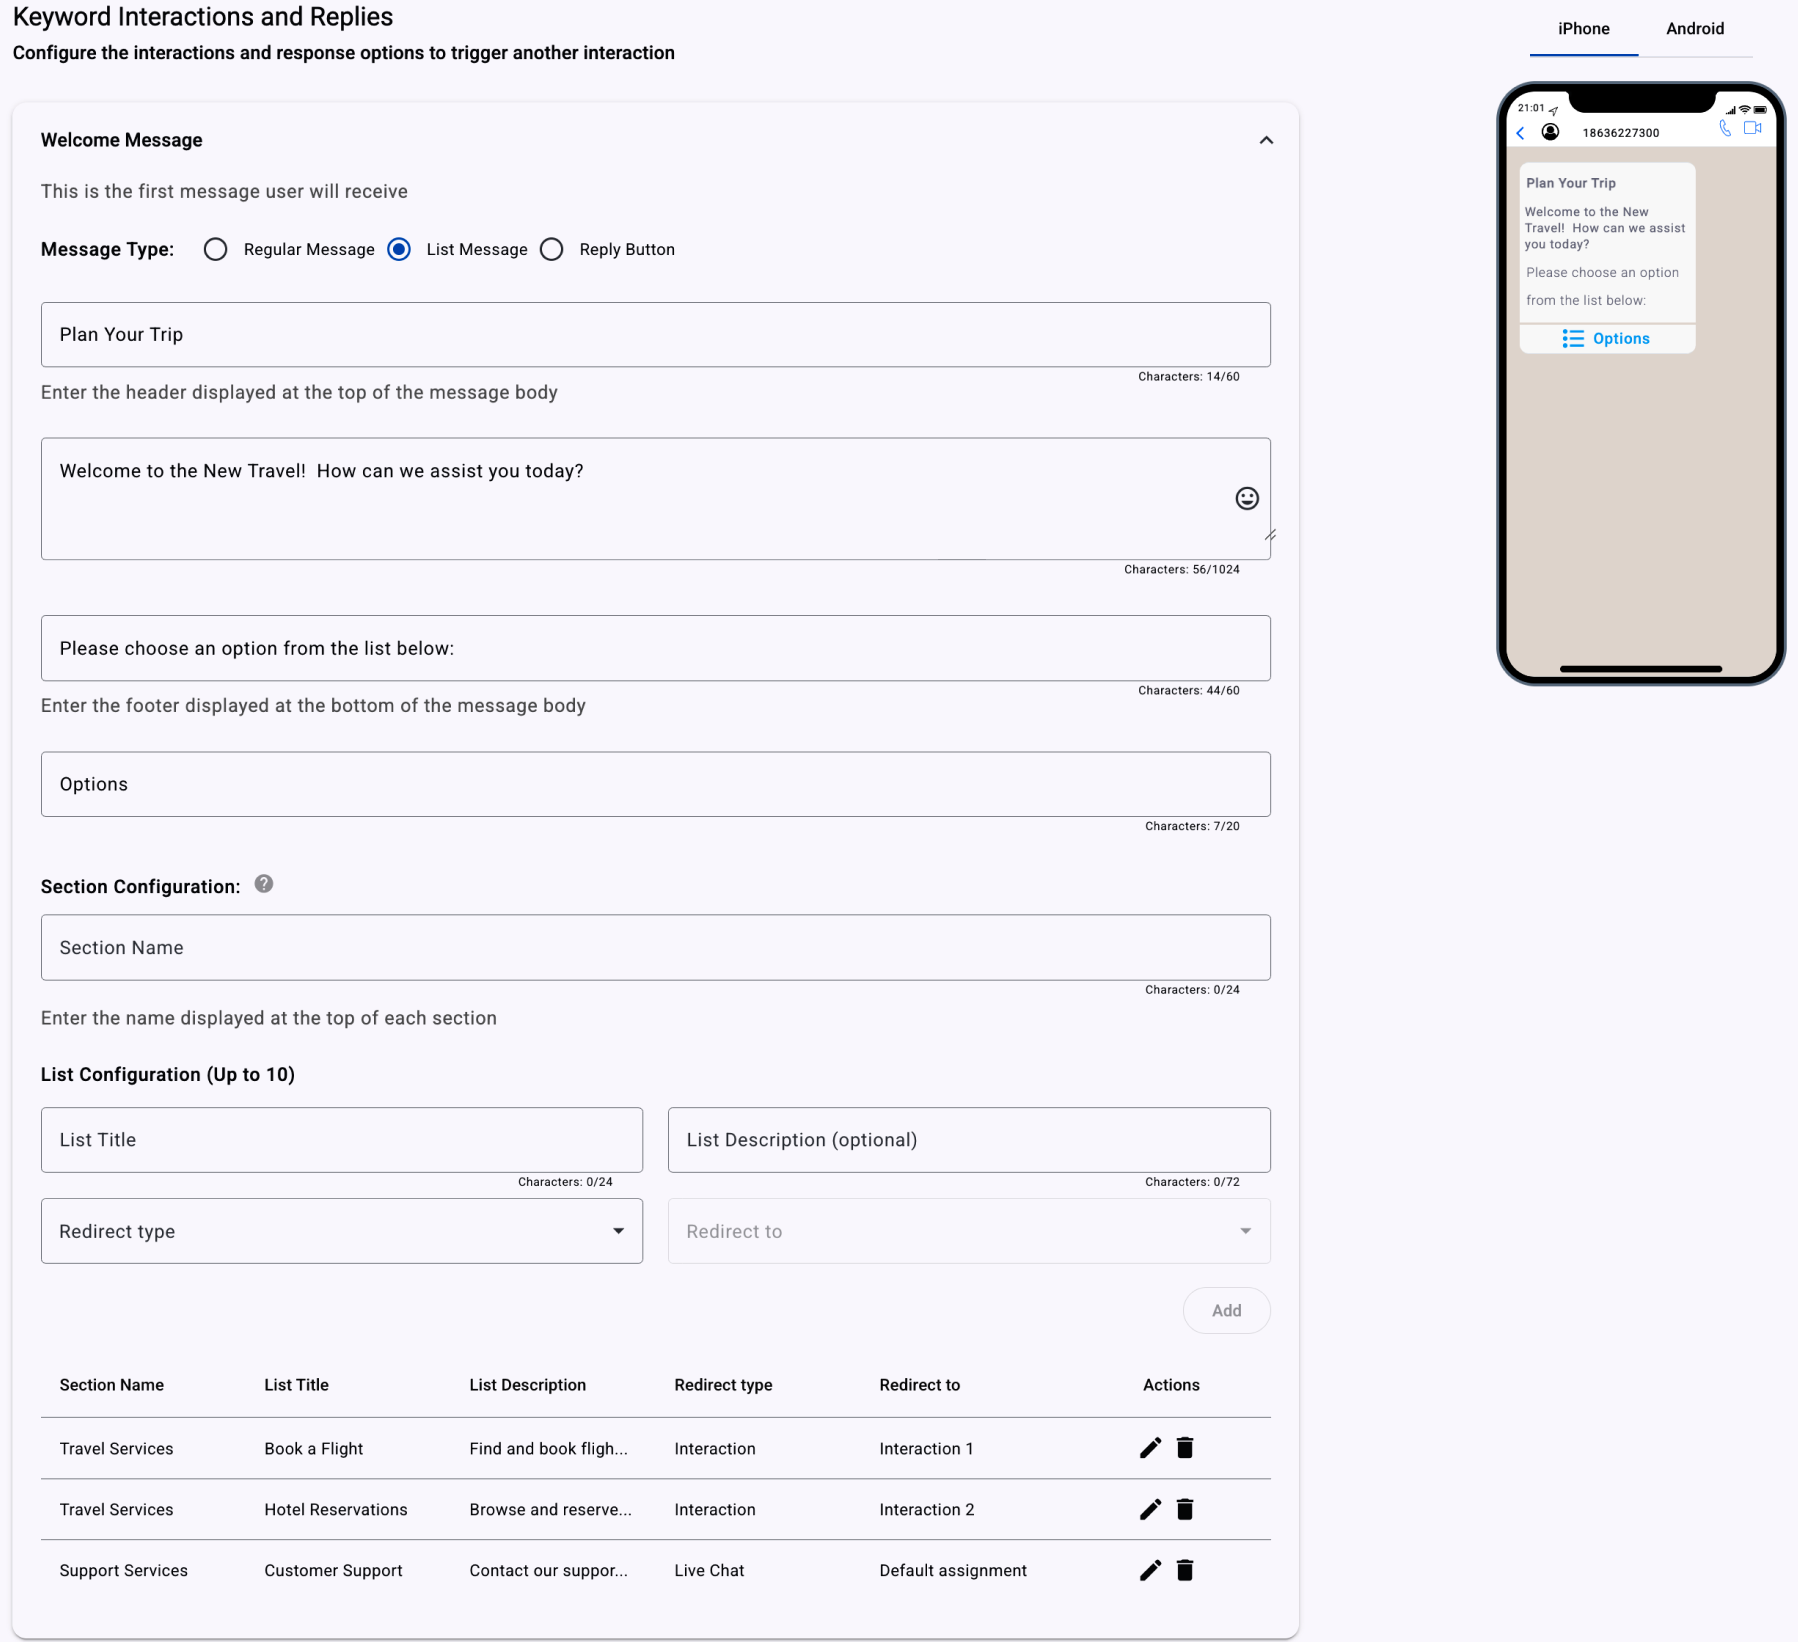
Therefore, once the "redirect type" and "redirect to" configuration is complete, each item will be included in a menu item table displayed under the configuration section. Menu items will be placed in ascending order as they are entered, automatically advancing the keyword identifier at each menu entry.
The following screenshot shows a populated WhatsApp chatbot Welcome Message sample with possible options that can be configured into any given chatbot step in its flow, with the table at the bottom.
After configuring the Welcome Message, the next step is to define the Interaction flow.
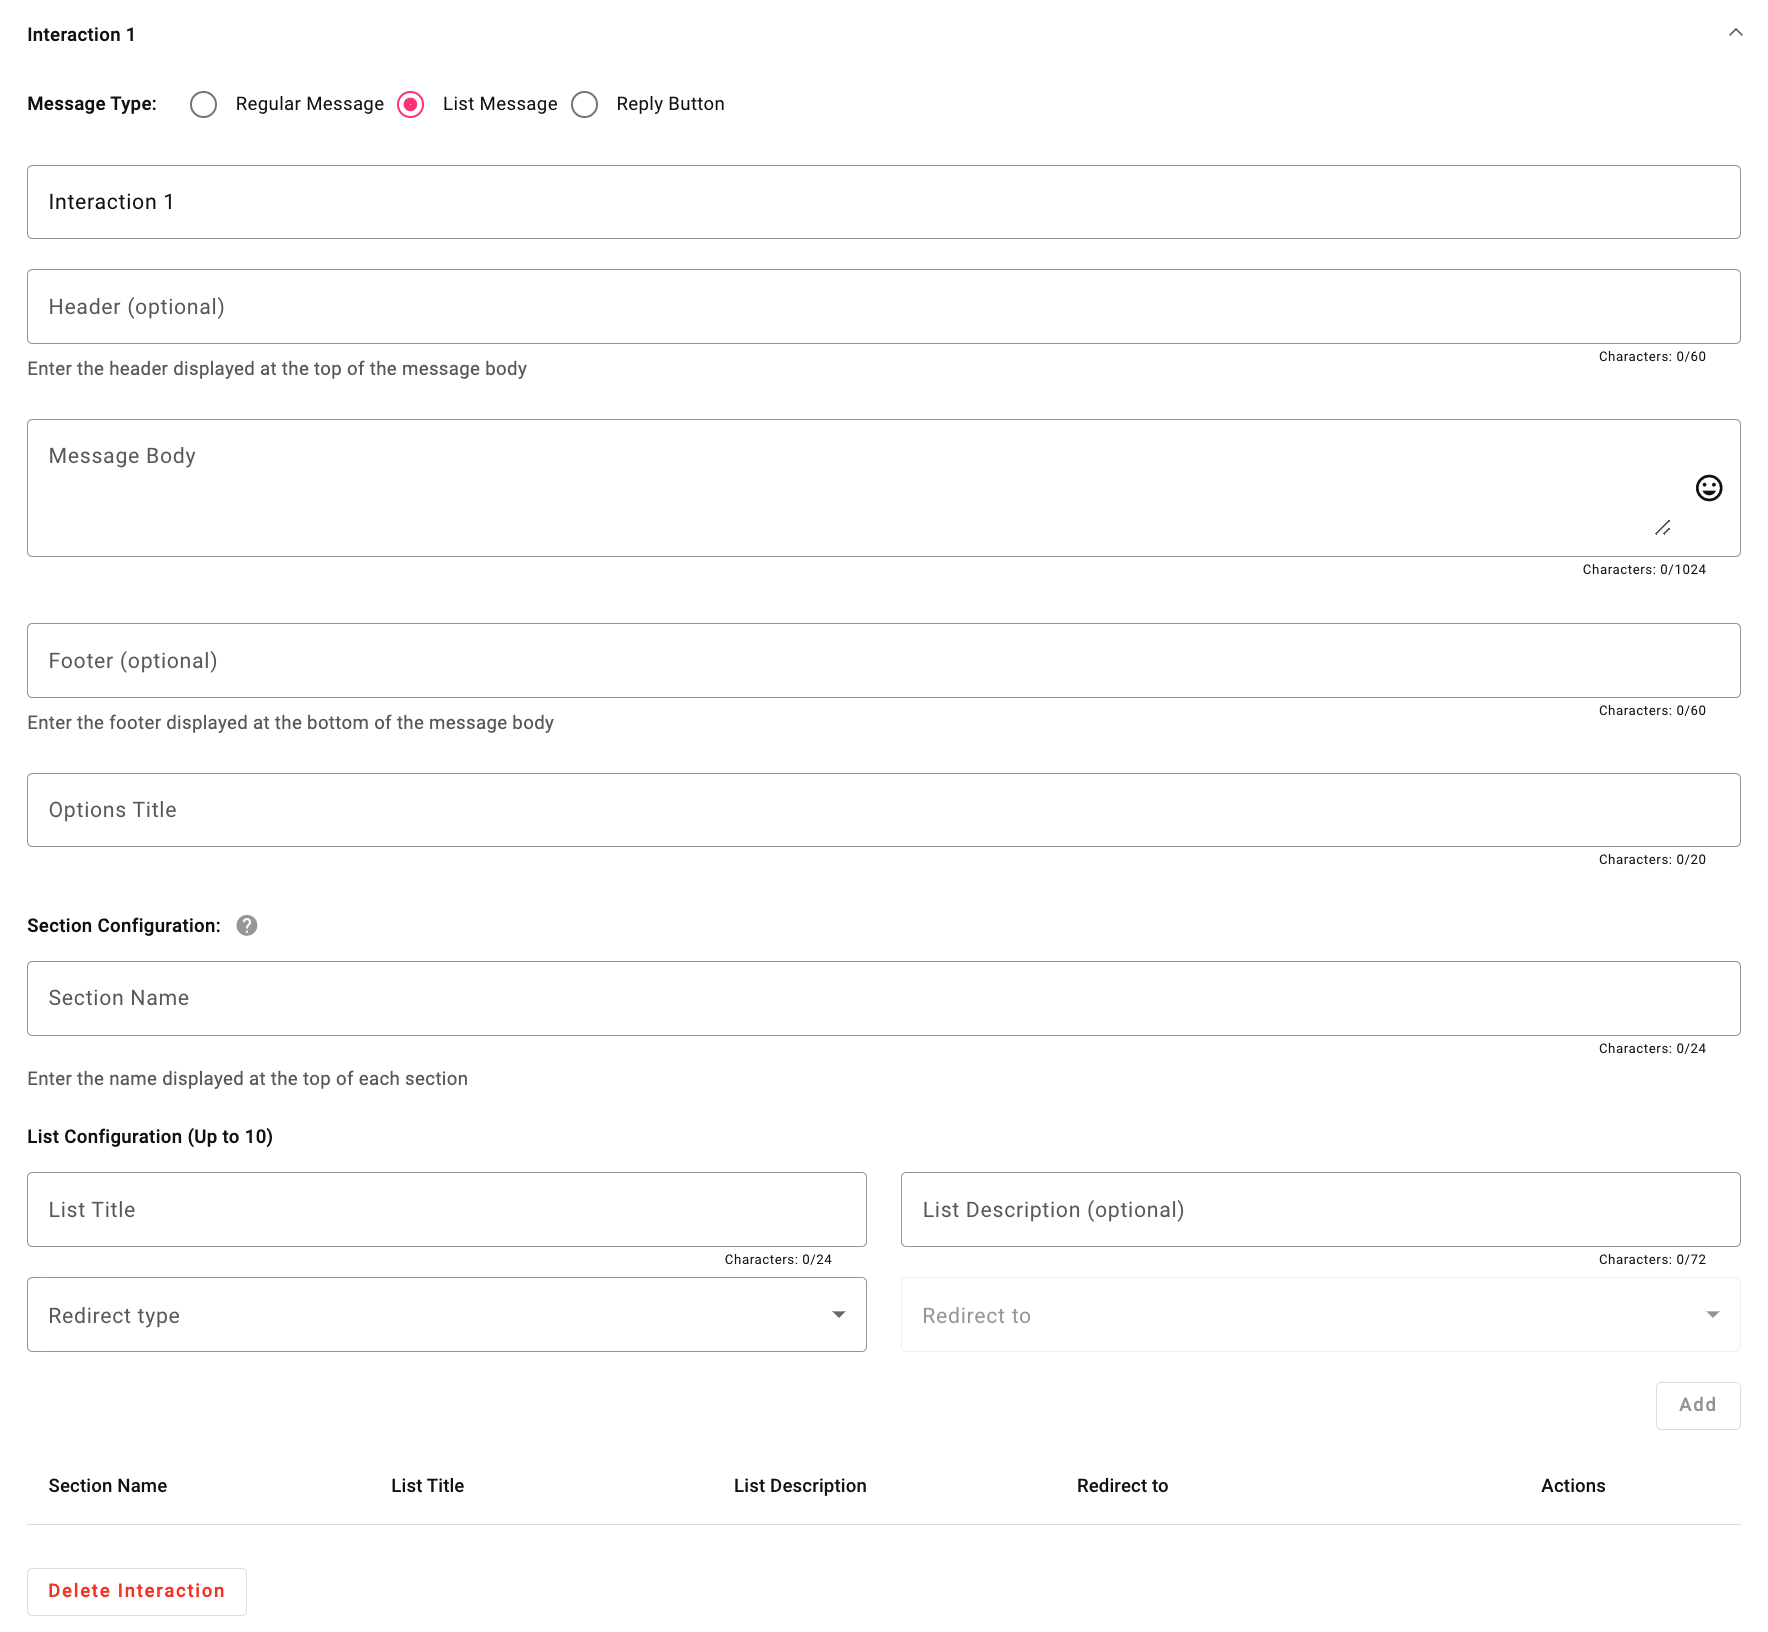
Interaction
In the Interaction section, you define how the chatbot engages with users by creating automated responses, questions, and actions based on user inputs or triggers. This shapes the conversational flow, ensuring dynamic and personalized interactions that effectively guide users and provide information.
To know the steps for setting up each Interaction, go to the Interaction section.
Updated 3 months ago