Blacklisted Subscribers
Add or remove Subscribers from Blacklists by selecting the Blacklist tab located on the right side of the Subscribers tab from the Subscribers main section.

The Blacklist contains subscribers who have either Unsubscribed or Opted-Out from messaging services and will not receive messages from the service that they opted out or unsubscribed from. It contains the following elements.
-
A Blacklists dropdown menu to select which blacklist is to be modified
-
A Blacklist Subscriber Search Filter. This filter allows you to search for each subscriber that is blacklisted, based on the delivery channel the end user unsubscribed from.
SMS: filter by phone number of the unsubscribed user.
Email: Filter by phone number of the unsubscribed user.
WhatsApp: filter by phone number of the unsubscribed user.
RCS: filter by phone number of the unsubscribed user.
-
Reason dropdown displays the possible reasons why a subscriber was added to the blacklist.
-
Source dropdown displays the displays from which source the subscriber was added to the blacklist.
-
A button to Add to the blacklist that has been selected
-
And a table that shows blacklisted subscribers in the selected blacklist
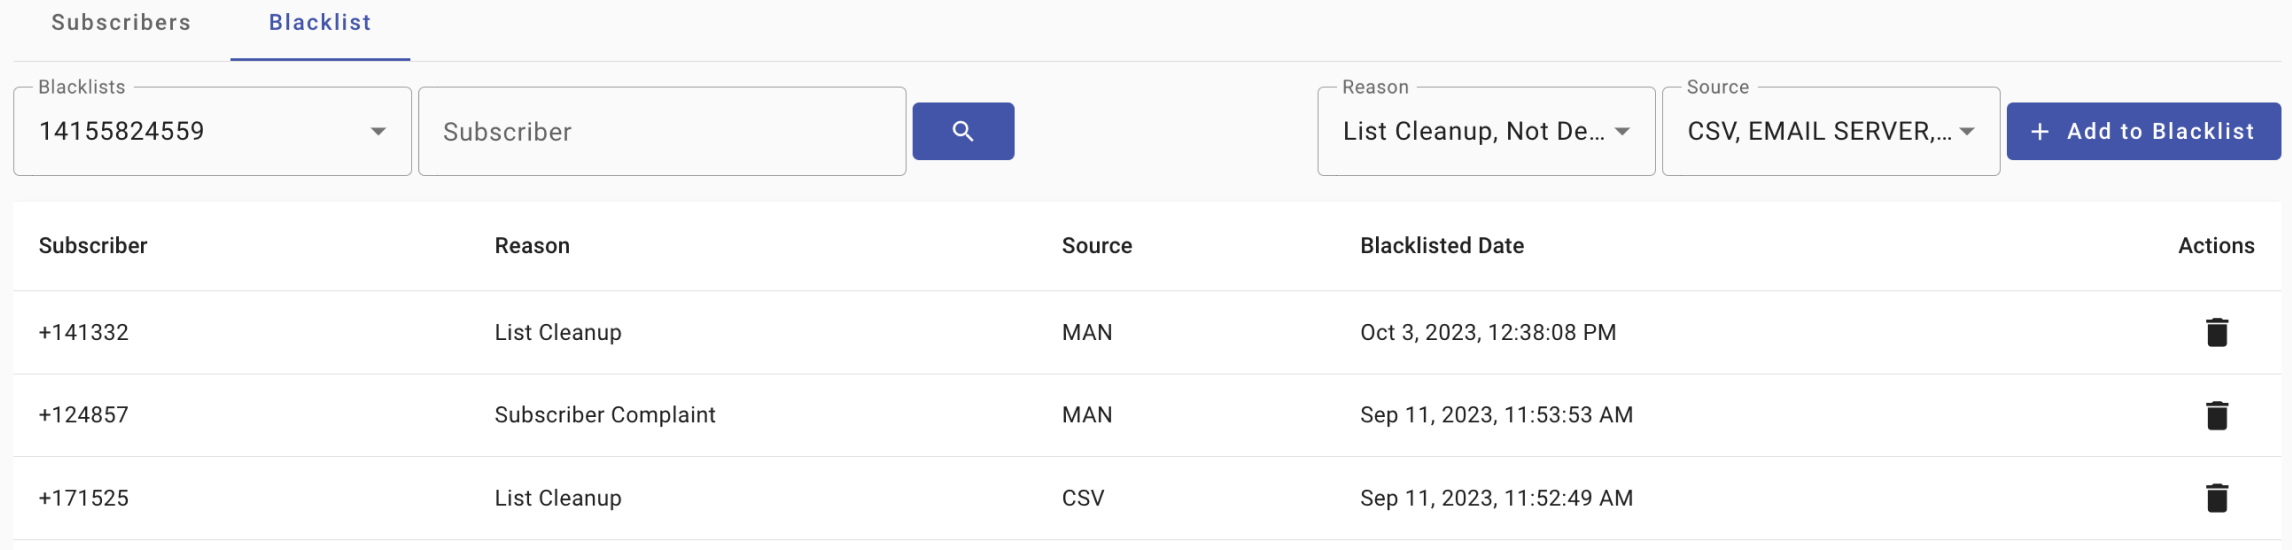
In the screenshot above, the blacklist selected is the one that corresponds to the 14155824559 long code and the table shows the one subscriber that has been blacklisted for that list.
Blacklists Segmentation
Blacklists are segmented for each Sender entity that has been configured in the platform. These can be found in the Blacklists dropdown box located on the top left side of the Blacklist tab section.

The sample screenshot above, shows a platform with five sending entities configured:
- A _shortcode _number, 52811.
- A long code number, 14155554559
- An email, [email protected]
- A WhatsApp entity as Company Account and
- A RCS RMB agent identified as CompanyAgent.
As you add or remove sending entities, the Blacklists options will be modified accordingly. For example, you can add different email sending entities to fulfill different roles for your organization and they would be reflected as one the Blacklist options in the dropdown box.
Once you select a Blacklist option, only the subscribers that are blacklisted for that option will be displayed in a table format as shown below.

The table is organized in four different columns,
Subscriber: Shows the identity of the subscriber in either mobile format if the blacklist refers to SMS, WhatsApp or RCS, or in email address format if the blacklist corresponds to an email sending entity.
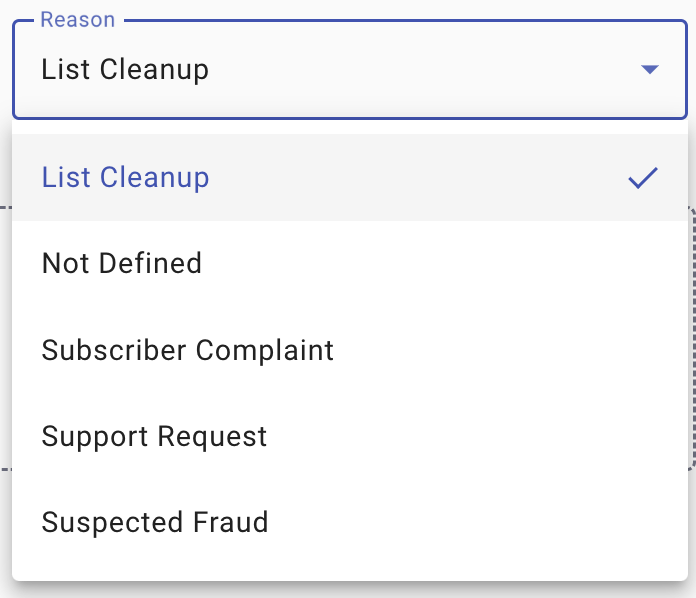
Reason: Shows the reason why the subscriber was blacklisted.
There are five categories of reasons:
- List Cleanup (The client performed a cleanup on the subscriber list)
- Subscriber Complaint (The subscriber expresses dissatisfaction with a product, service or experience)
- Support Request (The customer requests the support team to add a subscriber to the blacklist)
- Not Defined (There is no reason defined to add the subscriber to the blacklist)
- Suspected Fraud (The subscriber is misusing the platform)
Source: Shows from which source the subscriber was added to the blacklist.
There are three types of source:
- CSV (The client added the subscriber to the blacklist from a CSV file)
- MAN (The client manually added the subscriber to the blacklist)
- OPT-OUT (For SMS and Whatsapp, the subscriber enters an opt-out keyword. For Email, the subscribers clicks on the Unsubscribe link)
- EMAIL SERVER (For Email, if the subscriber complains or is bounced, he/she will be added to the blacklist])
- NOT DEFINED (The source from which the subscriber is entered into the blacklist is not defined)
Blacklisted Date: Shows when the blacklisting took place
Actions: Allows you to revert the blacklisted status of the subscriber making it available to receive the messaging service again. Selecting it will allow you perform the reversal, requiring confirmation of a dialog box that ensures the conditions of subscriber consent have been met.

Adding Subscribers to the Blacklists
From the Blacklists dropdown box,
- Select the sending entity that will blacklist the subscriber.
- Select Add to Blacklist located at the top-right corner.

Selecting it will allow you to perform the adding subscribers to the blacklist, requiring confirmation of a dialog box that ensures the conditions of subscriber consent have been met. Read the terms carefully as they are important, and ensure that you are in compliance with all of them.
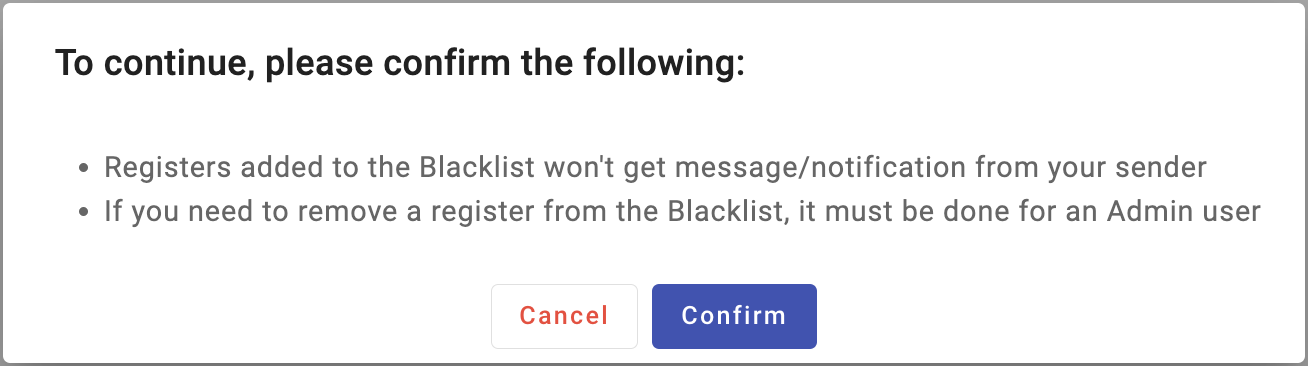
ON THE CONSENT DIALOG BOX: If the Consent Dialog is not confirmed, you will not be able to add subscribers to the blacklist, since it is an essential part of the Terms of Service.
Once the Consent Dialog has been confirmed, the following options to add subscribers to the blacklist will be available:

- Upload CSV file (Multiple Subscribers)
- Add a single Subscriber (Single Subscriber)
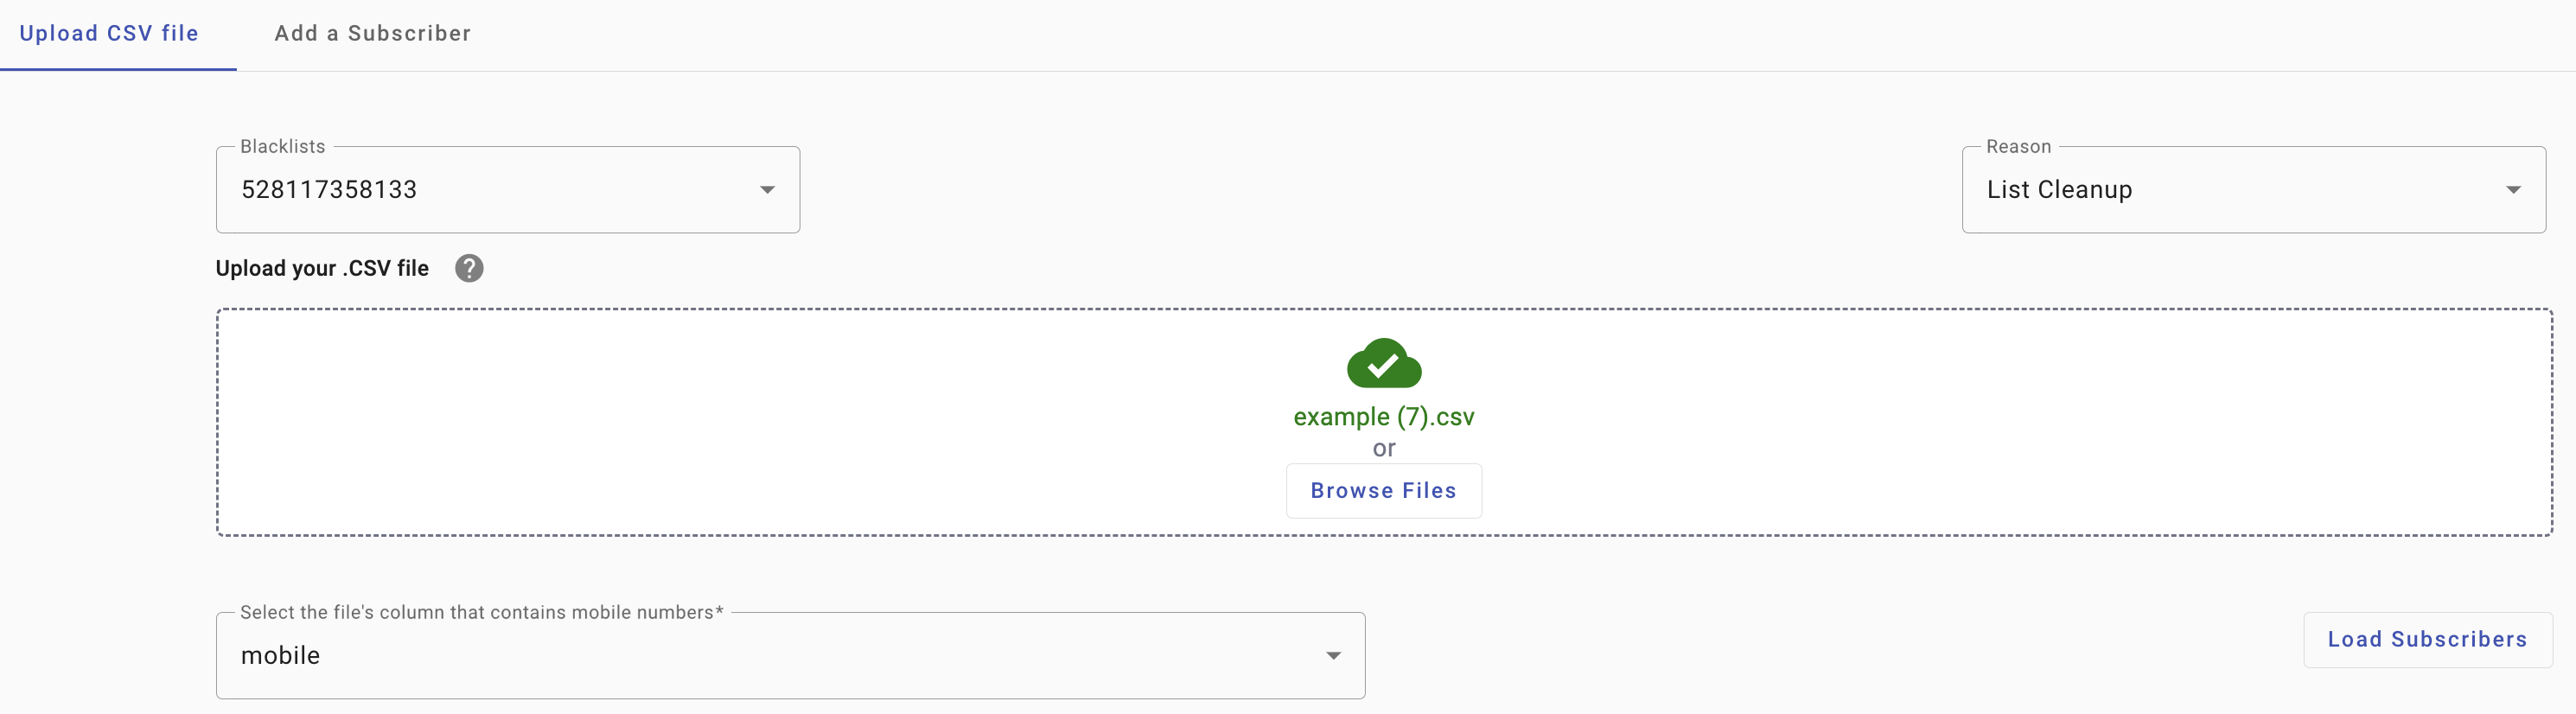
Upload CSV file
To add multiple subscribers to the blacklist,
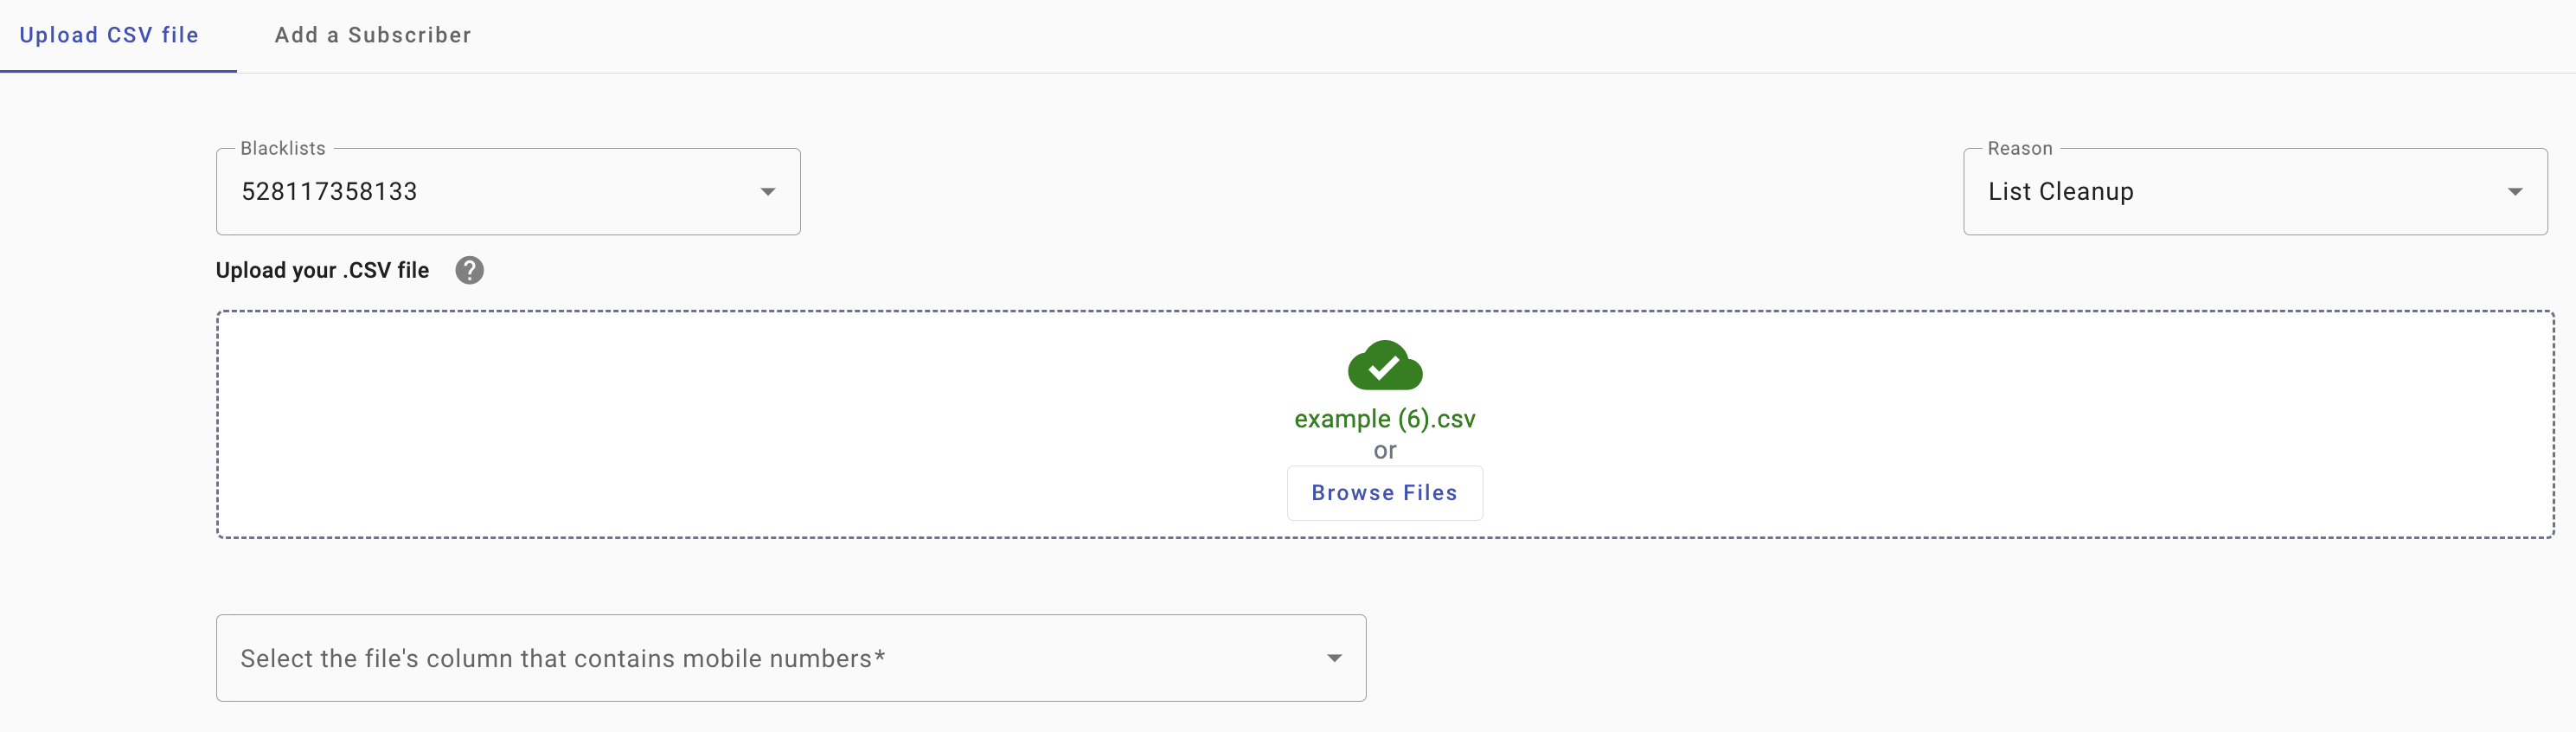
- From the Blacklists dropdown menu, select the sender that contains the subscribers you want to add to the blacklist.
NOTEIn case you want to add the same subscriber (to the blacklist) that has been added to more than 1 sender, the subscriber will be blocked only from the sender (blacklist) that was selected.
- Select the Upload CSV file tab
- Insert the CSV file in the Drag & Drop area on the screen or click Browse Files to select the file from where it is stored.
ON CSV FILES REQUIREMENTS: Only comma-separated value (.CSV) formatted files can be uploaded to the platform. Make sure that the uploaded file is a comma-separated value file that allows you to save data in tabular format. It is mandatory to have a row of headers on the first row of the file including a ‘mobile’ type header to facilitate the validation process of the file by the platform.
Once you have selected the blacklist and uploaded the CSV file, it will be displayed the Reason dropdown menu and a Field Matching column that presents in each of its rows a drop down menu, which is where the actual matching between the CSV file record attributes and the platform fields takes place.
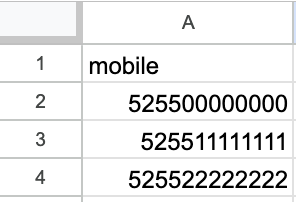
Let us use an example of how the field matching is done. The CSV file to be uploaded looks as follows. Note that although it looks like a spreadsheet, it is in fact an Excel file saved with the .csv extension.
Once the CSV file has been uploaded, we proceed to select the reason why the subscribers were added to the blacklist from the Reason dropdown menu.
For example, if the blacklist selected from the Blacklist dropdown menu contains mobile numbers, your CSV file must include the mobile numbers of the end users you blacklisted in a column called "mobile." Therefore, you are going to select the file’s column that contains mobile numbers from the Field Matching dropdown menu and click the Load Subscribers button. Finally, the mobile numbers of the end users will be added to the selected blacklist.
Single Subscriber
To add a single subscriber to the blacklist, select the Add a Subscriber tab which displays the Add New Subscriber form with the existing platform Fields in the Subscribers List and fill it out with information being requested.
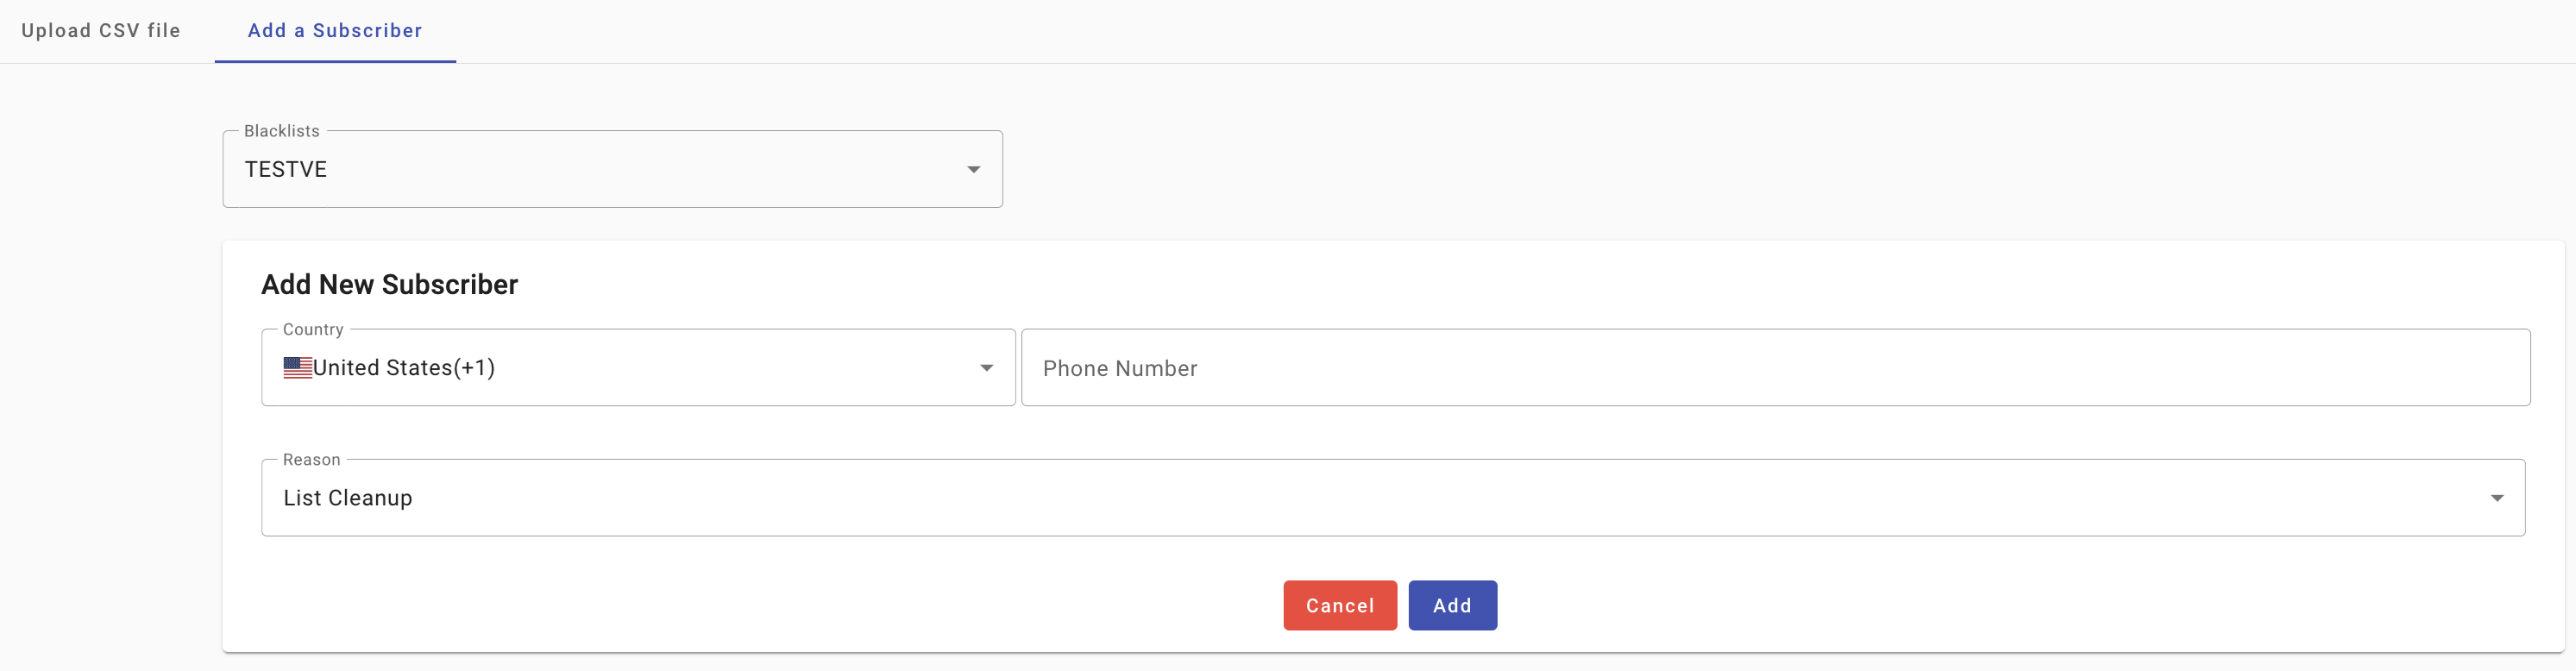
- From the Blacklists dropdown menu, select the sender that contains the subscriber you want to add to the blacklist.
NOTEIn case you want to add the same subscriber (to the blacklist) that has been added to more than 1 sender, the subscriber will be blocked only from the sender (blacklist) that was selected.
- Select the country your subscriber belongs to from the Country dropdown.
- Enter the Subscriber's mobile number or his email address according to the blacklist selected.
- From the Reason dropdown menu, click the reason option why the subscriber was blacklisted.
Email Unsubscribe
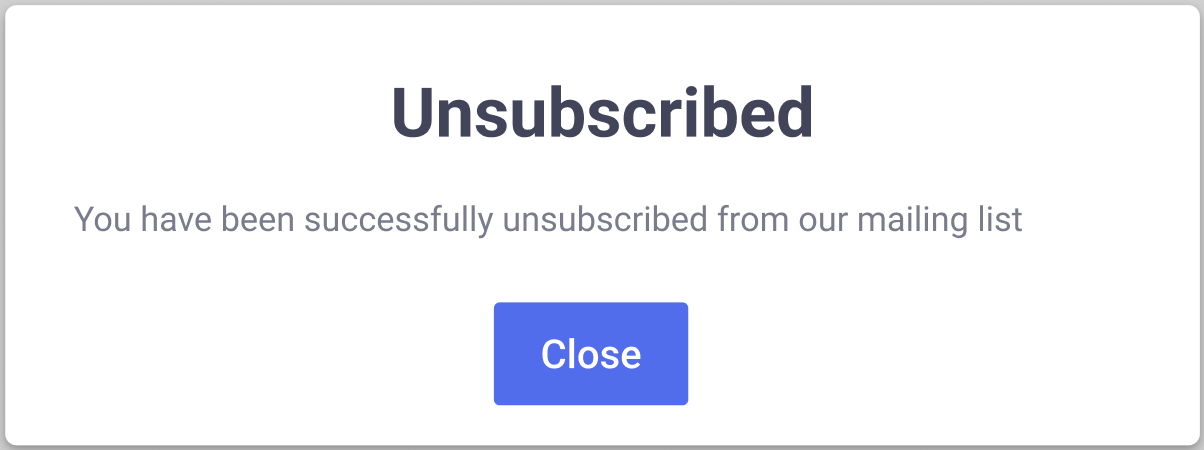
The process for Email Unsubscribe is when a Subscriber decides they no longer wish to receive Broadcast Emails. By clicking the Unsubscribe link located in the email's footer, they are redirected to a confirmation page. From this page, they will confirm to stop receiving any further emails from us.
For example, when the Recipient opens an Email sent from the platform, it will contain the Unsubscribe Link located in the email's footer.

By clicking on the Unsubscribe Link, the end user will be redirected to a Unsubscribe Confirmation page.
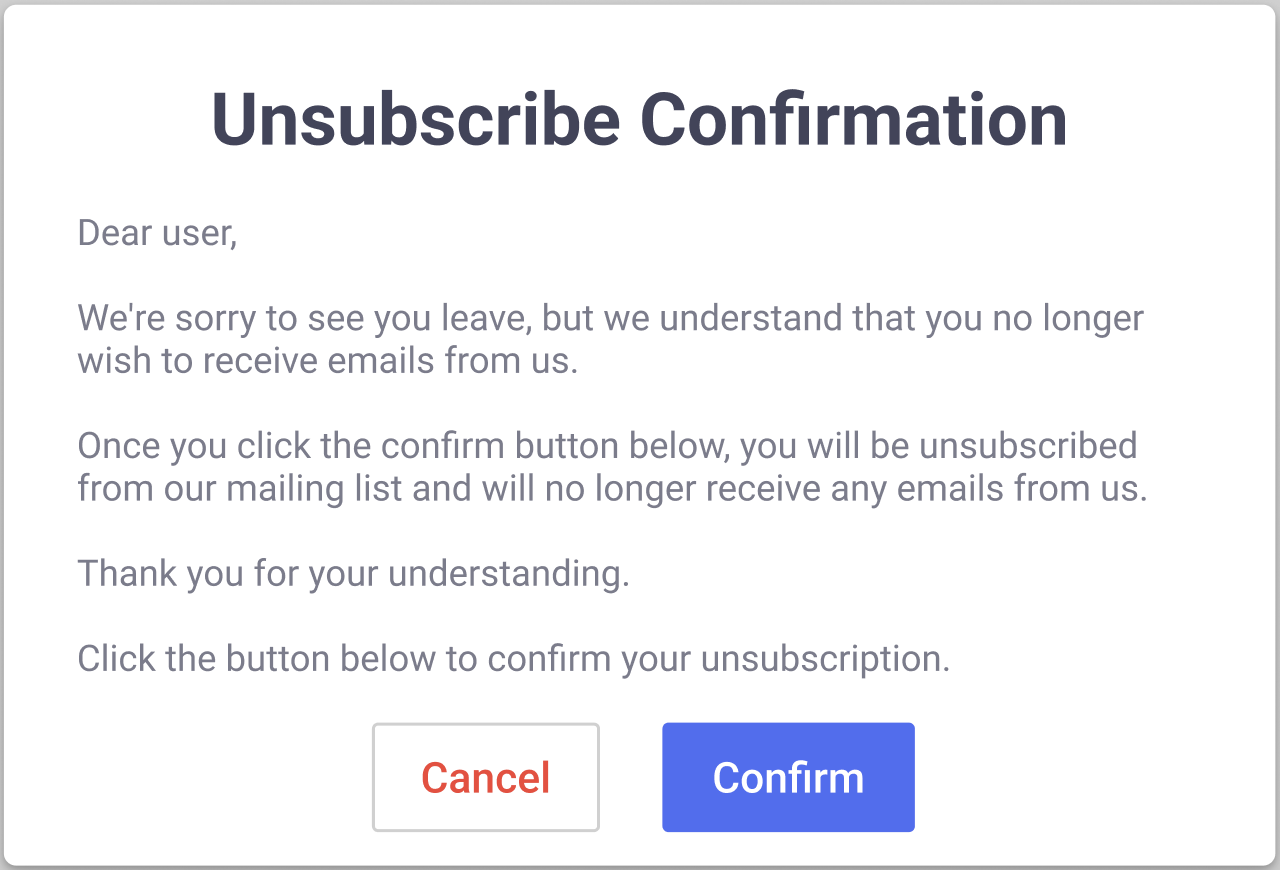
When the end user clicks on the Confirm button, a message will be displayed stating that they will no longer receive Emails.
Immediately, the Subscriber will be placed on the Email Blacklist.
Updated about 1 month ago