Add Phone Number to WABA
Add, verify, and manage a WhatsApp Business Account phone number in a Workspace.
Add and verify a phone number (sender) for an existing WhatsApp Business Account (WABA) in Communications Platform so the Workspace can send WhatsApp messages.
A WhatsApp Business Account (WABA) is a Meta account that manages your business profile and WhatsApp senders. Each phone number must be linked to one WABA, assigned to a Workspace, and verified before you can use it for WhatsApp messaging.
WARNINGA phone number can be active in only one Workspace at a time. If the phone number is already active in another Workspace, you cannot reuse it.
Confirm the WABA creation method
Confirm how the WABA was created before you add a phone number. The creation method determines how you can add and verify phone numbers.
| Method | Description | Phone number limits |
|---|---|---|
| Partner-Initiated Process | The customer’s Business Solution Provider (BSP) sends an invitation by email or support ticket. The customer reviews and accepts the invitation, optionally adds a phone number (sender), and confirms. After the customer accepts, the WABA is created under the customer's Meta Business account and shared with the BSP. | After the WABA is active, you can add and verify phone numbers directly in the platform by using WABA Phone Numbers. After Meta verifies the WABA, you can add up to 25 phone numbers. |
| Embedded Sign-Up | The customer creates or links their own WABA through the Embedded Sign-Up flow in the platform. They authenticate with Meta and complete the setup, including the phone number and business profile information. The WABA is created under their Meta Business account. | Add phone numbers during the sign-up process. To add more numbers later, repeat the Embedded Sign-Up flow. If the WABA is not verified, you can add up to 2 phone numbers during Embedded Sign-Up. After Meta verifies the WABA, you can add up to 25 phone numbers. |
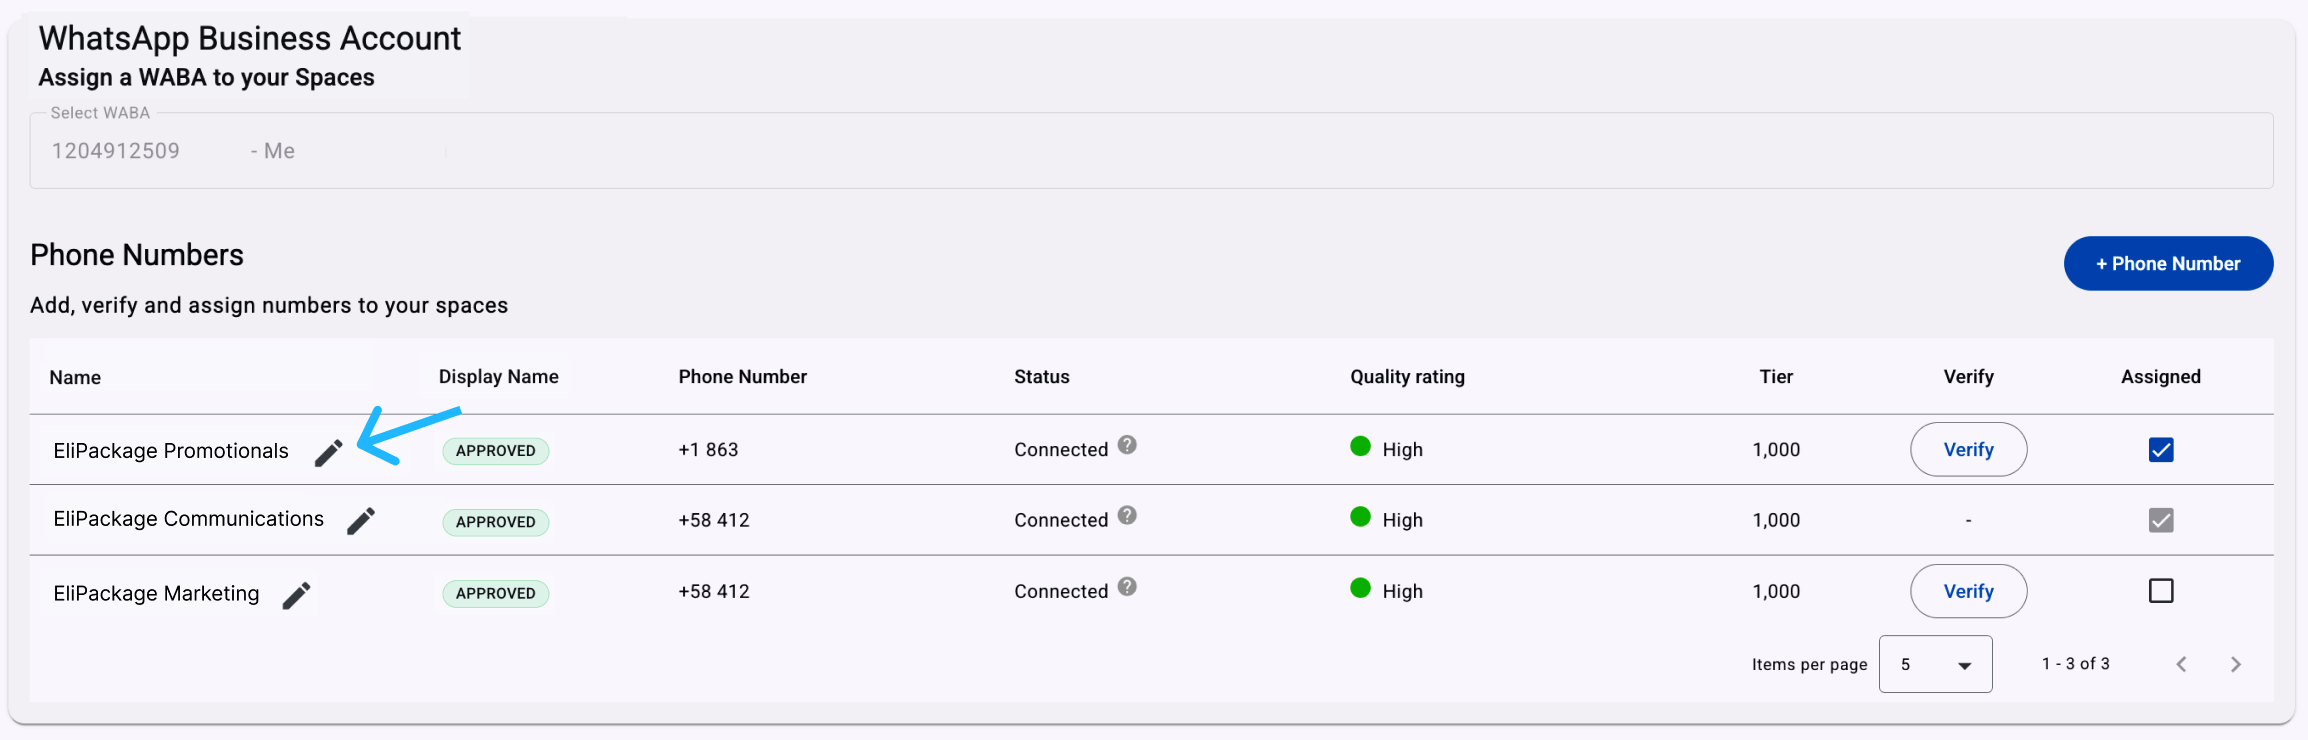
Add a phone number
-
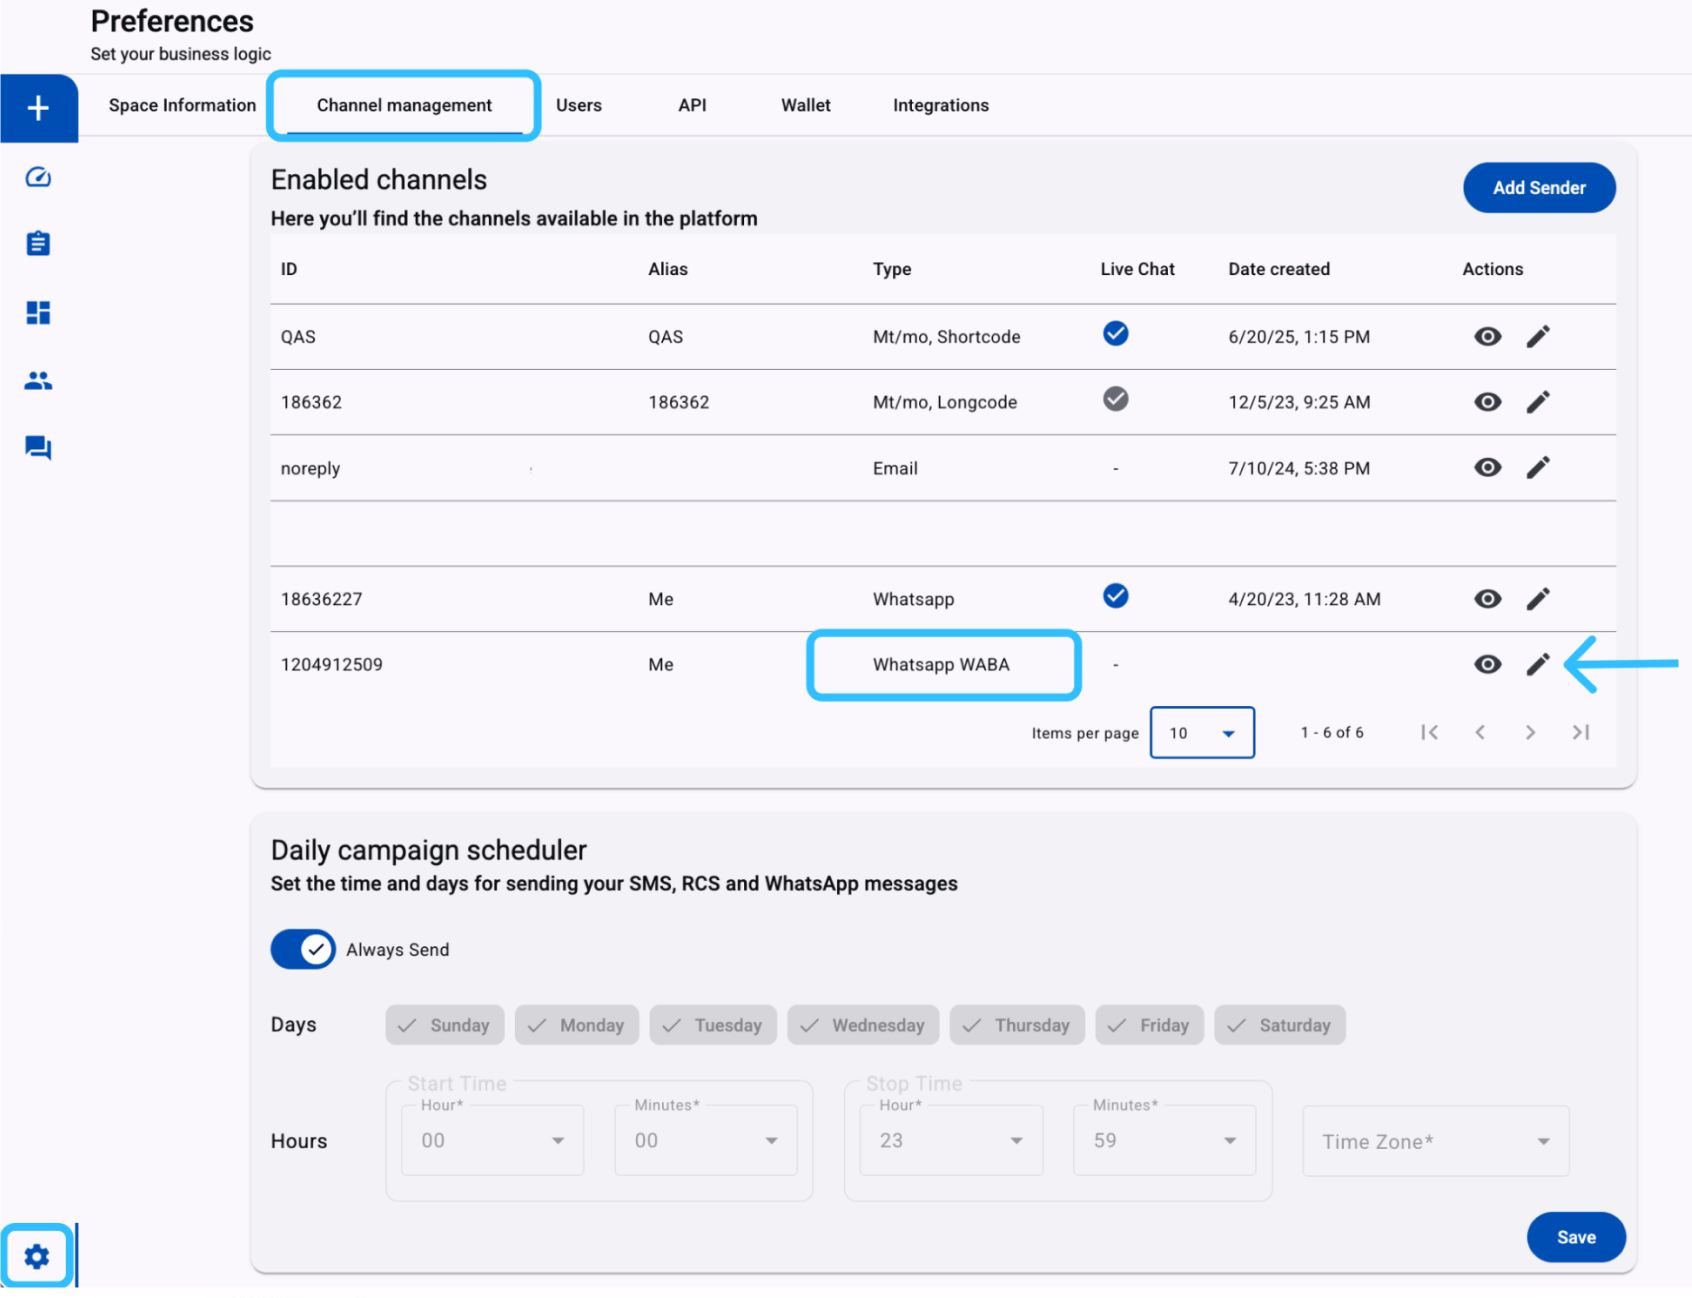
Open the WABA details view.
Go to Preferences > Channel management, locate the row where Type is WhatsApp WABA, and click the Edit icon.
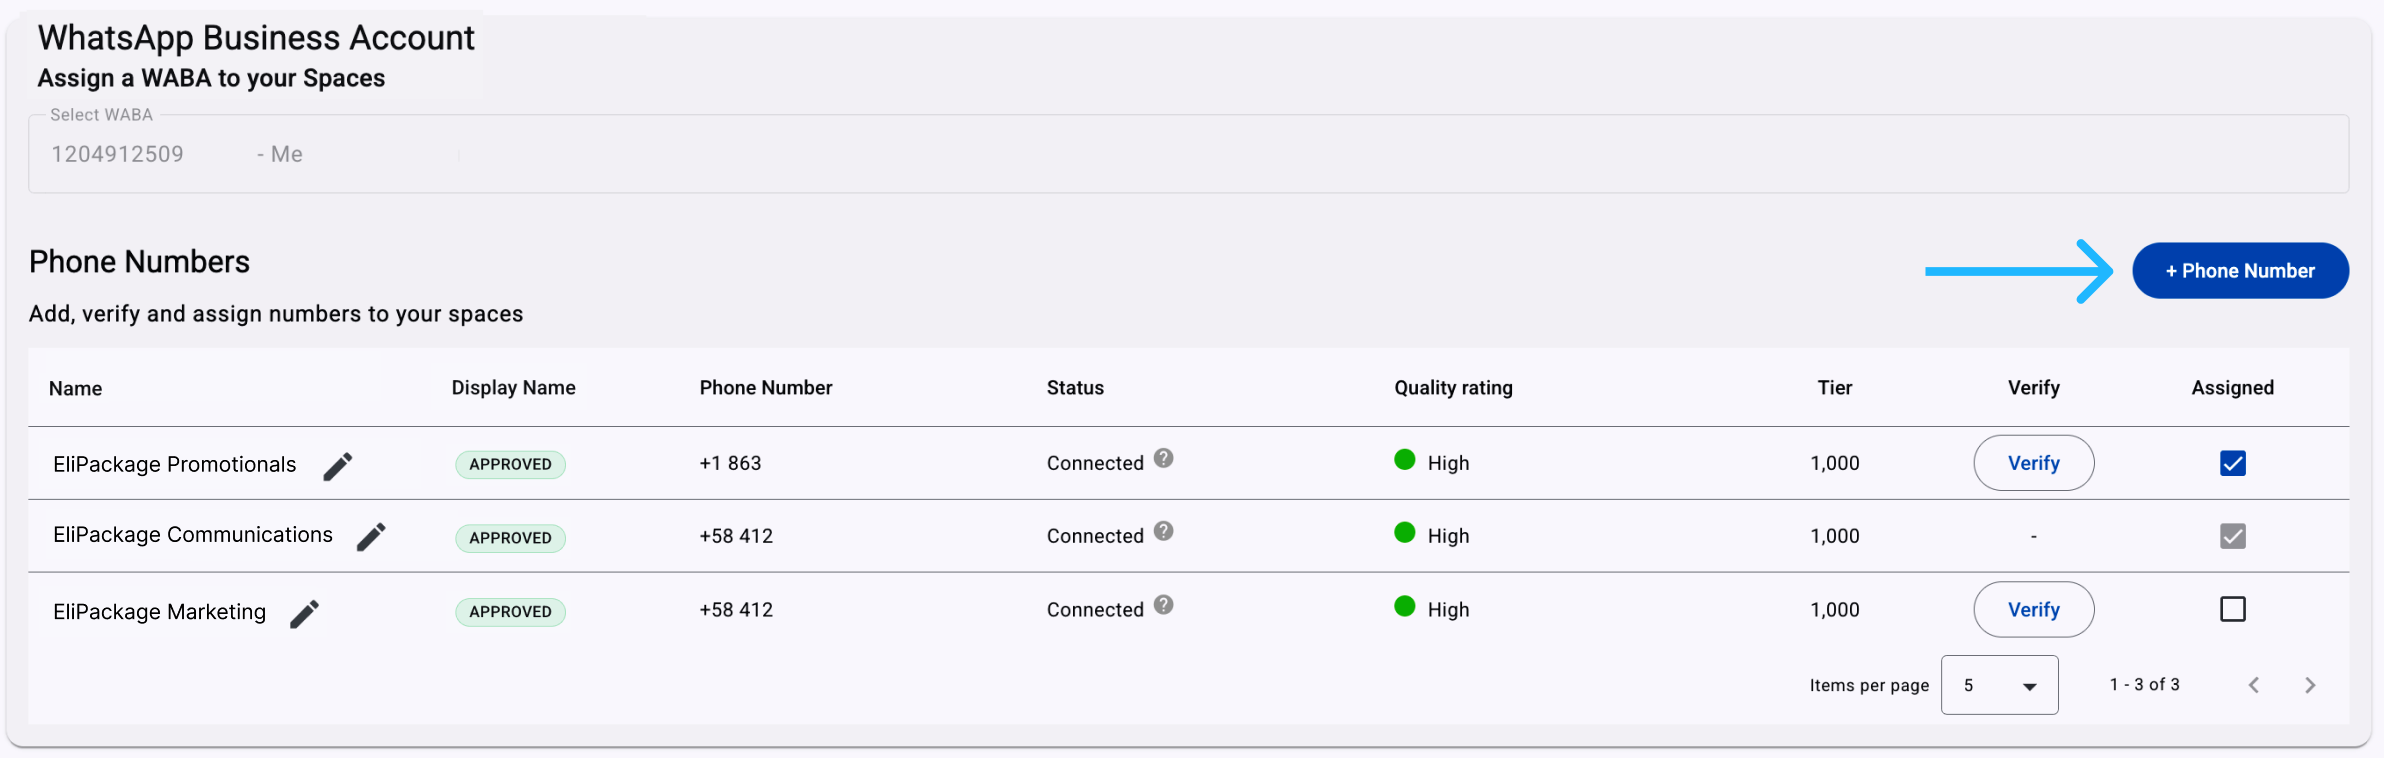
The WhatsApp Business Account view opens and lists the phone numbers for the WABA.
-
Click + Phone Number in the top-right corner of the Phone Numbers section.
-
Enter the phone number information.
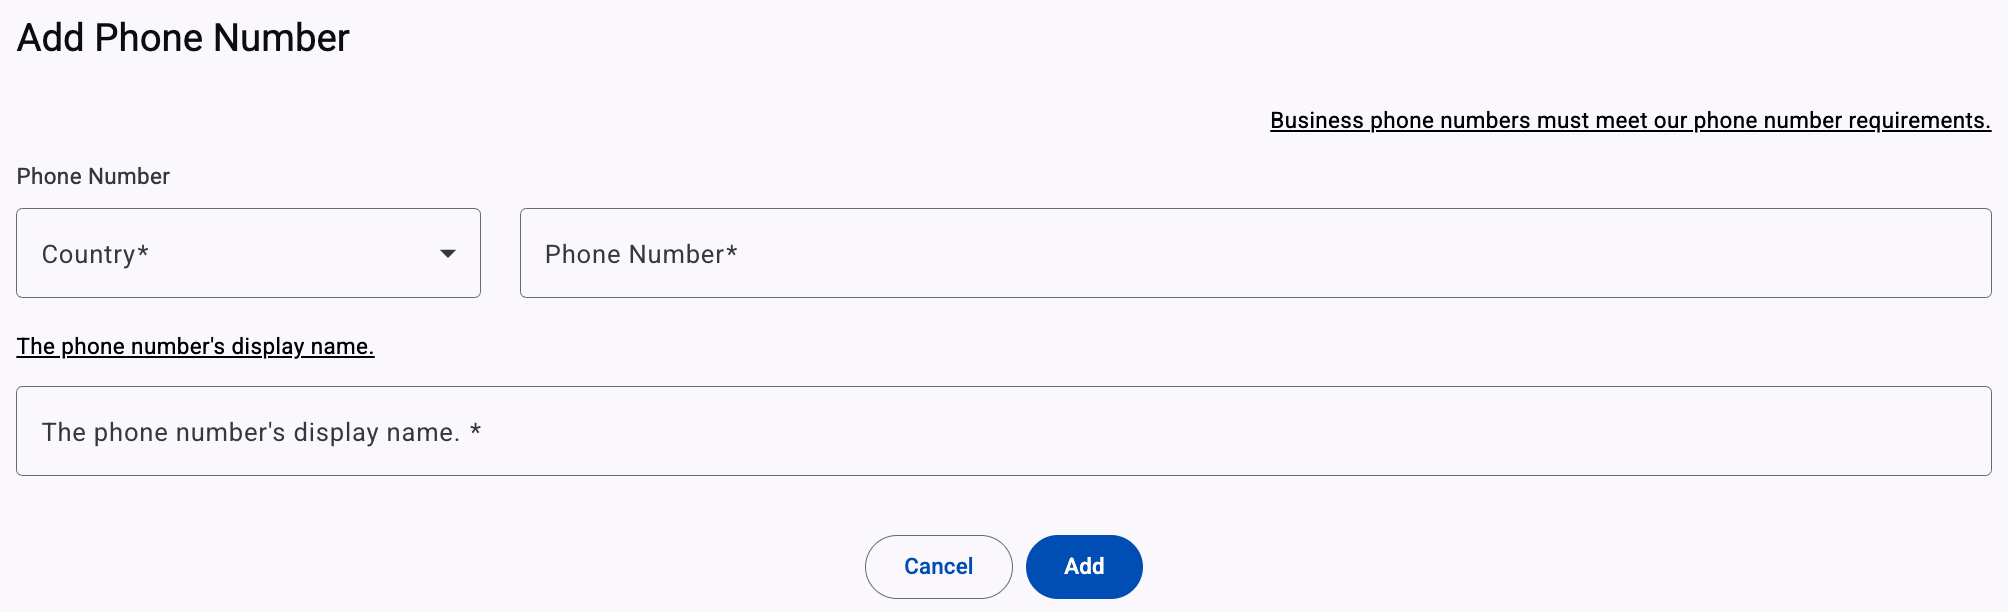
Field Description Country Select the country code for the phone number. Phone Number Enter the business phone number you want to add to the Workspace. Display Name Enter the name customers will see in your WhatsApp profile, such as your business or brand name. The display name must be related to your business and must not violate the WhatsApp Business Messaging Policy. -
Click Add to register the number under the WABA.
-
Assign the phone number to the Workspace.
After you add the number, it appears in the Enabled channels table. Select the checkbox to assign the phone number (sender) to the current Workspace.
-
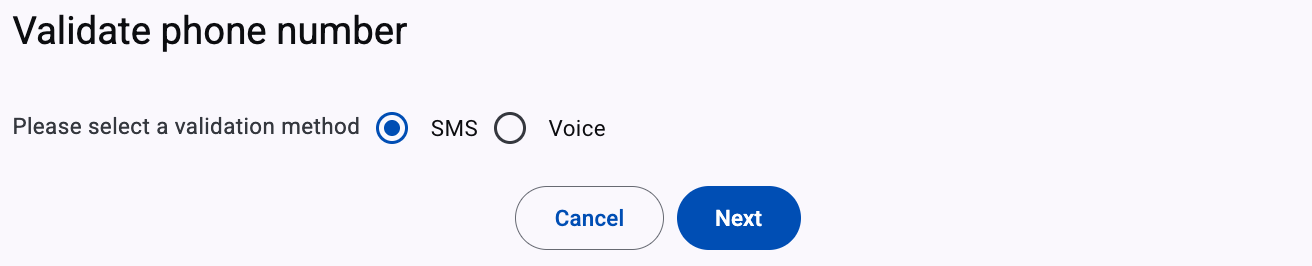
Verify the phone number.
After you assign the phone number, click Verify in the Verify column. Complete the OTP (one-time password) verification process by SMS or voice call.

-
Wait for activation.
After verification, wait 60 to 120 minutes for the phone number to become active and ready for WhatsApp messaging in this Workspace.
Edit the display name
The WhatsApp Business Display Name is the business name customers see on your WhatsApp Business Profile. When you add a new phone number to your WhatsApp Business account in your business portfolio, you assign it a display name. The display name is used to create a certificate required to register an account on the WhatsApp Business platform.
Display names must be related to your business and must not violate the WhatsApp Business Message Policy.
After your phone number is verified and active, update its display name from the Phone Numbers table:
-
Locate the sender you want to update and click the edit (pencil) icon next to its current Display Name.
-
Review the current name and enter the new display name.
The New Display Name window shows the current name associated with the phone number.
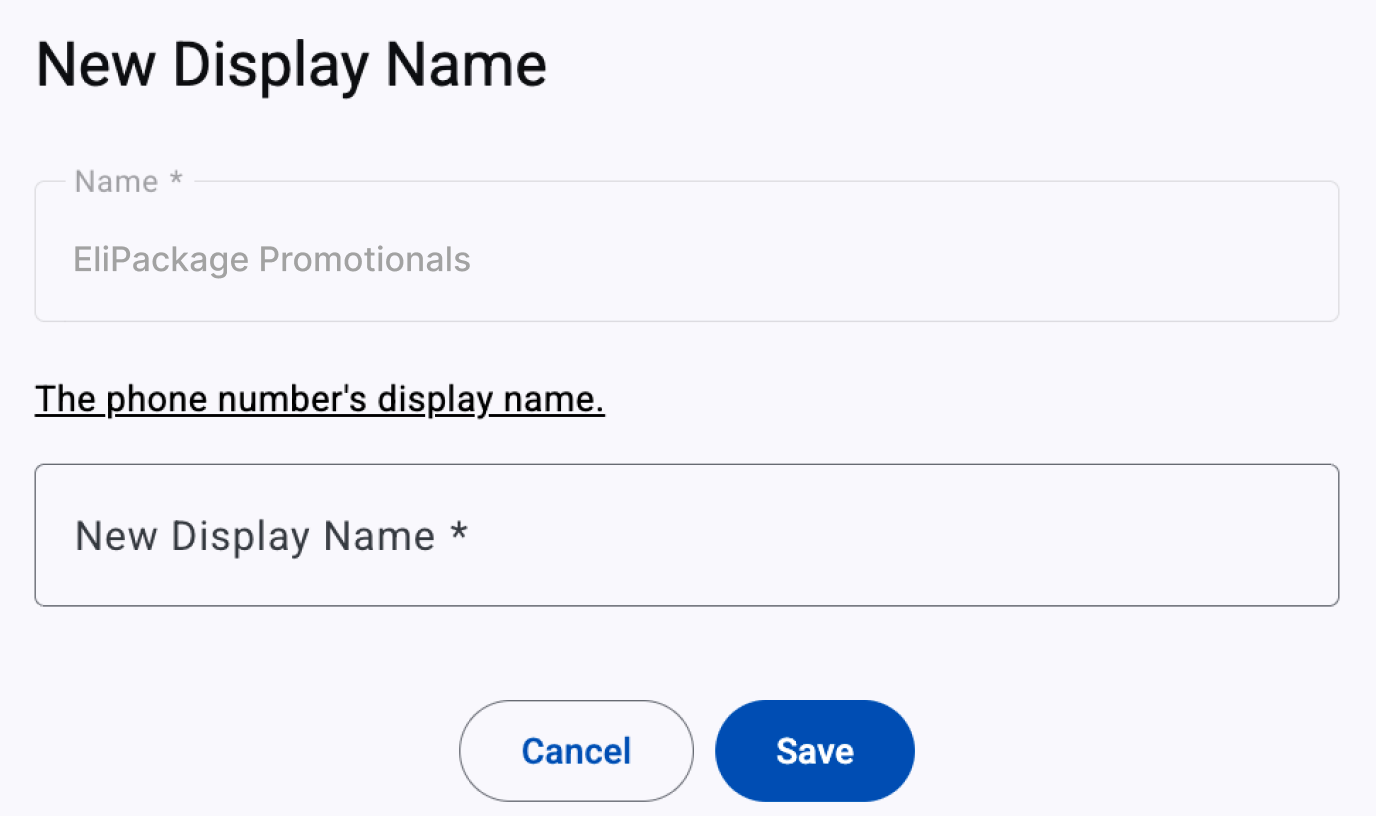
Field Description Name Displays the current name assigned to the phone number. Use this field to confirm which sender you are editing. New Display Name Enter the updated name you want customers to see in WhatsApp conversations and in your business profile. The display name must contain 3 to 80 characters. Use your legal business name, brand name, or a product name that clearly identifies your company. Avoid generic or misleading terms, such as “Customer Support” or “Official Account”. -
Click Save to submit the change for review by Meta.
The new display name appears after Meta completes the review, which may take 60 to 120 minutes. If Meta rejects the change, the previous display name remains active.
Updated 10 days ago