Invite Users
You add users to your Workspace and assign them specific roles. You ensure that each user has the appropriate level of access and responsibilities within the Workspace.
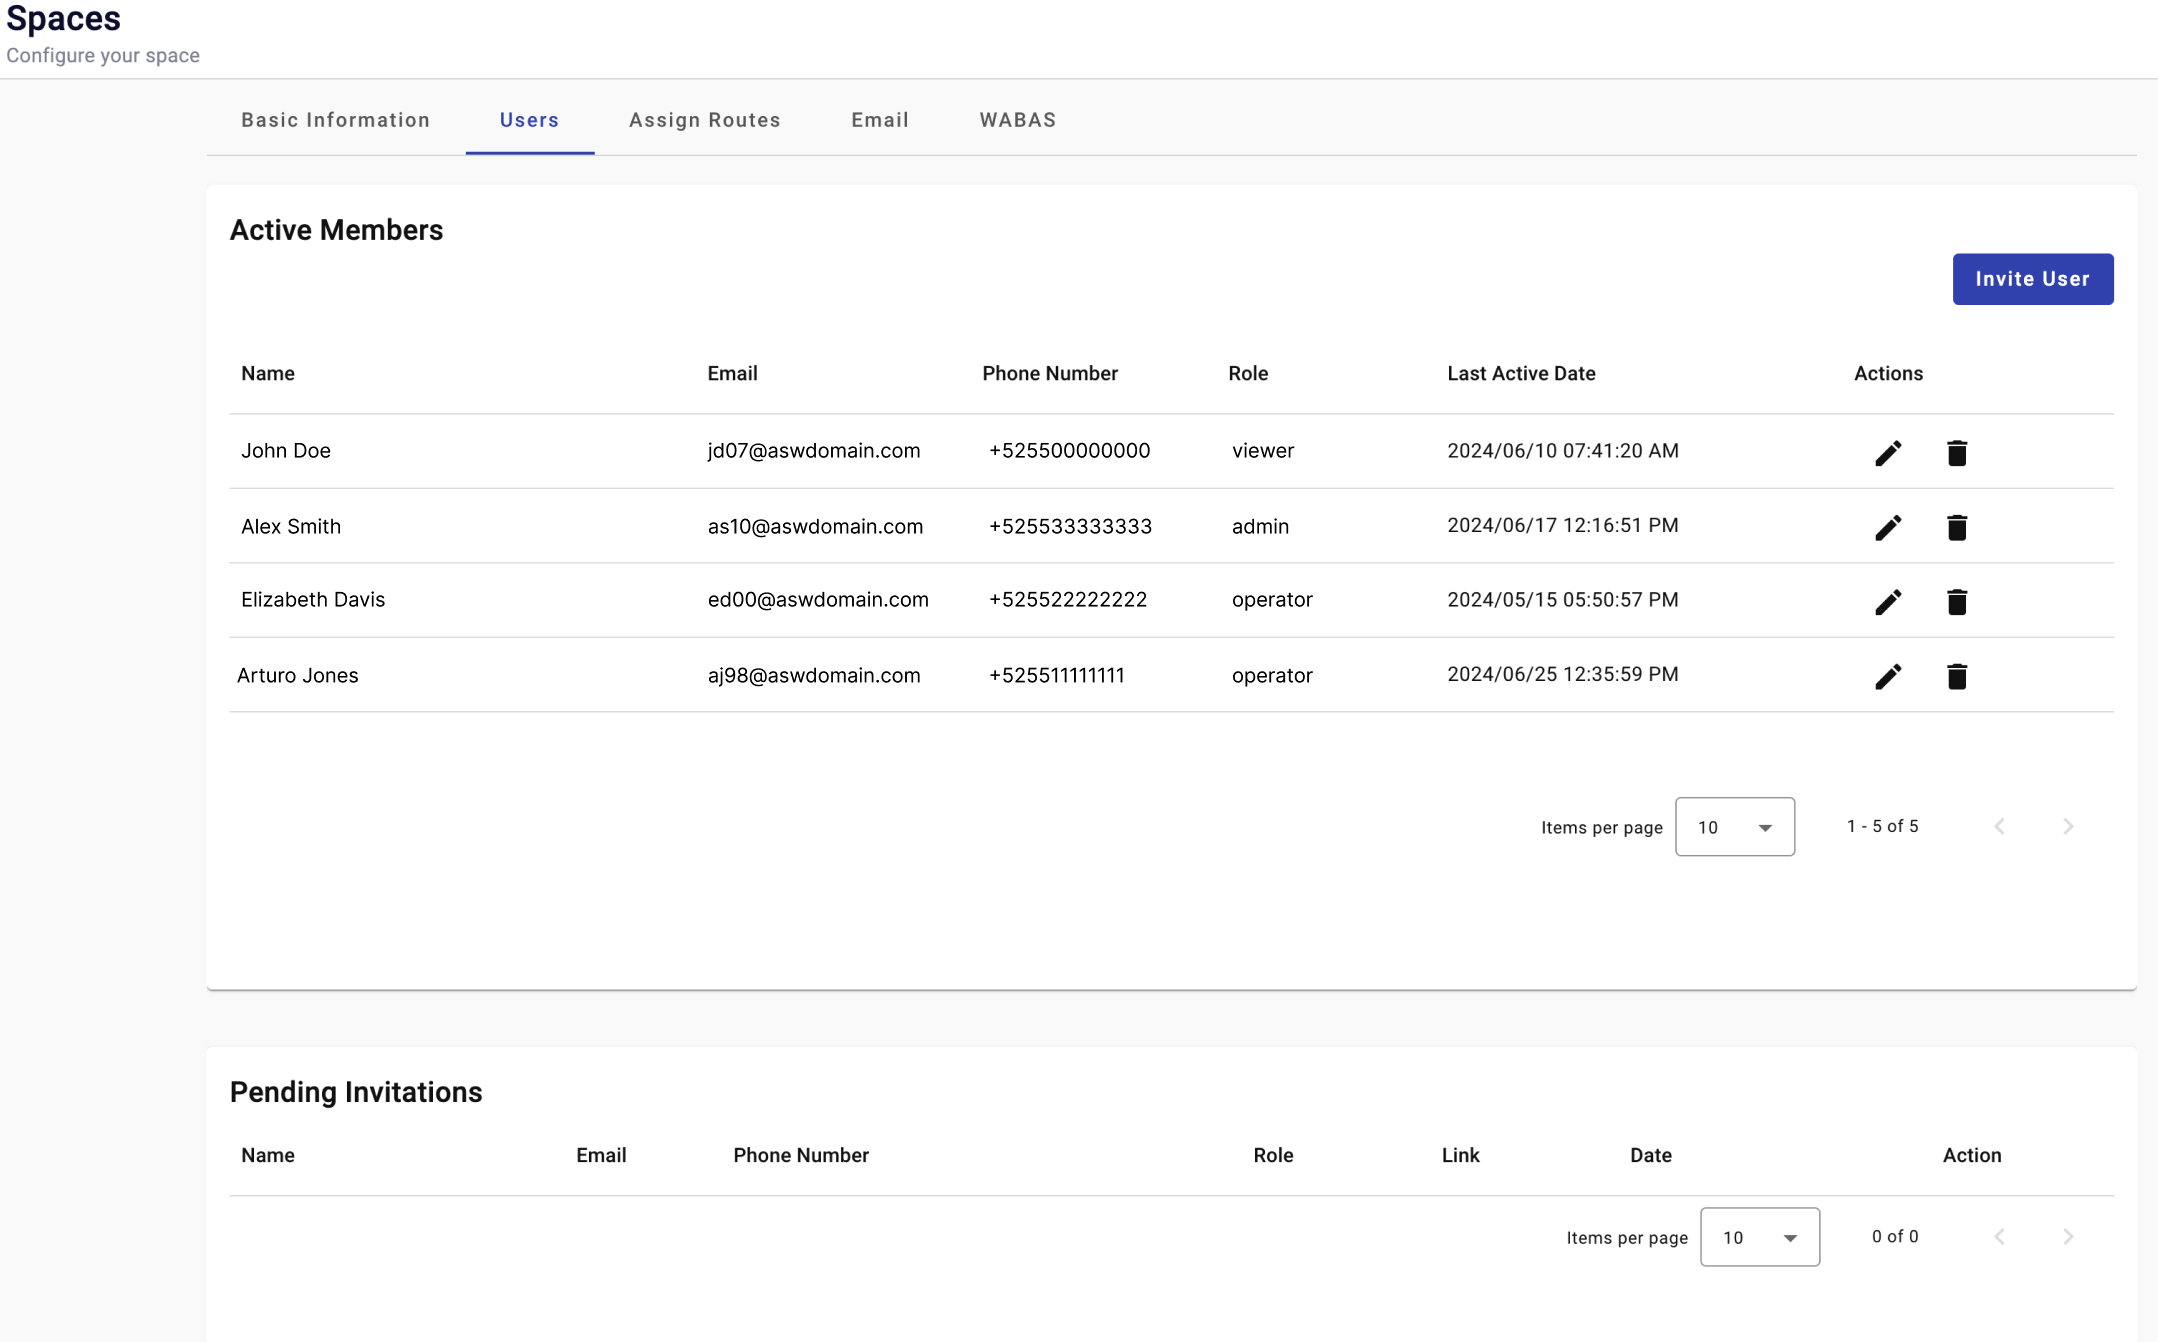
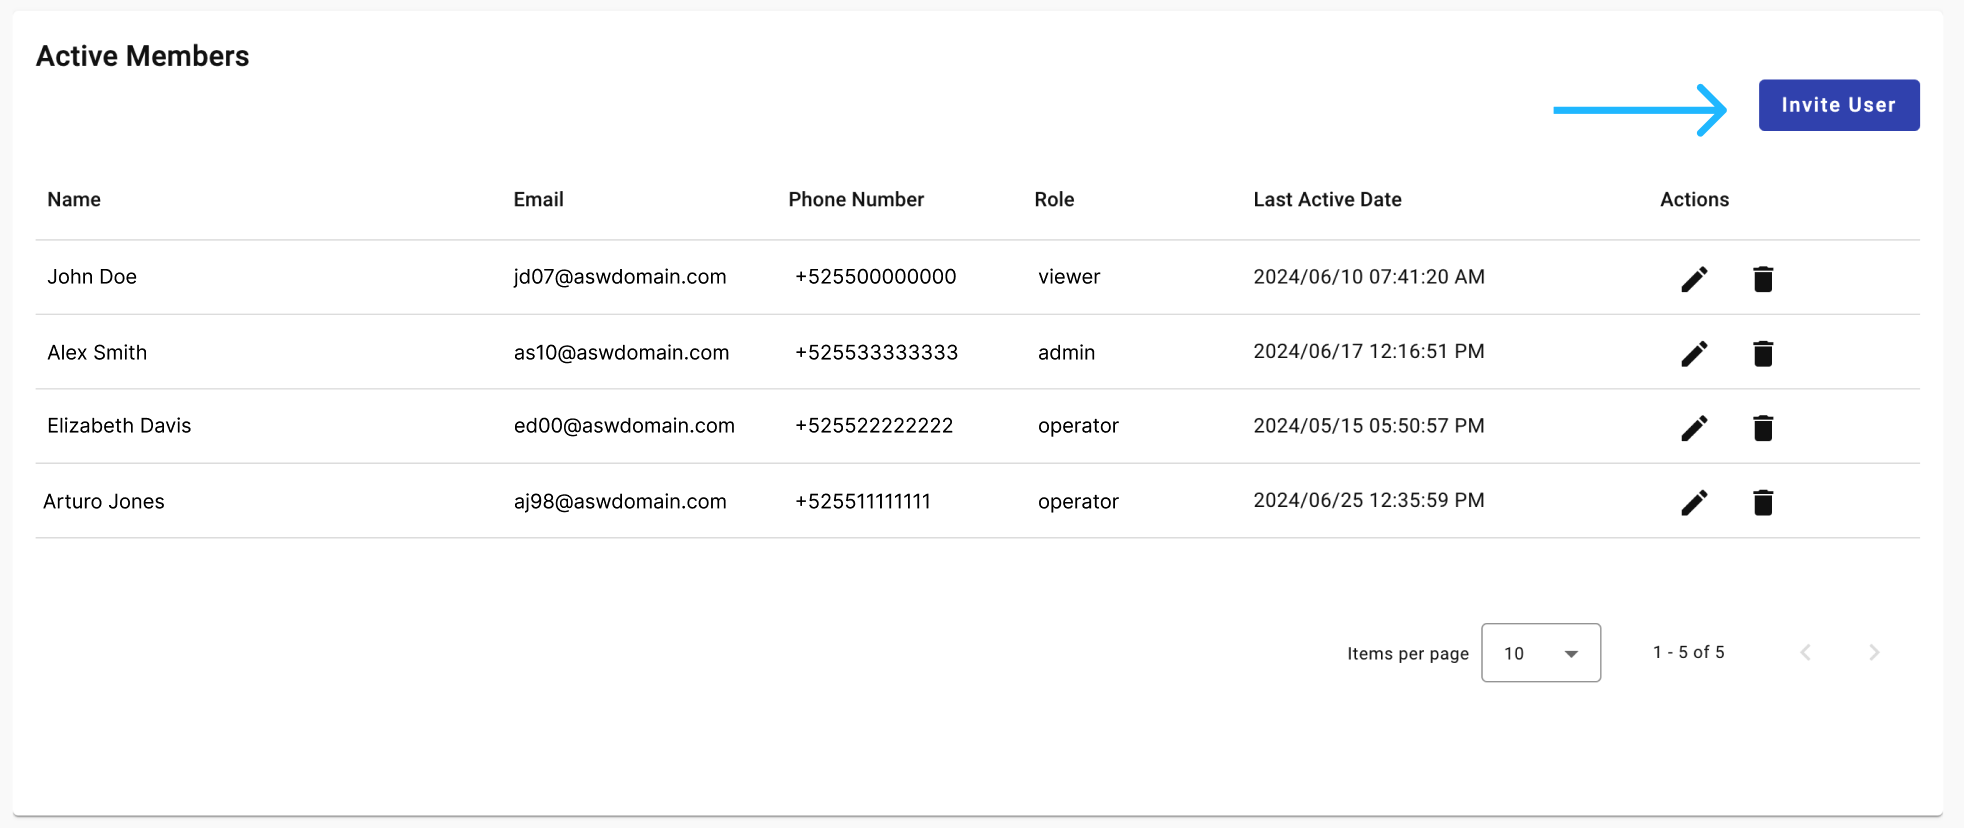
Active Members
Active members are users who accepted the invitation for the role assigned to them and completed their registration.
You see a list of all active users in the Active Members table. For each user, you see the following information:
- Name — The full name of the user.
- Email — The email address of the user.
- Phone Number — The user's phone number.
- Role — The assigned roles for the user within the Workspace. You assign multiple roles to a single user.
- Admin — Full access to all features and settings within the Workspace.
- Operator — Access to most operational features within the Workspace, with limited access to user management and high-level configurations.
- Viewer — Read-only access to the Workspace, with no ability to change settings or operational features.
- Agent — Access only to the Live Chat platform, with no access to the Workspace.
- Last Active Date — The last date and time the user was active on the Workspace.
- Actions:
- Edit — You select the Pencil icon to edit the user's details or change their roles.
- Delete — You select the Trash bin icon to remove the user from the Workspace.
Pending Members
You see all pending invitations that have been sent but not yet accepted in the Pending Members table.
For each pending user, you see the following information:
- Name — The full name of the user.
- Email — The email address of the user.
- Phone Number — The user's phone number.
- Role — The assigned roles for the user within the Workspace. You assign multiple roles to a single user.
- Admin — Full access to all features and settings within the Workspace.
- Operator — Access to most operational features within the Workspace, with limited access to user management and high-level configurations.
- Viewer — Read-only access to the Workspace, with no ability to change settings or operational features.
- Agent — Access only to the Live Chat platform, with no access to the Workspace.
- Link — Registration link.
- Date — The date when the invitation was sent.
- Actions:
- Delete — You select the Trash bin icon to cancel the invitation to the Workspace.
Invite User
You add a new user by following these steps:
-
Select the Invite User button on the right side of the Active Members section.
-
Complete the following fields in the Invite Users pop-up:
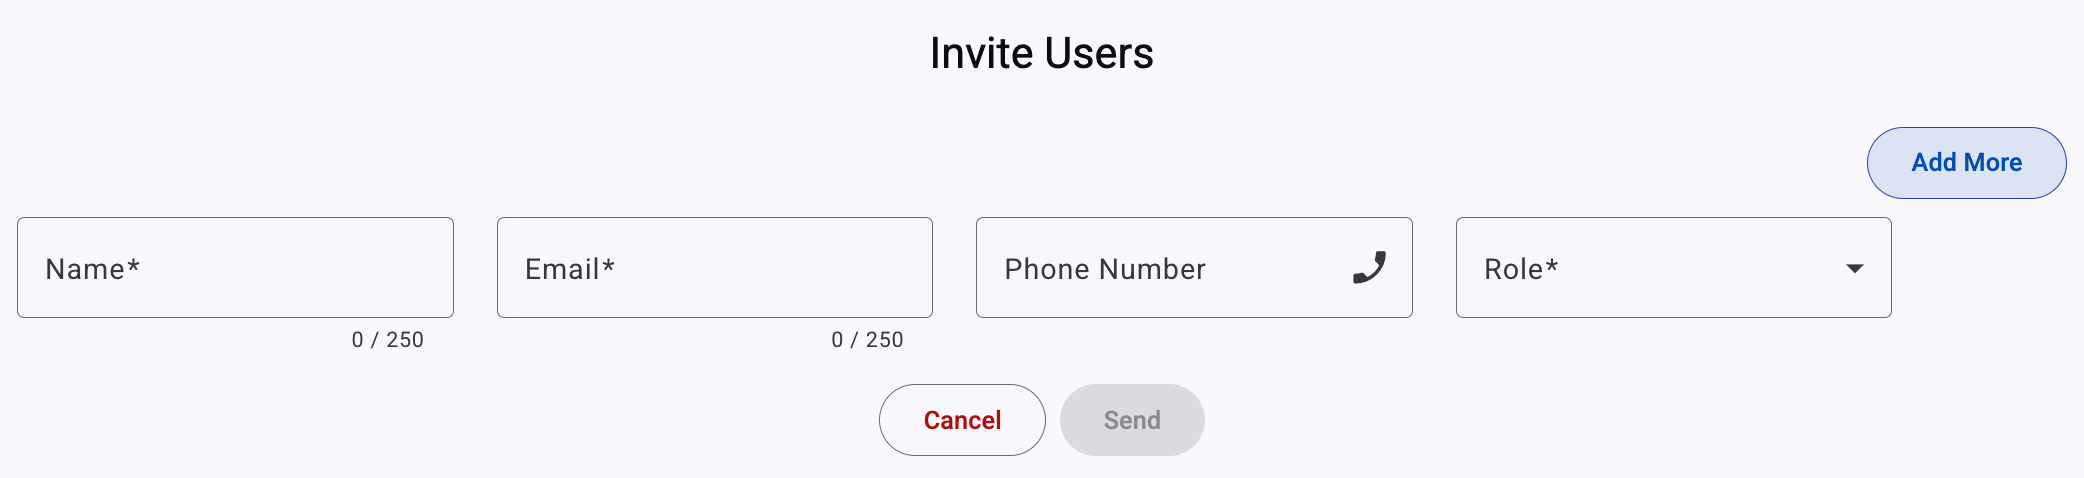
- Name — Enter the full name of the user.
- Email — Provide the email address of the user.
- Phone Number — Enter the user's phone number.
- Role — Select the appropriate role from the Role dropdown menu. The available roles are:
- Admin — Full access to all features and settings within the Workspace.
- Operator — Access to most operational features, with limited access to user management and high-level configurations.
- Viewer — Read-only access, with no ability to change settings or operational features.
- Agent — Access only to the Live Chat platform, with no access to the Workspace.
-
Add More (Optional) — If you need to invite multiple users at once, select the Add More button to include additional user details.
-
Send Invitation — After filling in all the necessary details, select the Send button to invite the user to the Workspace.
Invited users receive an email indicating that they were assigned a role in the Workspace. For example:
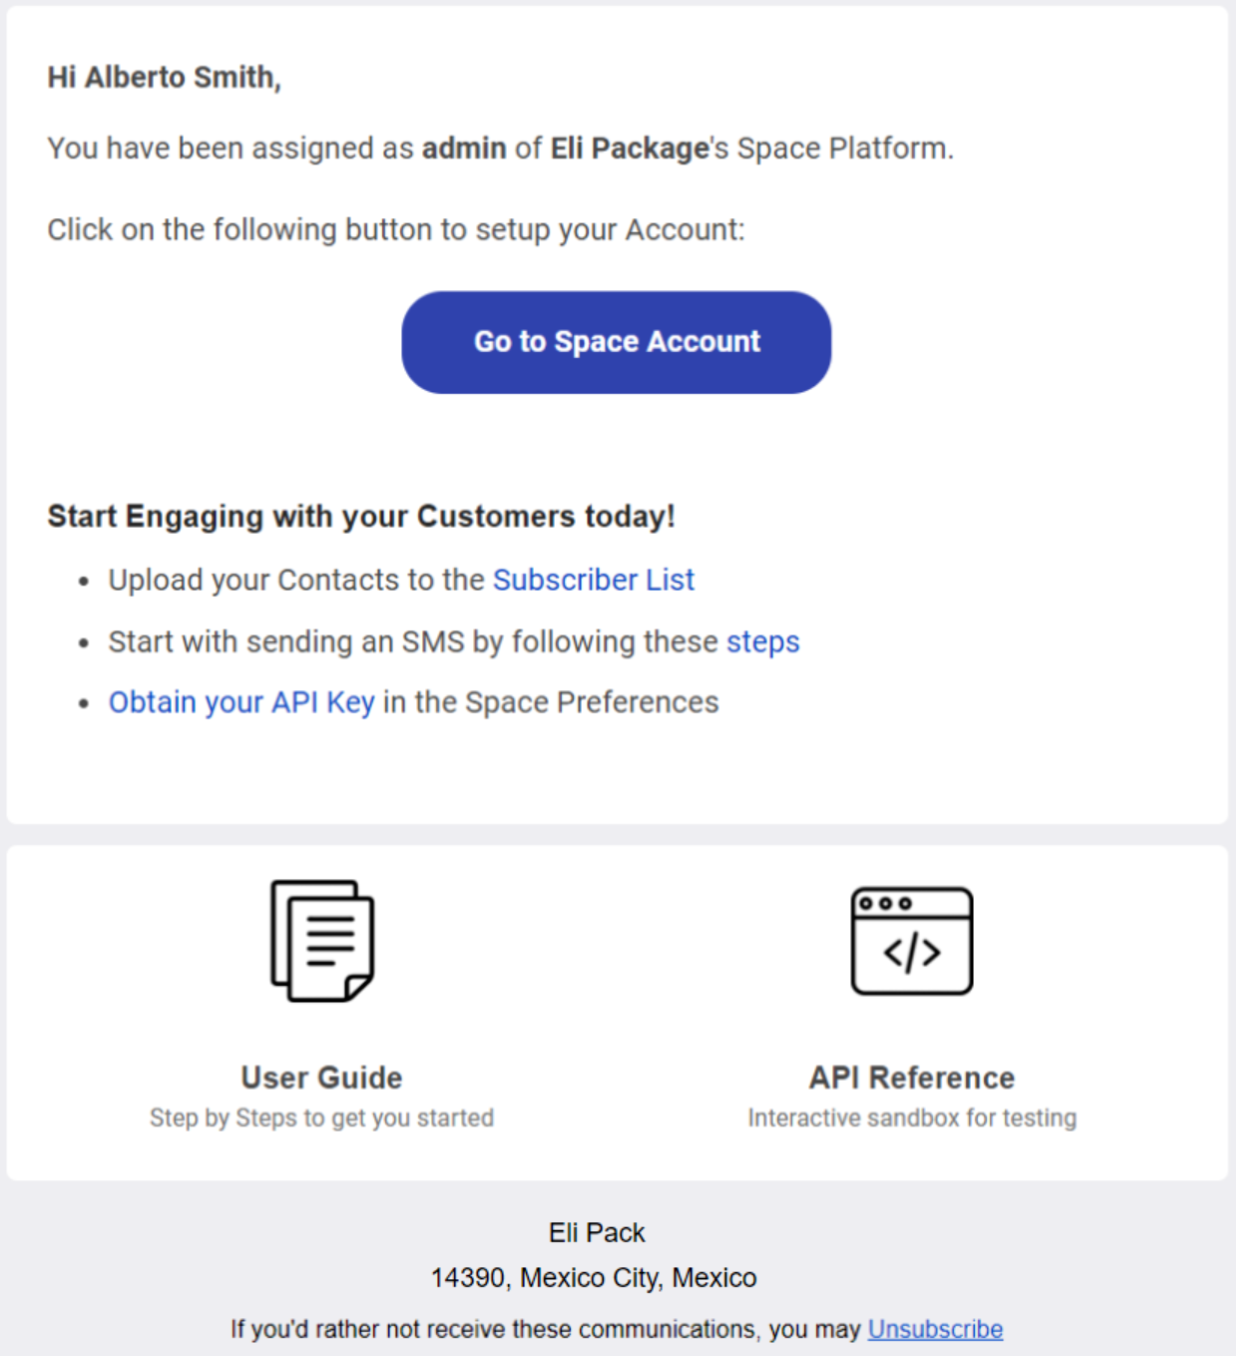
If the user account does not yet exist on the platform, the Go to Space link takes the user to the registration form.
You add new members to your Workspace and assign them the appropriate roles through these steps. Each member receives the correct level of access for their assigned role.
Updated 20 days ago