Assign Routes
You add Routes and Virtual Routes to the Assign Routes tab for use by the respective Workspace. You manage and prioritize the communication routes to ensure message delivery and connectivity.
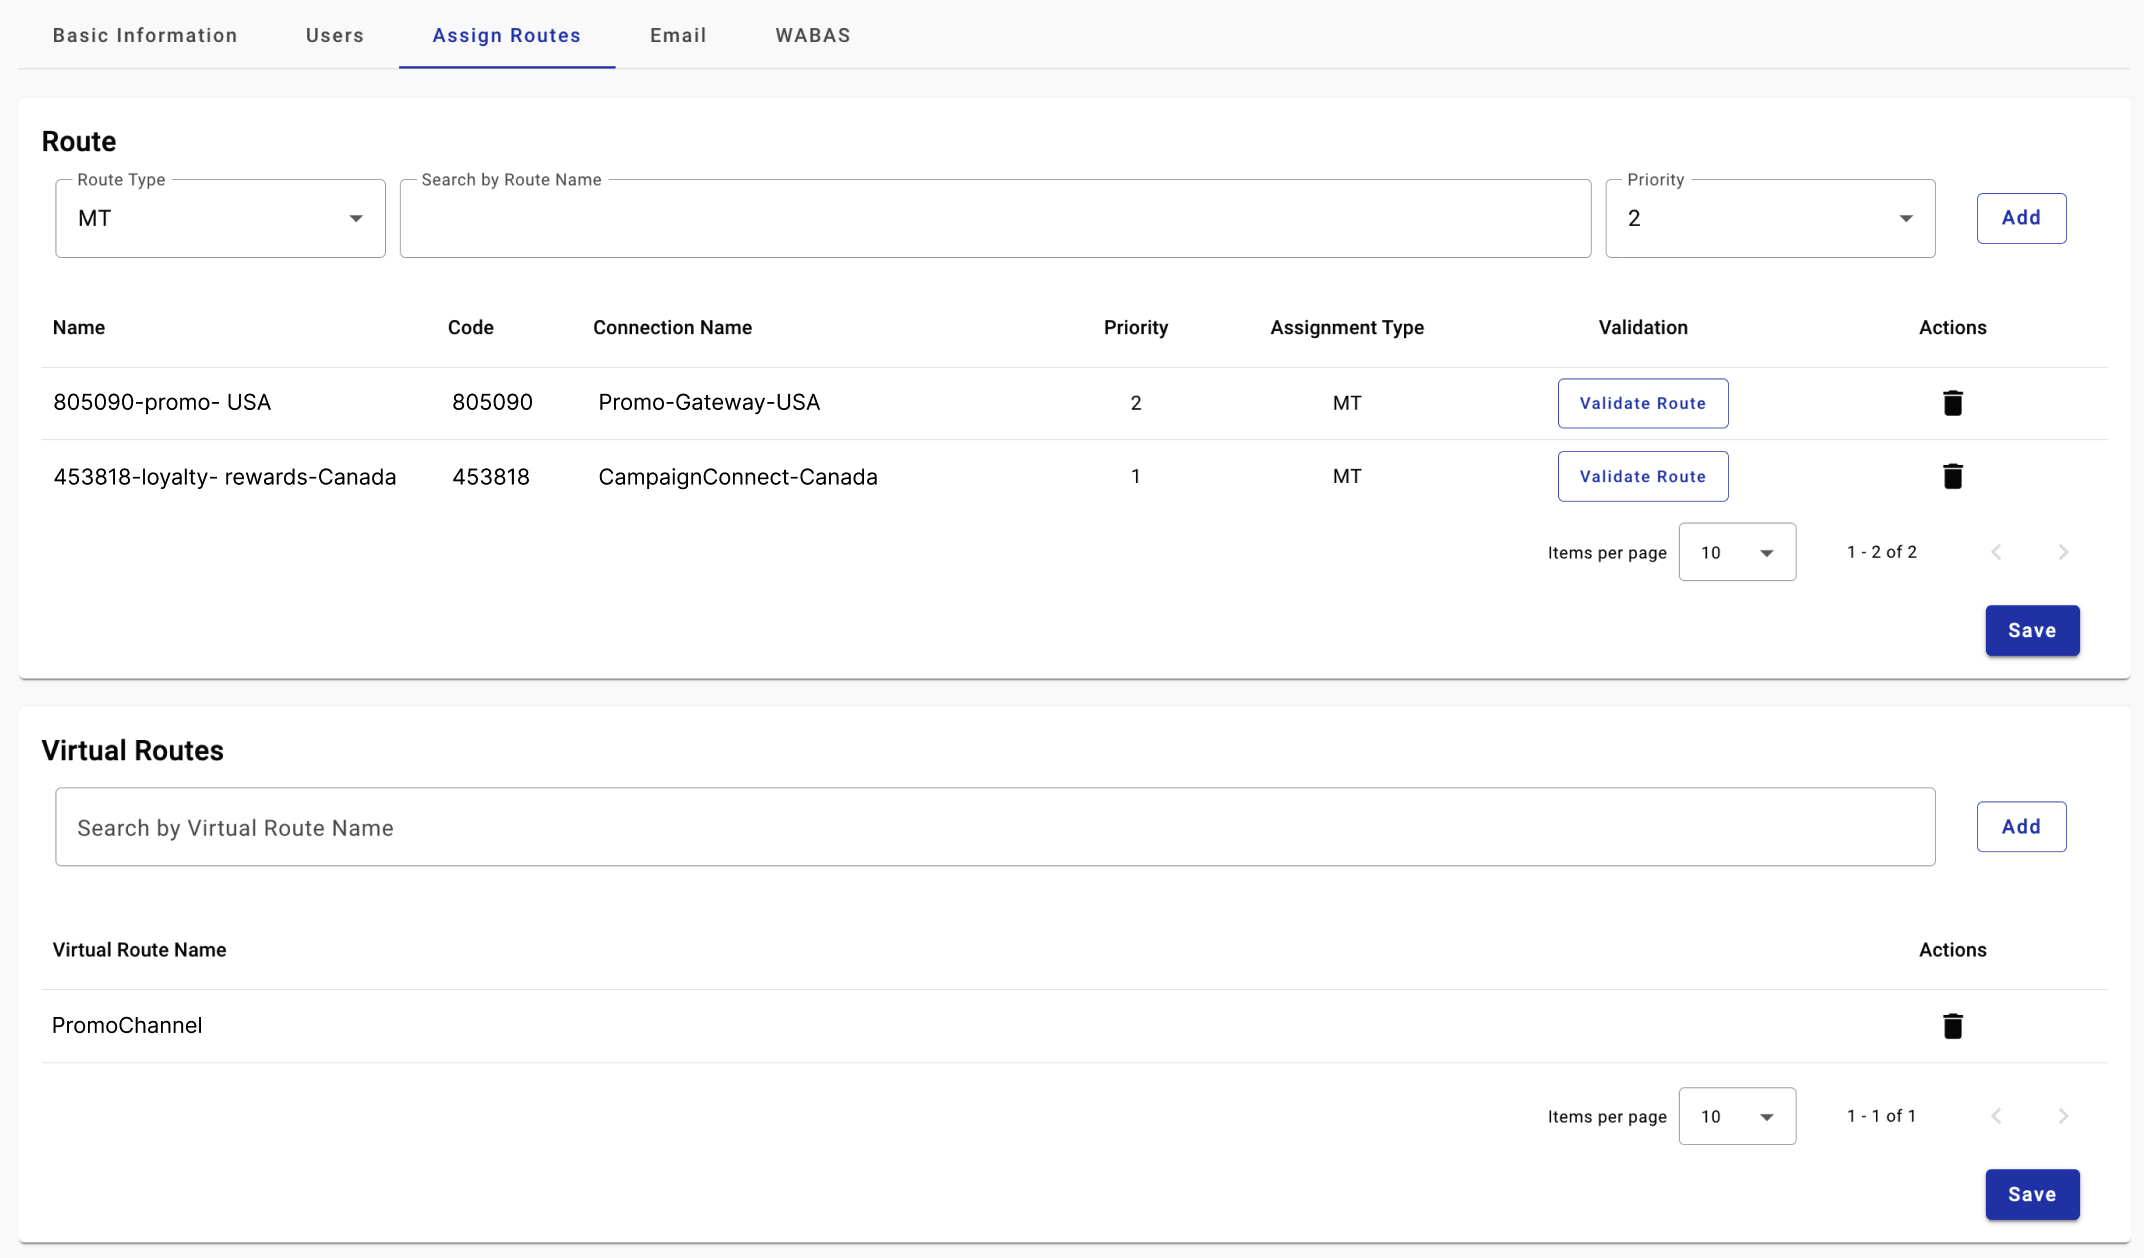
You work with two sections in this tab:
-
Routes: A Route is a predefined path through which messages and communication traffic are directed to reach their intended destination. Routes manage how messages are sent and received within the platform. Configurations include connection names, priorities, and assignment types.
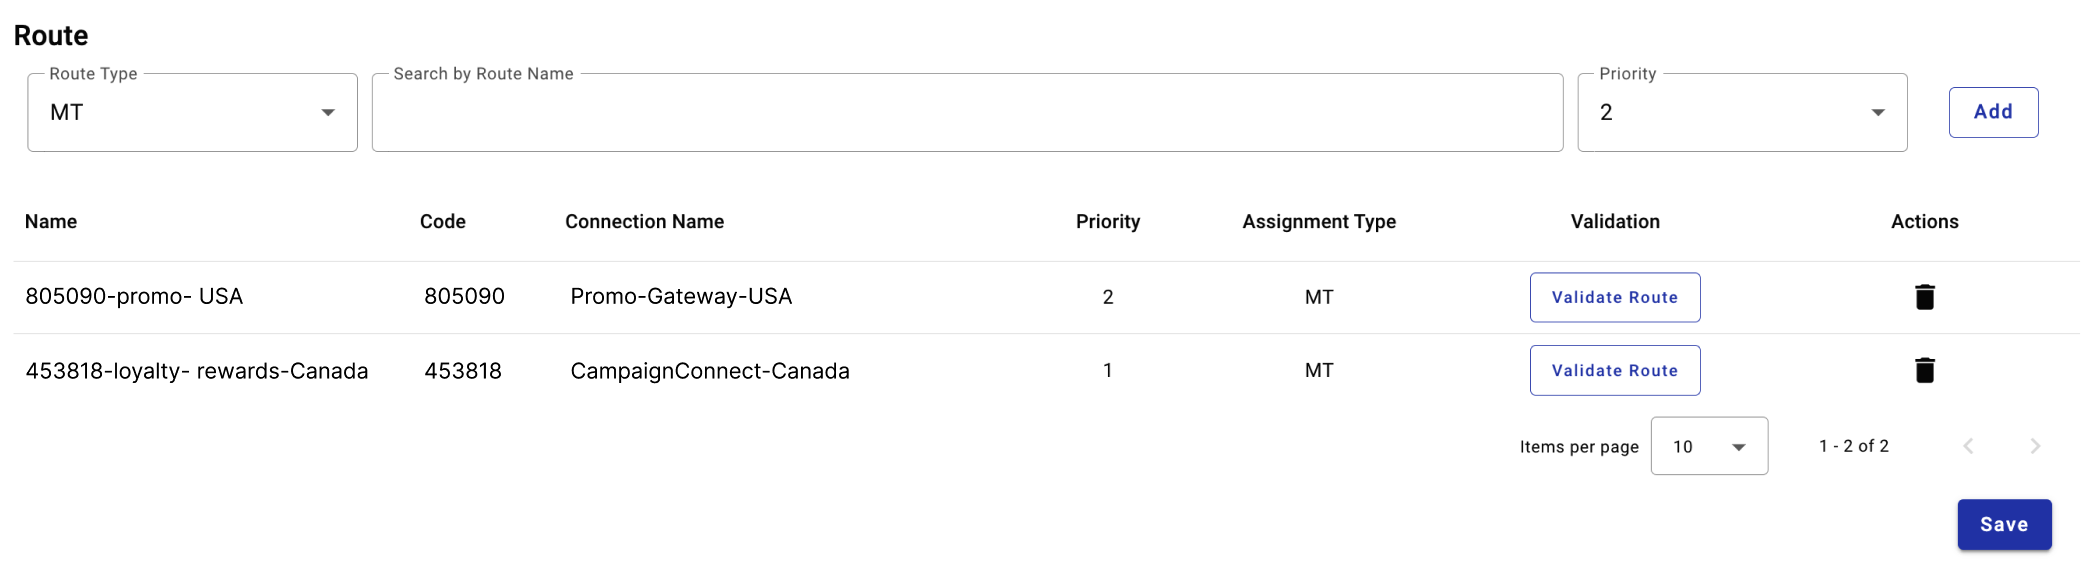
You see the following columns in the Routes table:
- Name — Name of the route.
- Code — Code number associated with the Route.
- Connection Name — Name of the specific connection used for the route.
- Priority — Determines the order in which routes are used, with higher priority routes being preferred.
- Assignment Type — Defines the type of messages handled by the route (MT, MO, or both).
- Validation — You test the route to validate that it works correctly.
- Actions — You select the trash bin icon to remove the route from the list.
-
Virtual Routes: A Virtual Route is a logical pathway used to manage and direct communication traffic without relying on a physical connection. Virtual routes handle and route messages within the platform's internal systems.
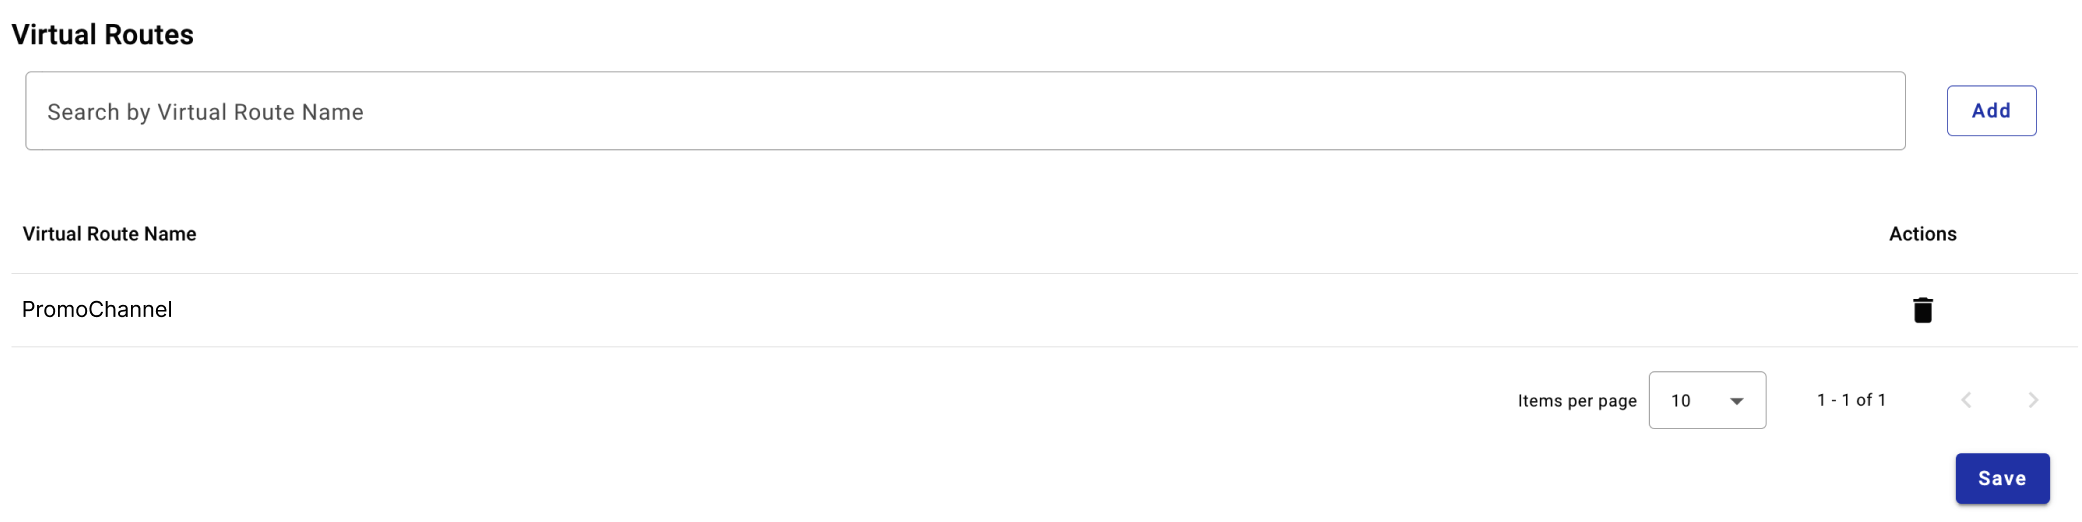
You see the following columns in the Virtual Routes table:
- Name — Name of the virtual route.
- Actions — You select the trash bin icon to remove the virtual route from the list.
You add a route and a virtual route to the Workspace using the steps below.
Add Route to the Workspace
You add a route to the Workspace using the following steps:
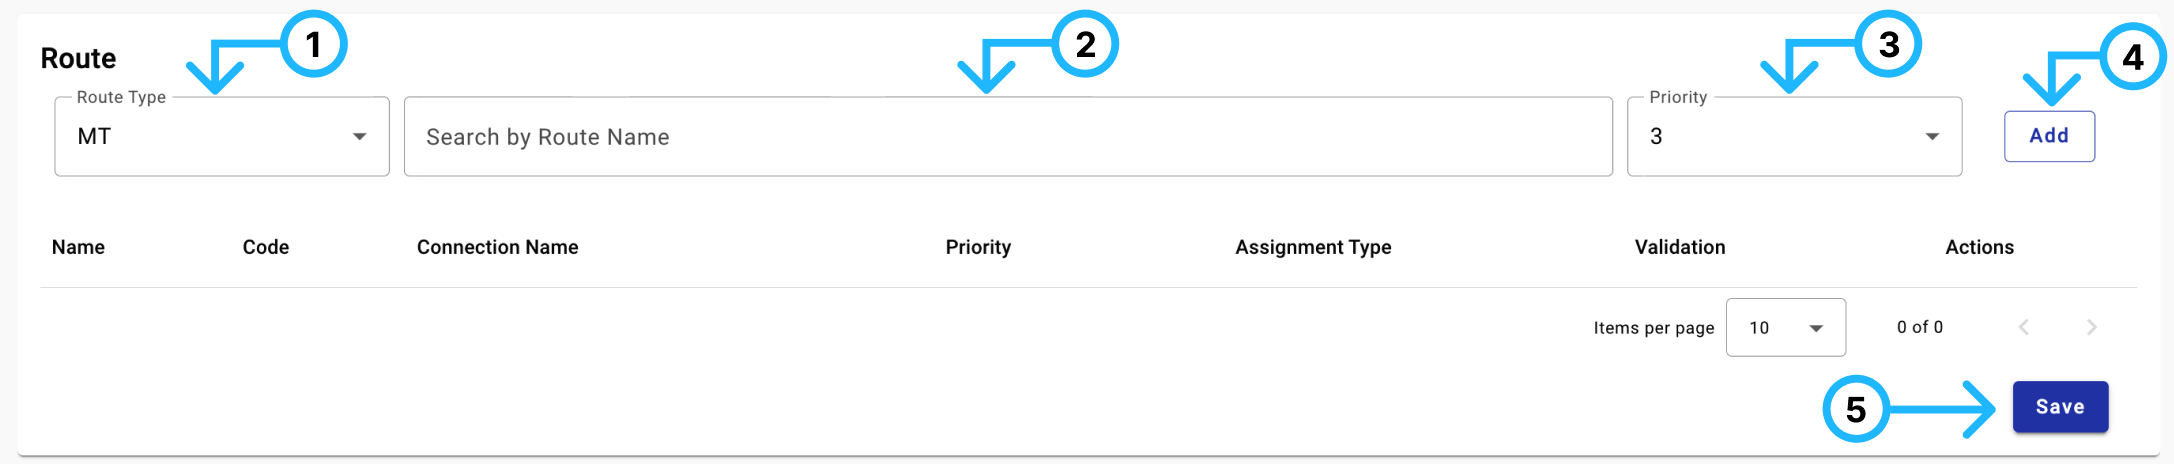
- Select Route Type: In the Route Type dropdown menu, select the type of route you want to add — Mobile Terminated (MT) or both MT and MO (Mobile Originated).
- Search for Route Name: Enter the name of the route in the Search by Route Name dropdown menu or select the desired route from the dropdown menu.
- Set Priority: Select the priority for the route using the Priority dropdown menu. Higher numbers indicate lower priority.
- Add Route: Select the Add button to include the route in the list. The newly associated Route is displayed in the Routes table.
- Save Route: Select the Save button to save the route.
Add Virtual Route to the Workspace
You add a virtual route to the Workspace using the following steps:
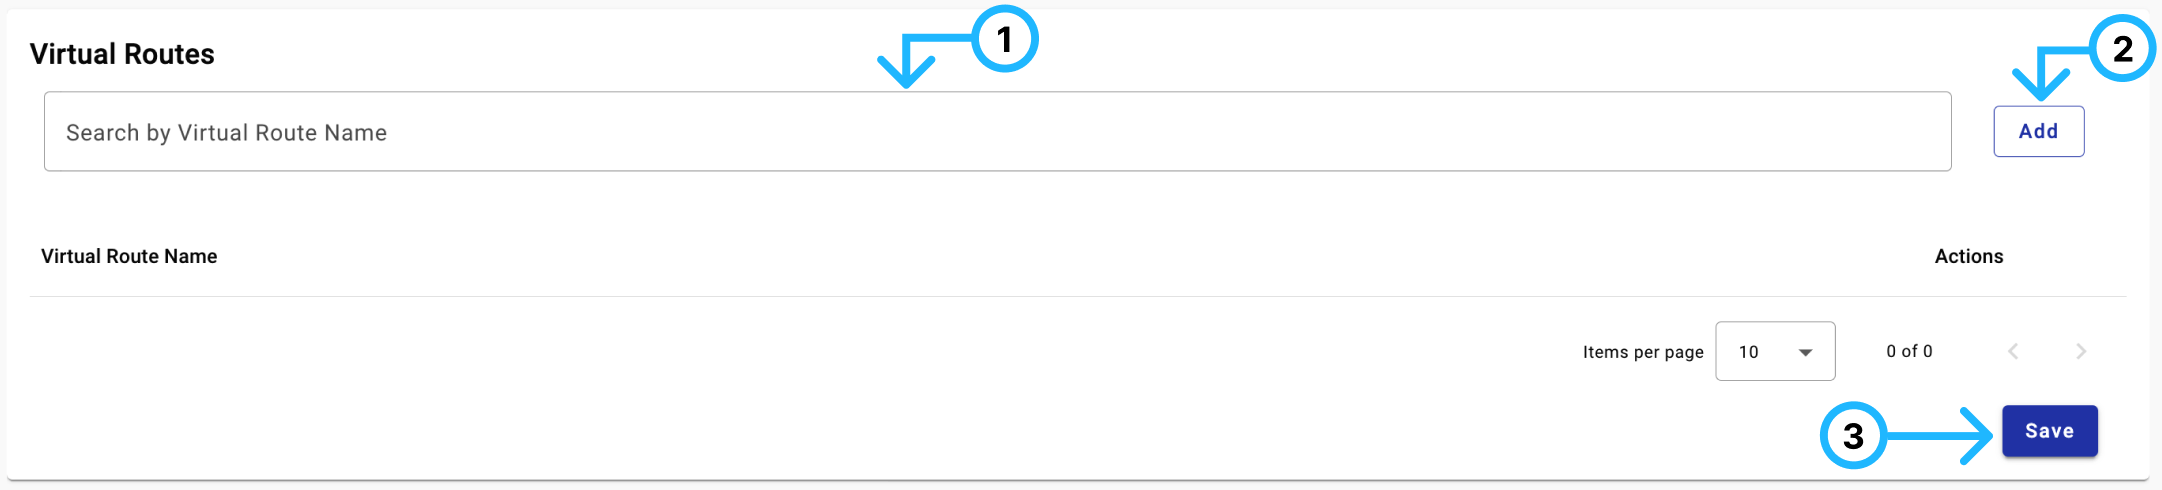
- Search for Route Name: Enter the name of the virtual route in the Search by Virtual Route Name dropdown menu or select the desired virtual route from the dropdown menu.
- Add Virtual Route: Select the Add button to include the virtual route in the list. The newly associated Virtual Route is displayed in the Virtual Routes table.
- Save Virtual Route: Select the Save button to save the virtual route.
After completing these steps, the route or virtual route is added to your Workspace and available for use.
Updated 20 days ago