Messaging Logs
View, filter, preview, and export Messaging logs across SMS, Email, RCS, and WhatsApp.

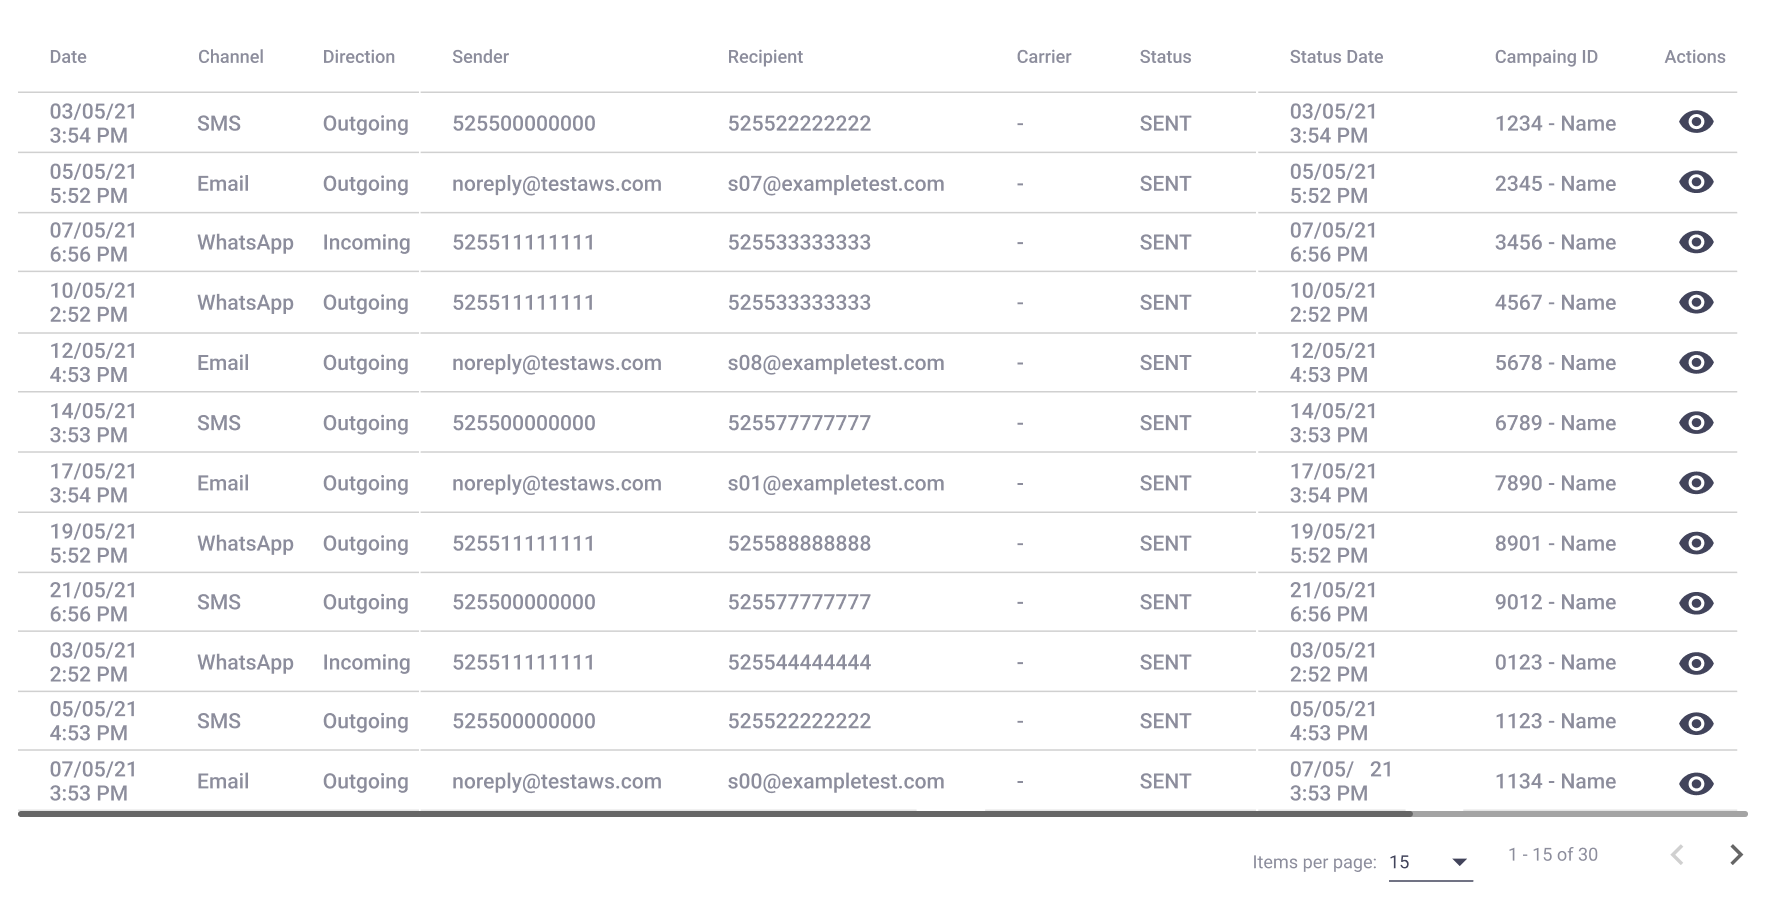
The Messaging tab includes a table at the bottom of the page. The table shows messages for the selected Date Range across these delivery channels:
- SMS
- RCS
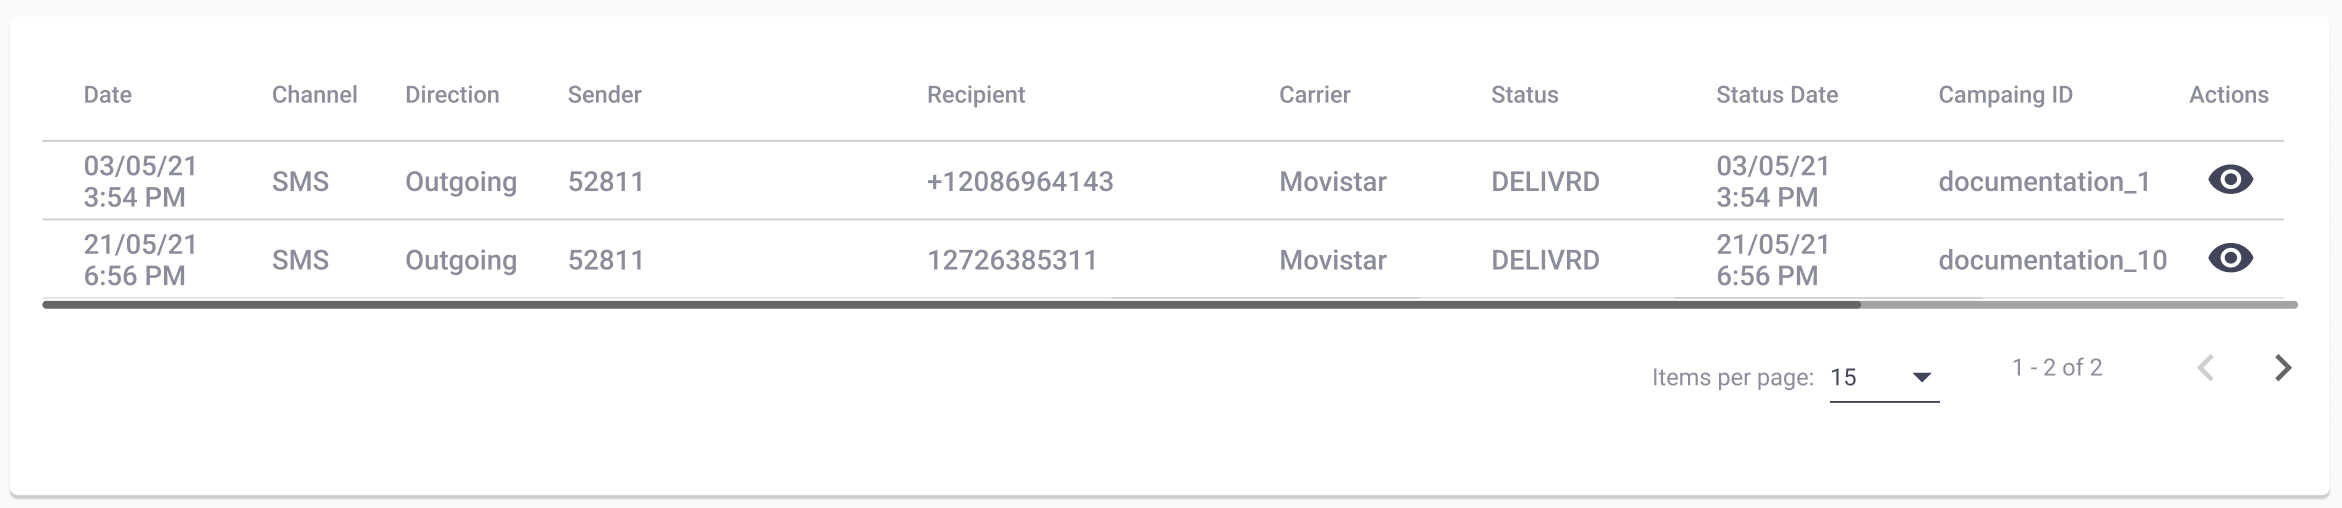
The table sorts message records from newest to oldest. Each record includes the following columns:
- Date: Shows when the message took place.
- Channel: Shows the delivery channel.
- Direction: Shows whether the message was outgoing or incoming.
- Sender: Identifies the platform entity and user in the exchange.
- Recipient: Identifies the entity that receives the message.
- Carrier: Shows the recipient's mobile operator for outgoing SMS messages, when available.
- Status: Shows the outcome of the exchange.
- Status Date: Shows when the status was recorded.
- Campaign ID: Identifies related broadcast and automation IDs.
- Action: Opens the details for a specific table entry.
For SMS and WhatsApp, Sender shows the sending or receiving number. For Email, it shows the email address involved. For RCS, it shows the platform RBM identity or the user's mobile number.
Carrier information is usually not displayed during Status for Outbound Messages. For API integrations, Campaign ID shows the alphanumeric identifier defined in the externalId field.
Preview WhatsApp messages
Use the Action column to preview WhatsApp message details.
For outbound WhatsApp messages (MT), you see the message as recipients see it. The preview supports these WhatsApp elements:
- Header types
- Body
- Footer
- Button types
For incoming WhatsApp messages (MO), you can preview supported multimedia content. Image previews appear directly in the message interface.
For other multimedia types, the preview shows an icon. Each icon represents the received multimedia type.
NOTEIncoming WhatsApp image previews are available for 3 days. After that period, the interface displays only the image file icon.
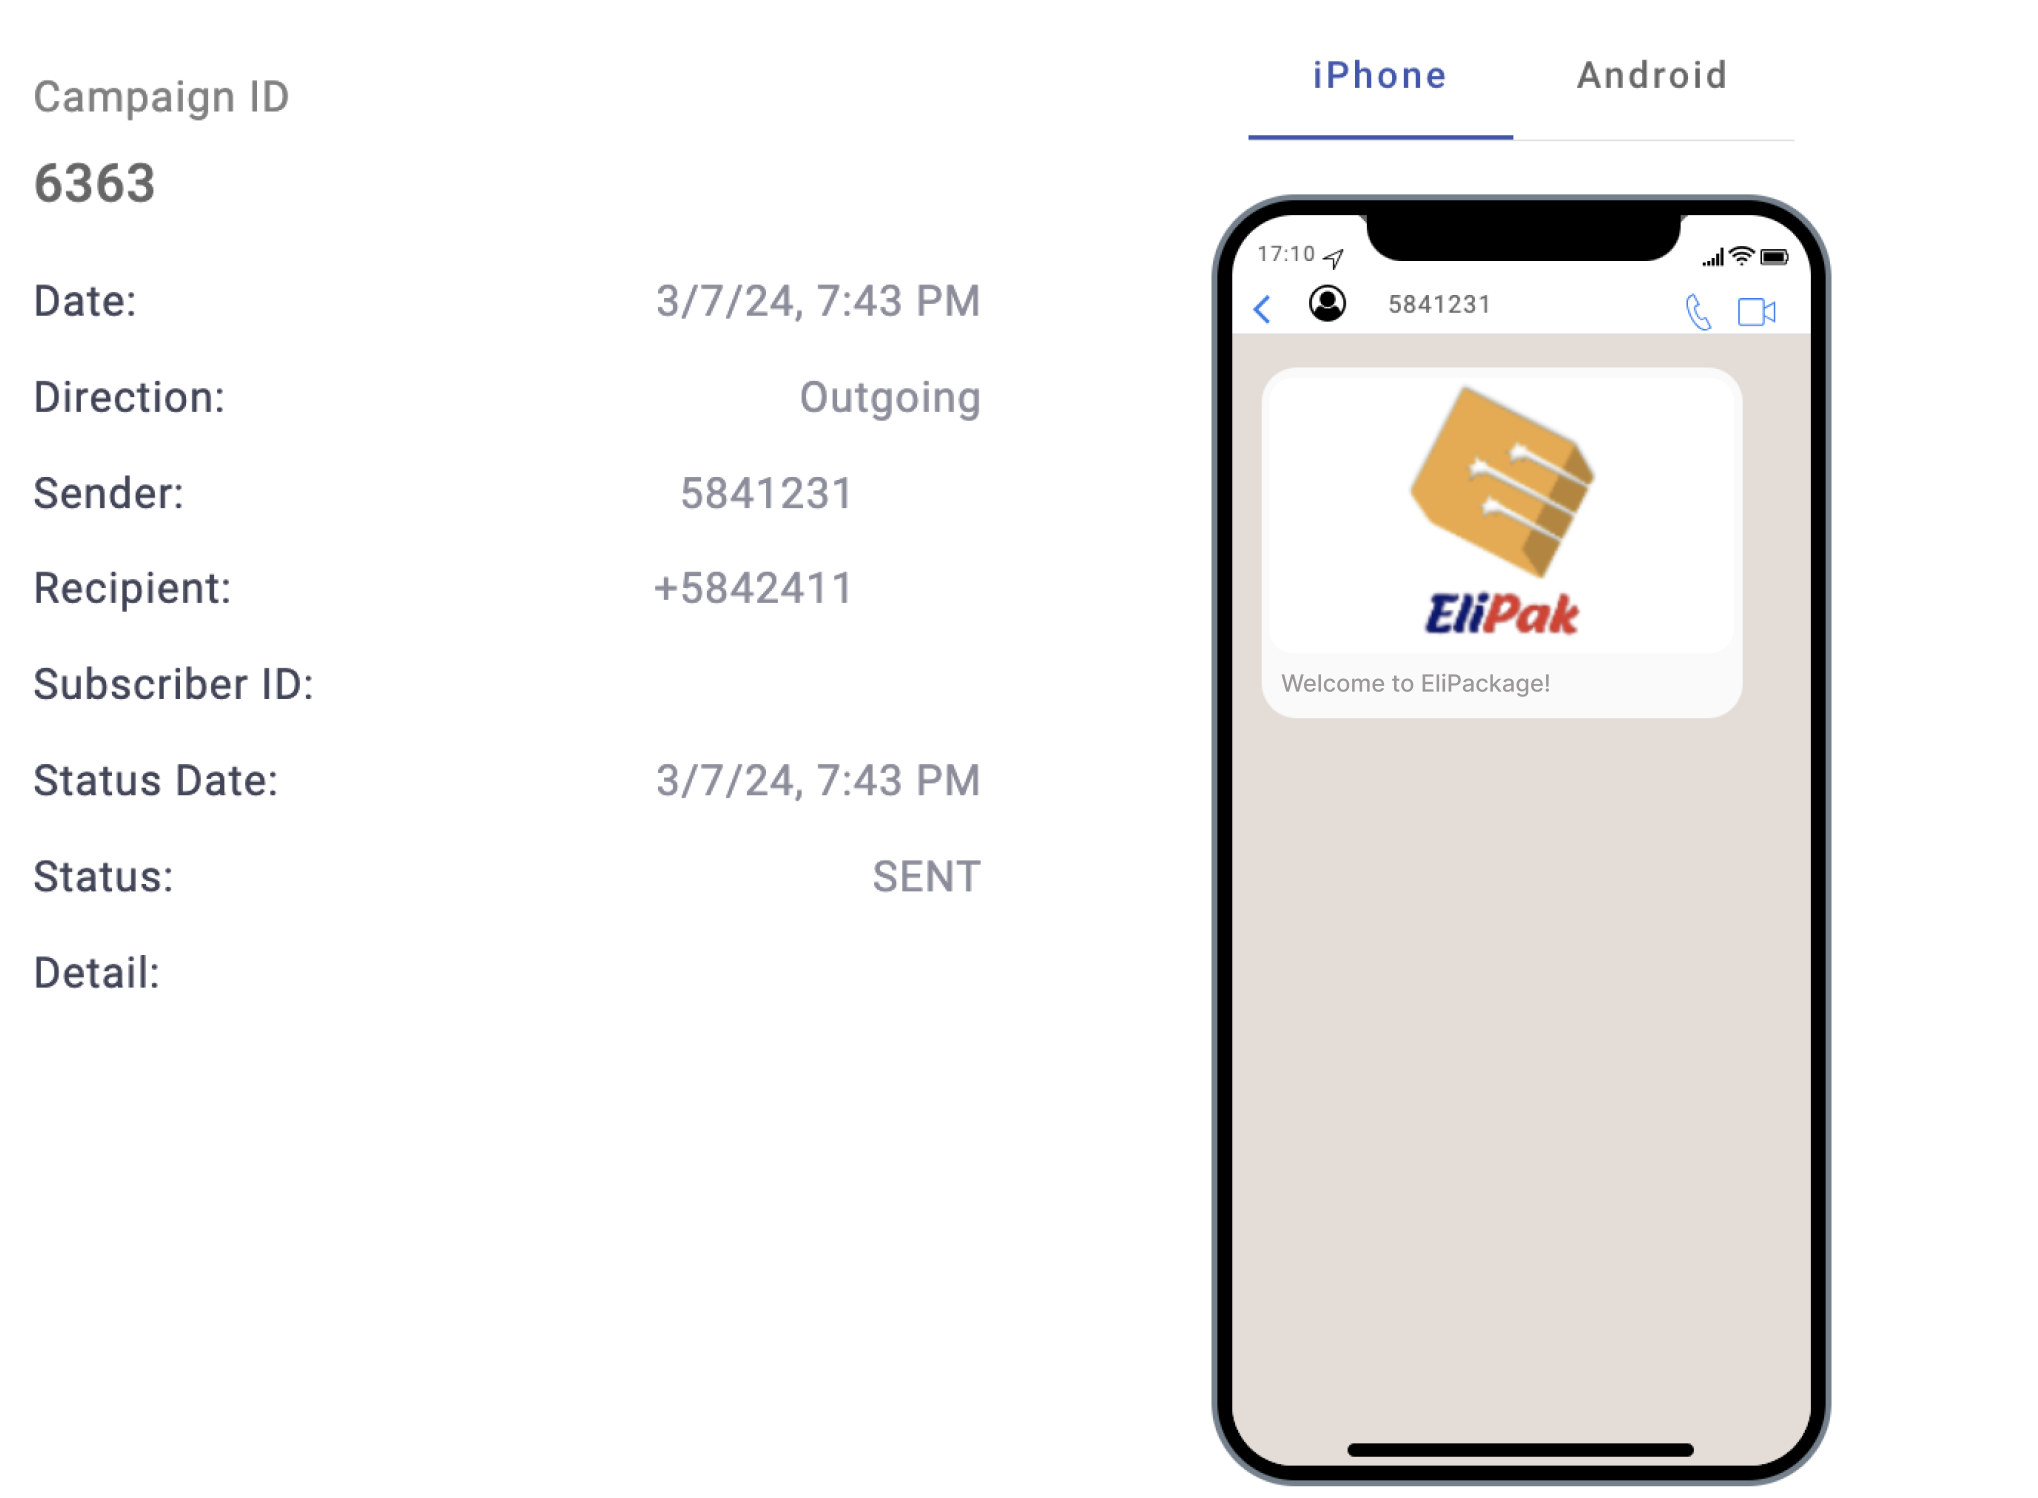
| Row Name | Description |
|---|---|
| Campaign ID | Unique identifier of the broadcast and automation. |
| Date | Date when the message was sent. |
| Direction | Direction of the message. "Outgoing" means Mobile Terminated (MT). "Incoming" means Mobile Originated (MO). |
| Sender | Sending identity for the delivery channel. |
| Recipient | Recipient's phone number or email address. For SMS, WhatsApp, or RCS, this is the phone number. For Email, this is the email address. |
| Subscriber ID | Unique identifier of the contact. |
| Status Date | Date of the last status update or change. |
| Status | Status of the message. Each delivery channel has its own statuses. See Message Status. |
| Detail | Reason why the WhatsApp or RCS message failed. If the message did not fail, this field is blank. |
Select View all Logs above the table to open the Messaging log table. From there, you can filter logs and change visible columns.
View all Logs
The View all Logs section replicates the Message log table. It also adds filter and display options.
Use these controls at the top of the section:
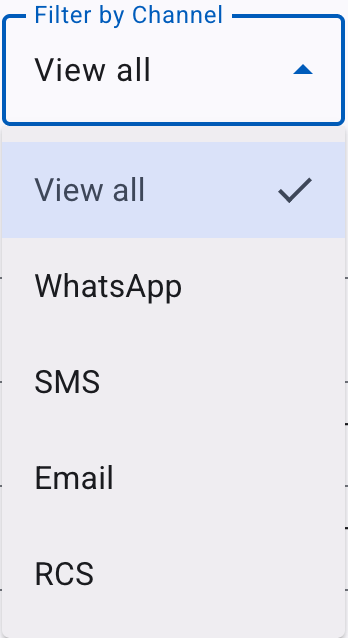
- Filter by Channel
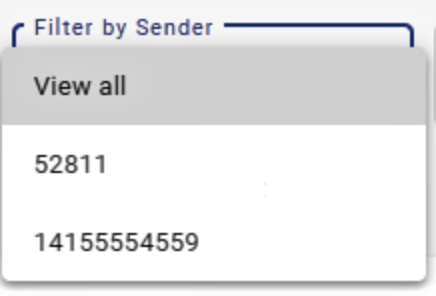
- Filter by Sender
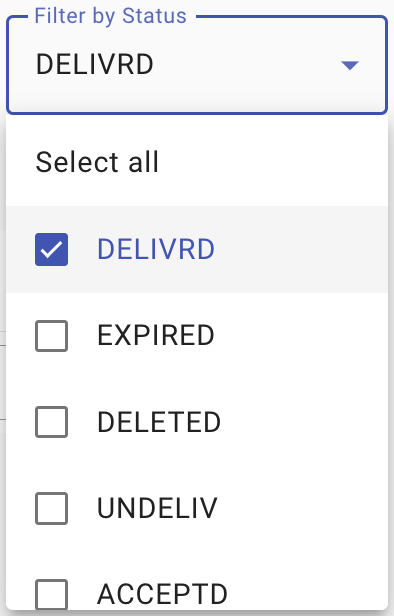
- Filter by Status
- Fields Visibility

The following filters are available:
- Date Range Filter: Filters logs by the selected date range.
- Search by: Searches by recipient or Campaign ID.
- Search textbox: Accepts the recipient, broadcast ID, or automation ID.
- Filter by Channel: Filters by SMS, RCS, Email, or WhatsApp.
- Filter by Sender: Filters by the sender selected for the channel.
- Filter by Status: Filters by one or more statuses for the selected sender.
- Fields Visibility: Shows or hides columns in the table.
The Date Range Filter displays only data generated within the selected range. If you select This Week, the filter may consider Sunday the first day. This behavior depends on the browser timezone.
The Message Status section provides status details for each delivery channel.
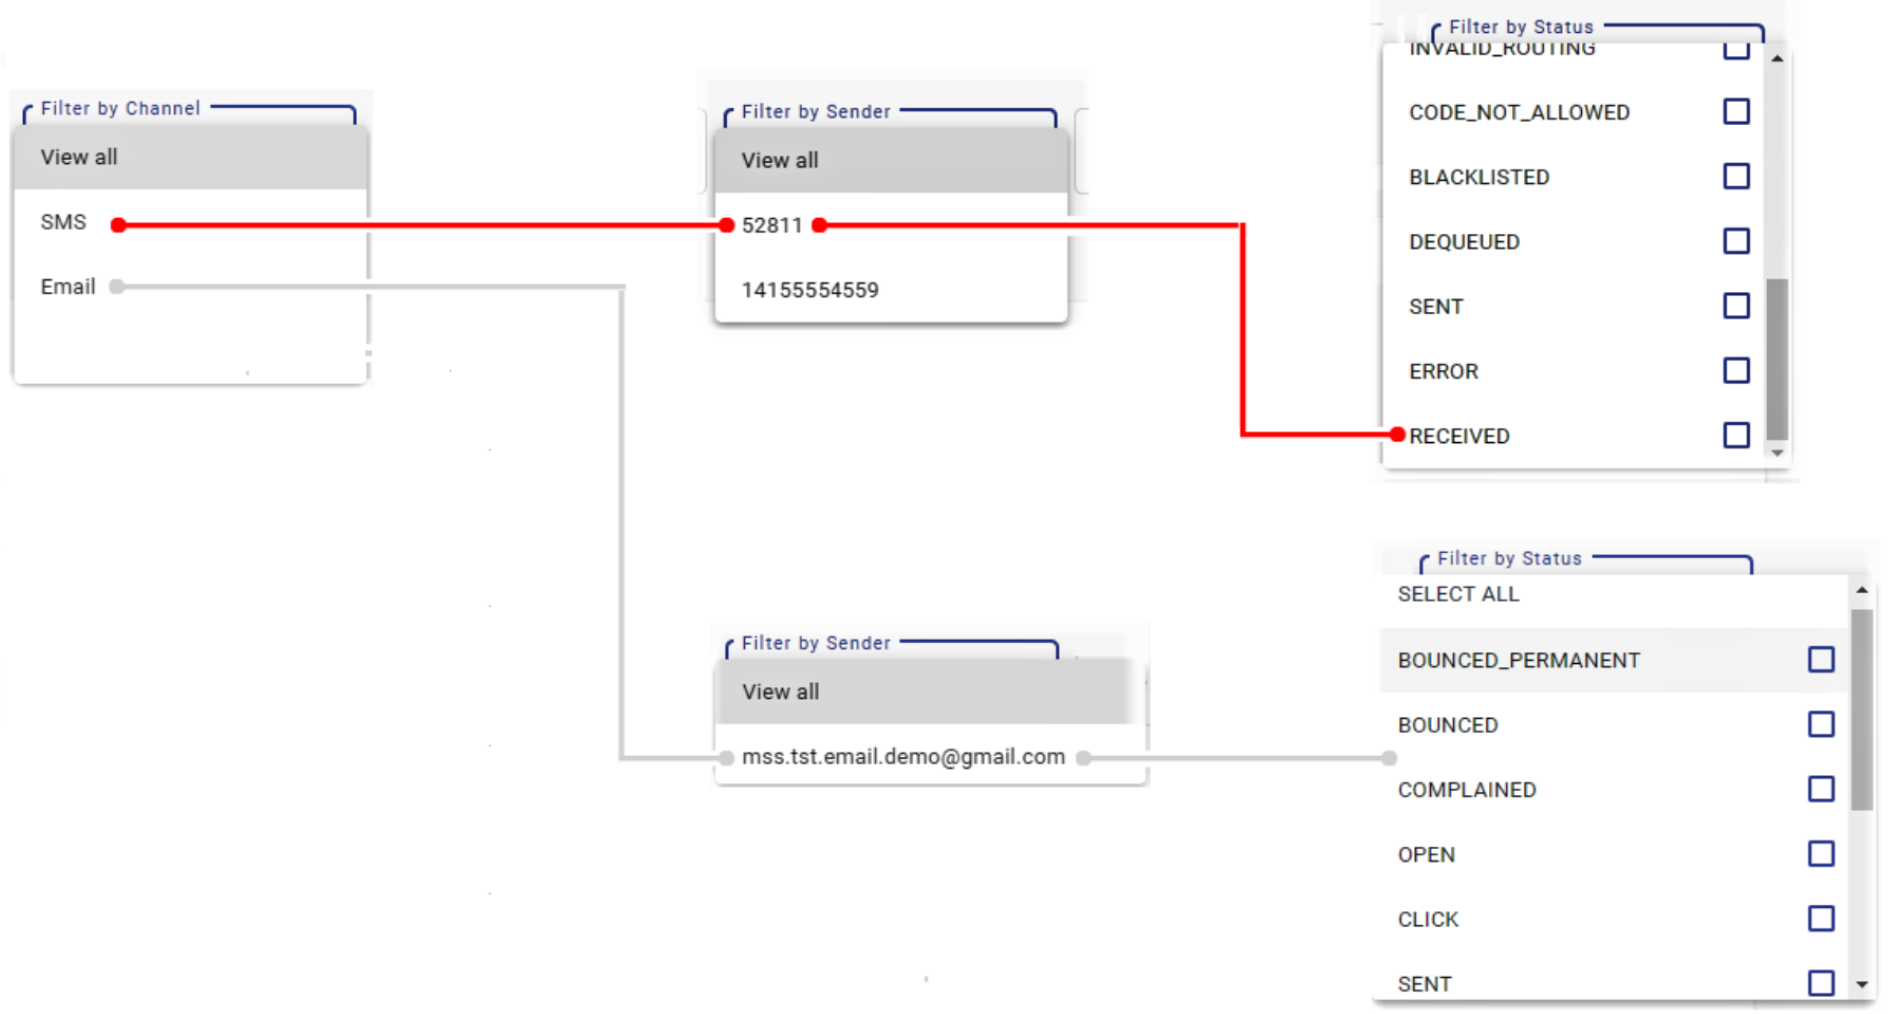
Example: Filter SMS messages by sender and status
This example views SMS messages sent from sender 52811 with a status of RECEIVED.
-
Under Filter by Channel, select SMS.
This enables Filter by Sender and Filter by Status.
-
From Filter by Sender, select 52811.
-
From Filter by Status, select RECEIVED.
The resulting table includes only SMS messages from 52811 with a status of RECEIVED.
Export a report
Export a report after you filter the table and choose the visible fields.
- Select Export Report.
- Confirm the export in the dialog box.

The platform generates the report as a .csv file. After you select OK, a confirmation message appears at the bottom of the screen.
The message confirms that the report is being processed. The report is sent to your email within seconds.
The confirmation message disappears after a few seconds. Processing time depends on the total number of records.

NOTEIf you export an Email report, the CSV file does not include the Content record.
Multiple filter combinations are available. The example above follows the path highlighted in red below.
View all Logs controls
The following definitions describe each element in the View all Logs section:
- Back: Returns you to the main Messaging tab screen.
- Show: Sets the date or date range of displayed messages.
- Export report: Sends a
.csvreport to the email address for the current session. - Fields Visibility: Controls which columns appear in the message log table.
- Filter by Channel: Filters the table by delivery channel. Default value: all channels.
- Filter by Sender: Filters the table by sender for the selected channel. Default value: view all.
- Filter by Status: Filters the table by status for the selected channel and sender. Default value: view all.
When Filter by Channel is set to SMS, Filter by Sender shows the configured SMS sending numbers or routes. When Filter by Channel is set to Email, it shows the configured email addresses.
Each delivery channel has different statuses for transient and final outcomes. The Message Statuses section provides details.
INCOMING & OUTGOING FILTERTo view incoming messages, select RECEIVED from Filter by Status.
To view outgoing messages, choose SELECT ALL from Filter by Status. Then clear the RECEIVED option.
Updated 9 days ago