Enabling Push Notifications
The Push Sender is related to a platform integrated Application that delivers notifications via the internet to that application. Before sending Push Notifications, you must meet the following requirements:
- Have a Mobile Application
- Registered a Google Firebase and/or Apple Developer Credentials
- Integrate our SDK into your Application’s code
Requirements for Recipients to receive Push notifications:
- Internet connection
- Installed Application in device
- Device registered with SDK
Setup
To begin configuring a Mobile Application for Push Notifications:
• Click Add Sender, located in the upper right corner of the Senders Log.
In the New Sender screen,
• Select Push in the Sender Type dropdown menu.
This will display the Push Settings and App Configuration sections.
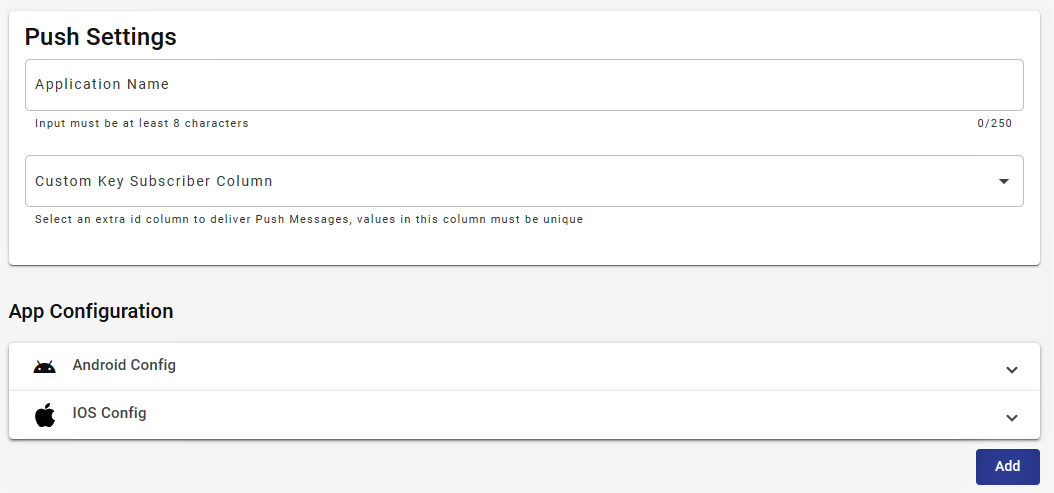
• In Push Settings enter the Application name as it will be displayed within the platform
• Select from the dropdown menu the Custom Key Subscriber Column
Either Android or iOS Mobile Applications can be integrated to deliver Push Notifications using the Platform. In the App Configuration section, select the operating system you will be setting up.
Android Configuration
To configure an Android App you must first generate a Firebase Service Account Private Key file.
Obtaining the Firebase Service Account File
The following steps allow you to obtain the Firebase service account file. Follow these steps:
- Enter the App’s Firebase account.
- Select Project Overview
- Select Project Settings
- Select the Service accounts tab
- Click Generate new private key
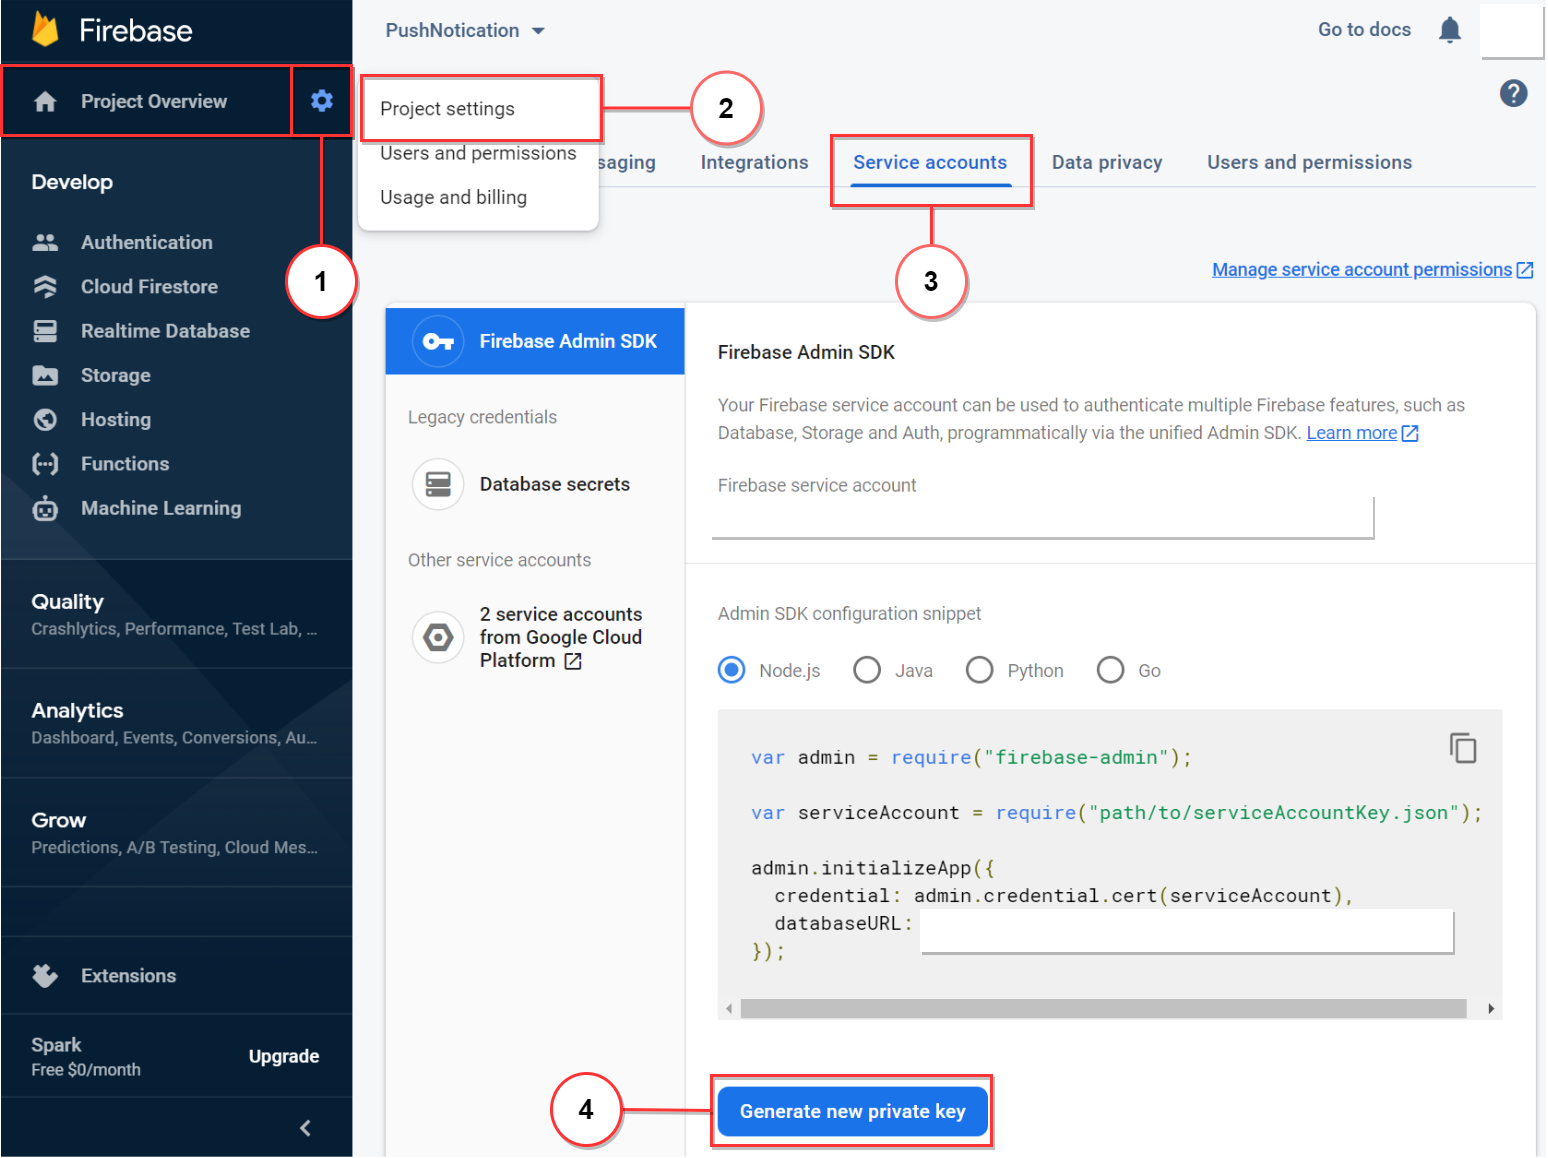
A JSON file with the Private Key will be downloaded. Save the file in a secure location, as it is required to set up the Android configuration.
Configuring the App
Under the App Configuration section, select the Android Config drop-down menu and upload the App’s Firebase Service Account private key file that was generated in the previous step, into the upload box.

Once the upload step is completed, the following will be displayed in the Push section,
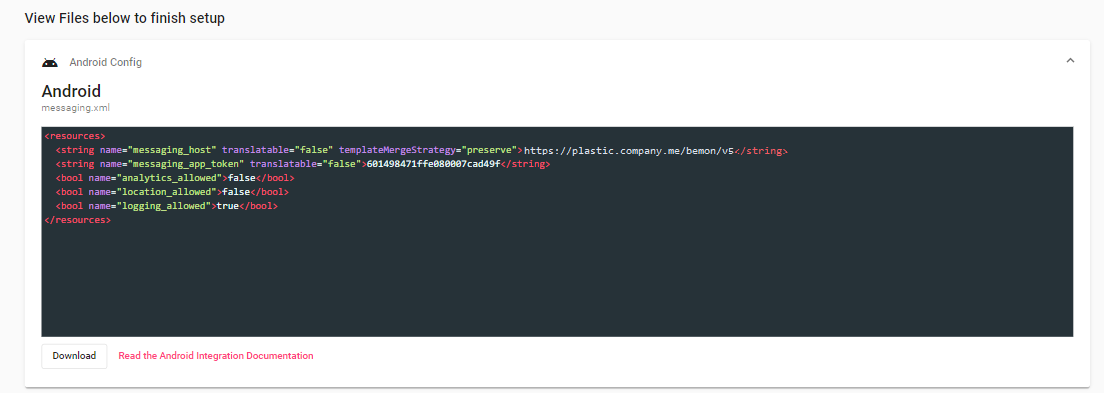
Click Download and add the downloaded file to your Application’s project.
iOS App Configuration
Under the App Configuration section, select the IOS Config drop-down menu. You will see three mandatory fields:
• Bundle ID
• iOS Team ID
• iOS Key ID
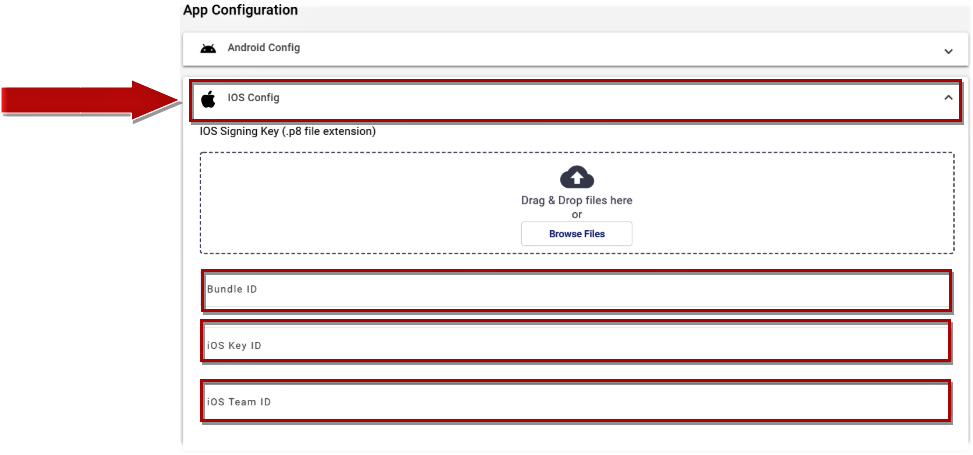
Bundle ID (App ID): Represents the App’s unique identifier under the iOS ecosystem.
To obtain the App’s Bundle ID, open your project with XCode, and select the top project item in the project navigator at the left. Then Select TARGETS -> General.
The Bundle Identifier is found under Identity.
iOS Team ID: From the Apple’s Developer Central Center, under the Account section, click Membership, and under Membership Information, copy the Team ID field.
iOS Key ID: Establish a secure communication with an APN using stateless authentication tokens.
You need an APNs authentication token signing key to generate the tokens to be used by the server to deliver Push Notifications.
Request this key from your developer account on developer.apple.com.
From the Apple’s Developer Center account, under the Certificates, Identifiers & Profiles, Select the Keys section.
Select the APNs service and enter the key’s name, and click Continue.
When you request a key, Apple gives you:
• A 10-character string with a Key ID. You must include this string in your JSON tokens.
• An authentication token signing key, specific as a text file (with a .p8 file extension) that you will load in the next step.
Here, you will find your Key ID.
iOS Signing Key: By establishing an APN authentication, you will obtain an authentication token signing key. This will be in a text file (with a .p8 file extension).
Upload the file into the upload box by selecting Browse Files.
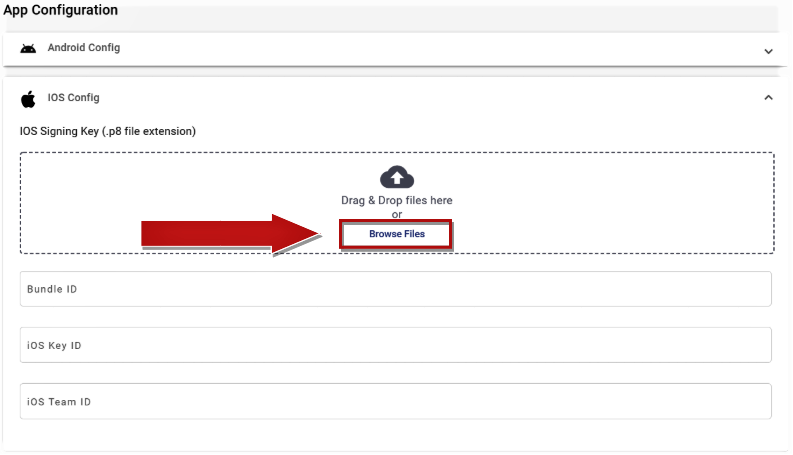
Once the required fields (Bundle ID, iOS Key ID, iOS Team ID) have been entered, click on Save.
The following will be displayed in the Push section:
Click Download and add the downloaded file to your application’s project.
Updated 14 days ago
