Push Notification
Creating a Push Notification Template allows you to preconfigure short, actionable messages that can be sent directly to users’ devices. These templates can be reused in future campaigns, saving time and ensuring consistency.
To begin creating an Push template:
-
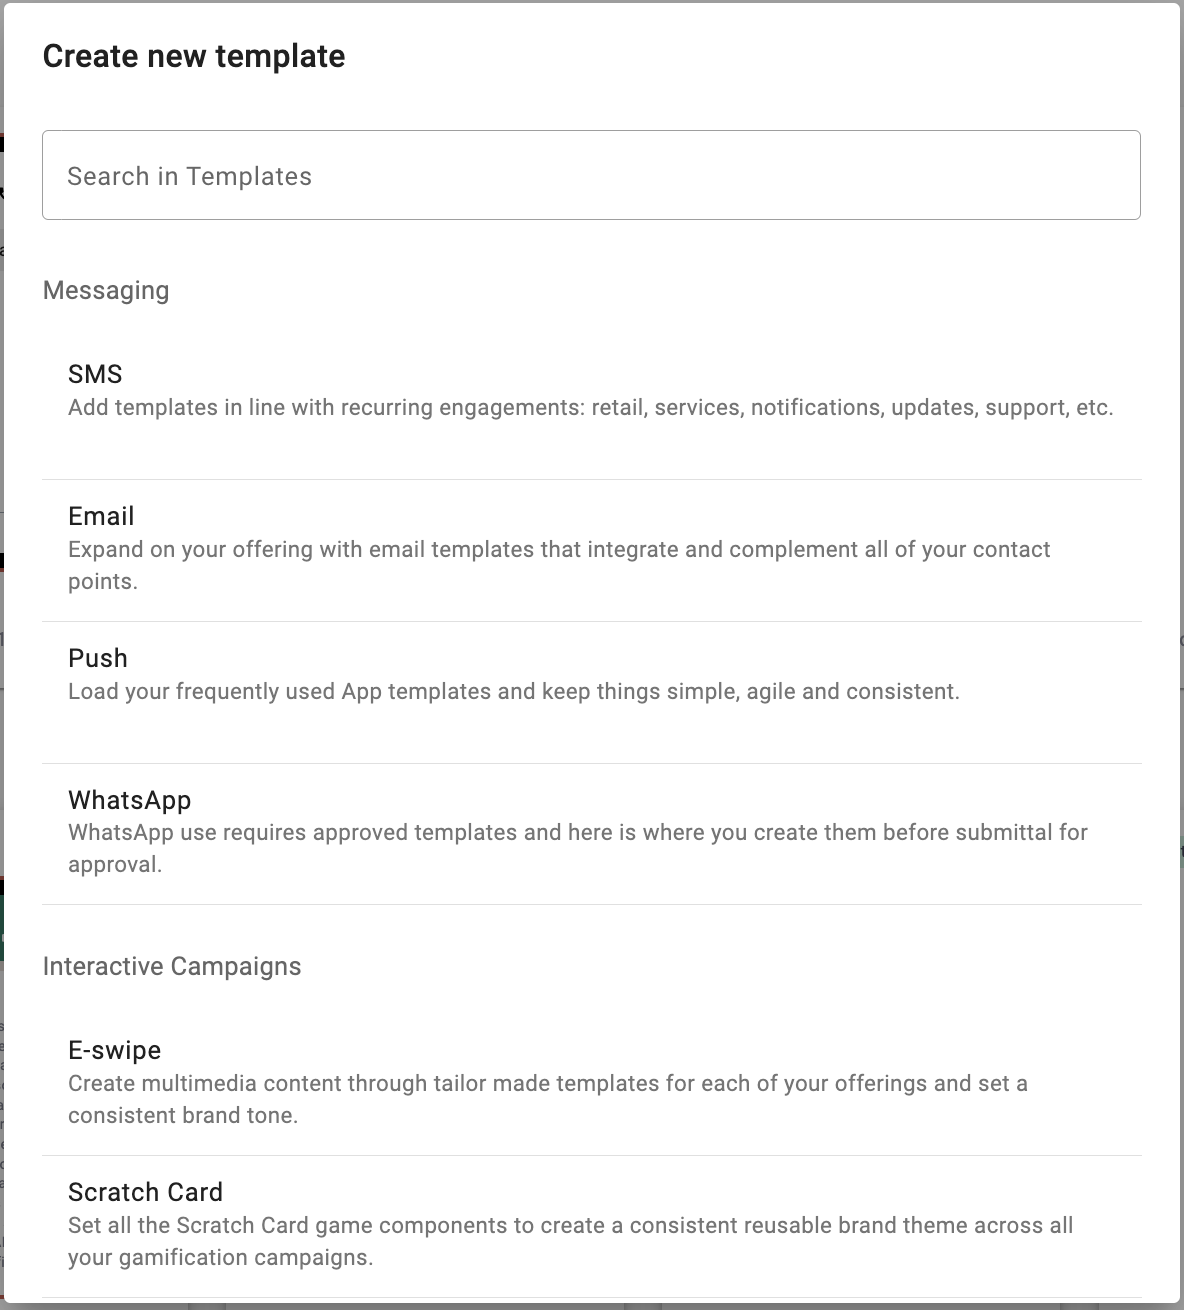
After selecting the Templates icon, and clicking on the + New template, the following pop-up window will be displayed. Click the Push option.

-
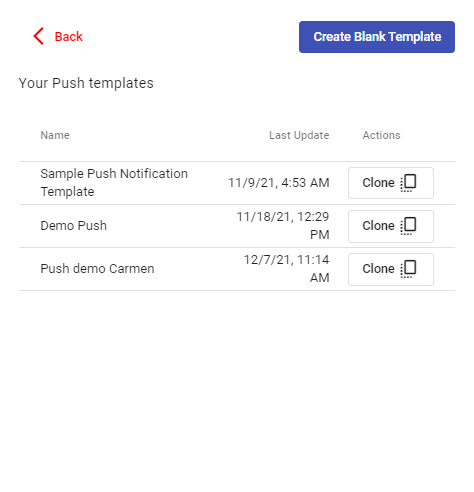
After selecting Push, a second window will appear. Here, you can either:
-
Click Create Blank Template to build a new template from scratch, or
-
Choose from existing Push templates (if available) to clone and reuse an existing format.

-
-
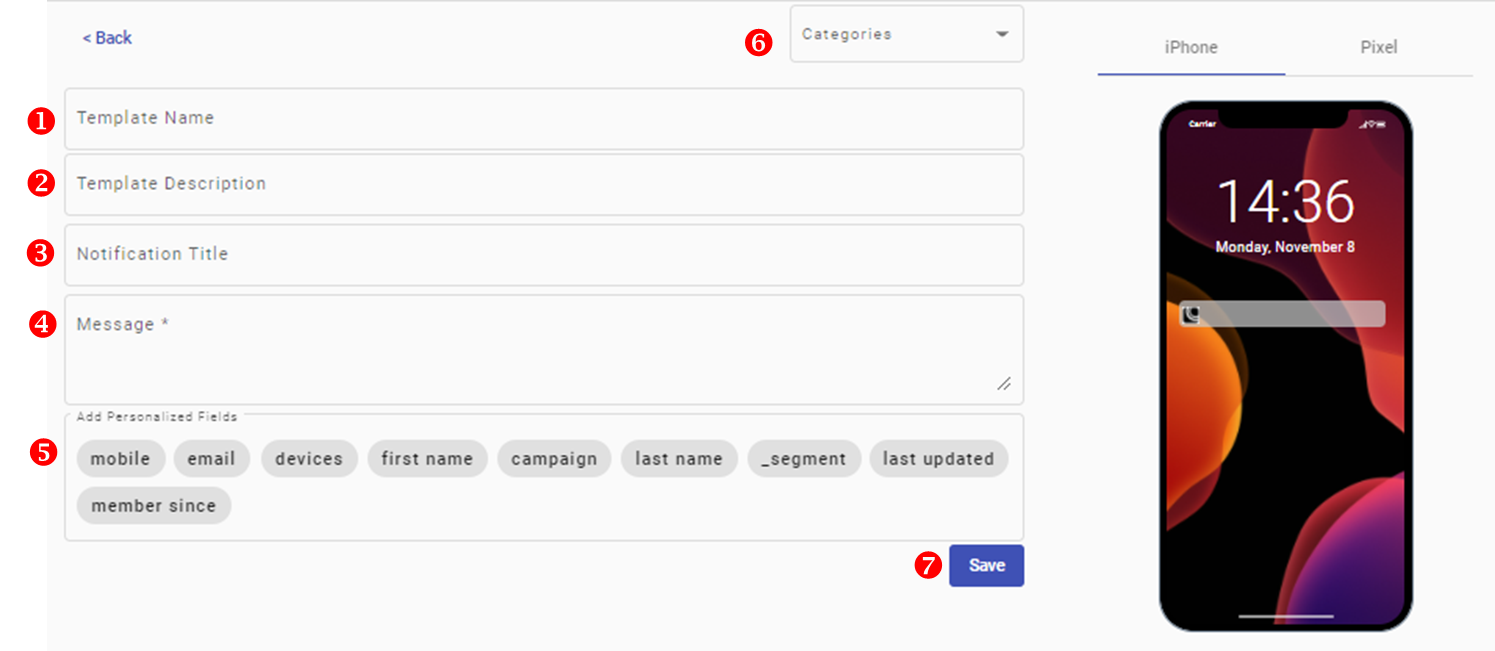
To create a new Push Notification Template, click on the Create blank Template button. Once clicked, the Push Template creator interface will appear, where you'll be asked to fill out several fields:

- Template Name: Enter a unique name to identify the template.
- Description: Provide a short description of the template’s purpose.
- Notification Title: This is the headline of your Push Notification. It appears prominently on the user's device.
- Message: Enter the body text of the notification. Keep it concise and engaging to encourage interaction.
- Personalized Fields (Optional): Insert dynamic fields (like {{first_name}}, {{phone}}, etc.). These fields are replaced with real subscriber data when the message is sent.
- Categories (Optional): Organize your template by assigning it to a category using the Categories dropdown. This makes templates easier to find later.
-
Once all the fields have been completed:
- Click the Save button.
- A confirmation message will appear, and you’ll be redirected to the main Templates screen where the new template will now be listed.
- All required fields must be filled out in order to save. If anything is missing, a warning message will appear at the bottom of the screen indicating which fields need attention.\
Updated about 1 month ago
