Chatbot Service
Everyone agrees that chatbots are a great tool to reduce customer service costs, improve response times with 24/7 service, increase engagement, all of this and more while providing cost savings, insights into consumer behavior and data, and lead generation, not only within your immediate surroundings but breaching borders into global markets. Chatbots allow businesses to provide exceptional customer service in various languages year-round, giving brands the capability to expand their operations into unexplored areas.
The Chatbot Service is a tool to get you started in all these areas. Its current implementation is a menu-based decision tree hierarchical scheme presented to the user to make selections to dig deeper towards the answer that is being sought.
In this new release of the Chatbot Service, we have introduced a Webhook functionality so that you can “report” to your application events that take place throughout the flow and recognize key aspects of the users’ interaction with the service and your offering.
After selecting New Campaign, entering the Campaign Name, and selecting Chatbot from the campaign options, you are brought to the Chatbot campaign creation section, which has the following steps,

- Delivery
- Interactions, and
- Summary
Delivery
The Delivery step is where you define the interaction channel for the chatbot and the keywords that customers use to invoke it.
Delivery Channel
Currently, there are two ways to provide the Chatbot Service, selected through radio buttons,
• SMS
• WhatsApp

Given the nature of the service, the "contact number" associated with it, SMS or WhatsApp, needs to be configured to satisfy the service’s uptime requirements.
Define Recipients
To invoke the service, SMS has the two options shown below.

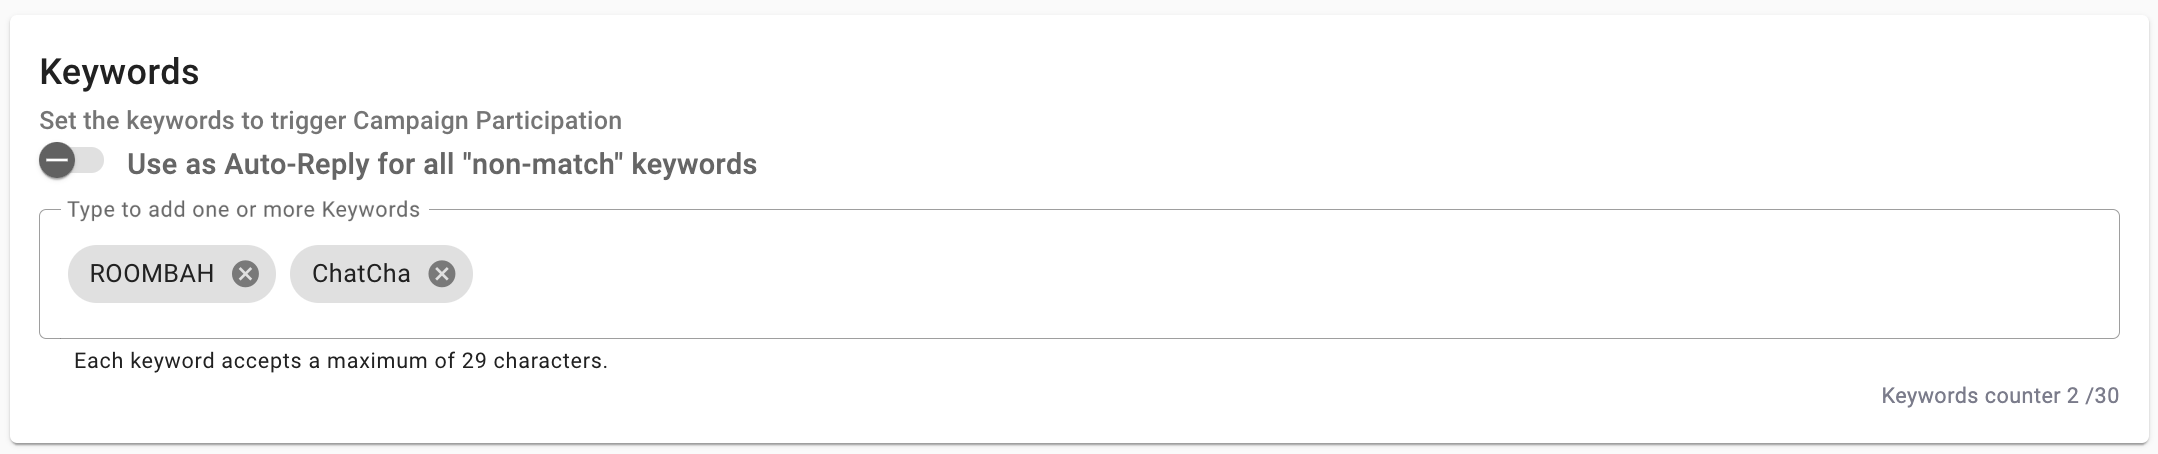
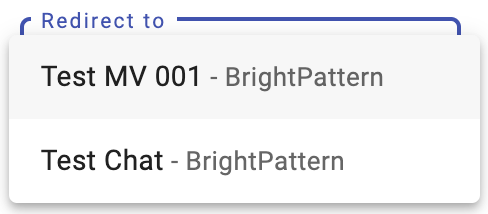
For SMS and WhatsApp as delivery channels the Keyword option is available. In either case, the platform will provide a Keyword entry section, such as the one shown in the example of the following image.
NOTE
Each keyword accepts a maximum of 29 characters.
Up to 30 keywords can be defined to invoke the service.
In case you don't want to enter a keyword, you have the option of using the 'Auto-Reply' feature for all "non-match" keywords. For example, if the subscriber enter any keyword , the chatbot will send the Welcome Message (first message user will receive) configured in the Interactions section. That is, this feature can be defined as a pre-start of the campaign in case the subscriber enters any keyword.
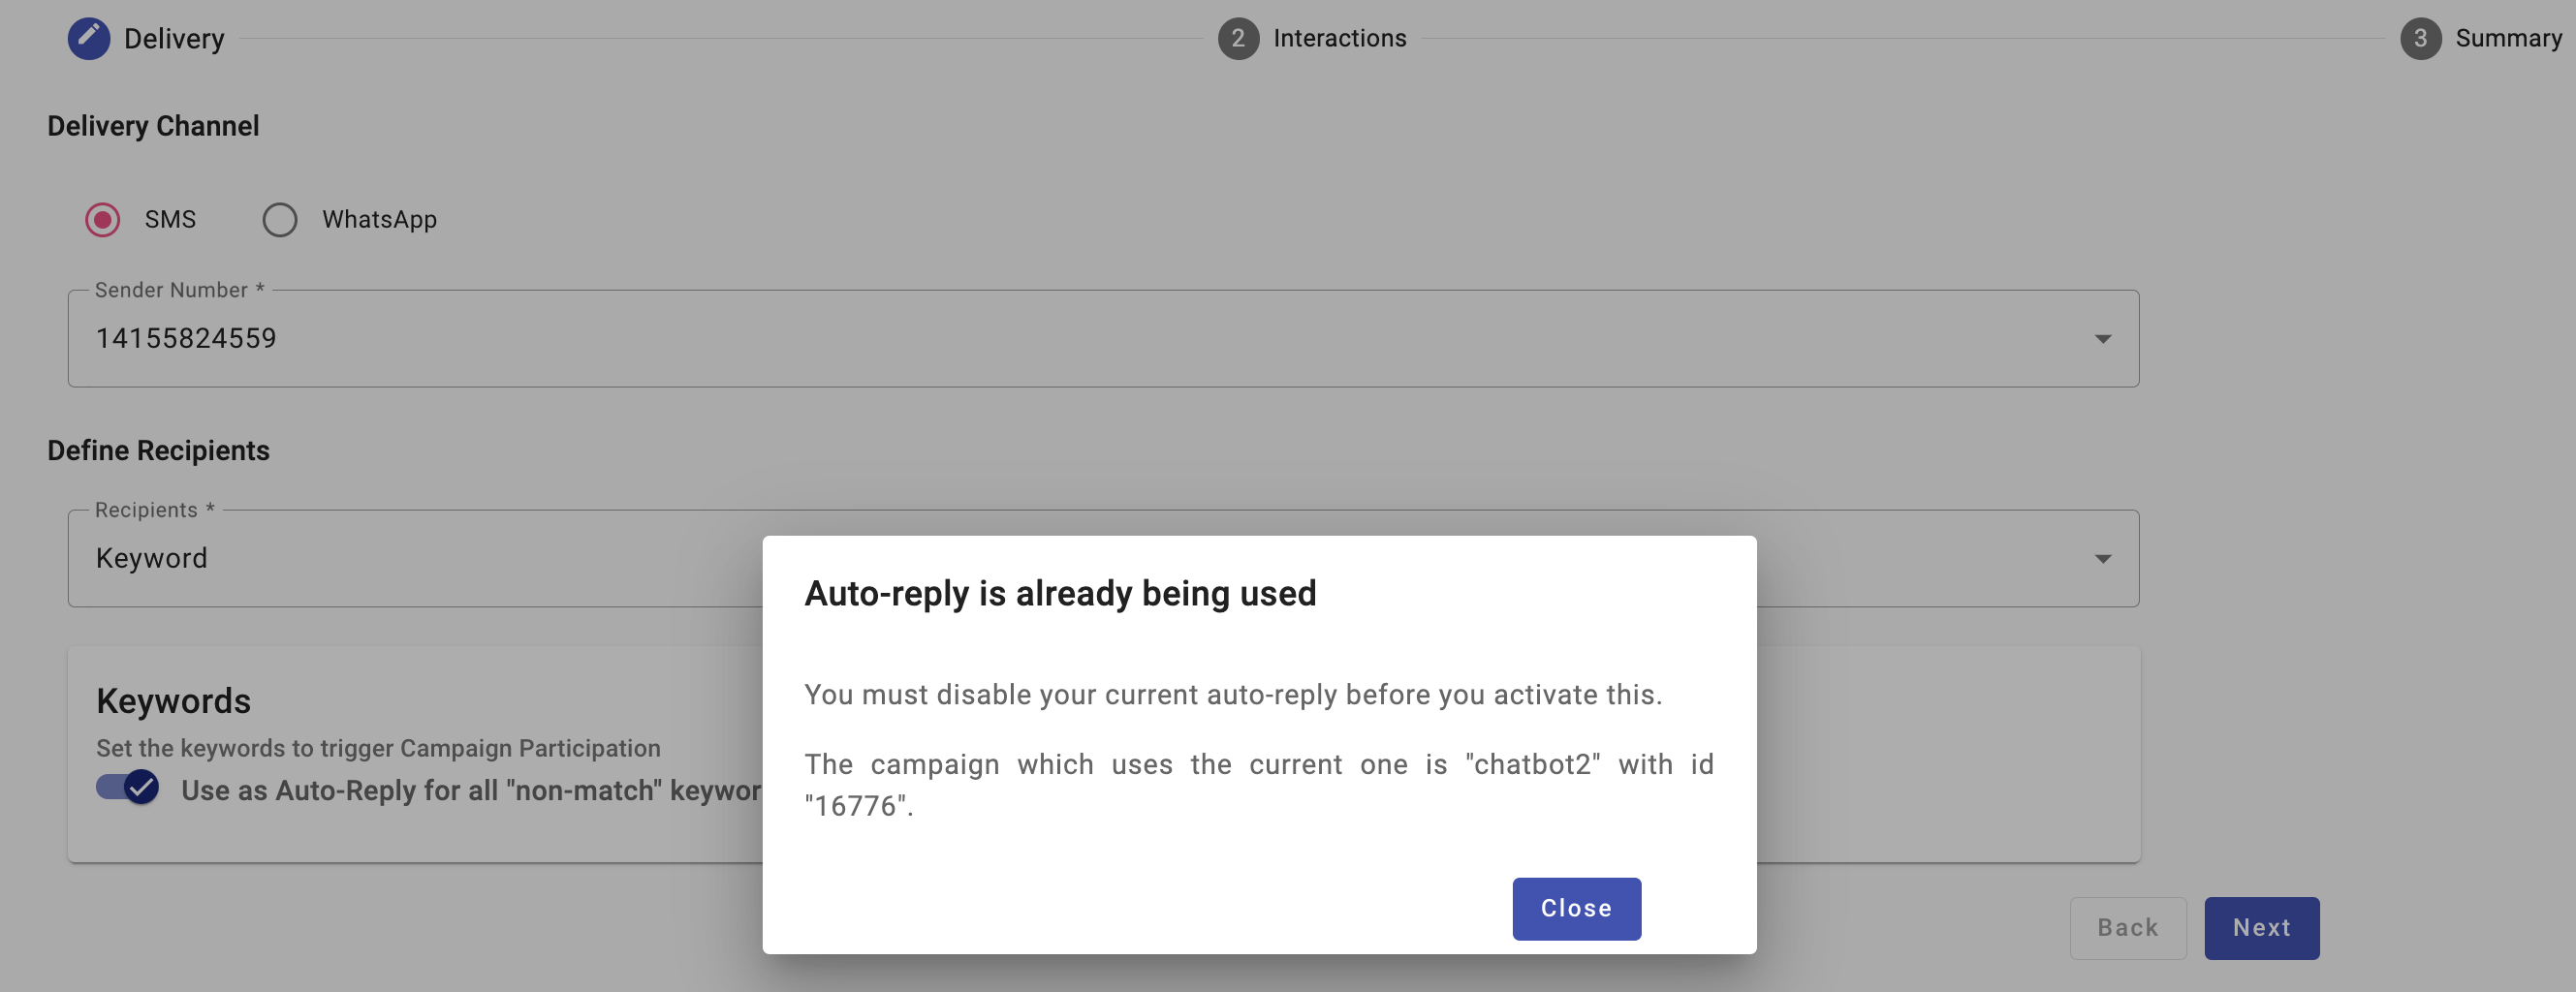
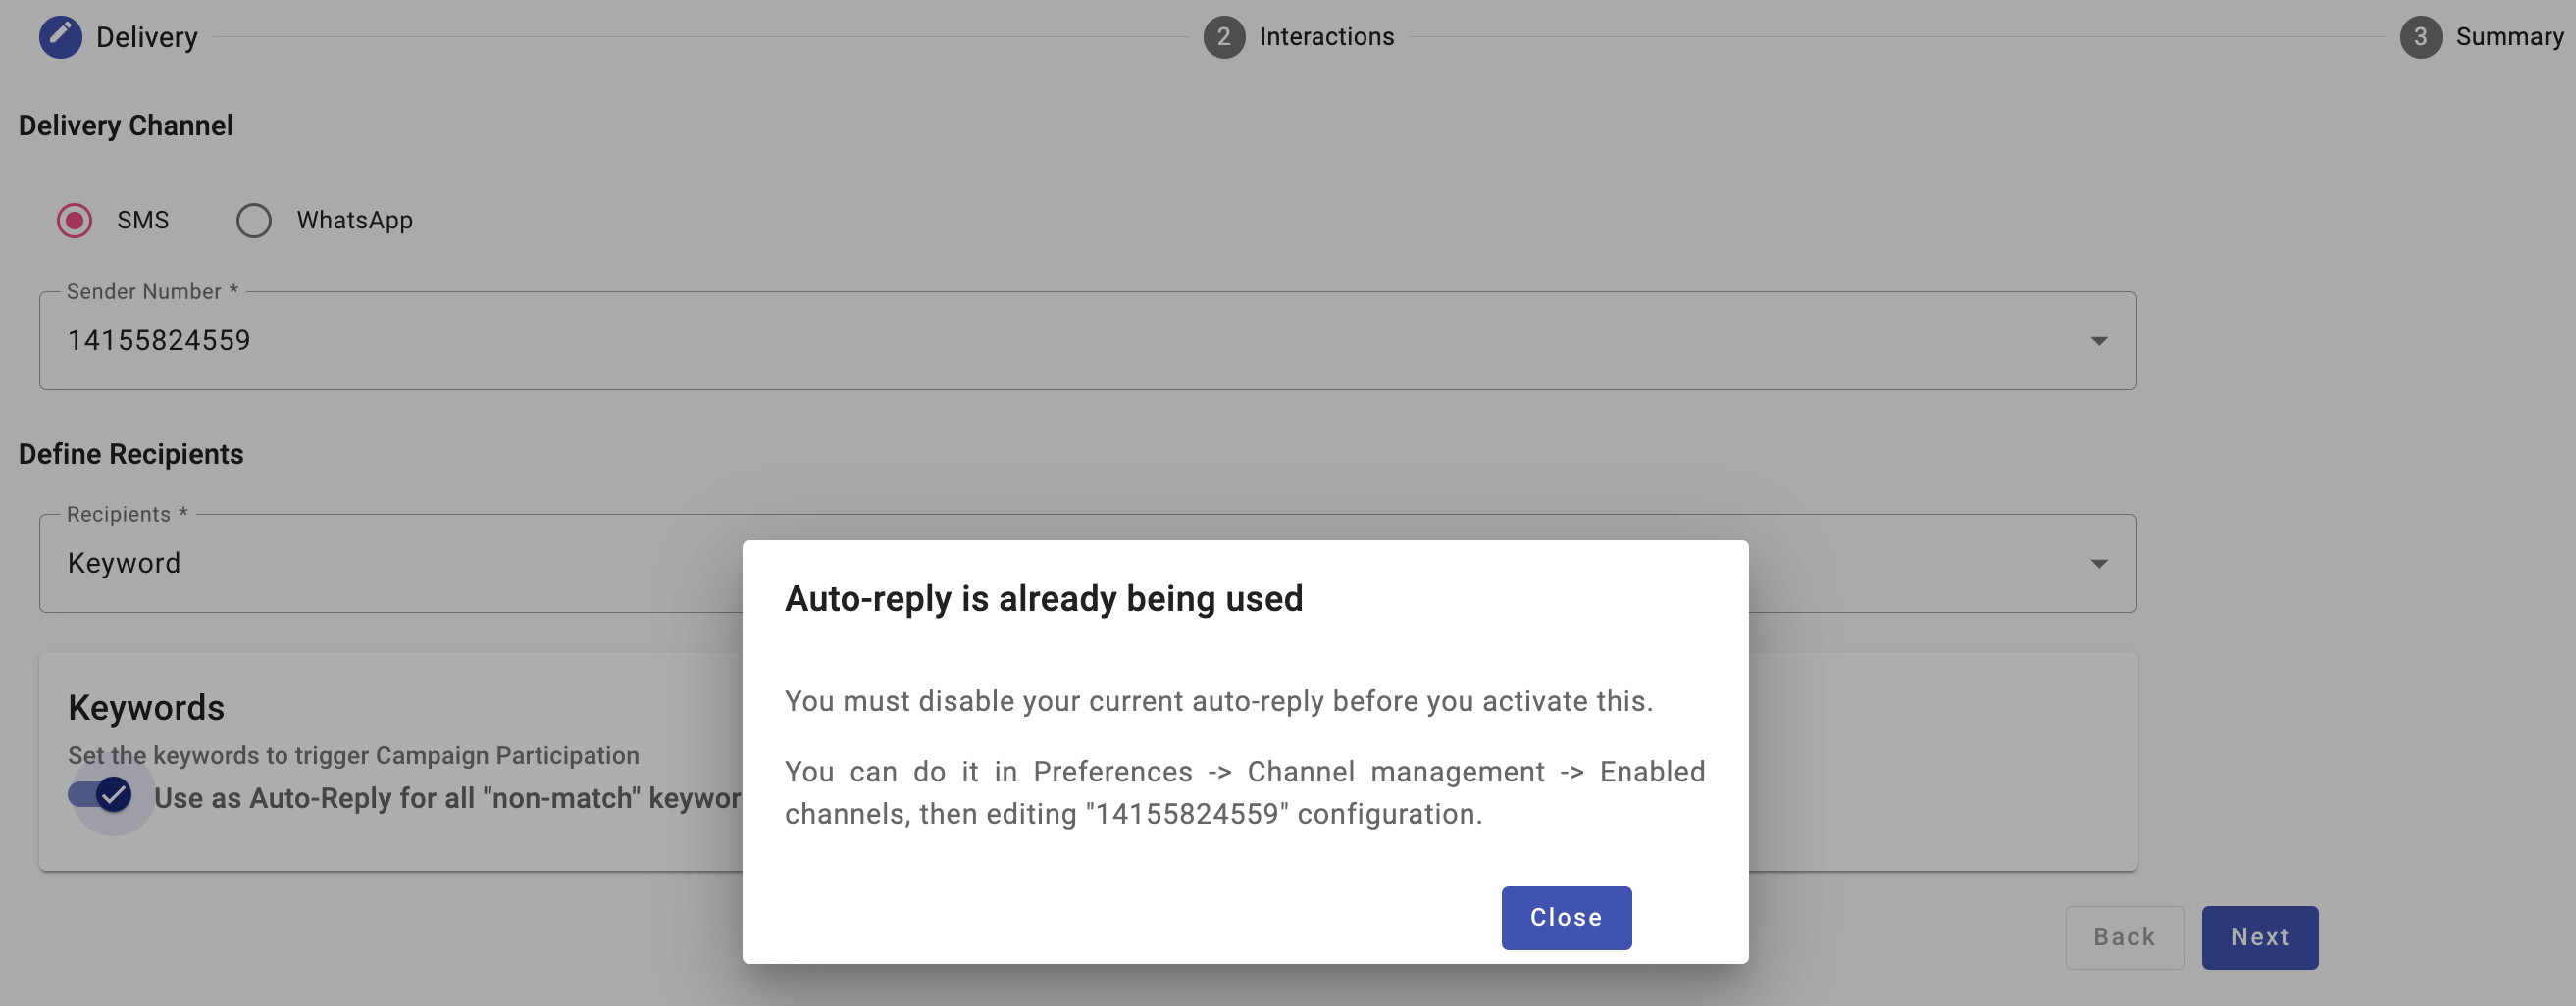
To use this feature, slide the toggle to the right but first you need to consider the following:
-
if another campaign has activated the 'Auto-Reply' function with the same sender number, you won't be able to use this feature. To use it, you need to disable the 'Auto-Reply' from the campaign that is already being used.
To find out what type of campaign is already using the 'Auto-Reply' function, slide the toggle to the right and a pop-up message will be displayed notifying you the campaign name and its id.
-
If a sender number is already activated the 'Auto-Reply Message' function, you won't able to use the 'Auto-Reply' function. To use it, you need to disable the 'Auto-Reply Message' by editing the sender number from the Sender Number Configuration (Channel Management tab) located in the Preferences section.
To find out what sender number is already using the 'Auto-Reply Message' function, slide the toggle to the right and a pop-up message will be displayed notifying you the sender number.
Therefore, the setup consists of,
- Select the service channel through the radio buttons
- Select the number for SMS. For the case of WhatsApp, the WhatsApp account will be the de facto option.
- Select the API Endpoint (available for SMS), Keyword(s) accordingly (available for SMS and WhatsApp) or 'Auto-Reply' function.
- Enter the Keyword(s) if you wanted to set the Keywords to trigger campaign participation.
- Select Next.
The API Endpoint option forgoes the need to define the Keyword(s) in this step but keywords represent the method in all instances to invoke the chatbot.
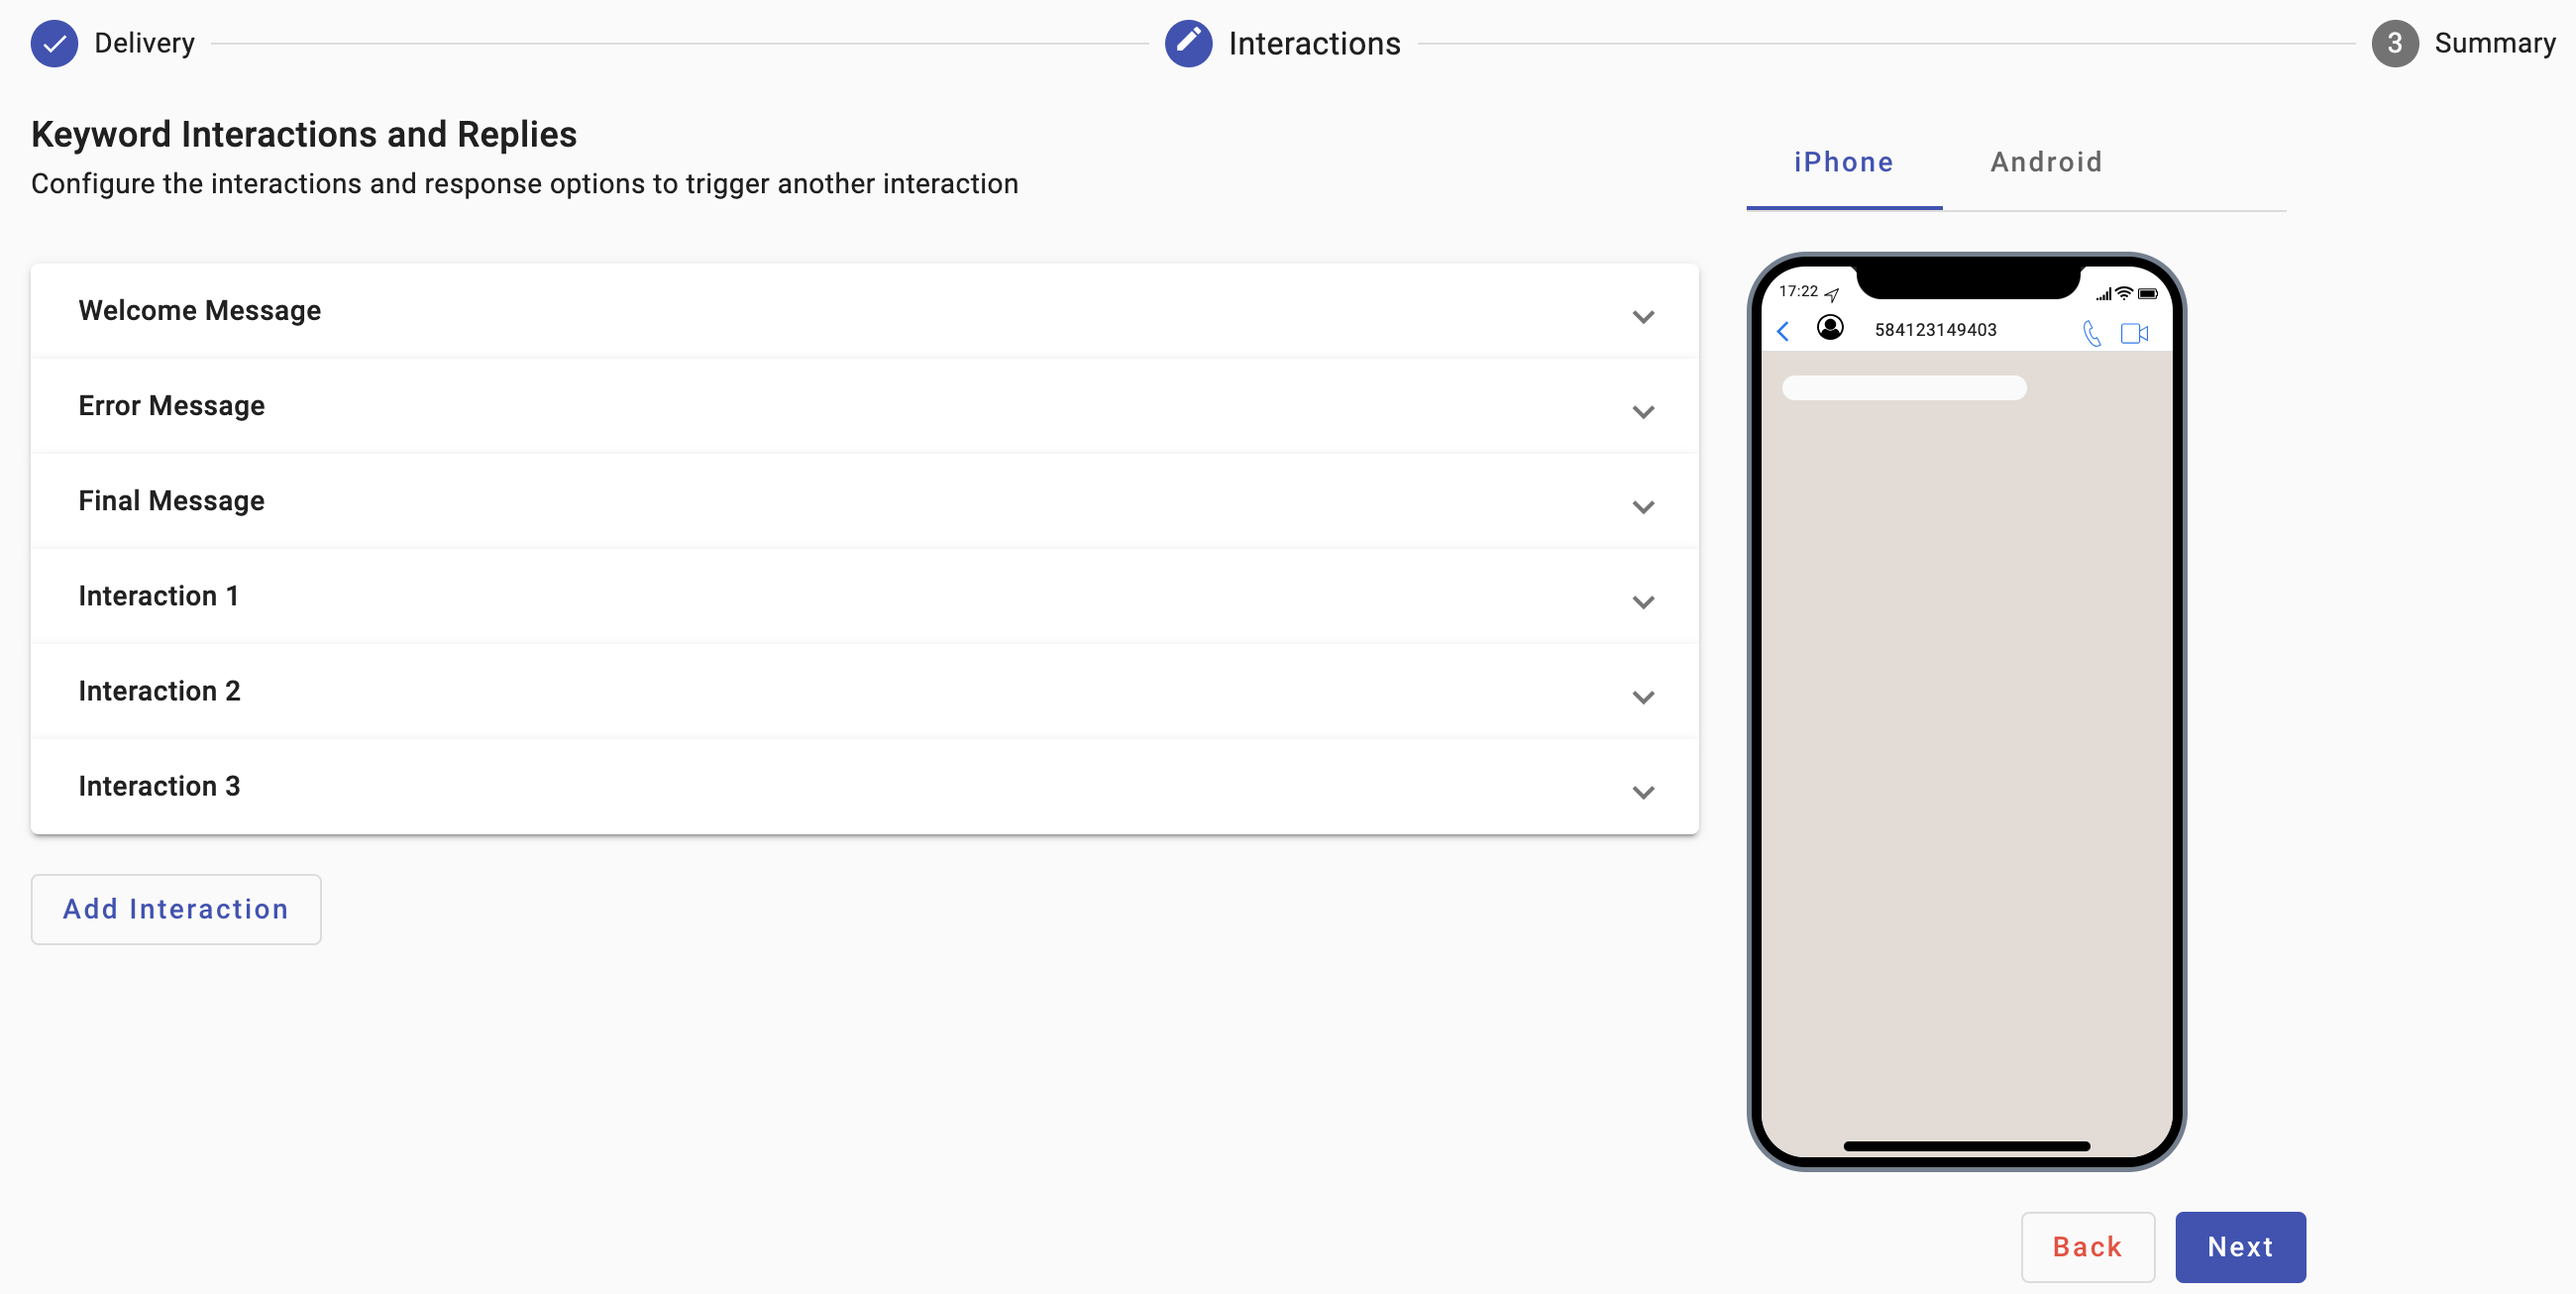
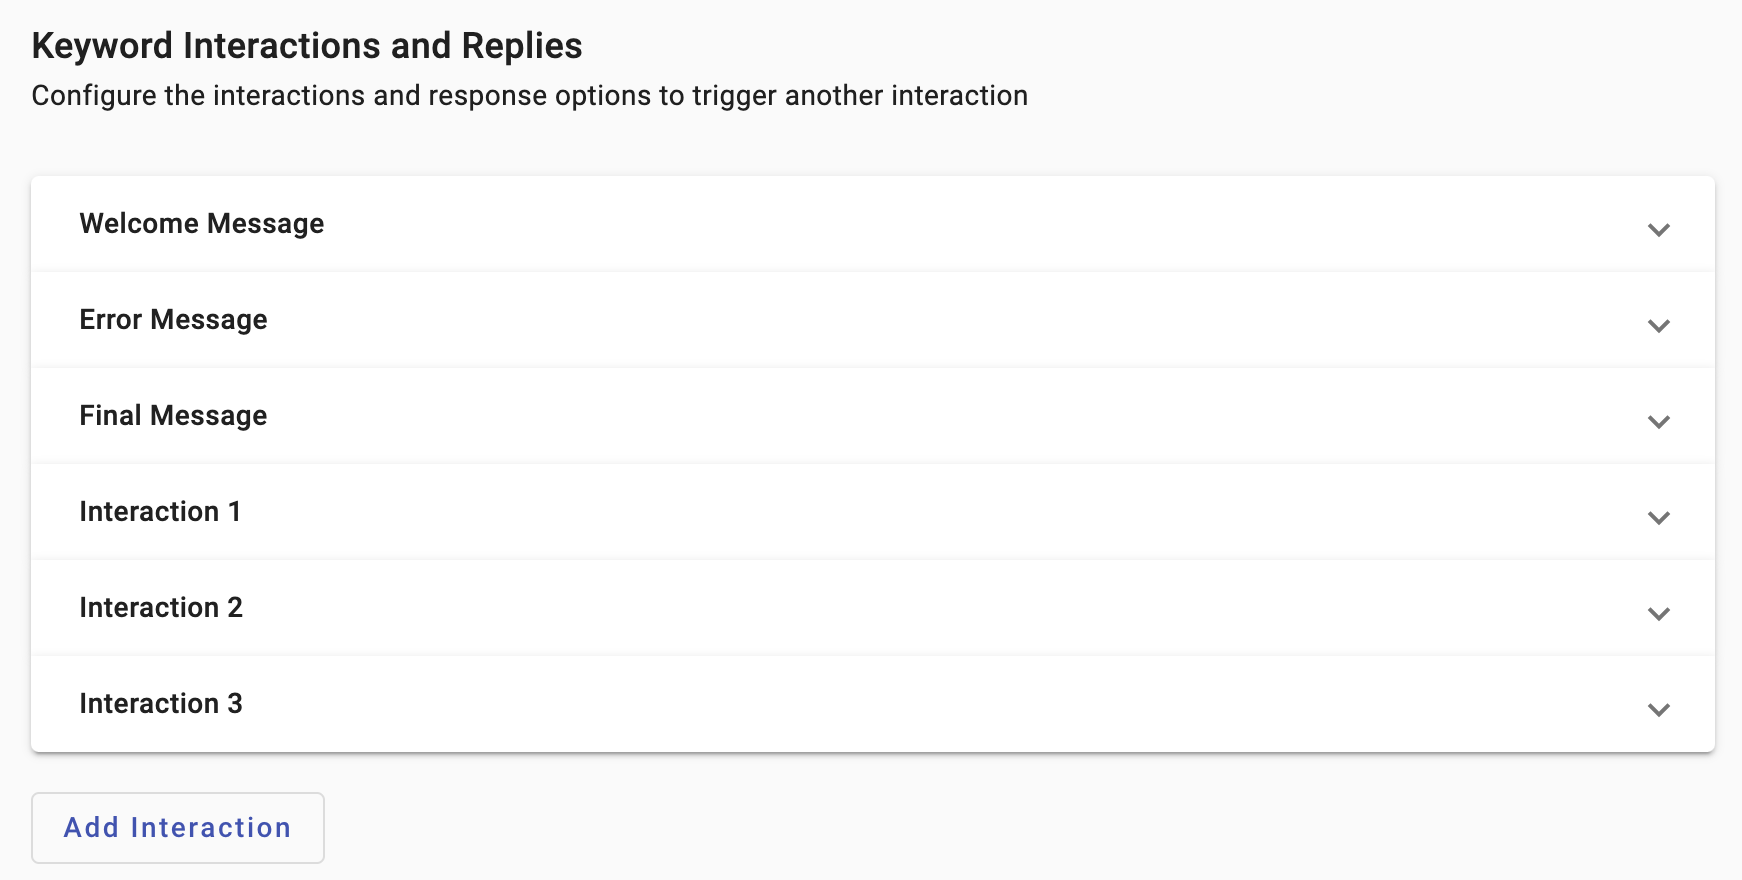
Interactions
The Interactions section is where you enter the chatbot script and set up its flow. It provides the following elements,
-
Welcome Message, which is where you insert the greeting that the user will receive once the service is invoked. It also represents the starting point of the hierarchical decision tree.
-
For SMS, there are three de facto Interaction steps arranged in a stack. For WhatsApp, the interaction stack will have five interactions, offering a starting point in the process of setting up the chatbot.
-
The Add Interaction button, which allows to add more interactions to the stack to accommodate the chatbot script.
-
The emulated device screen to give you the look-and-feel feedback of the user experience with your service.
API Endpoint Scenario
In the case you chose the API Endpoint as recipients, the platform will add an Invitation Message at the top of the Interactions stack.
The Invitation Message will be sent to users, and in it you should include instructions on how to access the chatbot.
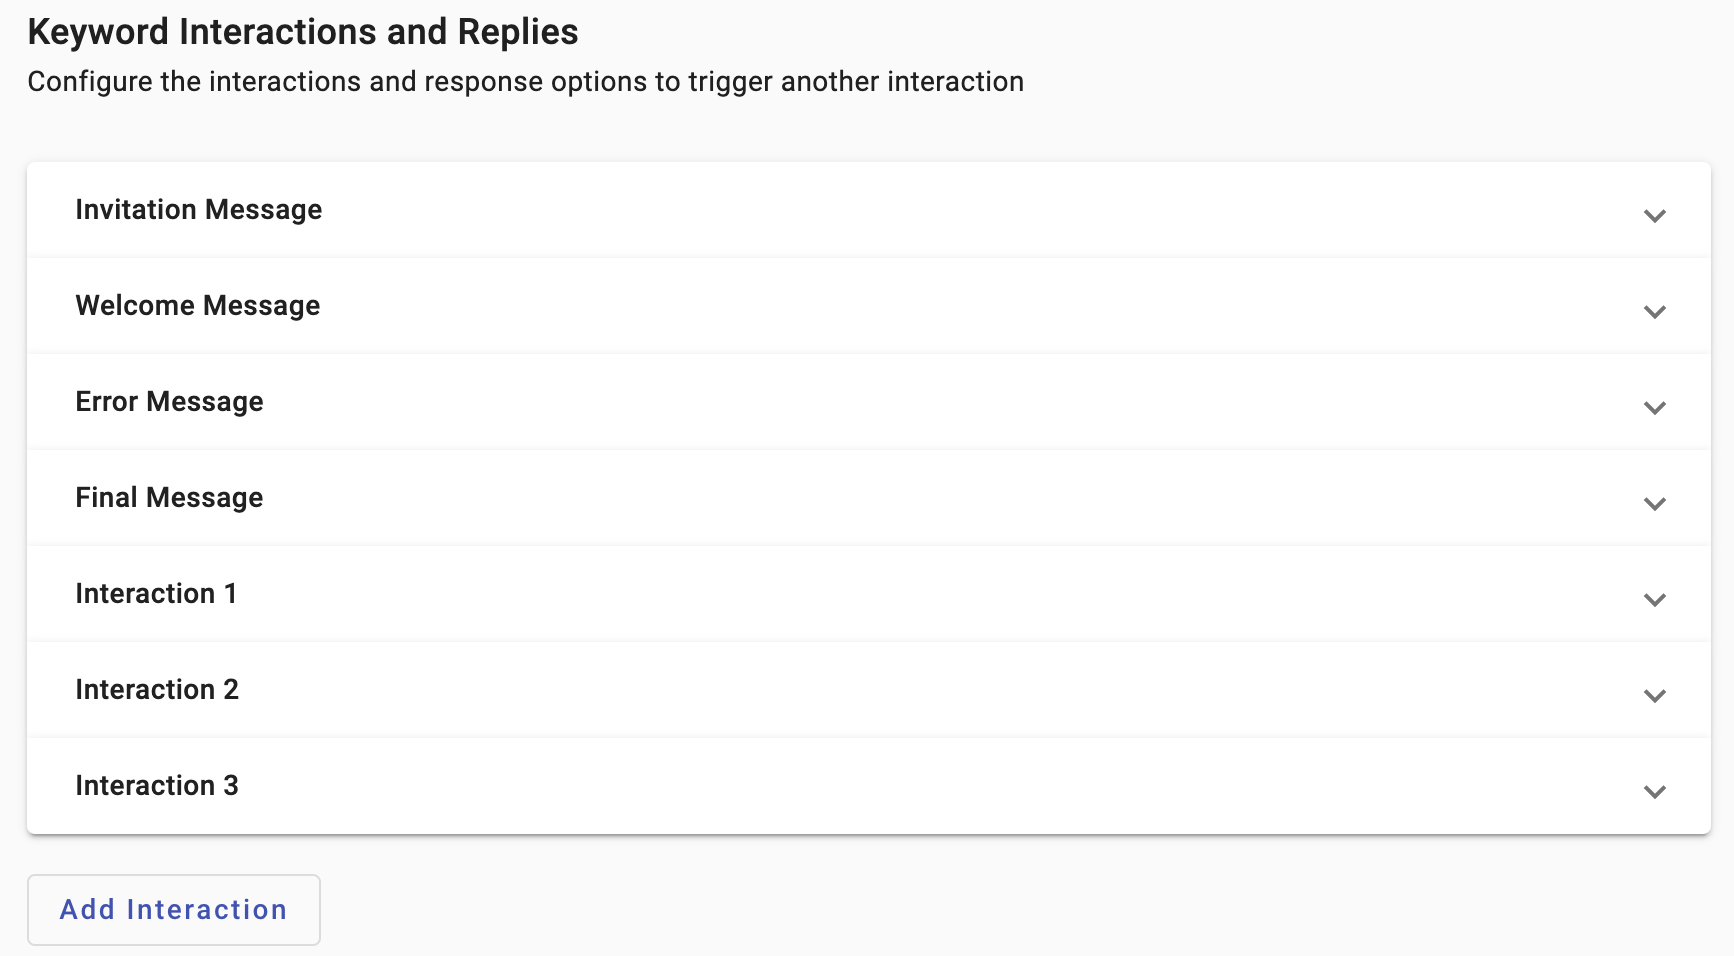
Its configuration has no bearing on the chatbot flow per se. The steps to configure it are straightforward,
-
Expand the Invitation Message section
-
Enter the invitation message text to use the chatbot, including the keywords to trigger it.
-
Under Trigger Keywords, enter the keywords that the platform will receive from the users to trigger the chatbot.
Ensure that you follow the guidelines provided for each element.
Welcome Message
The Welcome Message is the entry point into the Chatbot Service as it is where the trigger points to, making it a mandatory element of the setup.

In the Welcome Message,
- Enter the greeting message aligned to the channel type, each with its own characteristics; SMS using the standard 160-character cap, and WhatsApp with 1024 including emoji capability that you select from the smiley face on the right end of the message box.

As in all messaging scenarios in the platform, the character count for the message is displayed under the message box. The count includes the menu items, plus a four-character overhead for each menu entry.
The emulated device screen will display the information as it is being configured as feedback on your actions.
The steps that follow, have to do with the menu options presented to the end users. The user responses in the form of a single character keyword, allow the chatbot to redirect the user to the next action.
- For the case of WhatsApp, a Multimedia switch is available, allowing you to enter files into a drag-and-drop box that appears when it is selected.

By selecting the tooltip on the right of the drag-and-drop box, you will see the four possible types of multimedia files with their characteristics.

(a) Audio in aac, amr, ogg; codec = opus
(b) Document in pdf
(c) Image in jpg or png, and
(d) Video in mp4 or 3gpp (H.264 video and aac audio codecs)
The maximum file size is 5 MB for any of the four types, and the file will be sent as a separate message, either before or after the chatbot interaction message, as delivery order is not guaranteed.
When a multimedia file is included in an interaction, the emulated device screen will present the actual content for the case of an image file. For all other multimedia file types, the emulated screen will present placeholders as shown below.

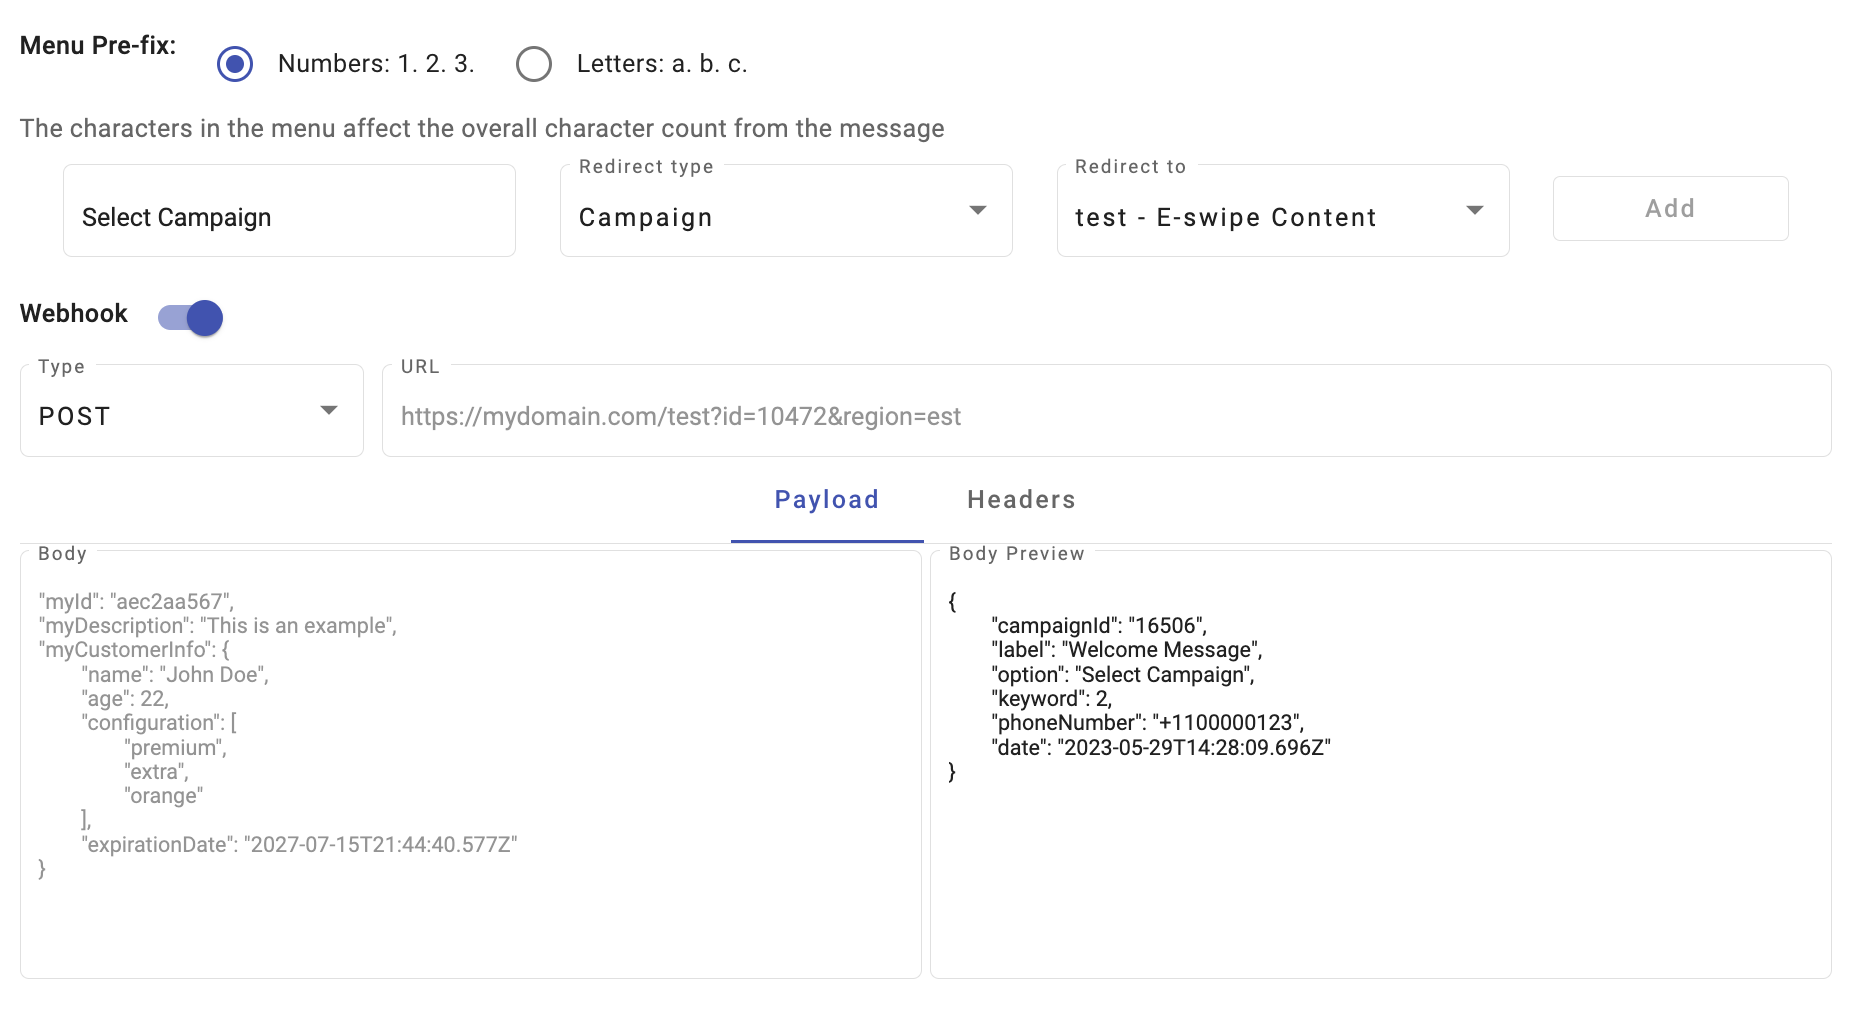
- A Menu Pre-fix scheme with an option for numbers or letters through radio buttons. Each prefix adds 4 characters to the message length which is a consideration for the SMS case, given its 160 maximum character length. These single-character keyword prefixes will be what the end user texts back as a response to each step in the chatbot flow. Each number or letter represents a response to the particular interaction that the user finds herself/himself in.

The following steps have to do with the menu options presented to the end users. The user responses in the form of a single character allow the chatbot to redirect the user to the next action.
- In the Welcome Message you can include from 1 to 4 response options for SMS, and from 1 to 9 for WhatsApp and, it has to have at least one response option menu item. The Menu text box is where you enter the name of the options that the user will choose from. For consideration in the SMS case, is the length of the name since it will be added to the overall character count of the message. WhatsApp affords much more leeway given that it does not have this type of restriction and it also includes emoji capability.

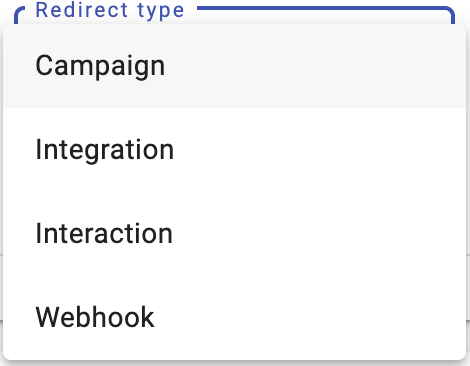
- In the Redirect type is where you identify the type of step that will follow in the flow of the chatbot. The platform will offer three options as shown.
-
Campaign defines if the next item in the flow corresponds to a Live platform campaign with content associated with the chatbot’s intended purpose, an out-of-flow action.
-
Integration defines if the next item in the flow corresponds to a third-party solutions that can be added to the interaction flows with your customers using the chatbot as the communication vehicle.
There are three types of integrations: Bright Pattern, OpenAPI and Custom Webhook.
-
Interaction defines if the next item in the flow corresponds to another interaction step within the chatbot flow, an in-flow interaction.
-
Webhook defines a notification event to be sent and handled by your application, passing on the data that identifies the step in the flow to which webhook corresponds the user has arrived, another out-of-flow action.
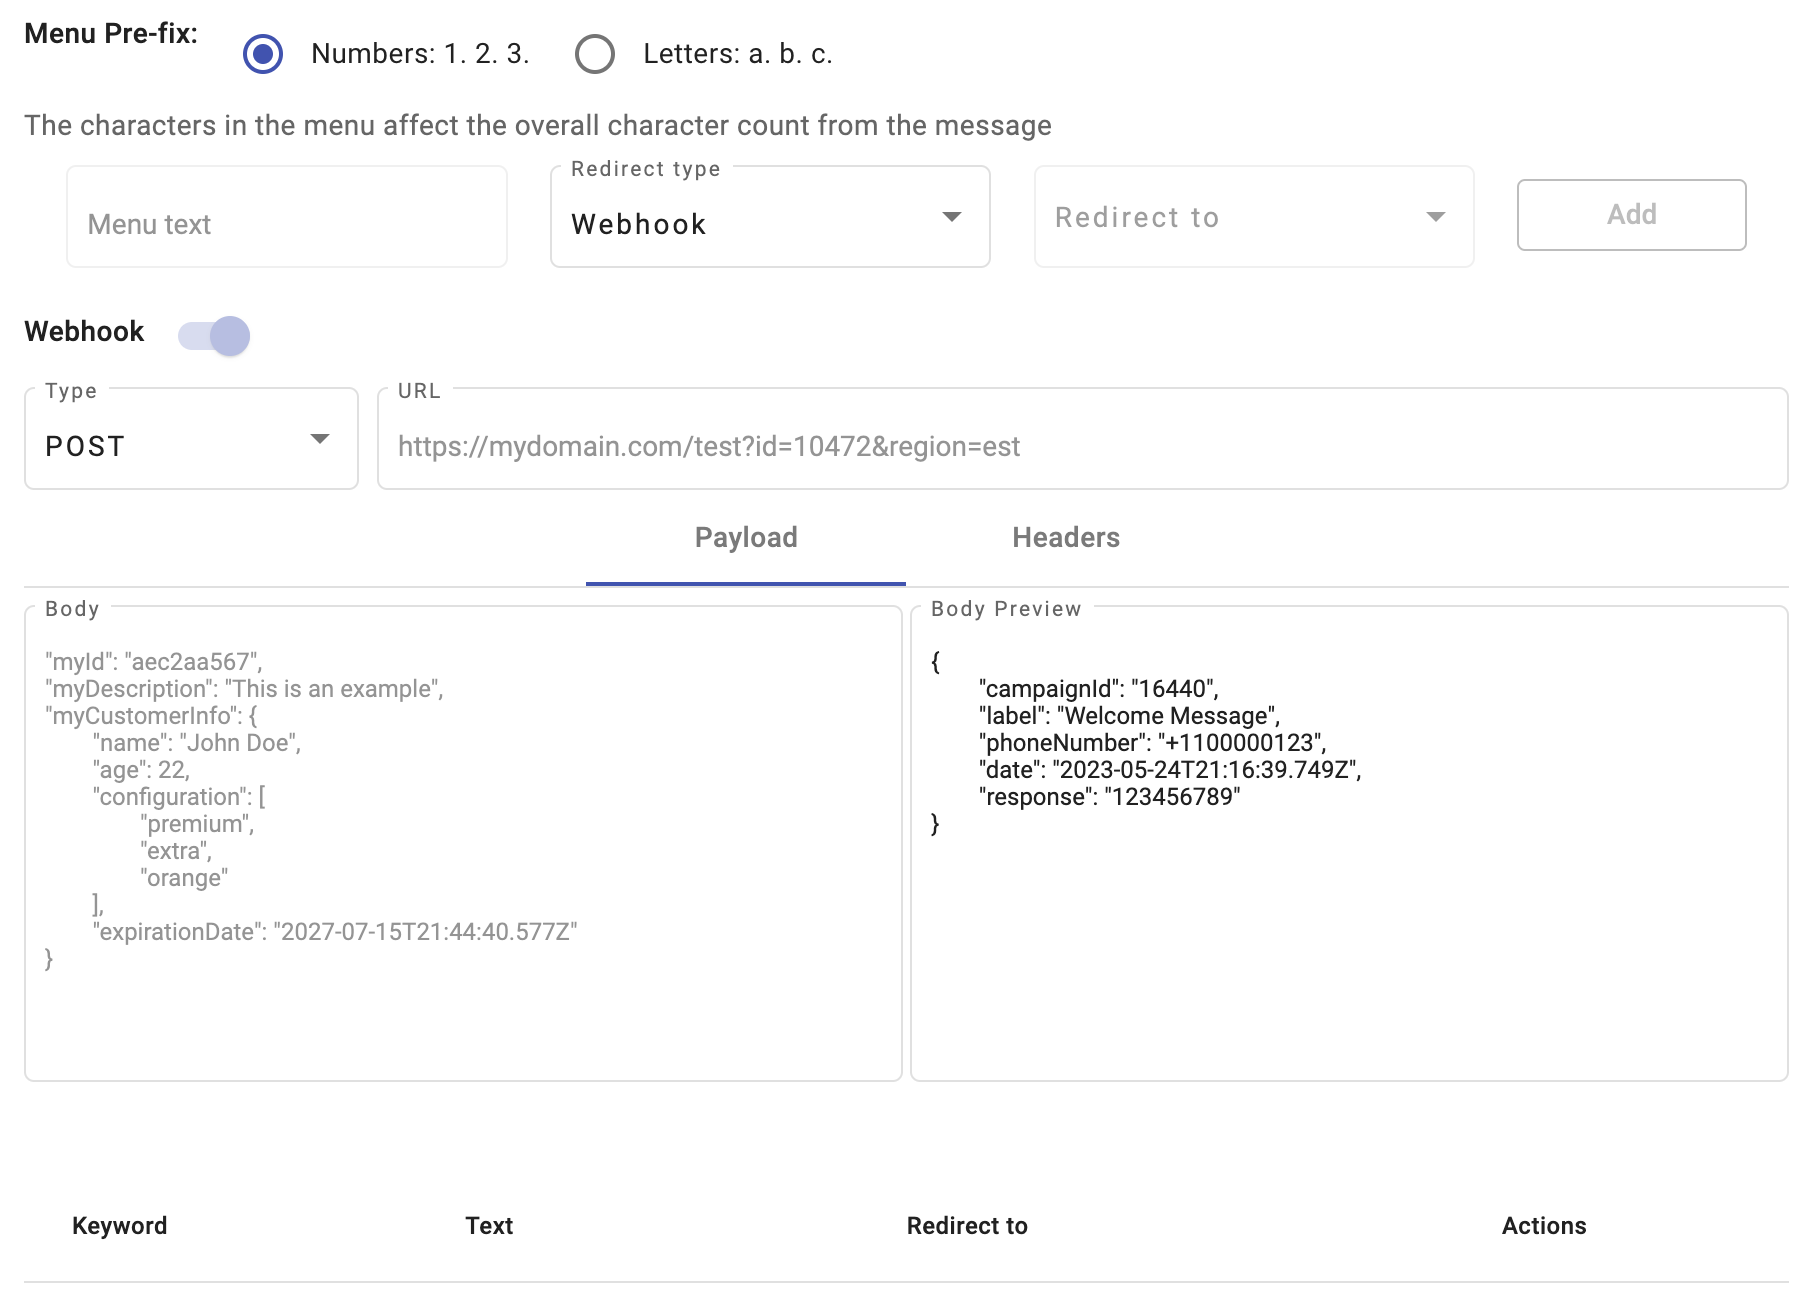
By enabling the webhook, your endpoint must have a POST access method and receive a JSON body.
You must type the following URL structure on the URL placeholder:
POST https://<Your_Domain>/<Your_Path>
The Webhook is divided by two components:
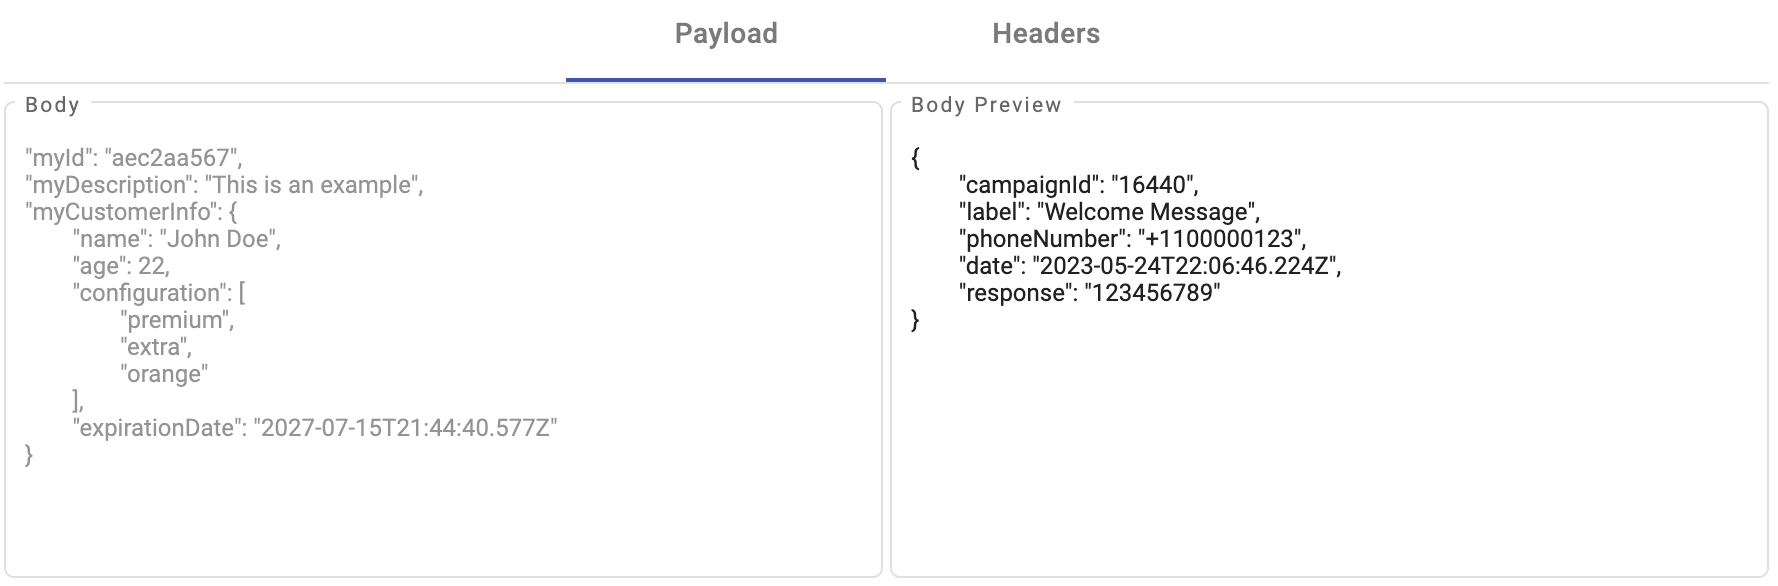
- Payload: The URL typed is the external callback where the events of the message will be registered and published. That is, the following example parameters sent to your callback URL will be the events to be recorded in the callback once the end users begin to participate in your campaign:
| Parameter | Description |
|---|---|
| campaignId | Unique identifier of the campaign. |
| label | Section of the chatbot. In this example, we are located in the Welcome Message section. |
| phoneNumber | Phone number of the end user. |
| date | Date when the Webhook receives the message. The date is represented with date in UTC Zulu format: (yyyy-mm-dd-Thh:mm:ss.ssZ). |
| response | Response from the end user who participated in the campaign. |
If you want to add additional parameters, from the Body textbox type in JSON format each parameter.
-
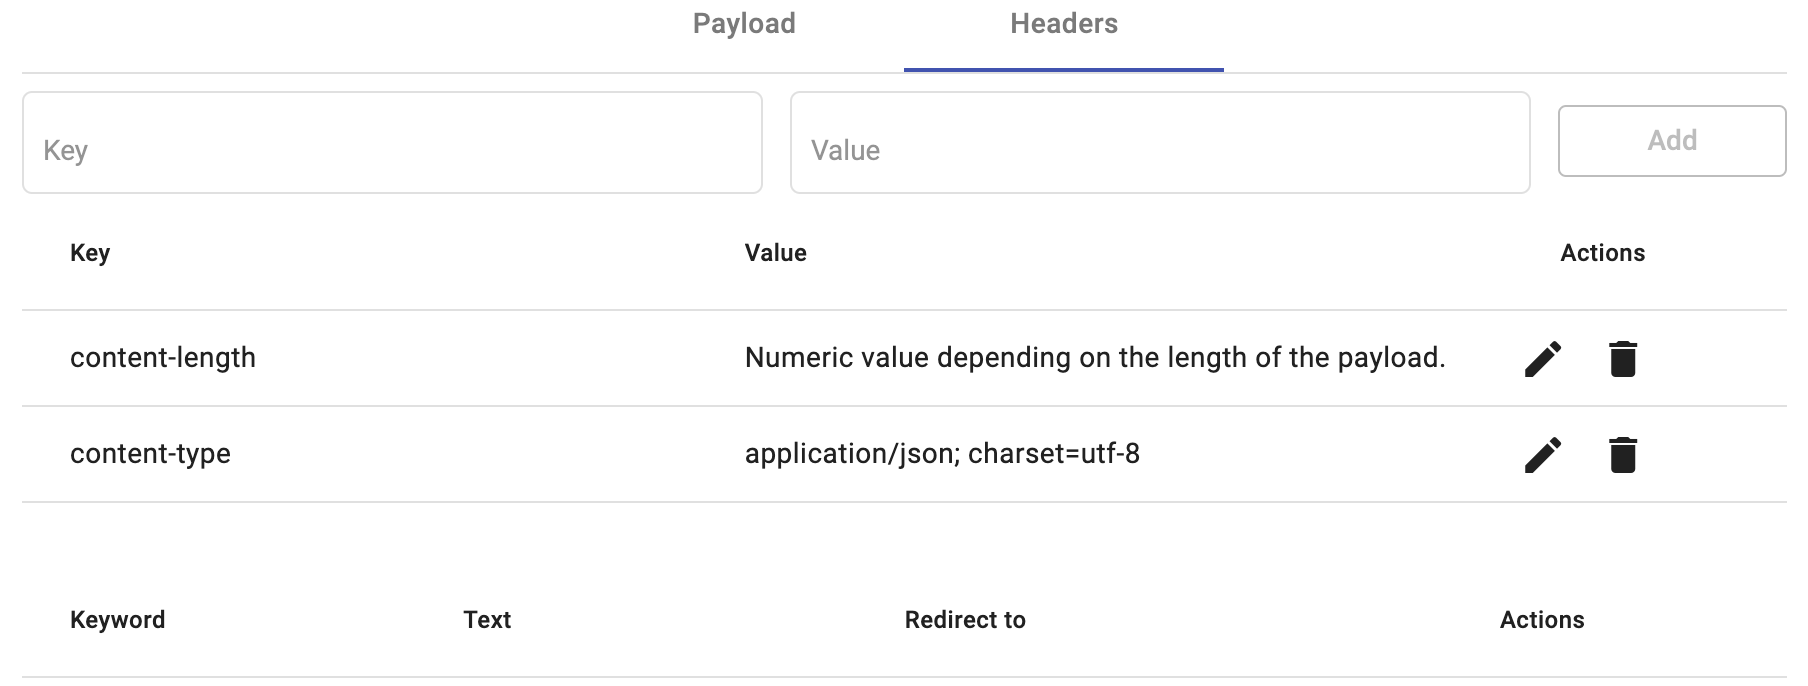
Headers: You can specify custom headers that the platform will use while sending the payload to the specified webhook endpoint. Custom headers give the destination application an option to authenticate your webhook requests, and reject any that do not contain these custom headers.
The headers use key-value parameters that are sent as part of the webhook request. The values of these key-value pairs are visible and editable in the webhook editor by selecting the Edit icon once the key-value have been added. And, you are able to delete the key-value by selecting the Delete icon.
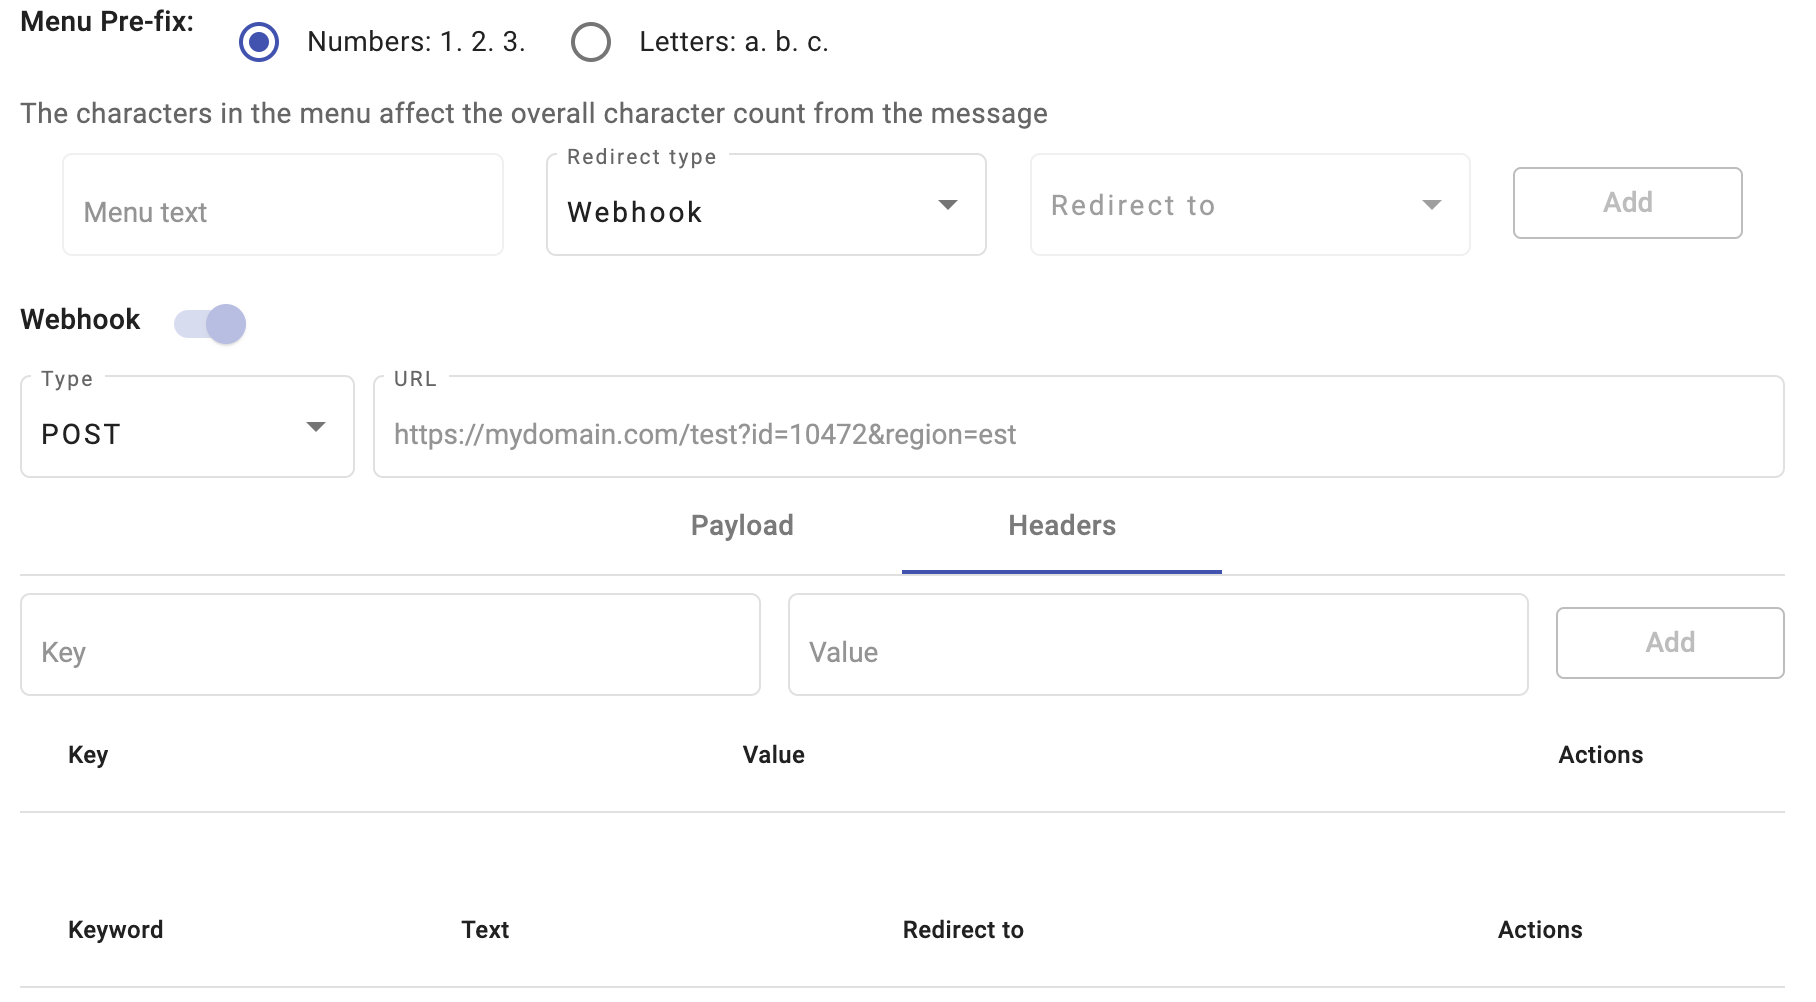
As Header example, the following headers key-value will be sent with all requests:
NOTE
If you select the Webhook as the "Redirect type", the "Redirect to" will not be available.
- Redirect to** represents the identity of the destination to which the platform will go for its next action. It is the identity of an interaction, a platform-defined campaign, or webhook event notification.
If the Redirect type is Campaign, the Redirect to will only show existing Live platform campaigns that qualify.

If the Redirect type is Integration, the Redirect to will only show each created and enabled integration. The dropdown menu displays the alias and the integration type.
Actually, we support the Bright Pattern, OpenAPI and Custom Webhook Integrations.
For more information, to create and enable each integration, go to the Integrations section.
If the Redirect type is Interaction, the Redirect to will only show interactions.

If the Redirect to is Webhook, the Redirect to will not be available.
![]()
Unlike the webhook payload that is set in "Redirect Type", this payload contains two extra parameters that will be sent to your callback URL:
- option: Option used by the end user who participated in the campaign.
- keyword: Keyword used by the end user who participated in the campaign.
Once the Redirect type and the Redirect to were configured by selecting the Add button, you have the option to add a webhook.
If the Redirect type set up was a campaign, integration or interaction, you can still add an underlying webhook associated with the option and POST the event to your application. This is shown in the figure below as an example.
By enabling the Webhook, it will display a POST method to the URL with either a default payload or one that you specify, delivered to your application for further processing.
Unlike the webhook payload that is set in Redirect Type, this payload contains two extra parameters that will be sent to your callback URL:
"option": Option chosen by the end user who participated in the campaign. The value of this parameter is the text you defined in the Menu text placeholder."keyword": Keyword used by the end user who participated in the campaign.
Therefore, once the redirect type and redirect to configuration is complete, this results in the inclusion of the item in a menu item table that is displayed under the configuration section. Menu items will be placed in ascending order as they are entered, automatically advancing the keyword identifier at each menu entry.
The following screenshot shows a populated WhatsApp chatbot Welcome Message sample with all the possible options that can be configured into any given chatbot step in its flow with the table at the bottom.

The table includes the five possible ways in which a menu option can be configured.

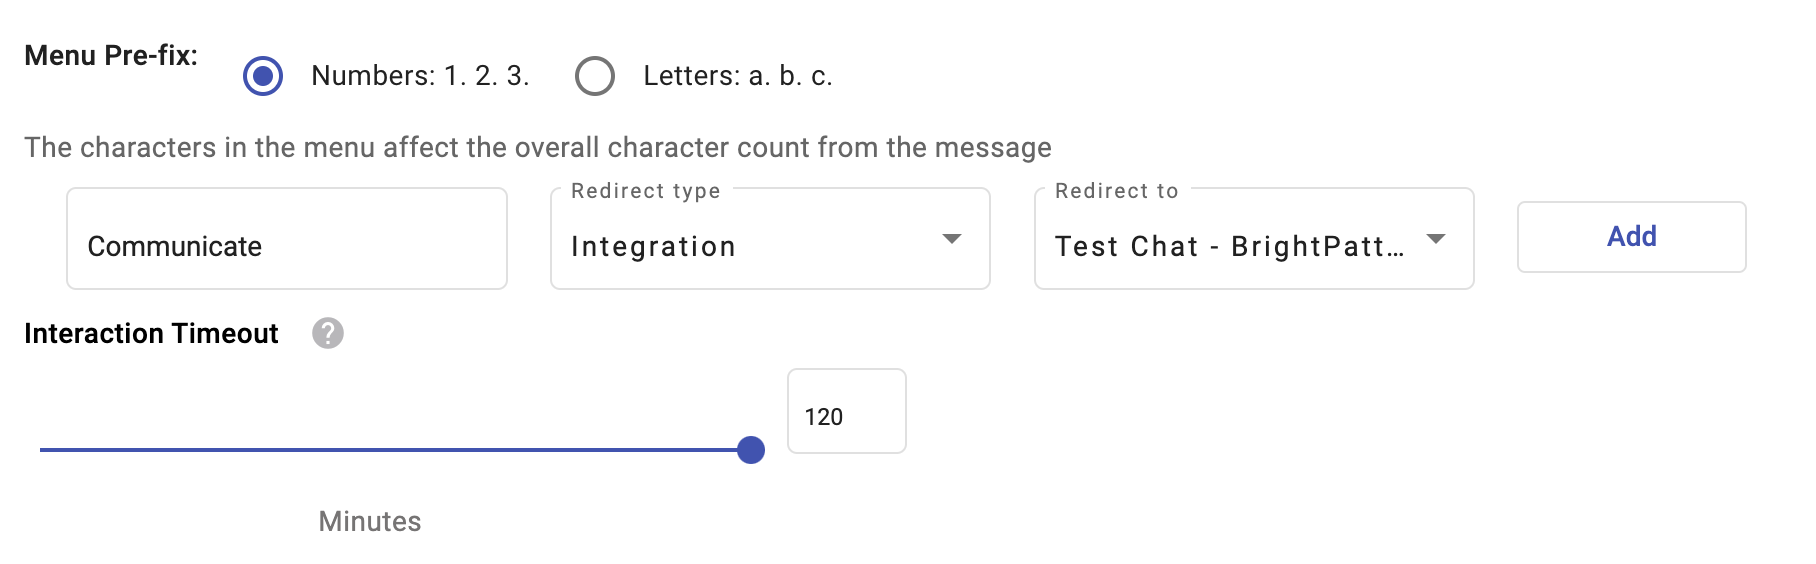
In case you have selected as "Redirect Type" the Integration option, and the Menu text, Redirect type, and the Redirect to are configured, it will display an Interaction Timeout.
This interaction timeout will help you to close the interaction (communication) between the end user and the chatbot. That is, sets the total number of minutes that must elapse due to inactivity. For example, if a session has started but the end user hasn't responded to or interacted with the campaign, the session will end after a certain amount of time has elapsed.
NOTE
The max time the session can wait before closing is 120 minutes.
Once set up the integration, select the Add button to add the integration to the menu item table.
Note the Actions icons at the far right of the table for editing or deleting a menu entry. And to the right of the icons a link icon that denotes the presence of a webhook associated with the option, where the first webhook is explicitly as a webhook Redirect to, while the other two are webhooks associated with the selection of an interaction and a campaign, an underlying webhook.
Graphically, from top to bottom they are as shown below.

To summarize the graphic, there are two outcomes that remain within the platform, options 1 and 4 of the menu (blue arrows), with option 1 being a plain interaction and option 4 and interaction (blue arrow) with a webhook underlying it (black arrow).
There are two outcomes that have platform campaigns as their next action, options 2 and 5, with option 2 invoking a Raffle Giveaway campaign (red arrow), and option 5 invoking a Web Polls & Surveys campaign (read arrow) with an underlying webhook (black arrow).
And finally, there is an explicit webhook event in option 3 (red arrow).
From this we can see that the chatbot session will remain active as long as interactions are invoked in the flow. Invoking either campaigns or explicit webhooks will result in abandoning the chatbot session.
Note the Actions icons at the far right of the table for editing or deleting a menu item.
The other, is the emulated device screen for how the interaction will be presented to the chatbot user.
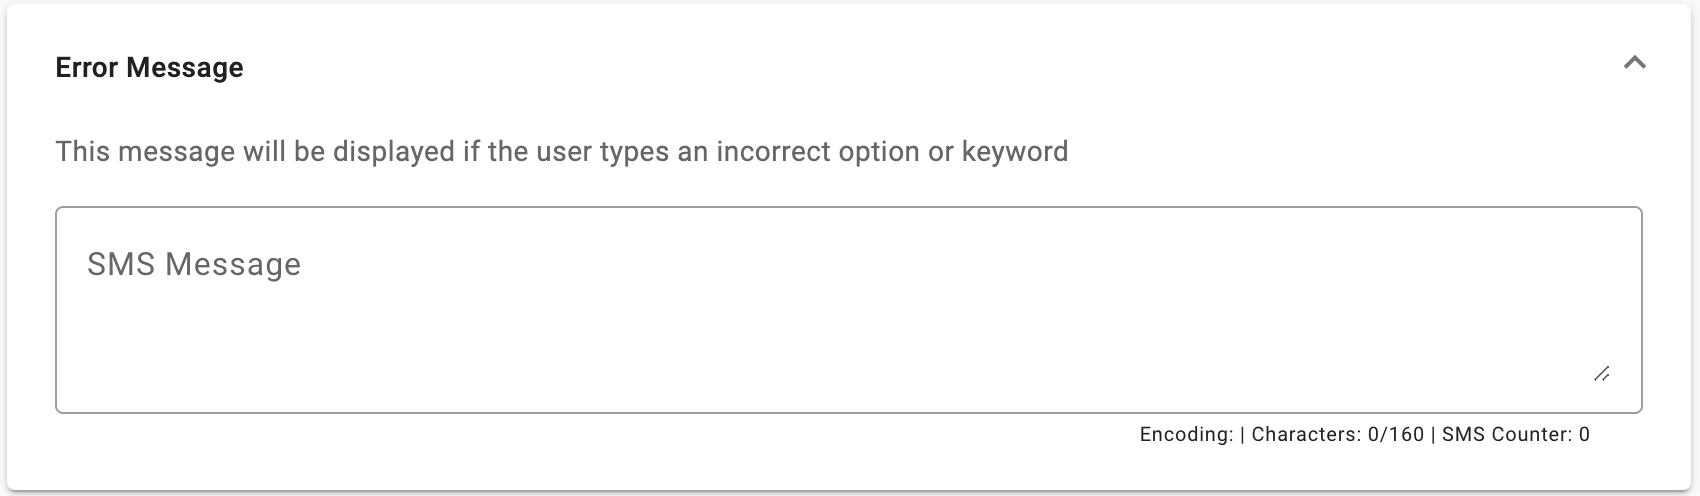
Error Message
The Error Message is the message you define that will be displayed in case the end user enters a wrong option or keyword. That is, this message will be displayed when the end user enters a keyword or an option to a certain interaction and the option or keyword entered does not correspond to the keywords or options indicated.
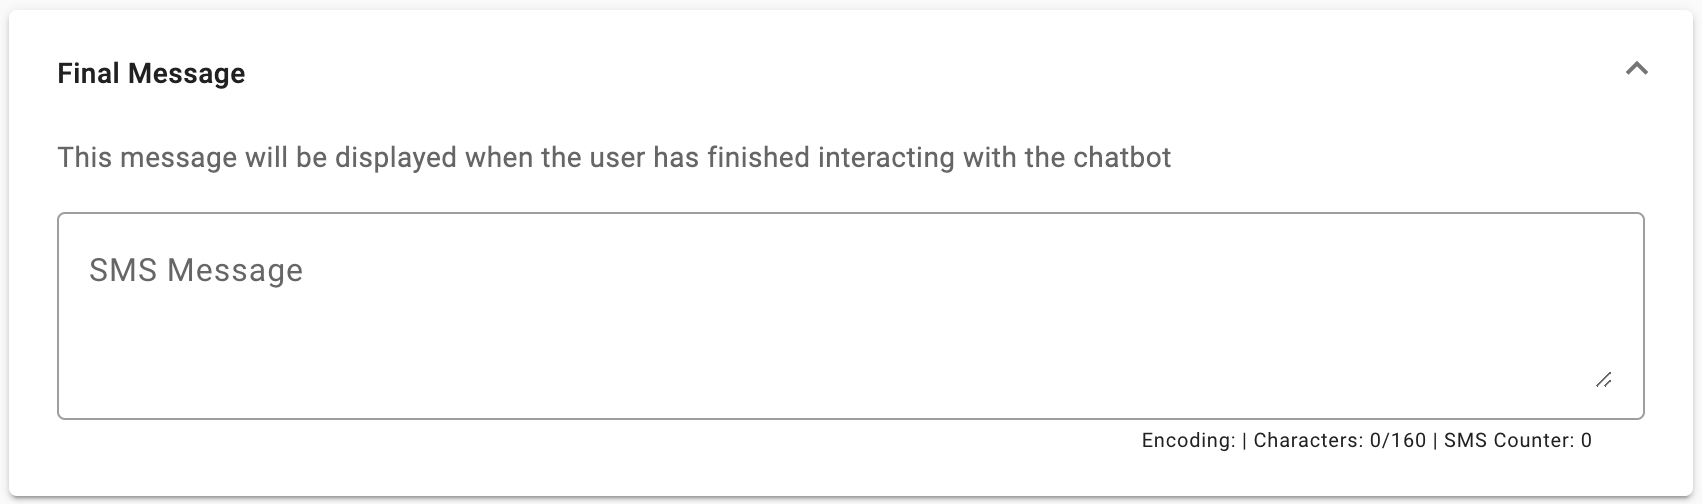
Final Message
The Final Message is the message you define that be displayed when the end user finishes interacting with the chatbot.
Interaction sections
The interaction sections are similar in configuration to the Welcome Message section, with all the same components and it adds three new elements.
- Default interaction label,
- Redirect default setting,
- Delete Interaction.
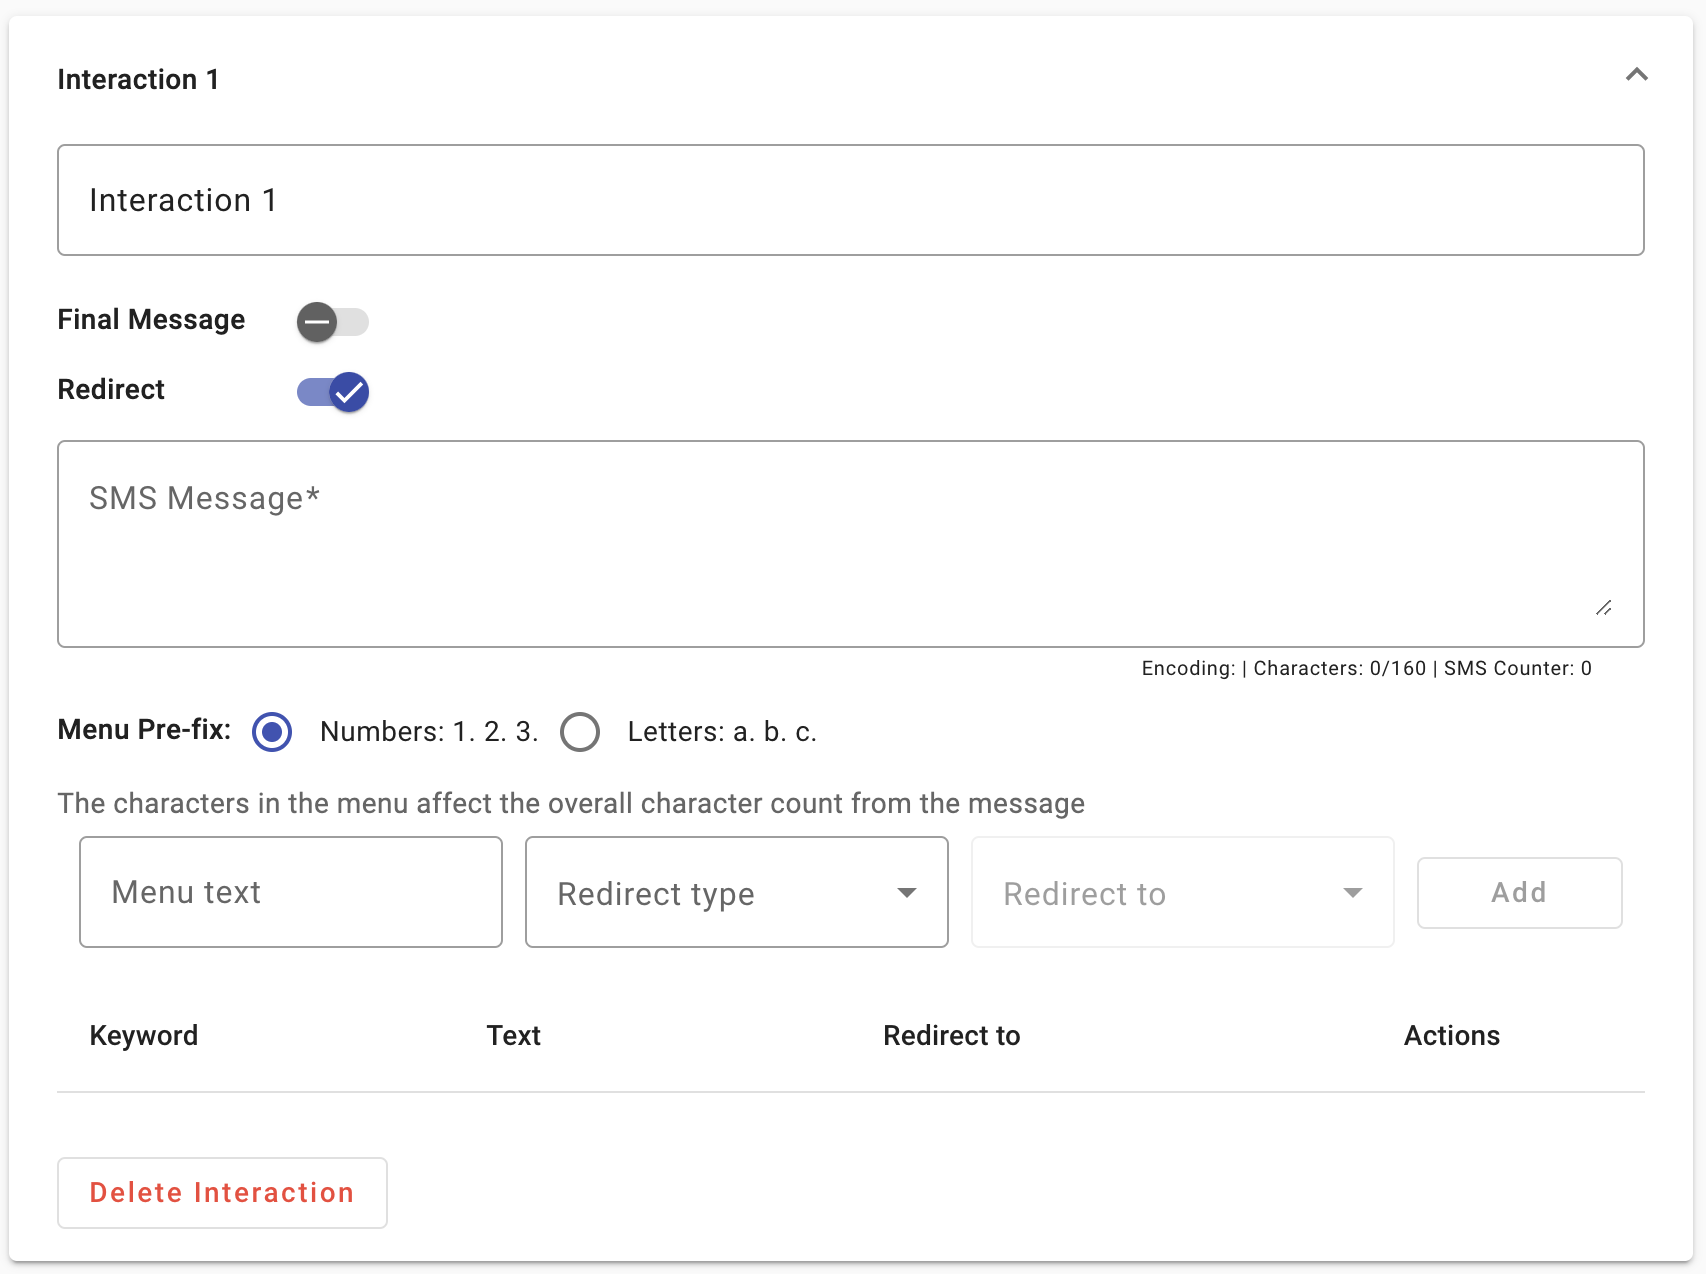
Default interaction label
At the very top of every interaction section, is the default interaction label that identifies it, and it progresses in ascending order as you move down the stack and as interactions are added.
These labels can be customized allowing you to identify related chatbot service flows under a common designation. Is done by modifying the Interaction Label with the text that suits your need, as shown below.

When the default labels are replaced, the new designation will appear as the identifier of the interaction in all instances, this is, in the interaction itself, in the interaction stack, in the Redirect to drop down menu, and in table configuration at the bottom of each interaction.
An example of one way to use it, is shown in the following figure.
Reinforcing this notion, the new labels will replace the default label values in all the Redirect to configurations, retaining the associations in the chatbot flow. So, if Interaction 1 was the original label designation in a Redirect to, when it is renamed to, for example, Top Menu, Top Menu will take the place of Interaction 1 in all instances in which Interaction 1 appeared in the platform. Of course, you can change them before hand to accommodate your preferences.
Redirect default setting
As the majority of all interactions will have an interaction that will follow it, the Redirect toggle switch will be enabled by default. However, at the end of a flow, whether there is only one or several within the service, there will be no action that follows this step and it is where the Redirect toggle switch will need to be placed in the disabled position.
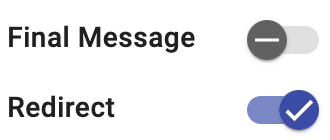
When the Redirect toggle is disabled, the Final Message toggle will be automatically activated. Once activated, the interaction will be redirected to the defined message that will be displayed when the user has finished interacting with the chatbot.[block:image]
{
"images": [
{
"image": [
"https://files.readme.io/4e12929-Screen_Shot_2023-07-09_at_20.42.46.png",
null,
null
],
"align": "center"
}
]
}
[/block]
If the interaction has set up an options menu, but one or more options is redirected to another interaction, a message will be displayed mentioning that the Final Message can only be sent if one or more options are redirected to interactive campaigns or webhooks. If any of the options is redirected to another interaction or integration, the final message will not be sent.[block:image]
{
"images": [
{
"image": [
"https://files.readme.io/dc3e6cf-ChatbotCampaign22.png",
null,
null
],
"align": "center"
}
]
}
[/block]
Therefore, the Final Message and Redirect toggles can be activated both if one or more options are redirected to interactive campaigns.[block:image]
{
"images": [
{
"image": [
"https://files.readme.io/19500be-ChatbotCampaign24.png",
null,
null
],
"align": "center"
}
]
}
[/block]
You are able to send a Multimedia Message along with the Redirect message. That is, the Multimedia and Redirect toggles can be activated both, but if the Multimedia toggle is deactivated, the Final Message will be activated immediately.[block:image]
{
"images": [
{
"image": [
"https://files.readme.io/ab352f5-ChatbotCampaign25.png",
null,
null
],
"align": "center"
}
]
}
[/block]
Delete Interaction
This is used to eliminate an interaction from the chatbot flow, since not all interactions are mandatory. The reasons for deleting an interaction of the flow could be many, but be aware that deleting an interaction may require to modify interactions that referred to it in other sections of the flow.
To summarize, the Welcome Message and the generic interactions sections are very much the same, with the exception that the first one cannot have its name changed, requires to have an action after it, and it is mandatory, while the others are the opposite in those three areas.
ON INTERACTIONS
In order to be able to fully engage in the setup on this step, we recommend that you have completed your chatbot script and have it handy so that each interaction can be copied into the configuration one interaction at a time. This includes having the multimedia content, the platform campaigns that will be invoked, and the webhook URLs with the specific payload content and header key/value pairs that you will require in your application to handle the webhook events.
A Sample Chatbot
As we mentioned earlier, the chatbot is a menu-based decision tree hierarchical structure, which is a set of fancy words for something that you use every day and run into all the time, whether you realize it or not, but they are all over the place.
Every time you unlock your phone, you run through the steps of some sort of hierarchical tree structure to get to unlock it. So that is what we are going to go over: how to define the steps of a process that is based on a set of possible stimuli to obtain desired outcomes. For this, we are going to break down selected parts of the figure that is shown below.


Both figures represent essentially the same hypothetical chatbot implementation of an outfit that offers rental ballroom services to set up events for the general public, called ROOMBAH, and it created a chatbot called ChatCha.
Users invoke ROOMBAH’s chatbot by sending ChatCha to its service number to get the process started.
This action takes the user to the entry point of the chatbots, the Welcome Message, shown in the left most position of the figures.
As users interact with the chatbot, they will be presented with some of the options that were configured for the process, and some not. Eventually, through the choices they made, some will arrive at the far right of the figure where no more actions are processed by the chatbot in Interaction 10.
So, the chatbot has the entry point in the Welcome Message and an exit point as an interaction that you will define. It could also be the case where you need to configure more than one exit point to end the session. Remember that the chatbot session will also end if the next step in the flow is not an interaction.
The ChatCha script can be created using an excel sheet such as the one shown below.

Notice that in the Excel sheet, the column headers are such that they follow the platform's input and configuration requirements. This way, the process ends up being copying and pasting each interaction element into the corresponding sections of the configuration and picking the correct settings.
Adding interaction steps
At first, it is good practice in the interactions step of the configuration, to add the total number of interactions of the script. This way, at the time of configuring an interaction, you will have the appropriate one to select from in the Redirect to pulldown menu.
For the ChatCha example, there are a total of 11 interactions that make up the chatbot. If you are configuring the chatbot for SMS, you will need to add 8 interactions and if you are using WhatsApp, you will need to add 6.
Select Add Interaction as many times as needed to reach the number of interactions in the chatbot script. In this case eleven (11).

Welcome Message configuration
As has been mentioned throughout, the Welcome Message is the entry point to the chatbot. These are the detailed steps to configure it:
-
Expand the Welcome Message section.
-
Copy/paste the SMS Message, or WhatsApp Message. The main difference between the two are the different options that each channel type offers. In our example, all text portions are the same. The differences are in the added capabilities present in the WhatsApp implementation.
Referring to the script above, where the contents for the Welcome Message are,

all the elements appearing on the script can be accommodated for both the SMS or the WhatsApp channels.
For an SMS chatbot it would be:
- Enter the contents of the message. The results are displayed on the emulated device screen.

Notice the legend under the SMS message box, reflecting the number of characters (Characters :108/160) still within the maximum number to limit the number of SMS messages needed for a single message. This is one of the considerations that needs to be taken into account when building an SMS based chatbot.
- Select the Menu Pre-fix scheme

Ensure that the prefix type to be used in the menu is number based, as it is what is called for in the script, the default value for all interactions.
- Enter the Menu option with its attributes as shown in the sequence in the image below.

You enter the Menu name, select the Redirect type, select the Redirect to and now the platform presents the opportunity to add the menu option by enabling the Add button. Immediately after you enter the Redirect type, the platform presents a webhook option. This is an underlying webhook option different from the Redirect type webhook option that appears in the dropdown menu. More on this later.
You select Add and the menu option appears in the Menu table and in the emulated device screen, as shown below.

A similar process is done to enter the second item in the script.
- Enter the second Menu option with its attributes as shown in the sequence in the image below.

After you enter the Menu name and select the Webhook option as called in the script under the Redirect type, the window expands to show the webhook elements that need to be configured, step (iii) in the sequence above.
Enter the URL the webhook is pointing to in your application. In the Payload tab it shows the Body Preview box with the default payload contents, and the Body box where you can customize the contents of the payload to suit your requirements. Under the Headers tab, you can also define Key/value pairs that describe something about the request (such as the type of data or authentication), and you can create custom headers for almost any purpose. This information is not shown in the script, as the default configuration is used.
Notice the information that is present in the default payload configuration in the figure below.

It shows the platform’s campaign ID, in this case 14046, the interaction label, in this case the Welcome Message, the option within the interaction to which the webhook was associated in two formats as the menu name or the keyword option, the user mobile phone number involved in the chatbot session, and a time stamp of when the event took place.
All webhooks will provide this type of information by default. If you need to include any additional payload information it would need to be programmed into the Body box.
When this menu option is selected by the user (the explicit webhook configuration into the chatbot flow under Redirect type), will result in ending the chatbot session as no other interaction in the flow is or can be defined.
For a WhatsApp chatbot the procedure is essentially the same, but with capabilities that it expands the content delivered over the chatbot to include the added features inherent to WhatsApp:
• It can deliver up to 1024 characters per message
• It can include multimedia content in the form of images documents, audio and video within the flow
• It offers up to 9 response options instead
• Interaction messages and response options can include emojis
The following screenshot illustrates these aspects.

Both the message and the menu items include emojis, with each emoji adding 6 characters to the message character count as it is represented by a string of 6 numbers in UTF-8 encoding.
The banner image is added through the multimedia toggle switch.
In graphical form, SMS would be

where the 1 on top of the arrow, represents the keyword chosen by the user to move from the Welcome Message to Interaction 1, the next step in the flow. The small red chain link represents the underlying webhook associated to option 2.
Graphically WhatsApp would be,

The differences being the multimedia and emojis added versus the SMS scenario.
Since in neither case Interaction 1 has not been defined, it is depicted as an empty box.
As the additional components provided by WhatsApp should be clear by now, we will forgo expanding upon the in the following descriptions except for the cases in which it adds capabilities not present in SMS.
Configuring Interaction 1
Configuring Interaction 1 involves the same procedure, and it is essentially the same for both SMS and WhatsApp
- Expand Interaction 1
- Copy/paste the SMS/WhatsApp Message text from the script
- Ensure that the prefix type to be used is correct
According to the script, the following steps need to be repeated 4 times since the script includes 4 menu items, each time following the sequence in the script.
- Copy/paste the Menu text from the script
- In the Redirect type dropdown menu, select Interaction
- Select the Redirect to dropdown menu. Select the interaction that corresponds to the Menu option you are entering.
- Select Add
Like before, you will go from this,

to this,

As you can see from the picture, at this point the tree begins to branch out, as the number of options given to the user have gone to 4. Menu item 1 (See Past Events) points to Interaction 2, item 2 (See Scheduled Events) points to Interaction 3, and so forth. In the graphic, each option that the menu has, represents a branch in the chatbot flow. Also, notice that for Menu item 3 (Contact Support), the graphic shows a black link icon that represents an underlying webhook associated with it.
For every interaction that is added, a similar effect will take place, however, there are instances in which you see an interaction return to the interaction that preceded it. Let us look into Interaction 2.
Configuring Interaction 2
Interaction 2 is defined in the script as follows,

and its platform configuration will look like,

Which results in the following graphical representation.

There are two important aspects that are shown here:
a. It is possible to go to any interaction regardless of where it occurs in the flow either down or up-stream, as it is shown here and in interactions 3, 4, 7, 8 and 11.
b. Within the chatbot flow, is possible to use a platform defined campaign as one of its steps, that, for the ChatCha example, occurs here in Interaction 2 redirecting to an E-swipe video, in Interaction 5 redirecting to a Raffle Giveaway campaign, Interaction 6 to an E-swipe image, and Interaction 9 to a Web Polls & Surveys campaign.
However, for the WhatsApp case, given its capabilities, you can include the video component directly in to the interaction step through its multimedia capabilities, and it would be done as follows,

Which is graphically contrasted as shown below.

Summarizing what has been done up to this point, there is the Welcome Message, were the chatbot process begins, there are interaction steps that take through multiple paths to address different topics handled in the chatbot, the interaction steps that can take you back in the flow, and there are platform campaigns that can be added-on to the chatbot.
Repeat the process described above for the remaining interactions in the script.
What is left at this point is to address how to finish or close a chatbot session.
Session ending interaction
In Chatcha, Interaction 10 is where the step that closes the chatbot session is configured.
According to our Chatcha script, we have,

Notice that the only information that is present in this interaction is the Message text, and all the other elements are empty. The configuration for this case is,

In the screenshot above, the Redirect being in the disable state eliminates all the other elements of an Interaction, which includes a Redirect to destination. There is no other action the chatbot will take the user to after it reaches an interaction with the Redirect toggle switch disabled, which is why it is used for ending a chatbot session.
Other considerations of the example
In the script configuration, notice that although Interaction 10 represents the end of the chatbot session, you can go beyond the session ending interaction, as this example shows with Interaction 11. As a matter of fact, you can define any interaction as the session ending interaction of the chatbot.
Summary
The Summary step is where you take the final actions to set up your Chatbot Service, and have a chance to review some of its configuration aspects. Its divided in three sections,
- Overview,
- Campaign Activation, and the
- Emulated device screen
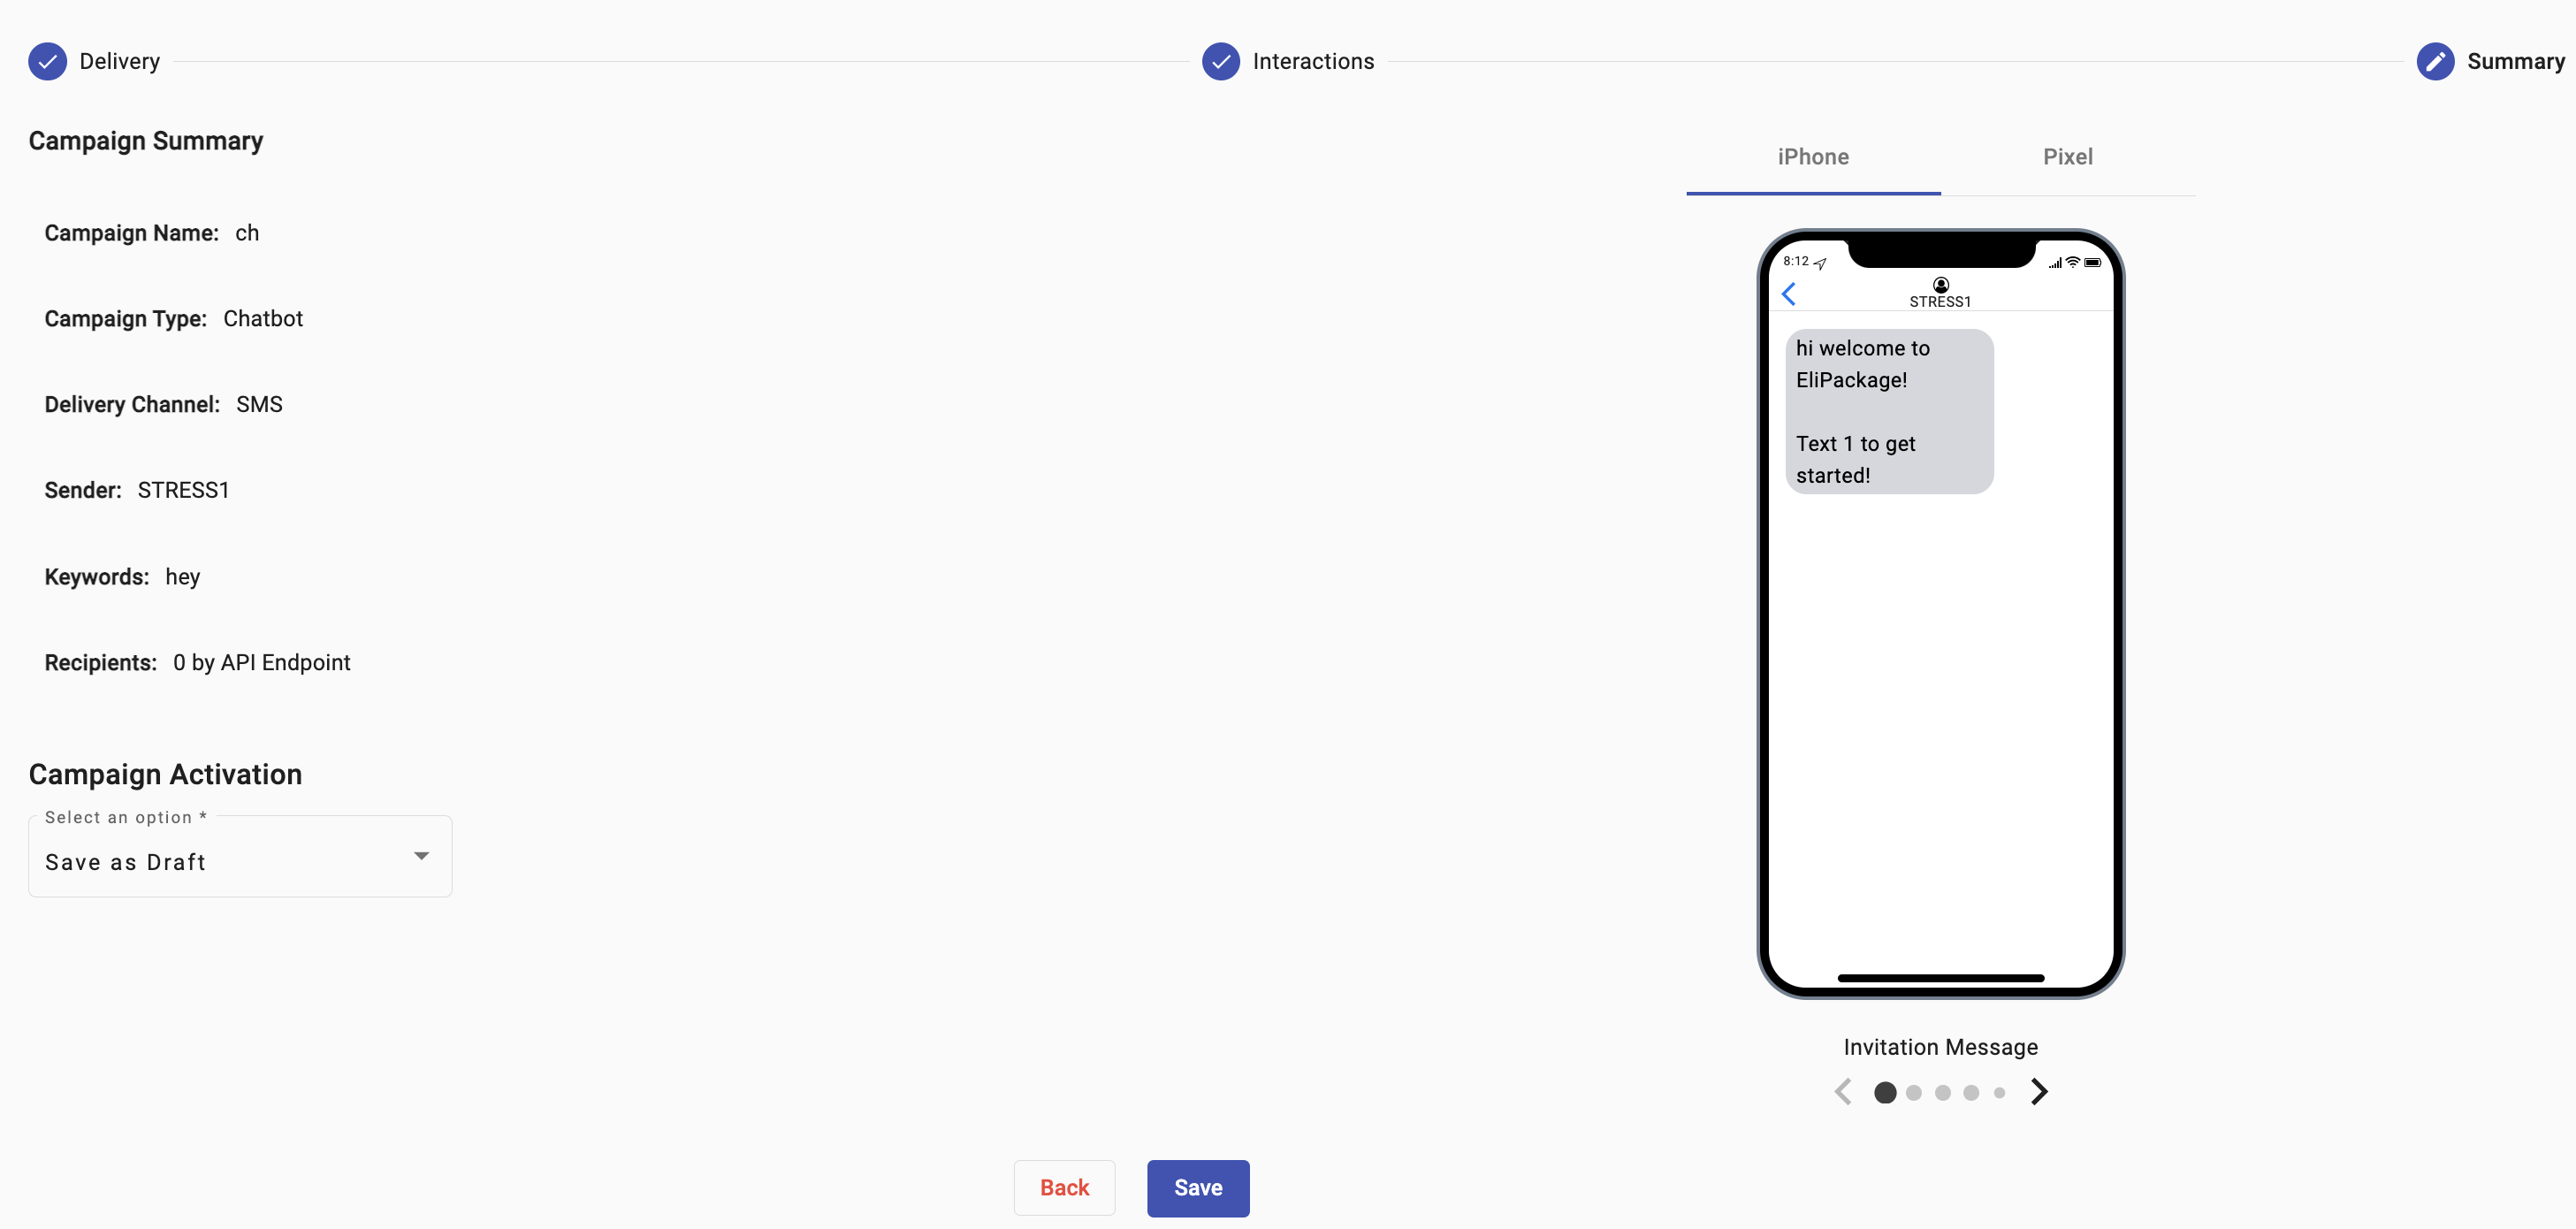
Overview
In the Overview section get to review some of the properties of the chatbot configuration.
- Campaign Name: identifies how the chatbot is referred to within the platform,
- Campaign Type: identifies the type
- Delivery Channel: identifies the engagement channel used for the service
- Sender: It identifies the entity within the platform through which the service is available
- Keywords: identifies all the keywords that invoke the Chatbot Service
- Recipients: After the chatbot is placed into service, it will identify the number of users that have used it
Campaign Activation
Campaign Activation offers two options,

- Live, will put the chatbot into service at once.

- Save as Draft, will place it on hold, saving it in the Performance Reports section of the User Interface in Draft status

Emulated device screen
In the emulated device screen, you can review the messages and the menu options for the entire chatbot through the use of the left and right arrows under it.

On Deleting Interactions
You may find yourself in a situation where you need to deliberately delete an interaction in the middle of the flow to modify it and introduce a change into it.
In doing so, the new interaction, even though the platform allows you to give it the same name as before, will not be placed in the same location on the interaction stack, nor will it be considered the same interaction as the one that was deleted. It is a brand-new interaction.
But, knowing that an interaction does not have to be in a particular position in the stack to function properly, as was shown with the Interaction 11 case, solves this particular scenario only impacting where it is shown in the interaction stack.
To illustrate this, you decide that Interaction 1 needs to be modified.
You expand Interaction 1 and instead of modifying it, you go ahead and select Delete interaction since you plan to configure a replacement for it. The platform will return a warning message with the impact this will have in the chatbot flow with a message similar to the one in the following image.

You select Delete, and the interaction is removed from the Interaction stack.
You proceed to select Add Interaction. The platform will add a new interaction at the bottom of the stack with the next available number in the sequence of interactions. This is shown in the screen shot below.

At the bottom of the interaction stack you see that an Interaction 12 has been added. Also notice the warnings on those interactions that were affected by the deletion of Interaction 1, given that their connections with Interaction 1 no longer exists as part of the flow.
Once you configure the elements in the newly created Interaction 12, reestablishing the connections, and saving the campaign as a Draft, the warnings will be removed.
Updated over 1 year ago