Define Recipients
Define the Recipients who will receive the Messaging or Campaign through the subscribers stored in the platform, by uploading a CSV file, writing the subscribers manually, or triggering campaign participation through a keyword.
From the Recipients dropdown menu, click one of the following options to define the recipients who will receive the messaging or campaign depending on the delivery channel and campaign selected:

API Endpoint
Selecting the API Endpoint option will generate an Endpoint that the Space owner can integrate to their existing System to trigger the Campaign.

Once the campaign has been created, when the Campaign is in Live Status, the Delivery Endpoint tab is available. The delivery endpoint helps you use our endpoint (method) to deliver the campaign.
The Delivery Endpoint is available for the following interactive campaigns:
-
Trivia
-
Web Polls & Surveys
-
Chatbot

The platform provides the following endpoint, located in the Endpoint URL text field :
https://elastic.messangi.me/thetrident/v1/campaigns/<Campaign_ID>/trigger
The developer is required to call this endpoint in order to send the SMS text messages to the final users. For example, If the final user makes a recharge of $12 (USD), the system calls that endpoint mentioning “Hey! The receiver with the cell phone number 345654 made a recharge of $12 (USD)”. Therefore, when making the request to the API, it is responsible for sending the SMS text message with a link to the final user. The developer needs to copy the endpoint and the Payload Sample.
{
	"receiver": "5555555",
	"campaignLabel": "demo"
}
For each campaign, a different Delivery endpoint is generated where 11129, shown in the sample card below, is the campaign ID.

We offer you to test the campaign when the final user makes the call by selecting Try Out now! located below the Payload.

When you select Try Out now!, the popup Try Out filling the blank fields form appears.

You can test the campaign by providing the phone number of the final user in the receiver field (who will receive the notification of the campaign). If you select Send Request, the message is sent immediately to the final user (receiver) and the platform will provide you the response to your request in the Try out response section.

Subscribers in Platform
Selecting the Subscribers in the Platform option, allows the messaging or campaign to be delivered to a more tailored and specific set of Recipients based on Subscriber information.

This is the selected default option, where it will automatically detect the following from the Subscribers List:
-
Number of Subscribers that have a valid Mobile Number.
-
Number of Subscribers that have an empty Mobile Number Field.
In the following Subscribers List, for example, it has detected a total of 18 Subscribers with Valid Mobile Numbers and 10 Subscribers that have empty Mobile Number Fields.

When you select the Subscribers in Platform option, you can select any filter or segment available in either dropdown, create a new one or none:
Filter
Use Filters to segment Subscribers based on set Rules placed on Subscriber List Fields.

-
None: When this method is used, it will offer the option to apply a Filter to the Delivery. By default, it will have None applied, implying that the SMS Broadcast will be delivered to all the Subscribers that exist on the Platform.
-
Create a New Filter: Create a new Filter to Segment Subscribers based on Rules. Use Filters to segment Subscribers based on set Rules placed on Subscriber List Fields.
If you want to create a new filter, a Dialog will open to start the Filter creation process.

For more information on creating a New Filter, go to the Filters section.
Segment
Use Segments to segment subscribers by lists. That is, you can create a segmentation list that will contain subscribers.

-
None: When this method is used, it will offer the option to apply a Segment to the Delivery. By default, it will have _None _Segments applied, implying that the Messaging or Campaign will be delivered to all the Subscribers that exist in the option selected.
-
Create a New Segment: Create a new Subscriber Segmentation List based on Rules.
If you want to create a new segment, a Dialog will open to start the Segment creation process.

For more information on creating a New Segment, go to the Segments section.
Upload CSV List
Selecting the Upload CSV List option, allows the messaging or campaign to be delivered to a more tailored and specific set of Recipients contained in the list by uploading an existing CSV file.
Once selected the option, it will display a dialog with Terms of Service:

To continue uploading subscribers, select Confirm. Otherwise, if you select Cancel the Subscribers cannot be uploaded until the Terms of Service have been accepted.
Once you have selected Confirm, you will be able to add multiple Subscribers to the list by uploading an existing CSV file.

Essential Conditions for Uploading a CSV File with Recipients
- File Format and Structure
CSV Format: The file must be a comma-separated values (CSV) file. This ensures compatibility with the upload system which typically parses CSV formats.
Column Headers: Include clear, descriptive column headers at the top of the file. The headers are
mobile,name.Avoid using duplicate column headers, regardless of their case, wheter lowercase or uppercase.
No fields should be left empty.
No extra or empty rows.
Avoid using duplicate column headers, regardless of their case, whether lowercase or uppercase.
- Data Types and Content
Mobile Numbers:
- Data Type: Numeric. Ensure there are no letters or symbols unless required (e.g., + in international codes).
- Consistency: Use a consistent format, especially if including country codes. It helps in the validation process.
Email Addresses:
- Valid Format: Must conform to standard email formats (e.g., [email protected]). This typically means no spaces, a single '@' symbol, and a domain.
- Lowercase: To avoid case-sensitive issues, it might be advisable to ensure all emails are in lowercase.
Names:
- Data Type: Textual. Names should be free from numbers or symbols unless culturally relevant.
- Capitalization: Proper names should have appropriate capitalization for readability and professionalism.
- Encoding & Size:
- UTF-8 Encoding: Use UTF-8 to accommodate international characters. This prevents issues with non-ASCII characters like accents or other diacritics.
If you selected SMS as Delivery Channel when the CSV file has been uploaded, you need to define the Column from the uploaded File that contains the Recipient’s Mobile Number.
In this example, the uploaded CSV file containing the Recipient information had mobile phone numbers under the Column labeled as ‘PhoneNumber’.

Once the file´s column that contains mobile phone numbers has been selected, it will automatically detect the following information for the Subscribers in the uploaded CSV file:
-
Number of Subscribers that have a valid Mobile Number (Green-Box).
-
Number of Subscribers that have an invalid Mobile Number (Red-Box).
-
Number of Subscribers that have an empty Mobile Number Field (Gray-Box).

In the example, in the uploaded CSV file the platform detected 1 Subscriber with a valid Mobile Number, 2 Subscribers with an invalid Mobile Number, and no Subscribers with an empty Mobile Number field.
To correct any of the detected invalid Mobile Numbers, click on the red box and a Dialog will appear to modify the detected invalid phone numbers:

Once the mobile numbers have been corrected making formatting corrections to detect the mobile numbers, it will display a correct check mark next to the number Field as shown below :

If the format of the mobile phone provided is incorrect in more than 5 recipients, click on the Items per page located at the lower-right corner of the List.
To save the formatting changes, click on Save to continue back to the Recipients step. Immediately a confirmation message will display at the bottom of the screen once the SMS Recipients have been updated. The confirmation message will disappear after a few seconds.

If you selected Email as the Delivery Channel, when the CSV file has been uploaded, you need to define the Column from the uploaded File that contains the Recipient’s Email.
Once the file´s column that contains emails has been selected, it will automatically detect the following information for the Subscribers in the uploaded CSV file:
-
Number of Subscribers that have a valid Email (Green-Box).
-
Number of Subscribers that have an invalid Email (Red-Box).
-
Number of Subscribers that have an empty Email Field (Gray-Box).

In the example, in the uploaded CSV file the platform detected 1 Subscriber with a valid Email, 1 Subscriber with an invalid Email, and 1 Subscriber with an empty Email field.
To correct any of the detected invalid emails, click on the red box and a Dialog will appear to modify the detected invalid emails:

Once the emails have been corrected making formatting corrections to detect the emails, it will display a correct check mark next to the number Field as shown below:

If the format of the email provided is incorrect in more than 5 recipients, click on the Items per page located in the lower-right corner of the List.
To save the formatting changes, click on Save to continue back to the Recipients step. Immediately a confirmation message will display at the bottom of the screen once the Email Recipients have been updated. The confirmation message will disappear after a few seconds.

Write down Subscribers
Selecting the Write-down Subscribers option will allow the message or campaign to be delivered by adding subscribers through copying, typing, or pasting them on the text box.
Once the option is selected, it will display a dialog with Terms of Service:

To continue adding subscribers manually, select Confirm . otherwise, if you select Cancel the Subscribers cannot be uploaded until the Terms of Service has been accepted.
A text box will be presented to copy and paste the content of a CSV file with the information of the Subscribers that you wish to add to the Subscribers List.

ON ENTERING SUBSCRIBERS MANUALLY
You can enter up to a maximum of 5,000 lines, and no minimum. Make sure that you are following the CSV file format.
Once you have entered the subscribers, select Load Subscribers to load each subscriber with all his information.
If you selected SMS as Delivery Channel, when the subscribers have been uploaded, you need to define the Column from the uploaded File that contains the Recipient’s Mobile Number.

Once you have entered the subscriber's information, it will automatically detect the following information:
-
Number of Subscribers that have a valid Mobile Number (Green-Box).
-
Number of Subscribers that have an invalid Mobile Number (Red-Box).
-
Number of Subscribers that have an empty Mobile Number Field (Gray-Box).
If you selected Email as Delivery Channel, when the subscribers have been uploaded, you need to define the Column from the uploaded File that contains the Recipient’s Email.

Keyword
Selecting the Keyword option allows you to define keywords to trigger campaign participation.
KEYWORD PARTICIPATION AVAILABILITY
This option is available when SMS or WhatsApp are the engagement channels.
For SMS and WhatsApp as delivery channels, the Keyword option is available. In either case, the platform will provide a Keyword entry section, such as the one shown in the example of the following image.
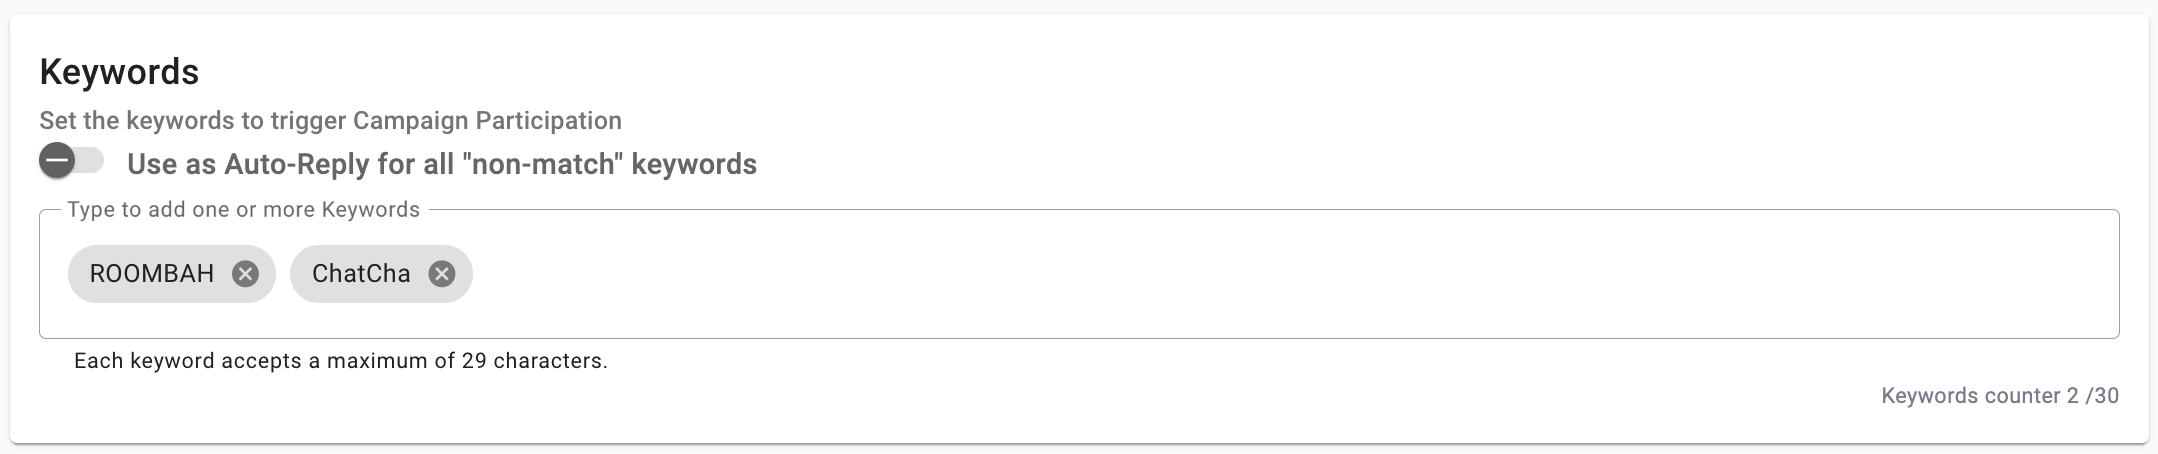
For example, you want users to participate in your E-Swipe Campaign to get discounts on their next flights. Therefore, you create the FLIGHT keyword with the message ‘Select the following link [E_SWIPE_LINK] to Save up to 30% on your Next Flight!
NOTE ON KEYWORDS
A keyword and its corresponding platform engagement entity are unique. For example, say the 12345 shortcode is being used in a campaign with the keyword "TRIAL". Creating a different campaign with the shortcode 12345 and the "TRIAL" keyword would create a conflict with the existing campaign. Hence, this condition is not allowed.
You can have up to 30 keywords, and each keyword accepts up to 29 characters. To keep track of the number of keywords in use, at the bottom right corner of the Keywords section is a keyword counter.
For more information about keywords, go to the Keyword campaign.
In case you don't want to enter a keyword, you have the option of using the 'Auto-Reply' feature for all "non-match" keywords. For example, if the subscriber enters any keyword, the chatbot (depending on the campaign type chosen) will send the Welcome Message (the first message the user will receive) configured in the Interactions section. That is, this feature can be defined as a pre-start of the campaign in case the subscriber enters any keyword.
In case the chosen campaign is an E-Swipe, Raffle Giveaway, Web Trivia, or Web Polls & Surveys, when the subscriber enters any keyword, the campaign will send the message configured in the Message section along with the short URL which contains the campaign.
To use this feature, slide the toggle to the right but first, you need to consider the following:
-
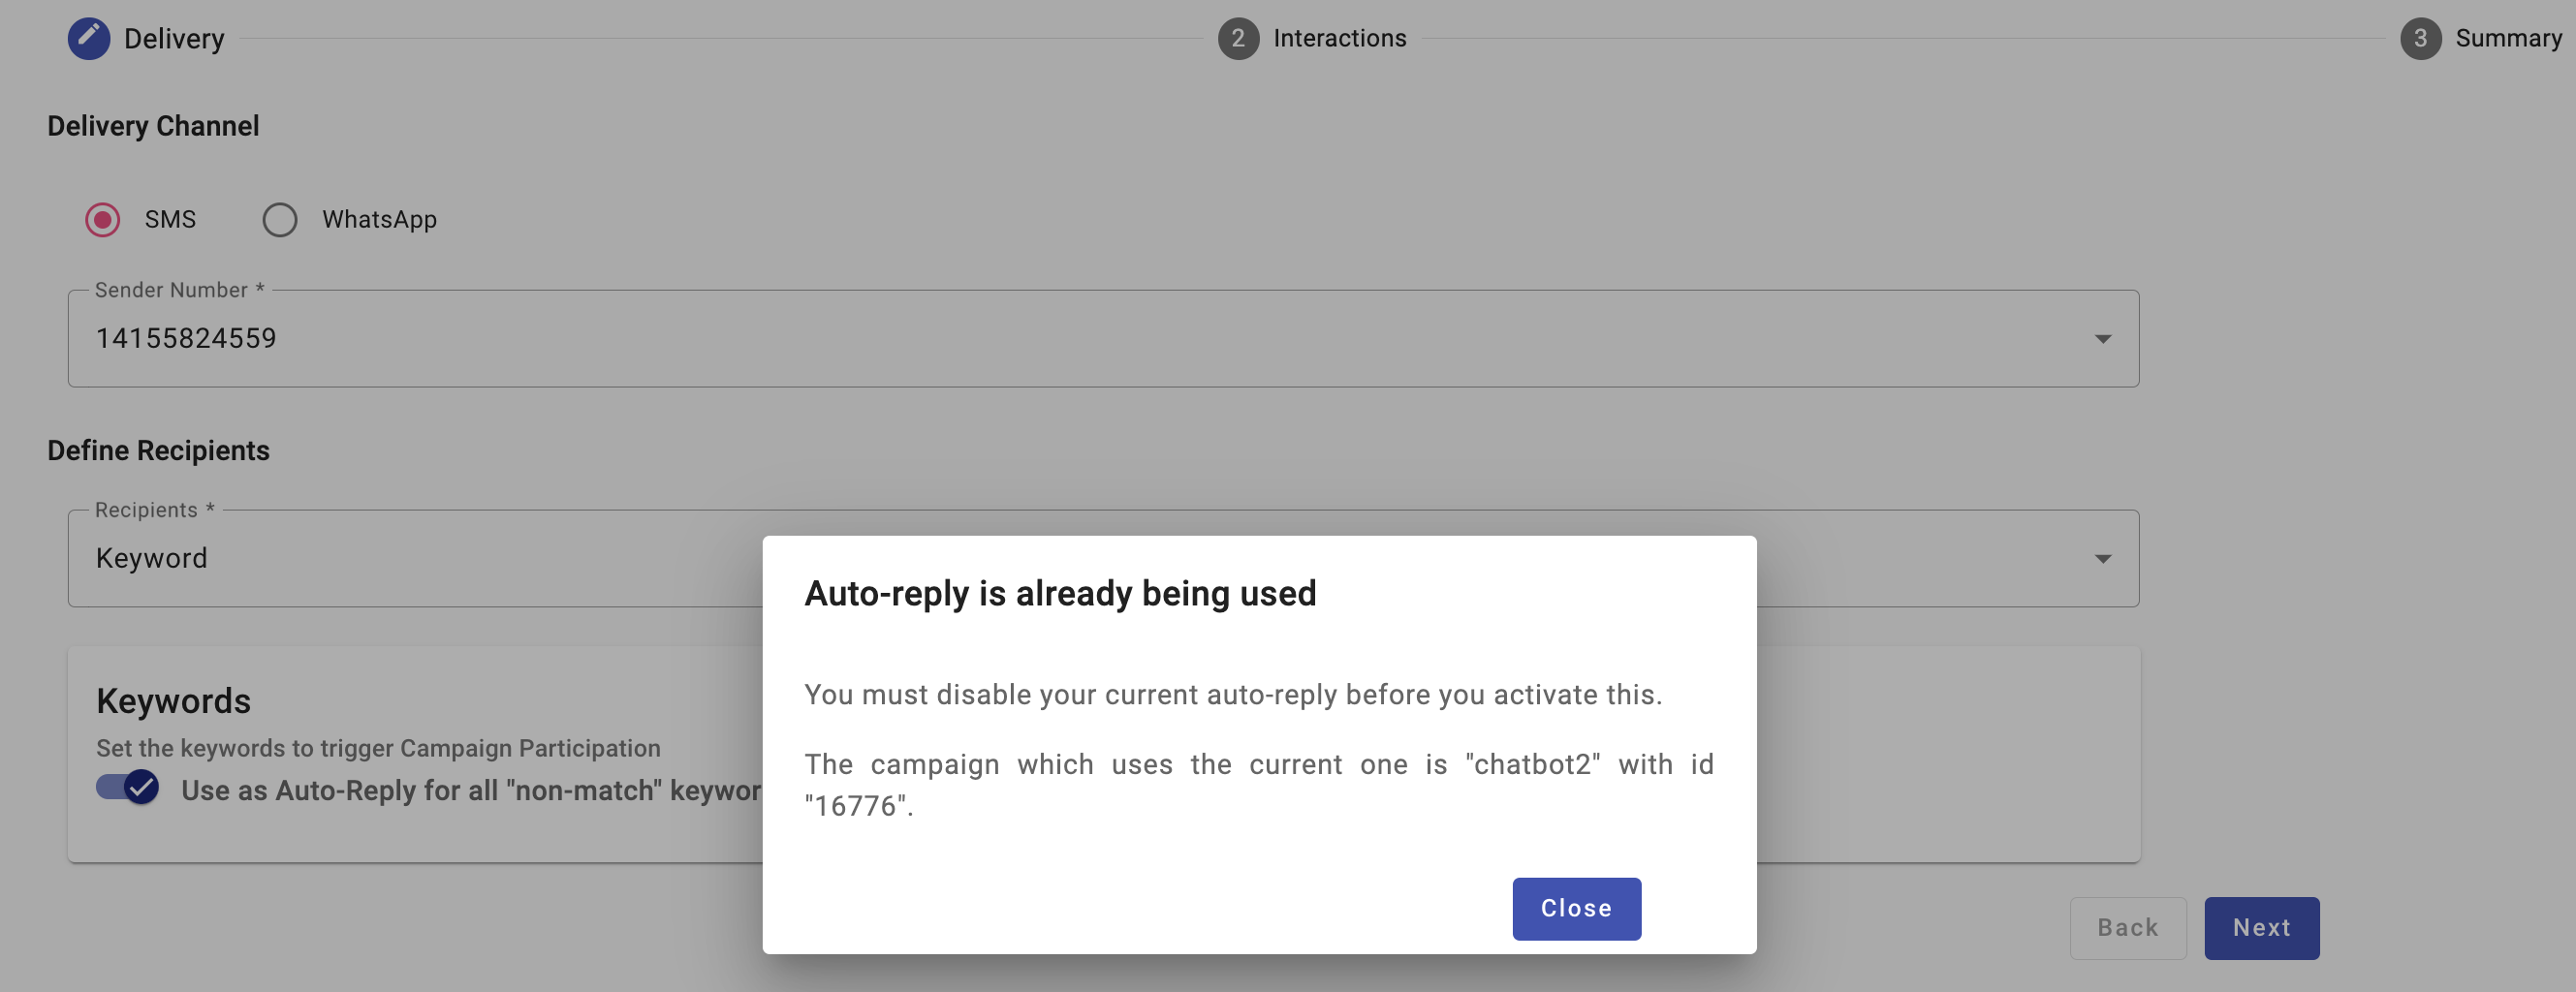
if another campaign has activated the 'Auto-Reply' function with the same sender number, you won't be able to use this feature. To use it, you need to disable the 'Auto-Reply' from the campaign that is already being used.
To find out what type of campaign is already using the 'Auto-Reply' function, slide the toggle to the right and a pop-up message will be displayed notifying you of the campaign name and its ID.
-
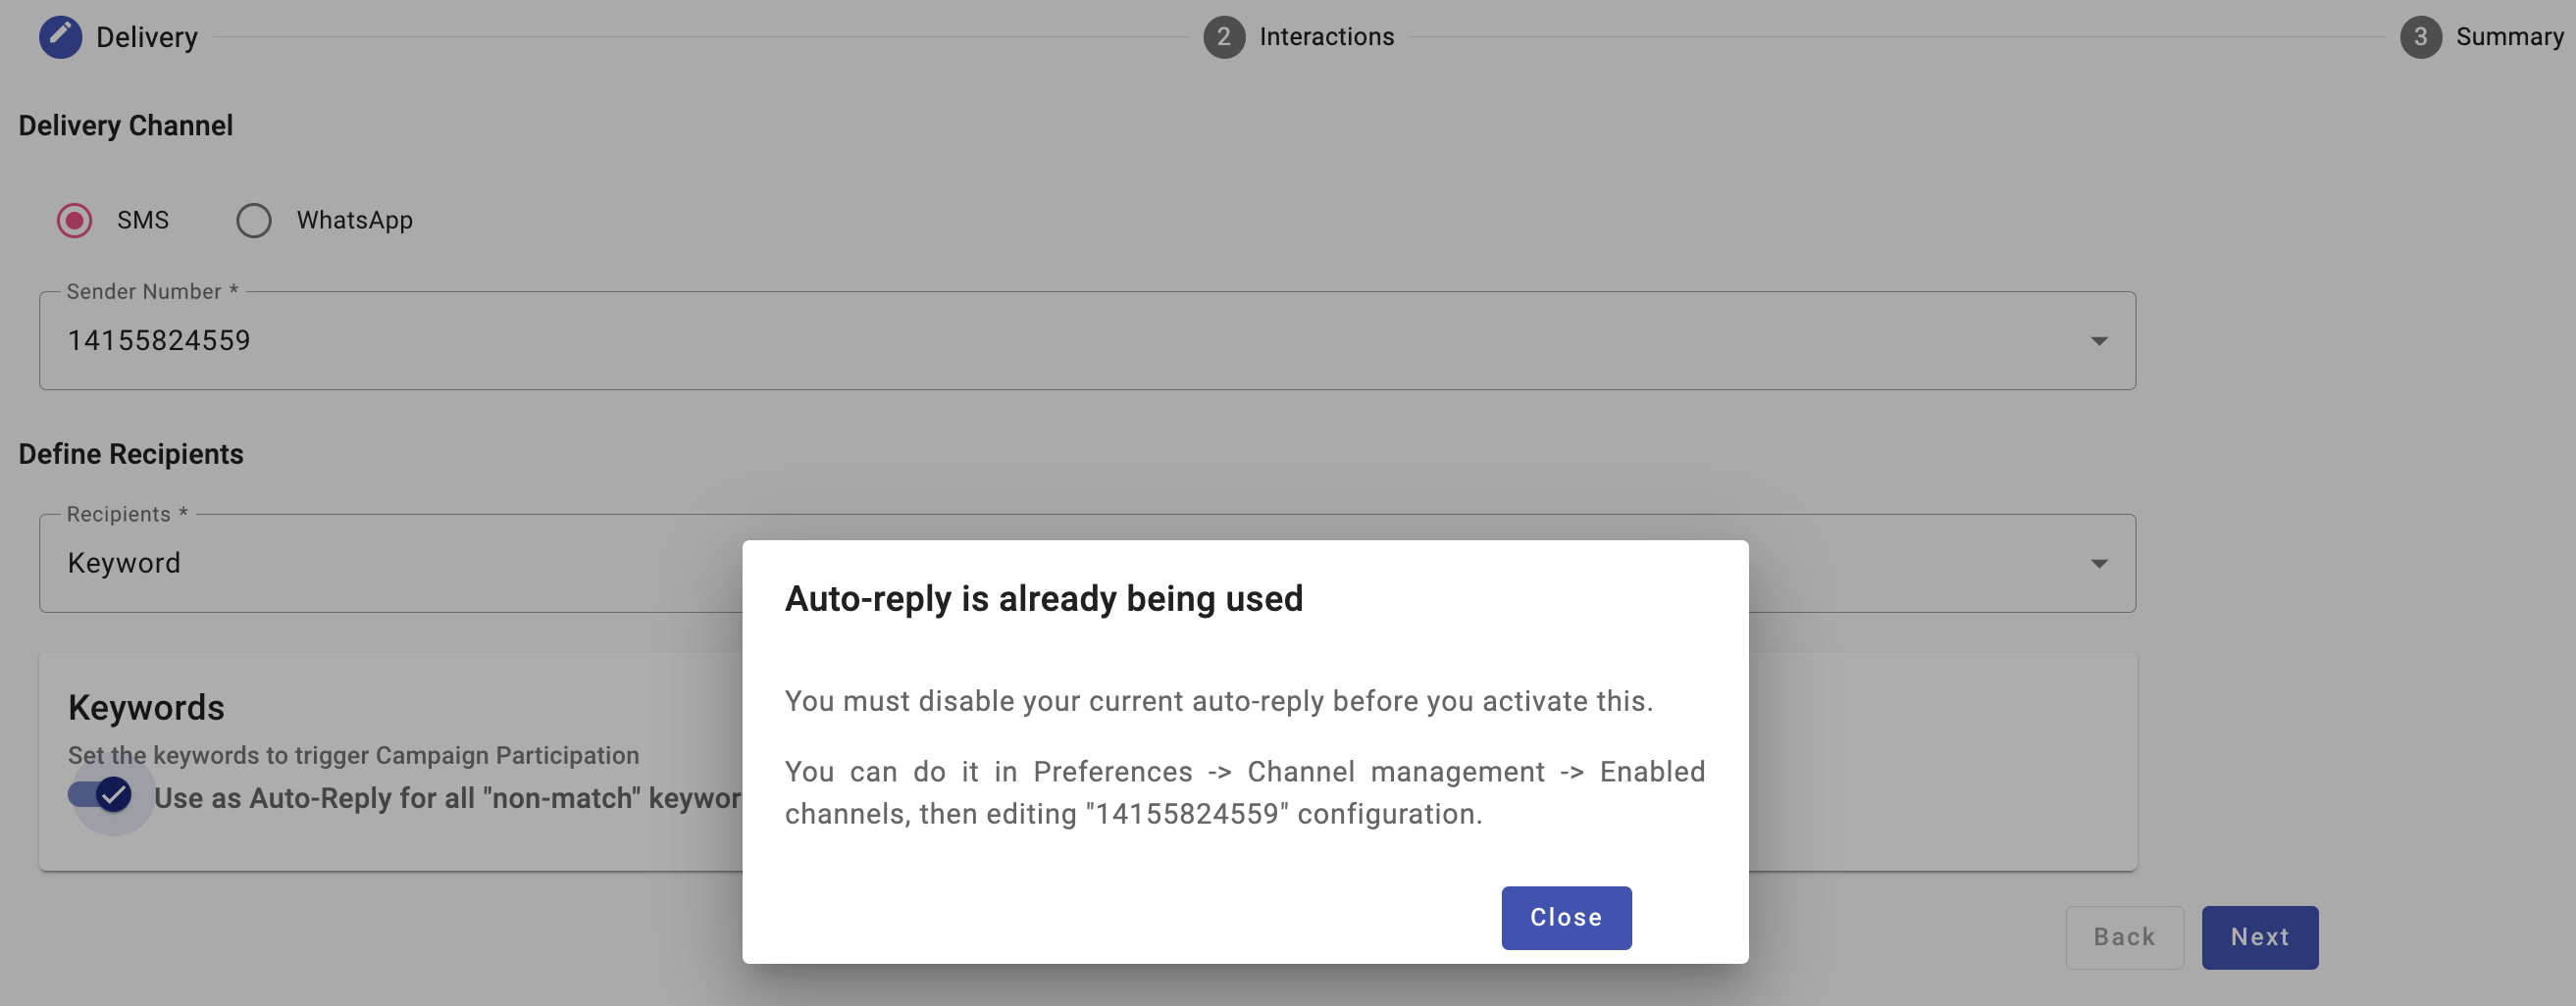
If a sender number is already activated by the 'Auto-Reply Message' function, you won't be able to use the 'Auto-Reply' function. To use it, you need to disable the 'Auto-Reply Message' by editing the sender number from the Sender Number Configuration (Channel Management tab) located in the Preferences section.
To find out what sender number is already using the 'Auto-Reply Message' function, slide the toggle to the right and a pop-up message will be displayed notifying you of the sender number.
Updated 3 months ago